Pages

Saturday, 31 July 2021

All Natural


Welcome

Meet today's card.
As I had mentioned, I have been making some sympathy cards to have on hand.  As it turns out, I now need a few and they are not fun to make at the time.  
This was a very simple one to create using a leaf found in my backyard.
This type of printing is called 'Cyanotype'.  I just love the results you can get.
(for more cards like this, go HERE and HERE)

So here's what I did to create my card.
  • I began with a piece of white cardstock.  I got out my Gel Plate and my Distress Oxide inks.
  • I pressed some Rustic Wilderness and Evergreen Bough DOX onto my Gel Plate and blended with my brayer. I like to leave a bit of space between them as not to contaminate the pads with the other colour.
  • I placed the leaves from my garden onto the plate and then rubbed a piece of paper over the top of it.  I lifted the paper partially from the plate, then lifted the leaves off and rubbed the paper down again.  **Normally when lifting a print, you would take the whole piece of paper off the Gel Plate after rubbing it down and you would be left with a white out area where the leaf was.  Using this method of printing gives you the whole image printed onto your paper.....hope that makes sense!!**
  • I let the print dry and then using my finger, I rubbed some white acrylic paint along the edges to add a bit of a distressed look.
  • I set that aside and worked on the panel you can see behind the print.  I didn't have any cardstock to mount the print onto; all my green cardstock pieces didn't work as they were the wrong shades of green, so I decided to make my own.  I did that by using the same colours mentioned above.  I added ink with a blending brush and then splattered with lots of water to lift the colour and add interest.  


  • I placed the leaf print into my Misti and stamped the sentiment with some Versafine Clair ink. 
  • I splattered the print with my black and white Posca pens to add some detail.
  • I glued the print onto the inked panel and then onto a heavy white card base.

Thanks so much for coming by and taking a look.

Adding my card to these challenges:
Simon Says Wed.- ANYTHING GOES
ModSquad- SYMPATHY

Stamps
Stamps- Scripted Bold Sentiments (Pinkfresh Studios)
Inks- Distress Oxides (mentioned above); Versafine Clair Noir
Paper- heavy white (Scribes Nook-Waterloo, Ontario)
Accessories and Tools- Gel Plate; brayer; leaf from garden; TE Blending Brushes; black and white Posca pens

Sunday, 25 July 2021

In My Thoughts


Welcome
Meet today's card.
Playing with a new stencil called Lace Panel from A Colorful Life Designs...so pretty.

So here's what I did to create my card.
  • I cut a piece of white cardstock for my main panel.  I got out my Gel Plate and pressed on some Cracked Pistachio and some Rustic Wilderness Distress Oxide inks directly onto my plate just leaving a bit of space between them as not to contaminate the pads with the other colour.  I brayered the colours together to blend them.
  • Next, I laid the Lace Panel stencil onto the plate making sure that the stencil had good contact with the plate.  I then lifted off the stencil and rubbed a piece of white cardstock over the plate to lift the print.  I was left with this lovely background.
  • Next, I rubbed the print with my anti-static bag and then placed it into my Misti.
  • Using the dragonfly from the Dragonfly Reflections set, I stamped it using some Versafine Clair ink.
  • I stamped the sentiment in the corner then to add interest to the Dragonfly wings, I covered them with some Nuvo Crystal Glaze to add shine and dimension.
  • I splattered with my Posca black pen and then glued it onto a heavy white card base.

Here is the stencil I used:

 Discount Code for A Colorful Life Designs

Thanks so much for coming by and taking a look.

Adding my card to these challenges:
Shopping Our Stash- QUIT BUGGING ME
Crafty Calendar- ANYTHING GOES
Sweet Stampin'- CREATE YOUR OWN BKG

Supplies
Stamps- In My Thoughts (Hero Arts); Dragonfly Reflections (Visible Image)
Inks- Distress Oxides (colours mentioned above)
Paper- heavy white (Scribes Nook- Waterloo, Ontario)
Accessories and Tools- Lace Panel stencil (ACLD); Nuvo Crystal Glaze; Gel Plate; 
Brayer (TH); Misti

Saturday, 24 July 2021

Be Merry


Welcome
Working on a few cards for the holidays (I guess you can never get started soon enough on that) although I am enjoying the summer and don't really want to think about the winter lol.
I have to say though, this card was fun to create.

Anyways, here's what I did to create today's card.
  • I began by inking up my white cardstock using my Gel Plate. To do that, I pressed some Peacock Feathers, Blueprint Sketch and some Salty Ocean Distress Oxide ink onto my plate.  Using a brayer, I blended the colours together, pressed my paper onto the plate and lifted the print.
  • I rubbed the inky piece with an anti-static bag and placed it into my Misti.  I stamped the snowflakes randomly over the blue panel with some Versamark ink and then white heat embossed the snowflakes.
  • Next, I got out this 'Merry' die.  It is a 2 part die with one die cutting the word and the other cutting the outline.  I cut the outline with some white cardstock, then cut the word right from the stamped panel.  
  • I glued the cut out Merry onto the outline piece and fitted it back into place matching up the background.
  • I glued it onto a white card base then added 3 gems to the snowflake centers.


Thanks so much for coming by and taking a look.

Supplies
Stamps- Snowflakes (TH); Crystal Snowflake (Impression Obsession)
Inks- Distress Oxides (colours mentioned above); Versamark
Paper- heavy white (Scribes Nook)
Accessories and Tools- Merry die (The Stamp Market); white eb powder; gems; 
Misti (My Sweet Petunia); Spellbinder Platinum; Gel Plate; Speedball Brayer; anti-static bag

Sunday, 18 July 2021

Reflection


Hello and Welcome
Meet today's card. 
  Calling it 'reflection' and doesn't that speak to the last year and a half we have had?

So here's what I did to create my card.
  • The background is simply done using a Gel Plate.  I rubbed my Peacock Feathers Distress Oxide ink pad directly onto the Gel Plate on one side, then rubbed some Salty Ocean on the other side leaving a bit of space in between them as to not contaminate the pads.  
  • Using a brayer, I blended them together a bit leaving a bit of a line down the center for interest.
  • I pulled out this lovely set from Visible Image called Dragonfly Reflections to use for the stamping.  
  • Next, I stamped some of the circles and the shapes you can see in the background with some Blueprint Sketch DOX ink.  I also inked around the outside edges.
  • I placed the panel into my Misti to stamp the dragonfly, splattered with my white Posca pen and set it aside to dry.
  • Using a small piece of scrap cardstock, I stamped the sentiment from the same set and then added some inking and distressing along the edges.  I glued that onto a piece of black cardstock.
  • I mounted the finished panel onto some black cardstock and then onto a heavy white card base.
  • Lastly, I pop dotted the sentiment over the dragonfly.

Thanks so much for coming by and taking a look.

Supplies
Stamps- Dragonfly Reflections (VI)
Inks- Versafine Clair; DOX inks mentioned above
Paper- black cs; heavy white (Scribes Nook- Waterloo, Ont.)
Accessories and Tools- Gel Arts plate; TH brayer; Misti (My Sweet Petunia); pop dots;
white Posca pen

Saturday, 17 July 2021

Flower Sympathy


Good Morning and Welcome to the Weekend!
Creating time is happy time for me.
So meet today's card.
A friend asked for some sympathy cards so this is one I came up with.  

So here's what I did to create my card.
  • I began by pulling out a monoprint I had done using the Circle Make Circles stencil from A Colorful Life Designs.  To make a monoprint, apply ink to the back of the stencil, spray with water and press onto your paper.  I used Kitsch Flamingo, Wilted Violet and Seedless Preserves Distress Oxide inks.  You will create a more watercoloured look rather then straight ink through the stencil.  
  • Next, I pulled out these Dog Rose Panels A & B dies.  I die cut my monoprinted panel using Panel A and made sure to keep all the cut pieces on a tray, ready to be fitted back into place.
  • I die cut using both A & B panels with some black cardstock.
  • I glued the black Panel A onto a piece of heavy white cardstock and glued the inked pieces I had carefully saved, back into place. I left some white areas open for interest.
  • I glued the black Panel B over that and set it aside.
  • Onto my main panel.  Using my Gel Plate, I rubbed my Wilted Violet and some Seedless Preserves DOX ink pads directly onto the plate.  Using a brayer, I blended the colours together and then rubbed some white cardstock over the plate to get the print.  I thought it looked a bit too bright, so using some diluted white paint, I did some dry brushing to tone down the colour a bit.
  • Also, using my finger, I dabbed white acrylic paint along the edges for interest.
  • While that dried, I took a piece of black cardstock, rubbed it with my Anti-static bag, stamped with some Versamark ink then white heat embossed the sentiment from SU.
  • I glued the Gel print onto a heavy white card base, then the flower panel over that and finally pop dotted the sentiment to the side.  


Here is the stencil I used:

                                                        Discount Code for A Colorful Life Designs
Thanks so much for coming by and taking a look.

Adding my card to these challenges:
Simon Says Wed.- EMBOSS IT
Sweet Stampin- CREATE YOU OWN BKG
Allsorts- FEMININE

Supplies
Stamps- Sympathy (SU)
Inks- Versamark; Distress Oxides (mentioned above)
Paper- bl cardstock (Michaels); heavy white (Scribes Nook- Waterloo, Ontario)
Accessories and Tools- Circle Makes Circle (ACLD); white acrylic paint; paintbrush (for dry brushing);
Dog Rose Panel A&B (Altenew); Gel Plate; Speedball Brayer; Lawn Fawn white eb powder;
Spellbinders Platinum die cutting machine


Tuesday, 13 July 2021

Christmas in July


Welcome
Christmas in July seems to be everywhere of late, so I decided to make a very simple card to get my holiday creating started.  I guess it's never to early to begin!!
This card would be a simple one to recreate especially if you are doing multiples.

I dug into my stash of inked papers and this is what I came up with.  

So here's what I did to create my card.
  • I found this piece of inked paper in my stash.  I love the colour blends, it reminded me of a cozy sweater.  I made it while playing with my Gelli Plate.  I always keep extra paper nearby to roll off my brayer when inking the plate and this was one of those roll off sheets.  Like I said in a previous post, use your roll offs for creating backgrounds.  For this one I used my Distress Oxide inks (Broken China, Wilted Violet, Seedless Preserves)
  • I took the inked panel and die-cut it using the Nordic Winter die from Tim Holtz.
  • I glued that onto a piece of white cardstock, then onto a white card base.
  • Using a leftover strip of white cardstock, I stamped the sentiment from Paper Smooches in my Misti and then pop dotted it over the die-cut background.

Thanks so much for coming by and taking a look.

Adding my card to these challenges:
Little Red Wagon- MID WAY TO CHRISTMAS
Shopping Our Stash- CHRISTMAS IN JULY
The Male Room- CHRISTMAS IN JULY


Supplies
Stamps- Holiday Cheer (Paper Smooches)
Inks- Distress Oxides (colours listed above); Versafine Clair
Paper- heavy white (Scribes Nook- Waterloo, Ontario)
Accessories and Tools- Nordic Winter die (TH); Misti (My Sweet Petunia); brayer; 
Spellbinder Platinum die cutting machine; Nuvo glue; pop dots

Sunday, 11 July 2021

Under the Lights


Hello and Welcome
Meet today's card.
An easy one to create using my Gelli Plate.
So many people seem to be intimidated by a gel plate, but honestly it couldn't be easier for creating fast and fun backgrounds.
I will walk you through it below.

So here's what I did to create my card.
  • I cut my card front panel from a piece of heavy white cardstock.  I got out my Gelli Arts Plate, a brayer and some Distress Oxide inks....Blueprint Sketch, Broken China and Wilted Violet.
  • I took the ink pads and pressed them directly onto my Gelli Plate, leaving a bit of space between the colours as not to contaminate my ink pads with the other colours.  
  • Using a brayer, I rolled over the Gel plate to blend the colours. *be sure to have an extra piece of paper handy to roll off the excess ink from your brayer.  These often make wonderful backgrounds as well or can be used to die cut *
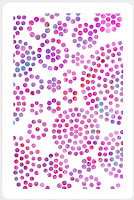
  • Next, I place the Dot Circle Stencil from ACLD over my Gel plate and using my tweezers, I gently pushed the stencil onto the plate being sure to make good contact with the plate.
  • I lifted off the stencil removing some of the ink from my plate, set it aside and rubbed my cardstock panel over my plate.  Voila, I had my background.
  • I dried the ink completely....{DOX inks take a bit longer to dry so use a heat tool or just set aside for a bit.}  When dry, I placed the piece into my Misti and stamped the silhouette image from Impression Obsession and then the sentiment from Visible Image using some Versafine Clair ink.
  • I mounted the inked panel onto a heavy white card base.


Thanks so much for coming by and taking a look.


Here is the stencil I used:
Dot Circle

                                                        Discount Code for A Colorful Life Designs

Adding my card to these challenges:
Allsorts- MASCULINE
Love To Scrap- ANYTHING GOES


Supplies
Stamps- Rock Silhouette (IO); Just Be Happy (VI)
Inks- Distress Oxides (colours listed above); Versafine Clair
Paper- heavy white (Scribes Nook- Waterloo, Ontario)
Accessories and Tools- Dot Circle (ACLD); Misti (My Sweet Petunia); Brayer (Speedball);
Gelli Arts Plate