Pages

Sunday, 30 January 2022

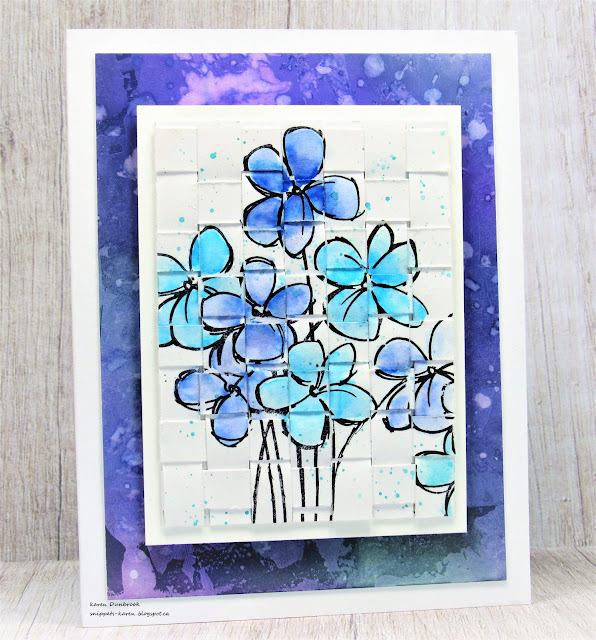
Paper Weaving with a Twist


Hello and Welcome
This week it's my turn to host the TLC (Technique Lover's Challenge) over at Splitcoast Stampers.
It's such a fun challenge where we try new techniques.  I always try and think of presenting a technique that is easy enough to do for everyone and that you will have the supplies needed on hand.
So I'm calling my challenge 
Paper Weaving with a Twist
(the twist being we are going to stamp on top of the weaving)

So here's what I did to create my card.
  • I actually began by scratching my head and try to think about what challenge I would present.  I do love the look of paper weaving.  Lately, as I have been going through all my random strips of paper, these white ones inspired me to use them.  
  • I cut a scrap of white cardstock and glued 7 paper strips vertically just along the top edge to hold them in place.  
  • Using the other paper strips, I wove them over and under horizontally until the piece was all woven.
  • I glued all the edges down securely and waited for them to dry.
  • When all was dry, I placed the woven piece into my Misti and stamped the Blossom Bunch right over the weaving with some black Versafine Clair.
  • After the ink had dried, I diluted some Distress Oxide ink (Blueprint Sketch, Peacock Feathers) with some water on my non-stick craft mat and used a paint brush to colour in my flowers.
  • I had some diluted ink left on my mat so I used a wet paint brush to splatter it onto my card front.
  • Now for the background....I found this piece in my stash.  I had put some Gesso onto it with a palette knife and let dry.  I inked it up with Distress Oxide inks, then splattered with water.
Here's what the panel looked like:
  • You can see how the Gesso resists the ink....I also threw some water on it to lift some of the colour.
  • I glued the gesso piece onto a white card base and pop dotted the woven flowers over that.
  • I left off the sentiment so you could fully see the weaving in the background.


Thanks so much for coming by and taking a look.

Supplies
Stamps- Blossom Bunch (Stampendous)
Inks- Versafine Clair, DOX
Paper- white (Scribes Nook, Waterloo, Ont.)
Accessories and Tools- paper strips; Misti (My Sweet Petunia); paint brush; 
non-stick craft mat; Gesso; palette knife

Saturday, 29 January 2022

Heavy Heart


Welcome
Happy Saturday.
Hoping to get in some crafting time today.
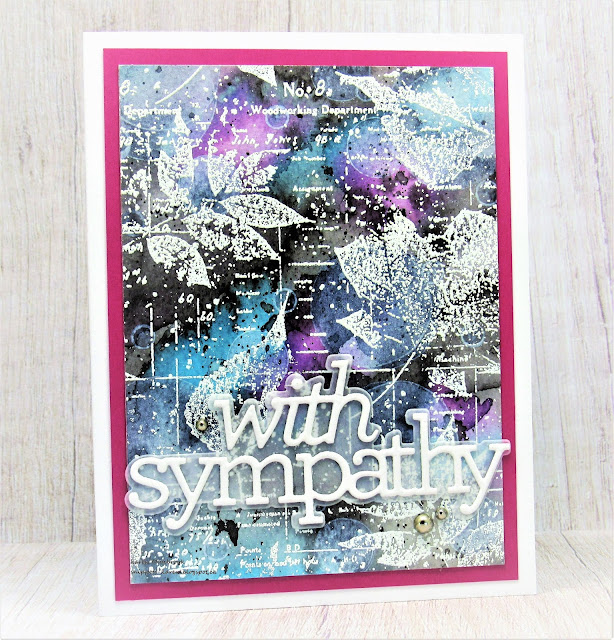
Meet today's card.  I'm trying to add to my stash of sympathy cards and this is what I came up with.

So here's what I did to create my card.
  • I began by cutting a piece of white cardstock 3 3/4 x 5".  I like that size as there is room to mat it before adding it onto a card base.
  • I got out a variety of Distress Oxide inks and using my Blending Brushes, just started blending away.  Colours used:  Black Soot, Picked Raspberry, Peacock Feathers, Blueprint Sketch, Weathered Wood
  • When I was happy with the inking, I spritzed water over the whole panel lifting some of the ink and blending other areas and then set it aside to dry.
  • I placed the dry panel into my Misti, rubbed with my Anti-static bag and stamped with this beautiful Leaf Ledger stamp using some Versamark ink and white heat embossed.
  • I splattered with my white Posca pen.
  • I glued the panel onto a piece of cardstock, then onto a white card base.
  • I die cut the new-to-me sentiment with white cardstock, then cut the outline with a piece of vellum and glued them together, then onto my card front.  
  • I added some silver gems that are most difficult to see in the photo.


Thanks again so much for coming by and taking a look.

Adding my card to these challenges:
Simon Says Wed.- ANYTHING GOES
Stamps & Fun= Creativity
A Place to Start- ANYTHING GOES

Supplies
Stamps- Leaf Ledger (Impression Obsession)
Inks- Versamark; Distress Oxide
Paper- Vellum; white cs- (Scribes Nook- Waterloo, Ont.)
Accessories and Tools- Lawn Fawn white eb powder; heat tool; Misti; 
white Posca pen; TE Blending Brushes; Sympathy die (SSS); Anti Static bag

Friday, 28 January 2022

Let There Be Light


Happy Friday and good Morning.
I don't know about you, but I need more sunshine in my life!
It is so cold, damp, dark and snowy where I live right now.
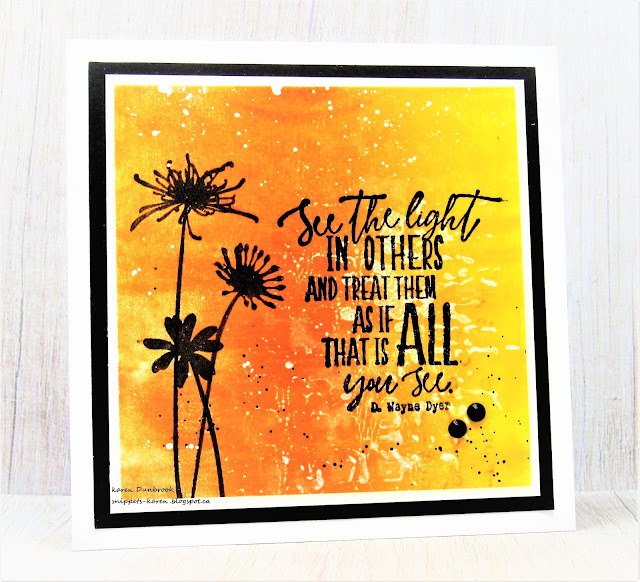
So I thought I would make a warm, sunny feeling card.

So here's what I did to create my card.
  • I pulled out this scrap of white cardstock that was cut off the bottom of a larger sheet I had applied Gesso over the top of with a palette knife.  It was for another card I was working on.  I thought the Gesso would add such great texture and it did.
  • I got out my Gel Plate and rubbed my Carved Pumpkin Distress Oxide ink pad right in the middle of my plate.  I then rubbed some Mustard Seed DOX ink on either side of that, then using my brayer, blended it all smooth and took the print.
  • When it was dry, I placed it into my Misti and rubbed it with my anti-static bag as I wanted to clear emboss it.  The bag helps the embossing powder stick just to the freshly inked area and not the whole card front.
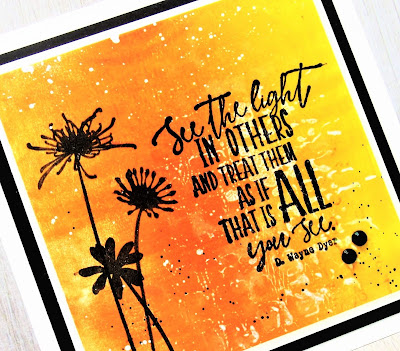
  • I stamped the flowers to one side, the sentiment along the other side and clear heat embossed them.
  • I splattered with my white Posca pen.  When dry, I glued it onto a piece of white cardstock, then black and finally onto a white card base.
  • I added some black gems for interest.

Thanks so much for coming by and taking a look.

Adding my card to these challenges:
Simon Says Wed.- ANYTHING GOES
Time Out- FRIEND QUOTE
Paper Craft Crew- FLORAL LOVE
Beyond the Blue- GEL PLATE


Supplies
Stamps- Wildflowers (Purple Onion); See the Light (Impression Obsession)
Inks- Distress Oxides; Versafine Clair
Paper- Scribes Nook- Waterloo, Ont.
Accessories and Tools- Misti (My Sweet Petunia); black gems; Hero Arts eb powder;
Anti-static bag; Gesso, Gel Plate, brayer; white Posca pen

Wednesday, 26 January 2022

There Are No Words


Hello and Welcome
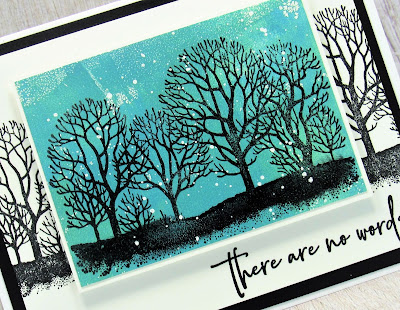
Adding another card to the stash after I found this blue piece of cardstock that I had rolled my brayer off onto while Gel Plate printing. I thought it would make a lovely background for this tree stamp by Inkadinkadoo that I scored at the Second Hand store for .50 cents.

So here's what I did to create my card.
  • Like I mentioned above, I found this piece of cardstock that I had used to remove paint from my brayer while Gel Plate printing.  I always keep those sheet even if they look super ugly at the time.  I inked up this tree stamp with some Versafine Clair and stamped onto the blue.  I clear heat embossed the trees to help make them pop.
  • I splattered using my white Posca pen and set aside to dry.
  • I cut a white card panel for my card front.  I inked up the stamp again with black Versafine Clair and stamped the trees onto one side, then inked and stamped again on the other side.  I wanted the look of a continuous tree line all across the front of my card.
  • I placed the white panel into my Misti and stamped the sentiment.
  • I glued the white panel onto a piece of black cardstock, then onto a white card base.
  • I pop dot mounted the blue stamped trees over the white background, matching up at the level of the ground.


Thanks so much for coming by and taking a look.

Adding my card to these challenges:
Simon Says Wed.- ANYTHING GOES
Double D- WHITE AND BLUE

Supplies
Stamps- Trees (Inkadinkadoo); Sympathy Sentiments (Penny Black)
Inks- Versafine Clair
Paper- Scribes Nook- Waterloo, Ontario
Accessories and Tools- Misti (My Sweet Petunia); white Posca pen; scrap paper;
Hero Arts clear eb powder; foam tape

Tuesday, 25 January 2022

Colourful Smiles


Good Morning
Hope you are having a great day.
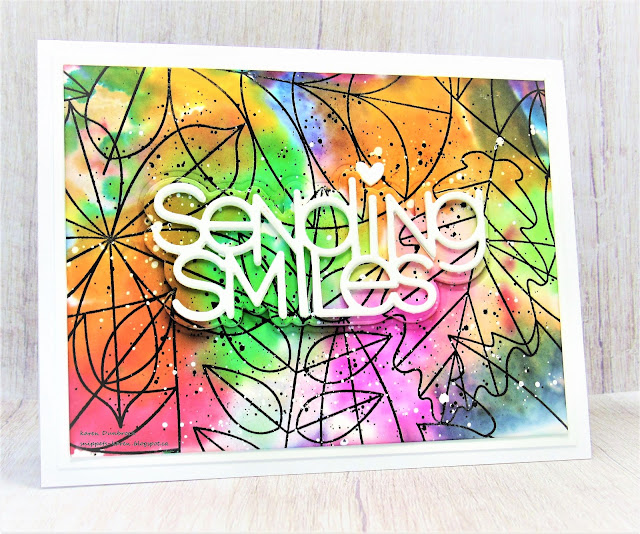
I found this colourful background in my stash and wanted to try and use it in some way.  
I got some new stamps before Christmas and this fun Leafy Leaves background was calling to be tried on a card. 

So here's what I did to create my card.
  • I bought some Bleeding Tissue paper on Amazon after seeing a video online using it.  So super simple to use.  The package I bought had a lot of tissue in it so it will last quite awhile.
  • I cut a piece of white cardstock, then tore pieces of the tissue paper and laid them all over my cardstock randomly but being sure to cover all the areas.
  • I liberally sprayed the whole panel with the tissue paper on it with water and pressed the tissue securely against the cardstock. 
  • I set it aside to dry completely which takes awhile since you need a good amount of water for the colour to transfer.
  • When it was dry, I took off the tissue paper and revealed these lovely colours.
  • I placed the piece into my Misti and stamped the Leafy Leaves from Simon Says with some Versafine Clair black ink.
  • I splattered the whole thing using my black and white Posca pen.
  • I die cut the sentiment in white and the outline for the sentiment from the panel.  
  • I glued the white sentiment onto the cut away shadow and let them dry.
  • I glued the inked cardstock onto a heavy white card base and pop dotted the sentiment back into place.
  • I glued the little heart over the sentiment.


Thanks so much for coming by and taking a look.

Adding my card to these challenges:
Get Creative- ANYTHING GOES


Supplies
Stamps- Leafy Leaves (SSS)
Inks- Versafine Clair 
Paper- white (Scribes Nook- Waterloo, Ont.)
Accessories and Tools- Bleeding Tissue paper (Amazon); Misti (My Sweet Petunia);
Sending Smiles die (SSS); white and black Posca pen; water mister (TH)

Monday, 24 January 2022

Wounded Wings


Good Morning
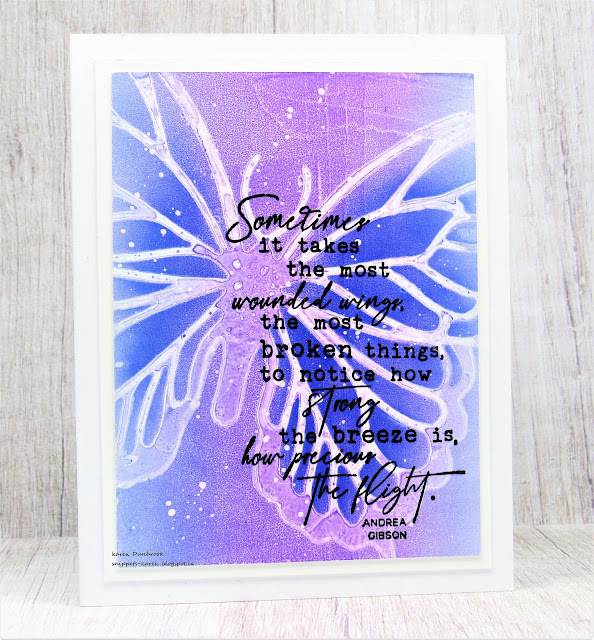
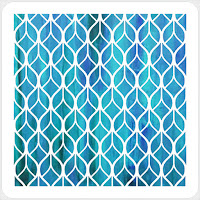
Here is today's card made using my Gel Plate, some Distress Oxide inks and this beautiful Butterfly Mask from A Colorful Life Designs.
So here's what I did to create my card.
  • I began by getting out my Gel Plate, brayer and 2 Distress Oxide ink pads; Blueprint Sketch and Wilted Violet.  Working with Distress inks on a Gel Plate is so super simple and required little clean up, just a baby wipe or some water and a cloth.
  • I pressed the Wilted Violet DOX ink into the center of my plate, then added some Blueprint Sketch along each side.  I smoothed out the colours using my brayer.
  • I pressed the Butterfly Mask onto my plate and used the end of my paintbrush handle to gently press the mask onto the plate to get good contact.
  • I carefully lifted off the mask which removed some of the colour and rubbed a piece of white cardstock over the plate to lift the print.
  • I splattered it with my white Posca pen and let dry.
  • When it was dry, I placed it into my Misti and stamped this new to me sentiment from Impression Obsession called Broken Wings.  
  • I kept it simple by gluing it onto a white card base.


Here is the mask I used:

Discount Code for A Colorful Life Designs
(affiliate with no extra cost to you)

 Thanks so much for coming by and taking a look.

Adding my card to these challenges:
Crafts Galore Encore- ANYTHING GOES
The Creative Crafters- ANYTHING GOES
We Love Stamping- ANYTHING GOES/ WINGS

Supplies
Stamps- Wounded Wings (IO)
Inks- Versafine Clair, DOX
Paper- white (Scribes Nook- Waterloo, Ont.)
Accessories and Tools- Butterfly Mask (ACLD); white Posca pen; Gel Plate; Speedball brayer;
Misti (My Sweet Petunia)

Sunday, 23 January 2022

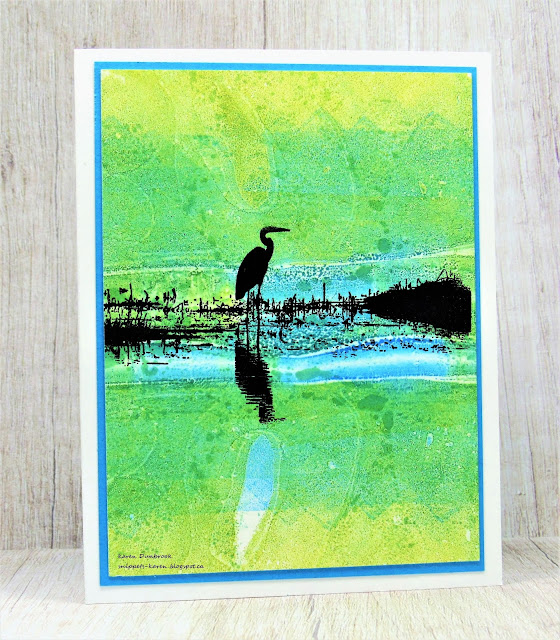
Reflections


Good Morning
Meet today's card using the same great Heron stamp from Magenta that I used the other day.
I wanted to try a new technique for the background so I thought this stamp would work perfectly with it.

I don't know about you, but I am often inspired while watching TV shows.  On one of them, I saw a painting in the background that got me thinking.  Basically, the saturation of colour was in the center and then spread out from there.  I put on my thinking cap and tried to figure out how to recreate that look.

So here's what I did to create my card.
  • I began by cutting a piece of Yupo paper.  For anyone who is unfamiliar with Yupo, it is a plastic coated paper used with inks.  
  • I took out some Ranger Alcohol inks and Ranger Blending Solution. Colours:  I'm guessing...Sailboat blue, pool and lettuce by Ranger. I need to get better at writing down the colours. When I get time to create, I just getting into a creating mode and forget!
  • I squeezed a line of the Blending Solution down the center of my Yupo, dropped on some Alcohol inks and using an old gift card, dragged the colours upwards on the panel.
  • I repeated that process again with more Blending Solution and Alcohol inks but this time, pulled the inks downwards.  Very simple process.  I just kept doing that until I was happy with the coverage.
  • The inks dries almost instantly so it was easy to move onto the next step.
  • I placed the panel into my Misti and stamped the Heron along the center of the panel with some Archival Black ink.
  • I glued the panel onto a piece of navy cardstock, then onto a white card base.

Thanks so much for coming by and taking a look.

Adding my card to these challenges:
We Love Stamping- ANYTHING STAMPED OPTION WINGS
CASology- RENEW
(take a deep breathe, try something new and look ahead hopefully)


Supplies
Stamps- Reflective Blue Heron (Magenta)
Inks- Ranger AI; Archival Black
Paper- Yupo (Amazon); white cardstock (Scribes Nook- Waterloo, Ont.)
Accessories and Tools- old gift card; Ranger Blending Solution; Misti (My Sweet Petunia)

Saturday, 22 January 2022

Happy Hello


Hello and Welcome
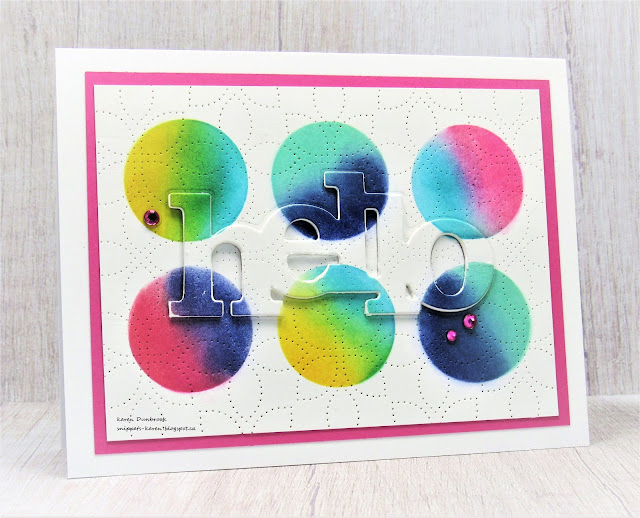
Just a fun simple card today using the 6 Circle Shadow stencil from ACLD.

So here's what I did to create my card.
  • I cut a piece of white cardstock and positioned the 6 Circles stencil over it.  
  • Using my TE Blending Brushes, I inked up the circles with my Distress Oxide inks.  Here are the colours I used:  Picked Raspberry, Cracked Pistachio, Peacock Feathers, Mustard Seed and Blueprint Sketch.
  • When the panel was dry, I added interest using the Detail Petals plate die.  It creates a pattern without cutting through the cardstock.
  • I looked at the panel trying to figure out what to do next and started looking through my dies.  I found this Hello and thought it worked so well.  I decided to do an eclipse sentiment so I die cut the hello from the inked card panel and set it aside...be sure not to lose any of the little pieces as you will need them all when fitting back into place.
  • I die cut the 'hello' 3 more times with some white cardstock, then glued them all together adding the one from the inked panel on the top.
  • I glued the panel onto a piece of pink cardstock, then onto a white card base.
  • I fitted the 'hello' back into place and glued all the little extra pieces to create the raised look that the eclipse technique gives.  
  • Lastly, I added 3 little pink gems to match.


Here is the stencil I used:

Discount Code for A Colorful Life Designs
(affiliate with no extra cost to you)

Thanks so much for coming by and taking a look.

Adding my card to these challenges:


Supplies
Stamps- none
Inks- Distress Oxides 
Paper- Scribes Nook, Waterloo, Ont.
Accessories and Tools- 6 Circle Shadow stencil; TE Blending Brushes; Hello die (Amazon); 
Details Petals cover plate (SSS); pink gems

Friday, 21 January 2022

Finding Nature


Hello and Welcome
Meet today's card.
I was inspired to use this Reflective Blue Heron stamp from Magenta after seeing some wonderful cards done by my friend Christine Alexander.  You can see them here.
Christine used Alcohol inks on her Gel Plate, but I am going to use some Distress Oxides on mine.

So here's what I did to create my card.
  • I got out my Gel plate and rubbed on some Cracked Pistachio, Peeled Paint, Peacock Feathers  and a bit of Salty Ocean Distress Oxide ink right in the middle of the plate. (I added the ink on the top and bottom like a mirror image)
  • I used my brayer to blend the colours, keeping them separate on each side.
  • Now as a disclaimer, this is not my original idea but I watched Lydia Fiedler do this on one of her lives...are you ready for it?  I carefully folded my Gel Plate in half, being sure that the center areas touched each other.  Crazy right!
  • I laid the plate flat and then rubbed my white cardstock over it to take the print.
  • Next, I placed the inked piece into my Misti and stamped the Heron with some Versafine Clair ink.
  • I glued the panel onto a piece of blue cardstock, then onto a white card base.
  • I debated about whether or not to add a sentiment but decided to leave it as is.

Thanks so much for coming by and taking a look.

Adding my card to these challenges:
As You Like It- FAV COLOURING MEDIUM
(My fav is my Distress Oxide inks.  I can use them on my Gel Plate, watercolour
with them..so many ways to use them)


Supplies
Stamp- Reflective Blue Heron (Magenta)
Inks- Distress Oxides; Versafine Clair
Paper- white (Scribes Nook, Waterloo, Ont.)
Accessories and Tools- Gel Plate, Brayer, Misti (My Sweet Petunia)

Monday, 17 January 2022

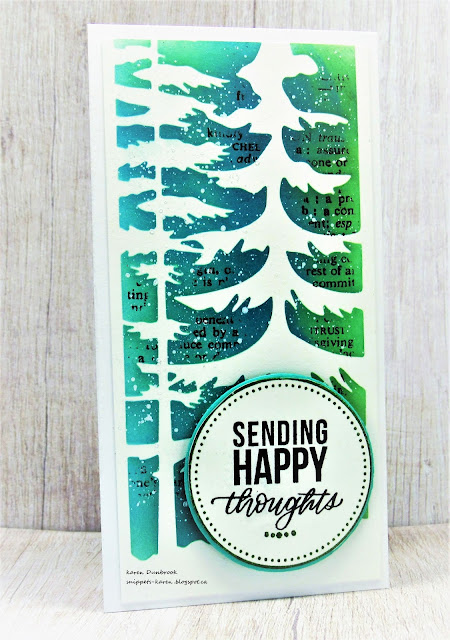
Sending Some Happy


Good Morning
Hope you had a good weekend.  I appreciated having some time to create.
I pulled out this great stencil from ACLD called Pine Tree Right.  There are a series of tree stencils similar to this one and all create such great backgrounds.  They especially work well for creating slimline cards.
My card today is a Mini Slimline...a bit smaller then the regular size.  
A standard Slimline card is size is 8 1/2 x 3 1/2 whereas a Mini Slimline is 6" x 3".
To see how I made another mini slimline and an envelope to fit it, see this card:

So here's what I did to create my card.
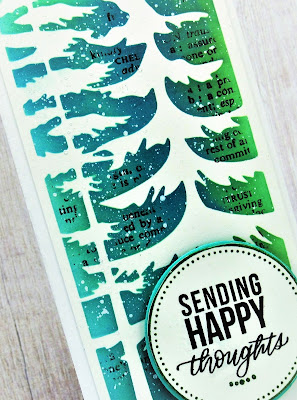
  • I placed a piece of white cardstock onto my Waffle Flower Stencil Mat and positioned the Pine Trees stencil over that.  I began to ink it up with some Lucky Clover Distress Oxide inks just along the right side of the stencil and towards the middle.
  • Next, I filled in the rest of the areas with some Rustic Wilderness DOX ink.  
  • To add more interest and shading to the trees, I rubbed on some Broken China DOX ink just along the left hand sides of the trees.
  • Leaving the stencil in place, I stamped over it with the Friends background script stamp to add interest.  
  • I splattered the whole panel with my white Posca pen.
  • While that dried, I stamped the sentiment from the Hexagon Crafty Hugs set with some Versafine Clair ink and then stamped the circle from an Avery Elle set with more of the Rustic Wilderness ink around the sentiment.
  • I die cut it with a circle and glued it onto a piece of blue/green cardstock to match the background.
  • I glued the stenciled trees onto a white slimline base (6" x 3") and pop dotted the sentiment at the bottom.


Here is the stencil I used:


Discount Code for A Colorful Life Designs
(affiliate with no extra cost to you)


Thanks so much for coming by and taking a look.

Adding my card to these challenges:
Simon Says Wed.- FUN WITH STENCILS
Stamping Sensations- ANYTHING GOES WITH OPTION OF A DIE
Alphabet Challenge- 'U' IS FOR UNEQUAL (BIG AND SMALL)


Supplies
Stamps- Crafty Hugs (SSS); Merry Circle Tags (Avery Elle); Friends Bkg (HA)
Inks- Distress Oxides (mentioned above); Versafine Clair
Paper- Scribes Nook; Waterloo, Ont.
Accessories and Tools- Stencil Mat (Waffle Flower); TE Blending Brushes; 
Misti (My Sweet Petunia); Posca pen; Infinity Circle Dies (HA)

Sunday, 16 January 2022

Winter Hugs


Welcome
Meet today's card.
I combined 2 new stencils from A Colorful Life Designs with this sweet mitten die one of my boys gave me for Christmas.

So here's what I did to create my card.
  • I cut a piece of heavy white cardstock and placed it onto my Stencil Mat (I have mentioned this new to me product in previous posts and I am really love it.)
  • I placed the All Over Hearts stencil onto my cardstock and rubbed on some Peacock Feathers Distress Oxide ink.  
  • I removed that stencil and positioned the Delicate Scroll Stencil over the panel and inked with some Blueprint Sketch DOX ink.  I think it gave a look of blowing snow.
  • I splattered with my white Posca pen and set aside to dry.
  • While that dried, I die cut the mittens from some white cardstock.  My son bought them on Amazon so I unfortunately don't know who makes them.
  • I stamped the sentiment with some more Blueprint Sketch ink and clear heat embossed it. I glued that onto a matching cardstock scrap of paper.
  • I glued the stenciled panel onto a piece of light blue cardstock, then onto a white card base.
  • I added foam tape to the back of the mittens and also to the sentiment.

Here are the stencils I used:
All Over Hearts


Discount Code for A Colorful Life Designs
(affiliate with no extra cost to you)


Thanks so much for coming by and taking a look.

Supplies
Stamps- Everyday Sentiments (YNS)
Inks- Distress Oxides (mentioned above)
Paper- heavy white (Scribes Nook; Waterloo, Ont.)
Accessories and Tools- stencils (ACLD); mitten die (Amazon); TE Blending Brushes;
Stencil Mat (Waffle Flower); white Posca pen; foam tape; eb powder; heat tool

Saturday, 15 January 2022

Lots of Love


Good Morning
Today I am playing with a new stencil from ACLD called All Over Hearts.  
A really fun stencil to create a simple card.

So here's what I did to create my card.
  • I pulled out my Waffle Flower Stencil Mat and then cut 2 piece of cardstock; one for the card front panel and one to fussy cut the hearts from.
  • I positioned the stencil over my paper and starting at the left hand side, I blended on some Picked Raspberry Distress Oxide ink.  
  • I continued to ink up my panel next with some Wilted Violet, then Peacock Feathers and finally some Cracked Pistachio on the far right.  I love those colours together.
  • When I was happy with the inking, I moved that panel aside and inked up another one the same way.
  • I place panel #1 into my Misti and stamped the sentiment with some black ink, then clear heat embossed it.  
  • I splattered the whole thing using my white Posca pen.
  • I glued it onto a white card base, then I took panel #2 and fussy cut out the hearts.  I pop dotted them down the panel beside the sentiment.


Here is the stencil I used:

Discount Code for A Colorful Life Designs
(affiliate with no extra cost to you)

Thanks so much for coming by and taking a look.

Adding my card to these challenges:
Simon Says Wed.- FUN WITH STENCILS
Shopping Our Stash- STARTS WITH 'S' (stencil)
Allsorts- ADD A HEART


Supplies
Stamps- Love in Your Heart (Rubbernecker)
Inks- Distress Oxides; Versafine Clair
Paper- Scribes Nook (Waterloo, Ont.)
Accessories and Tools- Stencil Mat (Waffle Mat); Stencil (ACLD); TE Blending Brushes; 
Lawn Fawn clear eb powder; heat tool; Posca pen

Monday, 10 January 2022

Comfort and Peace


Hello and Welcome
I am on a quest to replenish my stash of sympathy cards.  
I made some for a friend and now I need some for my personal use.  It is difficult to make them at the last minute I find.

So here's what I did to create my card.
  • I began with a piece of white cardstock.  I got out my Gel Plate and pressed some Carved Pumpkin Distress Oxide ink on one side and some Crackling Campfire on the other side.
  • Using my brayer, I blended the colours together.
  • I had some grasses I picked up on a walk (before the snow came) and I laid them onto the plate, then rubbed my white cardstock over the plate to lift the print.
  • The ink dries super fast so I was able to place the panel into my Misti and stamped the sentiment from Penny Black using some Versafine Clair ink.
  • I splattered with my white Posca pen and added 3 little black gems.
  • I glued the panel onto a piece of red cardstock, then onto a white card base.

Thanks so much for coming by and taking a look.

Supplies
Stamps- Sympathy Sentiments (PB)
Inks- Distress Oxides; Versafine Clair
Paper- heavy white (Scribes Nook, Waterloo, Ont.)
Accessories and Tools- Misti (My Sweet Petunia); black gems; grasses found outside; 
Gel Plate; Speedball brayer; white Posca pen

Sunday, 9 January 2022

Simple Watercolouring


Hello
Hope you are all doing well.
Meet today's card.  I was in the mood to do some watercolouring; something I haven't done for quite awhile.

So here's what I did to create my card.
  • I cut a piece of heavy white cardstock 4 1/2" x 4 1/2".  I took a piece of acetate, rubbed some Spun Sugar Distress ink onto the acetate and sprayed with water.  I bent the acetate and 'kissed' it to my cardstock, then dried the ink.  That gave me a bit of a colour base to start stamping my flowers onto.
  • I positioned the Lotus stamp into the corner of my cardstock, inked with some black Versafine Clair ink and stamped.  I clear embossed it as I knew I wanted to use lots of water and colour and I didn't want it to bleed.
  • I stamped the lotus again onto some sticky paper and fussy cut it out to create a mask.
  • I masked the flower and stamped another one beside and then above it.  I embossed them as well with some clear embossing powder.
  • I rubbed some Abandoned Coral onto my non-stick craft sheet and using a wet paintbrush, diluted it.  I added some clear water to the flowers with my paintbrush, then added some of the colour into the flower petals. 
  • I still had some ink left on my mat, so I splattered it over the flowers to add interest.
  • I dried the flowers before watercolouring in the flower heads with some Squeezed Lemon Distress ink using the same technique I mentioned above, then the stems with some Peeled Paint.
  • After I dried the flowers, I diluted some Tumbled Glass DI ink and painted in the background, adding more ink close to the flowers and blending it out.
  • To add even more interest to the background, I used the Chain Weavers stencil from ACLD and gently went over the blue area that I had watercoloured using more of the Tumbled Glass ink.
  • When dry, I placed the panel into my Misti and stamped the sentiment from the Lotus set.
  • I glued it onto a piece of pale pink cardstock, then onto a 5" x 5" white card base.


Here is the stencil I used on the background.

Discount Code for A Colorful Life Designs
(affiliate with no extra cost to you)

Thanks so much for coming by and taking a look

Adding my card to these challenges:
Just Us Girls- INKED OR SPRAYED BKGD
CASology- RENEW 
(After making so many Christmas cards, I am renewing my love of florals for Spring)
613 Avenue Create- ANYTHING GOES


Supplies
Stamps- Inked Lotus (Altenew)
Inks- Distress Inks (all mentioned above); Versafine Clair
Paper- heavy white (Scribes Nook- Waterloo, Ont.)
Accessories and Tools- Stencil (ACLD); Lawn Fawn clear eb powder; sponge daubers;
paintbrush; acetate sheet

Thursday, 6 January 2022

Feeling Blue


Welcome
I am trying to replenish my sympathy cards...always good to have a few on hand.
This one was a very simple design, made on my Gel Plate using Distress Oxide inks and a stamp.

So here's what I did to create my card.
  • I began with a piece of white cardstock, my Gel Plate, brayer and 2 Distress Oxide inks....Blueprint sketch and Salvaged Patina.
  • I pressed the Blueprint Sketch ink pad directly onto my Gel plate on the left and the Salvaged Patina on the right.  Using my brayer, I blended the colours together. 
  • I stamped the Tall Wheat directly onto my Gel Plate to remove some of the ink and then rubbed my piece of cardstock over the plate to lift the print. I got a cool looking shadow effect from stamping onto the plate.
  • When the print was dry, I inked up the  stamp again with some black Versafine Clair ink and stamped over the ink lifted area of my print.
  • I splattered with my black and white Posca pen and set aside to dry.
  • I stamped the sentiment from PTI onto a piece of scrap white cardstock in my Misti.
  • I glued the printed panel onto a heavy white card base, then pop dot mounted the sentiment along the bottom.


Thanks a lot for coming by and taking a look.

Adding my card to these challenges:
Shopping Our Stash- STARTS WITH 'S' (sympathy)
Krafty Chicks- STAMP ACT


Supplies
Stamps- Tall Wheat (Hero Arts); Sentiments (PTI)
Inks- Versafine Clair; Distress Oxides
Paper- heavy white (Scribes Nook- Waterloo, Ont.)
Accessories and Tools- Gel Plate; Speedball brayer; Posca pens; foam tape; Misti