Pages

Sunday, 30 June 2024

Hooray Graduate

Hello and Welcome
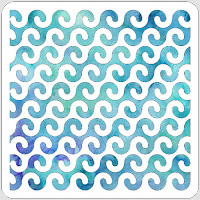
Today's card features a new for June stencil from A Colorful Life Designs called

So, here's what I did to create my simple card.
  • I placed a piece of white cardstock onto my Make Art Station.  I placed the Wild Rings stencil over the cardstock and inked it up with some Peacock Feathers Distress Oxide ink.  
  • Leaving the stencil in place, I used a small inking brush to ink just the insides of the circles with some Salty Ocean DOX ink to add more interest.
  • Next, I stamped the Hooray with some more Salty Ocean DOX and die cut it out.
  • I found some cardstock that was the same colour as the Salty Ocean and used that to die cut the image.  I glued that along the bottom of the stenciled panel.
  • I glued the stenciled panel onto a piece of blue cardstock, then onto an A2 sized card base.
  • I used some foam tape to add the sentiment across the top.

Here is the stencil I used:

Discount Code for A Colorful Life Designs
(Affiliate with no extra cost to you) 

Thanks so much for coming by and taking a look.

Adding my card to these challenges:
Simon Says Wed.- ANYTHING GOES
Just Us Girls- STENCIL ANYTHING GOES
Little Red Wagon- LAYER IT UP

Supplies
Stamps- HOORAY (TE)
Inks- DOX
Paper- heavy white (Scribes Nook- Waterloo, Ont.)
Accessories and Tools- stencil (A Colorful Life Designs); Blending Brushes (TE);
Make Art Station (Ranger); Grads die (AMAZON)

Friday, 28 June 2024

Time for Fun!

Welcome
I had fun playing with this new for June stencil from A Colorful Life Designs called

So, here's what I did to create my card.
  • I placed the Orderly Waves stencil over a piece of white cardstock and inked it up with some Cracked Pistachio Distress Oxide ink and some Rustic Wilderness DOX ink. 
  • I lifted the stencil off, cleaned it and then repositioned it.  I inked again with some Tumbled Glass and some Broken China DOX ink to create a fun pattern.
  • Next, I got out the sentiment and used the shadow die to cut right from the stenciled panel.  I die cut the sentiment with some black cardstock as well.
  • I glued the sentiment onto the shadow die that was cut from the card front.
  • I glued the card front onto a piece of green cardstock, then onto a white A2 sized card base.
  • I fitted the die cut sentiment back into place over the card front.
  • Lastly, I added 3 black gems below the sentiment.

Here is the stencil I used:

Discount Code for A Colorful Life Designs
(Affiliate with no extra cost to you) 

Thanks so much for coming by and taking a look.

Adding my card to these challenges:
Little Red Wagon- LAYERS  
(stencil layering)
Simon Says Wed.- ANYTHING GOES
Cardz 4 Guyz- ANYTHING MASCULINE

Supplies
Stamps- none
Inks- DOX
Paper- heavy white (Scribes Nook- Waterloo, Ont.)
Accessories and Tools- stencil (A Colorful Life Designs); 
Oh What Fun die ((A Pocket Full of Happiness); black gems; Inking Brushes (TE)

Saturday, 22 June 2024

Swimming By to Say Hi


Hello
Time for some beachy fun.
Today, I am using the new stencil from A Colorful Life Designs called 

So, here's what I did to create my card.
  • I took a piece of white cardstock and placed the Frothy Waves stencil over that.  I inked it up with some Salty Ocean Distress Oxide ink.  To help add some variation in the colour of the waves, I inked randomly with some Blueprint Sketch DOX ink.
  • Next, I used the Waffle Flower Die-Postage Collage and die cut the stenciled panel out.
  • I placed the panel into my Misti and stamped the sentiment in the bottom right hand corner.
  • I glued it onto a piece of white cardstock, then used some foam tape to add it to an A2 sized card base.
  • I stamped the little sea creatures in my Misti and coloured them with my Copic markers.
  • I cut them out and popped them over the wavy background with some more foam tape.

Here is the stencil I used:

Discount Code for A Colorful Life Designs
(Affiliate with no extra cost to you) 

Thanks so much for coming by and taking a look.

Adding my card to these challenges:
Cut it Up- FEELING BLUE
Daring Cardmakers- AT THE BEACH
Time Out- PHOTO INSPIRATION

Supplies
Stamps- Sea Creatures (Hampton Arts)
Inks- Versafine Clair; DOX; Copic Markers
Paper- heavy white (Scribes Nook- Waterloo, Ont.)
Accessories and Tools- stencil (A Colorful Life Designs); Misti (My Sweet Petunia);
foam tape; Postage Collage die (Waffle Flower)

Wednesday, 19 June 2024

Fruit Punch


Good Morning and Welcome
Today's card was just a fun mix of colours that reminded me of fruit punch.
I used a stencil from A Colorful Life Designs called 

So, here's what I did to create my card.
  • I placed a piece of white cardstock onto my Make Art Station and found the center point of my paper.
  • I pulled out a variety of Distress Oxide ink colours and got them ready to use.
  • Next, I masked off one of the Paint Strokes from the stencil and starting at the center point, I inked it up.  I continued masking and inking using all the different strokes until my card front panel was filled. (I didn't record the colours I used, so sorry)
  • When I was happy with the look, I splattered using my white Posca pen and set aside to dry.
  • I stamped the sentiment with some black Versafine Clair ink and used the die to cut it out.  I glued that onto a black die cut circle.
  • I glued my stenciled card front onto a piece of white cardstock and then onto a piece of black and finally, onto a white A2 sized card base.
  • I used some foam tape to pop the sentiment over the background.
  • I added some bling also from A Colorful Life Designs around the sentiment.

Here is the stencil I used:

Discount Code for A Colorful Life Designs
(Affiliate with no extra cost to you) 

Thanks so much for coming by and taking a look.

Adding my card to these challenges:
Simon Says Monday- LET'S PAINT
More than Words- Complementary Colours
Allsorts- MASCULINE or ANYTHING GOES

Supplies
Stamps- With All My Art (TE)
Inks- Versafine Clair; DOX
Paper- heavy white (Scribes Nook, Waterloo, Ont.)
Accessories and Tools- stencil (A Colorful Life Designs); Make Art Station (Ranger); 
white Posca Pen; TE Blending Brushes; gems (ACLD); Infinity Circle die (Hero Arts)

Monday, 17 June 2024

Happy Father's Day to My Guy


Welcome
Today, I am having fun creating a card for Father's Day for my husband.  I am using the newly released stencil from A Colorful Life Designs called:

So, here's what I did to create my card.
  • I placed the Swirling Droplets stencil over a piece of white cardstock and randomly inked it up with some Cracked Pistachio, Peacock Feathers and some Salty Ocean Distress Oxide ink.
  • I removed the stencil and then rubbed some of the Peacock Feathers DOX ink along the edges of the card front panel.
  • Next, I used my black Posca pen and splattered the whole panel.
  • While that dried, I stamped and clear heat embossed the beer cans and fussy cut them out.
  • To add colour to the cans, I pressed the Cracked Pistachio and the Peacock Feathers ink pads onto a piece of acetate, sprayed with water and dragged the stamped cans through the wet ink.
  • I stamped the sentiment from the same set onto a little piece of inky cardstock and then set aside to dry.
  • I glued the card front panel onto a piece of pale green cardstock, then onto an A2 sized card base.
  • I used some foam tape to add the cans over the center of my card front and then added the sentiment under it using some more of the foam tape.
  • To finish my card off, I added 2 black gems on either side of the sentiment.

Here is the stencil I used:

Discount Code for A Colorful Life Designs
(Affiliate with no extra cost to you) 

Thanks so much for coming by and taking a look.

Adding my card to these challenges:
Sweet Stampin'- FATHER'S DAY/ SPECIAL MAN
Allsorts- MASCULINE
Papercraft Challenges- FOR THE BOYS

Supplies
Stamps- Cheers Bruh (Unity)
Inks- DOX, Versafine Clair
Paper- heavy white (Scribes Nook, Waterloo, Ont.)
Accessories and Tools- stencil (A Colorful Life Designs); TE Blending Brushes;
black Posca pen; acetate sheet; black gems

Friday, 14 June 2024

Fintastic Birthday Wishes to You!


Good Morning and Welcome
Meet one of the new stencils for June from A Colorful Life Designs called:
These fish look as though they are swimming around in a circle, but there is a perfect open space to add any kind of sentiment.

So, here's what I did to create my card.
  • I placed a piece of white cardstock onto my Make Art Station and then added the Fishy Frame stencil over that.
  • I inked with my Distress Oxides with these colours, varying them as I went along:  Cracked Pistachio, Peacock Feathers, Blueprint Sketch and some Uncharted Mariner.
  • I removed the stencil and diluted some Peacock Feathers DOX ink with water and used that to splatter over the fish.
  • When the panel was dry, I placed it into my Misti and stamped the sentiment into the open area.
  • I glued the panel onto a piece of mottled blue cardstock and then onto an A2 sized white card base.
  • Final step was to add 3 black gems right under the sentiment.

Here is the stencil I used:

Discount Code for A Colorful Life Designs
(Affiliate with no extra cost to you) 

Thanks so much for coming by and taking a look.

Adding my card to these challenges:
Simon Says Wed.- BRIGHT AND COLORFUL
Crafts Galore Encore- ANYTHING GOES
The Four Seasons- ANYTHING SUMMER GOES

Supplies
Stamps- Lost for Words (Visible Image)
Inks- Versafine Clair; DOX
Paper- heavy white (Scribes Nook- Waterloo, Ont.)
Accessories and Tools- stencil (A Colorful Life Designs); Make Art Station (Ranger);
TE Blending Brushes; black gems

Sunday, 9 June 2024

Paint Pulling


Good Morning
Here is a fun card I created using some Paint Pulling.
I haven't done this in so long but after watching a Friday Night Live with Vicki Boutin, I wanted to make a card using this technique again.  
You can do this technique using inks diluted with water, but the effect is better using some acrylic paint.

So, here's what I did to create my card.
  • I cut 2 piece of cardstock as I wanted to use one to die cut after inking.
  • I placed a dab of the blue paint on the edge of my card panel and then using an old gift card, I dragged the paint across the paper.
  • I repeated that process with the green until most of the panel was covered with some paint.  I was sure to leave some white space too.  So sorry I don't have a picture of the panels in process.  I got so into it and forgot.
  • When the panels were dry, I stenciled in places using the Messy Dot Grid stencil with some Peacock Feathers and some Twisted Citron Distress Oxide ink.
  • To add even more interest, I stamped the numbers randomly over the panels with some Mermaid Lagoon DOX ink.
  • I used one of the panels to die cut the sentiment and glued it onto the black shadow die.
  • I cut the other panel into strips of random size, then glued those onto another piece of white cardstock.  
  • I glued the finished card front panel onto a piece of black cardstock, then onto a white A2 sized card base.
  • I used some foam tape to add the sentiment over the middle.

Here is the stencil I used:

Discount Code for A Colorful Life Designs
(Affiliate with no extra cost to you) 

Thanks so much for coming by and taking a look.
Here is the link to Vicki's FNL video:

Adding my card to these challenges:
CRAFT- MASCULINE
Simon Says Wed.- MASCULINE

Supplies
Stamps-Numerator (AALL and Create)
Inks- DOX
Paper- heavy white (Scribes Nook: Waterloo, Ont.)
Accessories and Tools- Stencil (A Colorful Life Designs); Paints (Vicki Boutin);
old gift card; die (Concord and 9th)

Saturday, 8 June 2024

Sweet Hello

Hello and Welcome
For today's card, I tried to think outside the box using this new for June stencil from A Colorful Life Designs called:
I paired it up with an Embossing Folder to give it an interesting look.

So, here's what I did to create my card.
  • I placed a piece of white cardstock onto my Make Art Station, then positioned the Agave stencil over to one side of the panel and inked it up with some Cracked Pistachio, Rustic Wilderness and a bit of Peacock Feathers Distress Oxides.  
  • I lifted the stencil off and placed it on the opposite side of my cardstock panel, then inked with the same colours.
  • I removed the stencil and placed the piece into the Mosaic 3D Embossing folder and ran it through my machine.
  • Next, I took my Rustic Wilderness DOX ink pad and ran it over the raised embossing to add more interest.
  • I die cut the 'Hello' die from a piece of green cardstock, then glued that onto the shadow die that was cut from some white.
  • I glued the card front panel onto a piece of green cardstock, then onto a white A2 sized card base.
  • I use some foam tape to pop the sentiment into the middle of my card and then added 3 black gems around it.


Here is the stencil I used:

Discount Code for A Colorful Life Designs
(Affiliate with no extra cost to you) 

Thanks so much for coming by and taking a look.

Adding my card to these challenges:
Simon Says Mon.- MASCULINE
Simon Says Wed.- MASCULINE
As You Like It- FAV TYPE OF EMBOSSING- WET or DRY and why?
(I love dry embossing with folders as there are so many different possibilities using them)

Supplies
Stamps- none
Inks- DOX 
Paper- heavy white (Scribes Nook; Waterloo, Ont.)
Accessories and Tools- stencil (A Colorful Life Designs); TE inking brushes;
Mosaic EB folder (Altenew); black gems; Hello die (SSS)

Sunday, 2 June 2024

Tropical Hello


Good Morning
This card was a fun one to create using the new from A Colorful Life Designs stencil called

So, here's what I did to create my card.
  • I began with a piece of white cardstock that I inked up with some Cracked Pistachio and some Squeezed Lemonade Distress Oxide ink.
  • Next, I placed the Swirling Droplets stencil over the inked cardstock and rubbed on some Rustic Wilderness DOX ink until the whole card front was inked.
  • I placed the cardstock into the Monstera Leaves EB folder and ran it through my machine.  By stenciling the background and then embossing, it added great detail to the leaves.
  • I splattered with my white Posca pen and set aside to dry.
  • While that dried, I die cut the 'HELLO' letters out and glued it onto the shadow die cut background.
  • I glued the dried panel onto a piece of pale green cardstock, then onto an A2 sized card front.
  • I used some foam tape to pop the sentiment up over the card front panel and added some black gems around it.

Here is the stencil I used:

Discount Code for A Colorful Life Designs
(Affiliate with no extra cost to you) 

Thanks a lot for coming by and taking a look.

Adding my card to these challenges:
Simon Says Wed.- ANYTHING GOES
Simon Says Mon.- LOTS OF TEXTURE
Alphabet Challenge- WET/DRY EMBOSSING

Supplies
Stamps- none
Inks- DOX
Paper- heavy white (Scribes Nook- Waterloo, Ont.)
Accessories and Tools- stencil (A Colorful Life Designs); TE Inking Brushes;
black gems; White Posca pen; Monstera Leaves EB folder (Altenew);
HELLO die (Whimsy Stamps)

Saturday, 1 June 2024

Butterfly Collage


Welcome
Today, I am showing you the new stencil from A Colorful Life Designs called 
I didn't use them as suggested by their name as waves, but instead by overlapping the inking I was able to create a fun background for my collage.

So, here's what I did to create my card.
  • I began by placing a piece of white cardstock onto my Make Art Station.  I added the Orderly Waves stencil over that and inked it up with some Cracked Pistachio Distress Oxide ink.
  • I removed the stencil, cleaned it off and then put it down again in the other direction and inked with some Peacock Feathers DOX ink.
  • I removed the stencil and rubbed the whole panel with my Anti-static powder.
  • I placed the stenciled piece into my Misti and stamped the Butterfly Collage with some black Versafine Clair ink and clear heat embossed it.
  • I glued the panel onto a piece of white cardstock, then onto a piece of black then onto an A2 sized card base.
  • Finally, I added 2 black gems inside the stamped images.

Here is the stencil I used:

Discount Code for A Colorful Life Designs
(Affiliate with no extra cost to you) 

Thanks so much for coming by and taking a look.

Adding my card to these challenges:
Simon Says Wed.- ANYTHING GOES
Time Out- MAGICAL
Krafty Chicks- ANYTHING GOES

Supplies
Stamp- Butterfly Collage (Prima)
Inks- DOX; Versafine Clair
Paper- heavy white (Scribes Nook- Waterloo, Ont.)
Accessories and Tools- stencil (A Colorful Life Designs); Make Art Station (Ranger);
TE Blending Brushes; Misti; black gems; Anti-static powder; clear EB Powder