Pages

Wednesday, 29 December 2021

Merry and Bright


Hello and Welcome
Posting a few last minute cards.  
I ran out of time after being so busy with my daycare kids and having the stomach flu.  

So here's what I did to create my card.
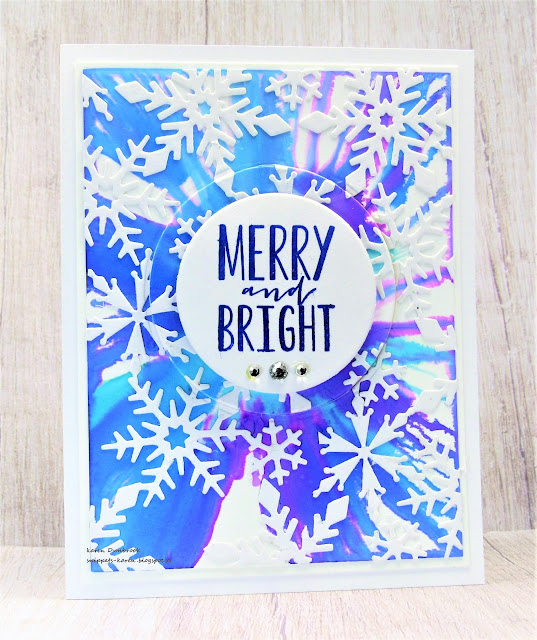
  • I pulled out a piece of Yupo paper, my salad spinner and some Alcohol inks.  **For any of you that missed my 'Salad Spinner Alcohol inks' video, you can see it HERE.
  • After creating my background with the Alcohol inks, I glued on the snowflakes that I had die cut from the Blizzard Corner with some white cardstock. It cuts a corner but I altered it to fit cover the panel.
  • When I was happy with the design, I die cut a circle from the center and set it aside.
  • I glued the AI inked panel onto a heavy white card base, then pop dotted the circle back into place, matching up the snowflakes.
  • I cut another circle from some white cardstock, smaller then the first one, stamped the sentiment onto that, then glued them together.
  • I added 3 silver gems under the sentiment. 


Thanks so much for coming by and taking a look.

Supplies
Stamps- Tis the Season (PTI)
Inks- Ranger Alcohol Inks; Versafine Clair
Paper- Yupo; heavy white: Scribes Nook- Waterloo, Ont.
Accessories and Tools- Salad Spinner; rubbing alcohol, Blizzard Corner (Poppy Stamps);
Infinity Circle die (HA)

Monday, 27 December 2021

Beary Good Birthday


Happy Hello.
Here's a simple card I made using a background I found in my stash.  
Yes, I keep saying I find these backgrounds in my stash, it is a large collection.  Often when I get time to play, I just make backgrounds, then tuck them away for a future card.

So here's what I did to create my card.
  • Like I mentioned above, I looked through my stash until I found this background.  I had either embossed a Gel Plate roll off sheet or I inked the inside of the embossing folder? (I need to do a better job at writing down what I have done while creating these backgrounds.)
  • I stamped the bear from the Polar Pals set, fussy cut it out and then used my Copic markers to add colour.
  • I stamped the sentiment from the same set on a scrap strip of cardstock.
  • I glued the embossed piece to some white, then onto green cardstock, then onto a heavy white card base.
  • I pop dotted the bear into the corner and added the sentiment strip along the top.

Thanks so much for coming by and taking a look.

Adding my card to these challenges:
Little Red Wagon- DOTS OR STRIPES
Simon Says Wed.- LET'S PARTY
Creative Crafters- ANYTHING GOES
Allsorts- ANYTHING WINTER


Supplies
Stamps- Polar Pals (MFT)
Inks- Versafine Clair, Copic markers
Paper- heavy white (Scribes Nook- Waterloo, Ont.)
Accessories and Tools- Holiday Knit eb folder (Sizzix); foam tape

Saturday, 25 December 2021

Ho Ho Ho


MERRY CHRISTMAS!!

I hope you all enjoy a day full of many blessing and happy memories.

This is a simple card I made for my son.  He loved it!

So here's what I did to create my card.
  • I began with a piece of white cardstock and cut out the Christmas Token die and set it aside.  
  • I glued the plaid paper behind the cut away circle.  I've had that paper for years so happy to be able to use it.
  • Next, I stamped out the Santa and fussy cut it out.  I really don't like to colour, so I decided I would paper piece him together.  I stamped the Santa again onto some patterned paper, fussy cut it out and glued it onto the Santa.  I did have to colour his face, boots and hands with Copic markers.
  • I glued the die cut panel onto a piece of red cardstock, then glued the Token back into place over that.  
  • I pop dotted Santa over the token and added a shiny white pom pom onto his hat.  
  • I glued it all onto a heavy white card base.

Thanks so much for coming by and taking a look.
I always feel so blessed to receive your wonderful, kind messages and I so appreciate you.

Supplies
Stamps- Jingle all the Way (MFT)
Inks- Copic markers
Paper- heavy white (Scribes Nook- Waterloo, Ontario); dp-?
Accessories and Tools- Misti; Christmas Token die (SSS); pop dots; shiny pom-pom

Tuesday, 21 December 2021

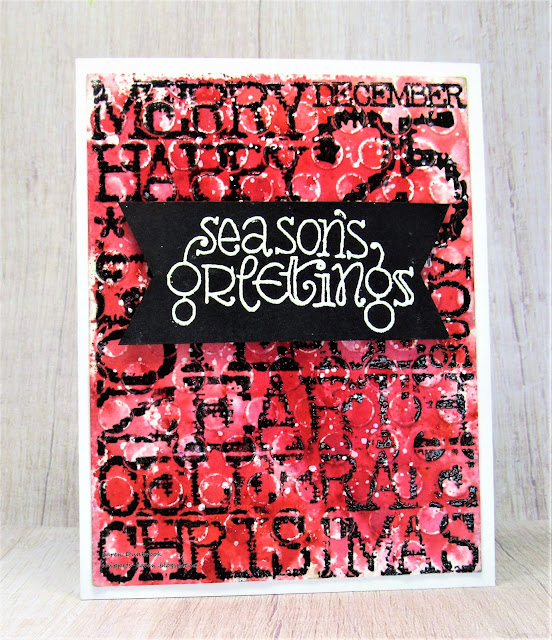
Celebrate the 25th


Welcome and Hello
 I recently picked up some lovely stamps from Impression Obsession and wanted to use them.
I looked through my stash and found this inked background that I had embossed with a circle embossing folder.  It looked like the perfect background so I went ahead and used it.

So here's what I did to create my card.
  • Like I mentioned above, I looked through my stash of inked backgrounds.  This one was once again, a paint roll off I did while Gel Plate printing.  I embossed it with a circle embossing folder, then sanded off the raised areas.  It adds so much interest and makes the embossing more visible.
  • I placed the inked/sanded piece into my Misti and stamped the Christmas Word Background over the embossing with some black Versafine Clair ink.  I stamped a few times to get a good impression, then clear heat embossed to help the letters pop.
  • I splattered the whole panel with some white to look like snow.
  • As that dried, I found a scrap of black cardstock and stamped the sentiment (another new one for me from IO) with some Versamark ink and white heat embossed it.  I cut the flag edges to add more interest.
  • I glued the panel onto a heavy white card base, then pop dot mounted the sentiment over that. 


Thanks so much for coming by and taking a look.

Adding my card to these challenges:
Little Red Wagon- DO THEY REALLY KNOW IT'S CHRISTMAS
Crafty Calendar- CHRISTMAS
Corrosive Challenge- ANYTHING GOES
Stamping Sensations- PICK A THEME AND STAMP IT

Supplies
Stamps- Christmas Word Bkg. (IO); Season's Greetings (IO)
Inks- Versafine Clair, Versamark
Paper- heavy white (Scribes Nook- Waterloo, Ont.)
Accessories and Tools- Misti (My Sweet Petunia); clear eb powder; Sizzix circle embossing Folder;
heat tool, sandpaper; acrylic paint; brayer

Sunday, 19 December 2021

Classic Christmas


Good Morning
So much on the go but finding some time to 'play'.  It's good for the soul.
So during my play time, here's what I came up with. 
A simple background using just one part of a stencil...I like to try new things and see what I can make.

I'm also playing with a new to me tool from Waffle Flower called the Stencil Mat.  It's a silicone mat that grips your stencil and has a corner edge detail that is very helpful when using layering stencils.  You can tuck the stencil right into the corner and it won't move.  Then when you are ready to layer, just place the next stencil into the corner for perfect placement.

So here's what I did to create my card.  
  • I pulled out my Stencil Mat and a piece of white cardstock and placed the second part of the Layered Holly stencil onto my paper and rubbed on some Candied Apple Distress Oxide ink.  That gave me the first set of 3 dots in red.
  • I lifted the stencil and rotated it 180 degrees so the berries were now under the first ones I stenciled and applied more of the red DOX ink.
  • I cleaned the red ink off of my stencil and repositioned it with the dots to the left side of the red ones I had already done.  I rubbed on some Rustic Wilderness Distress Oxide ink, lifted the stencil and rotated it again to add the berries on the right hand side.
  • After all the stenciling was done, I was left with this fun dot pattern.
  • To help add interest and define the areas of the dot patterns, I placed the piece into my ScorPal and using my ScorBug, I added the perforated dots that sort of looked like some 'faux' stitching and gave a quilted look.
  • I die cut the snowflake/wreath from some green cardstock and glued that over the dot background.
  • I die cut the sentiment 2 times from some heavy red cardstock and glued them together.  I then glued that over the wreath.
  • I added some red gems to help jazz it up a bit.
  • I glued the finished panel onto some more red cardstock, then onto the green and then finally onto a heavy white card base.


Here is the stencil I used...(just the berries part)

Discount Code for A Colorful Life Designs
(affiliate with not extra cost to you)


Thanks so very much for coming by and taking a look.

Supplies
Stamps- none
Inks- Distress Oxides (TH)
Paper- heavy white (Scribes Nook, Waterloo, Ont.)
Accessories and Tools- Layered Holly stencil (ACLD); Stencil Mat (Waffle Flower); 
Inking Brushes (TE); Wreath and Snowflake die (Sizzix); Sending Cheer die (WPlus9);
gems (Dollar Store); ScorPal; ScorBug, Stencil Mat (Waffle Flower)

Friday, 17 December 2021

Snowflake Wishes


Hello and Welcome.
Snow.....something we don't have at the moment.
I'm not really a fan of it all, but I do like a bit for Christmas.  
Anyways, finishing up a few cards to hand deliver.

So here's what I did to create my card.
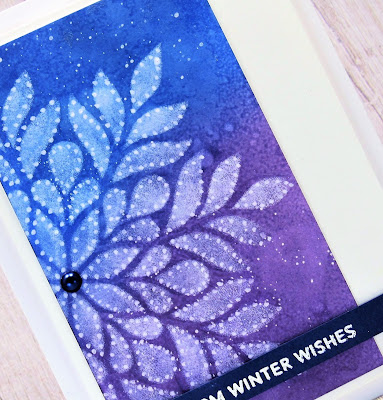
  • I pulled out my Gel Plate again, brayer and some acrylic paint.  I brayered my plate with the 2 colours of paint, then pressed the Elegant Snowflake stencil/mask into the paint using the tip of my paintbrush to get good contact with the plate.  
  • I removed the mask which also lifted some of the paint away to give me a faint impression of the snowflake.  
  • I set that aside to dry while I stamped out the sentiment strip from TE.  I placed a piece of navy cardstock into my Misti, stamped the sentiment with some Versamark ink and white heat embossed it.
  • When I looked at the panel, it looked dull and needed something, so I laid the stencil back into place and rubbed on some Hero Arts white ink.  I grabbed my white Posca pen and added some dots along the edges of the snowflake which brought it right to life.
  • I also splattered the whole panel with some more white.
  • I cut the panel down and glued it onto a piece of white cardstock, then onto a heavy white card base.
  • I pop dot mounted the sentiment along the bottom edge.


Here is the stencil I used:

Discount Code for A Colorful Life Designs
(affiliate with not extra cost to you)


Thanks so much for coming by and taking a look.

Adding my card to these challenges:
Little Red Wagon- DO THEY KNOW IT's CHRISTMAS
Watercooler Wed.- ANYTHING GOES
The Paper Funday Challenge- ANYTHING GOES/HOLIDAYS


Supplies
Stamps- Simple Strips Christmas (TE)
Inks- Versamark, HA Unicorn white
Paper- heavy white (Scribes Nook- Waterloo, Ont.)
Accessories and Tools- Elegant Snowflake (ACLD); Gel Plate; Acrylic Paint; 
Speedball brayer; Posca pen; Lawn Fawn eb powder

Thursday, 16 December 2021

Warmest Christmas Thoughts


Hello and Welcome
I hope you preparations for the holidays is going well.
There never seems to be enough time though.
Anyways, I found this background I had made on my Gel Plate and thought I would put it to good use.

So here's what I did to create my card.
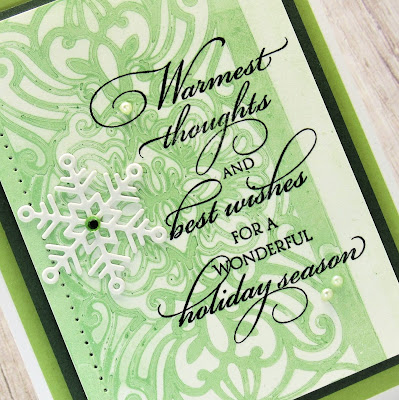
  • I began by pulling out my Gel Plate, brayer and some Peeled Paint and Cracked Pistachio Distress Oxide ink.  I pressed the ink pads directly onto the plate and brayered the colours together.
  • I laid the Pretty Victorian Stencil onto my plate, then rubbed some paper to remove some of the ink.  I removed the stencil and took my print by rubbing the cardstock over that.
  • Next, using a piercing tool, I poked some holes along the left edge of the panel to add interest.  
  • I placed the piece into my Misti and stamped the sentiment from Penny Black.
  • I glued that all onto a piece of black cardstock, then onto a piece of green and then finally onto a heavy white card base.
  • I die cut the little snowflake from some white cardstock and glued it to the side of the sentiment. 
  • I added some white pearls near the sentiment and then a green gem in the center of the snowflake.


Here is the stencil I used:
Pretty Victorian 

Discount Code for A Colorful Life Designs
(affiliate with not extra cost to you)


Well that's if for today.
I'm off to our little Santa's workshop with my little daycare kiddos.
We are creating lots of special surprises for their Mom's and Dad's.  
After all, it's the joy of giving I really want to instill in them.
If you ever want to take a peak at what we are working on, go HERE.

Thanks so much for coming by and taking a look.

Adding my card to these challenges:
Little Red Wagon- DO THEY KNOW IT'S CHRISTMAS
CAS on Friday- CHRISTMAS
Sparkles Monthly- VINTAGE CHRISTMAS


Supplies
Stamps- Joyful Wishes (Penny Black)
Inks- Distress Oxide; Versafine Clair
Paper- heavy white (Scribes Nook- Waterloo, Ont.)
Accessories and Tools- Pretty Victorian stencil (ACLD); brayer, Gel Plate; piercing tool;
pearls; Snowflake die- SSS

Tuesday, 14 December 2021

Snowy Afternoon


Welcome
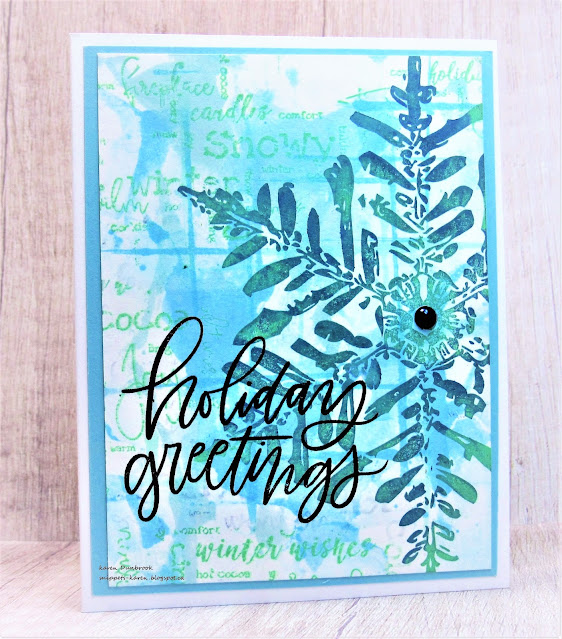
Meet my today's snowflake card.
Lots of inks, smooshing and fun.

So here's what I did to create my card.
  • I cut a piece of white cardstock for my card panel.  I rubbed some Broken China Distress Oxide ink onto my non-stick mat, sprayed with water and rubbed the panel into the wet ink.  I used the leftover ink on my mat to create the lines using the edge of a gift card dipped into the wet ink.
  • After drying the panel, I stamped over it with the Snowy Afternoon background stamp using some Cracked Pistachio DOX ink.  The words added a lot of interest.
  • I placed the dry panel into my Misti and positioned the large snowflake to one side.  I randomly pressed on some more Broken China DOX ink over the snowflake, sprayed with water and stamped.  I repeated that process using some Rustic Wilderness and Lucky Clover ink.
  • Lastly, I stamped the sentiment in the left hand corner with some black Versafine Clair and clear heat embossed it.  I added the black gem to the center of the snowflake.
  • I glued it onto a pale blue piece of cardstock, then onto a heavy white card base.

Thanks so much for coming by and taking a look.
I hope you holiday preparations are going well.

Adding my card to these challenges:
Simon Says Wed.- COLD AS ICE
A Place to Start- ANYTHING GOES OPTION BLUE
Love to Craft- ANYTHING GOES

Supplies
Stamps- Hand Lettered Holiday Greetings (MFT); Snowy Afternoon (Studio Light); 
Warm Wishes Snowflake (Colorado Craft)
Inks- Distress Oxides; Versafine Clair
Paper- heavy white (Scribes Nook- Waterloo, Ont.)
Accessories and Tools- Misti (My Sweet Petunia); old gift card; non- stick craft mat; 
clear eb powder; Mister (TH)

Monday, 13 December 2021

Walk in the Woods


Welcome
Meet today's card.
A simple one that took no time at all to make.

So here's what I did to create my card.
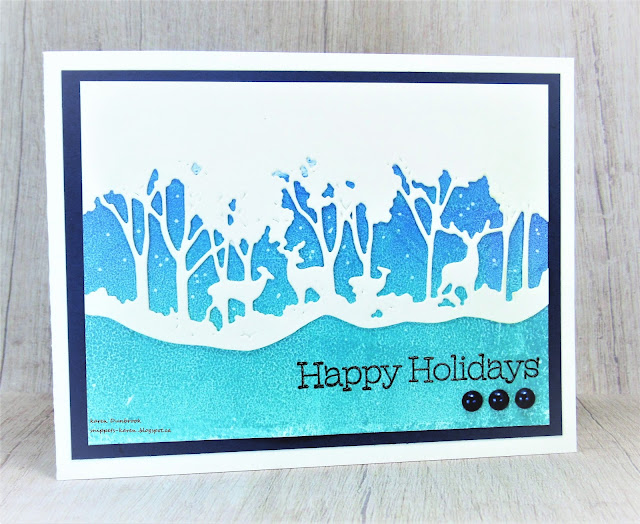
  • I wanted to create a simple blue sky background so I pulled out my Gel Plate and brayer.  I pressed some Peacock Feathers Distress ink along one side of the plate and then some Salty Ocean along the other side and blended them together using my brayer.  
  • I pressed a piece of heavy white cardstock over the plate and rubbed to lift the print.  It is honestly one of the easiest ways to blend a background.
  • I set that aside to dry then die cut the forest scene from white cardstock.  I love this die....a special gift from a special friend.  To add more interest, I cut along the bottom edge of the die cut before gluing it over the blue background.
  • I stamped the sentiment from and old SU set in the bottom corner.
  • I glued the panel onto a piece of dark blue cardstock, then onto a heavy white card base.
  • I added a few white splatters and then 3 navy dots under the sentiment.

Thanks so much for coming by and taking a look.

Adding my card to these challenges:
Simon Says Wed.- COLD AS ICE
Die Cut Divas- WINTER/ CHRISTMAS
Love to Craft- ANYTHING GOES

Supplies
Stamps- SU (??)
Inks- Distress Oxides, Versafine Clair
Paper- heavy white (Scribes Nook- Waterloo, Ont.)
Accessories and Tools- die (gift from a friend); Speedball brayer; Gel Plate; Posca pen;
gem dots (Dollar Store)

Wednesday, 8 December 2021

Three Wise Men


Welcome
Playing with a new stencil for my card today.
Here is the lovely Three Wise Men stencil.
It is a 2-part stencil/ mask.  I am just using the mask part today.

So here's what I did to create my card.
  • I began with a piece of white cardstock.  I positioned the mask piece of the stencil along the bottom of my cardstock panel and inked it up.  I began inking at the bottom with some Broken China Distress Oxide ink.  
  • Next, I moved up the card front in this order with these Oxide colours:  Blueprint Sketch, Dusty Concord and some Black Soot just along the top edge.
  • I dried the ink and rubbed over the whole panel with an anti-static bag, then leaving the mask in place, I stamped the Glory to God sentiment randomly over the background with Versamark ink and white heat embossed it.
  • I splattered with my white Posca pen before removing the mask.
  • Using a strip of white cardstock, I inked it up with some more Blueprint Sketch and Dusty Concord to match the background and then splattered with water.  I stamped the sentiment with some Versamark and white heat embossed it.
  • I glued the panel onto a piece of matching cardstock, then onto a heavy white card base.  
  • I pop dot mounted the sentiment in the corner just above the images.


Here is the stencil/mask I used:

Discount Code for A Colorful Life Designs
(affiliate with not extra cost to you)

Adding my card to these challenges:
Simon Says Wed.- Happy Holidays/ Merry Christmas
A Place to Start- ANYTHING GOES/ OPTIONAL BLUE CHRISTMAS
Peace on Earth- ANYTHING CHRISTMAS


Thanks a lot for coming by and taking a look.

Supplies
Stamps- Glory to God (Impression Obsesssion); Simple Strips Christmas (TE)
Inks- Versamark, Distress Oxide
Paper- heavy white (Scribes Nook- Waterloo, Ont.)
Accessories and Tools- stencil (ACLD); Lawn Fawn white eb powder; heat tool;
Blending Brushes (TE); Posca pen; anti-static bag

Sunday, 5 December 2021

Joyous Season


Welcome
Meet today's card.
Super simple and came together so quickly using what has become one of my favourite embossing folders this year.

So here's what I did.
  • Once again I went looking through my roll off sheet I did with acrylic paint while taking the Gel Plate printing class this past summer.  I found this one with blue and purple and thought it would work well.
  • I placed the paper into the Perfect Poinsettia embossing folder and ran it through my die cutting machine.  It does help to give the paper a light spritz of water before embossing for a deeper impression.
  • After I embossed it, I used a sanding block to gently sand off the raised areas....so simple but gives great results.  I splattered with my white Posca pen.
  • I die cut the Celebrate 3 times and glued them together.  Using some Blueprint Sketch Distress Oxide ink, I inked up the bottom of the sentiment to add more detail.  I glued that into the bottom corner.
  • I stamped the sentiment strip and pop dotted it over the celebrate.
  • I glue it onto a heavy white card base, then added some shiny gems to the center of the flower.

Thanks so very much for coming by and taking a look.

Adding my card to these challenges:
Simon Says Wed.- HAPPY HOLIDAYS/CHRISTMAS

Supplies
Stamps- Simple Strips Christmas (TE)
Inks- DOX, Versafine Clair, acrylic paint
Paper- heavy white (Scribes Nook- Waterloo, Ont.)
Accessories and Tools- Perfect Poinsettias eb folder (Altenew); Celebrate die (MFT);
inking tool; shiny gems (Dollar Store); foam mounting tape; sanding block, Posca pen

Saturday, 4 December 2021

Flowers for Christmas


Welcome
I love seeing the bright and happy poinsettias at Christmas time.
Using this new to me stencil called Single Poinsettia, I created a cluster of flowers.
A little masking, a little inking can transform the look.

So here's what I did to create my card.
  • I began with a white card panel and positioned the Single poinsettia in the bottom corner.  I masked off the areas I didn't want to ink up using some low tack tape.  
  • I inked up the stencil with some Festive Berries Distress Oxide ink. To darken the middle a bit, I used some Barn Door then right in the center where the berries are, I used a bit of Dusty Concord to darken.
  • I repositioned the stencil up to the side a bit, masked again and then inked with the same inks.  I repeated that process one more time, giving me 3 flowers in the cluster.
  • To add more interest, I stenciled using the Simple Grid and some more Festive Berries DOX ink.
  • I rubbed the ink along the edges as well to add some shading.
  • I splattered with my white Posca pen.
  • While that dried, I die cut the sentiment 3 times and glued them together.
  • I glued the flower panel onto a heavy white card base, then glued the stacked sentiment over the flowers.  
  • Lastly, I added 3 black gems for more interest.


Here are the stencils I used:

Discount Code for A Colorful Life Designs
(affiliate with not extra cost to you)

Thanks so very much for coming by for a visit.

Adding my card to these challenges:
Simon Says Wed.- HAPPY HOLIDAYS/ CHRISTMAS
Crazy 4 Challenges- CHRISTMAS FLOWERS
Alphabet Challenge - 'R' FOR RED


Supplies
Stamps- none
Inks- DOX (TH)
Paper- heavy white (Scribes Nook- Waterloo, Ont.)
Accessories and Tools- stencils- A Colorful Life Designs; Sending Cheer die (WPlus 9); 
TE inking brush; low tack tape; black gems (Dollar Store); Posca paint pen

Friday, 3 December 2021

Plaid for Christmas


Welcome
If you read my blog posts, once I start making holiday cards, I can't stop.  
Listening to Christmas carols on the radio, crafting....my happy place.
So meet today's card.

So here's what I did to create my card.
  • I began by stamping the Plaid in my Misti using some Peeled Paint Distress Oxide ink.  Over the top of that, I stamped the Outline Snowflakes to add more interest.  I think it made it so fun.
  • In my stash, I found this side fold card base...I do a few at a time to have on hand, (instructions found here) so I cut the plaid panel to fit on the card base as per the instructions and glued it down
  • I die cut the snowflake and glued it into the center, then pop dot mounted the sentiment over the snowflake.
  • To finish my card off, I added tiny green gems to all the snowflake points.

Thanks so much for coming by and taking a look.

Adding my card to these challenges:
Little Red Wagon- LET IT SNOW
Simon Says Wed.- HAPPY HOLIDAYS/ MERRY CHRISTMAS
Winter Wonderland- CHRISTMAS ANYTHING GOES


Supplies
Stamps- Outline Snowflake (SSS); Plaid (Concord and 9th)
Inks- Versafine Clair; Distress Oxide
Paper- heavy white (Scribes Nook- Waterloo, Ont.)
Accessories and Tools- Christmas sentiment strips (SSS); snowflake die (SSS); 
green gems (Dollar Store); Misti

Thursday, 2 December 2021

Have a Holly Jolly


Hello
So glad you could drop in.
I want to apologize.
I owe so many of you a visit...my life is a crazy one working with my 5 little daycare kiddos and preparing for Christmas.  There just are not enough hours in the day!!
Anyways, I found some paper strips in my stash, so decided to make them into a card.

So here's what I did to create my card.
  • Like I mentioned above, I found some paper strips in the box where I keep all my Christmas papers.  I seldom use papers from that box, but these vintage style ones inspired me to make another card using the Disappearing Nine Patch Background. Super simple with fun results. (you can click on the link to see the tutorial) Here is the first card I made using this technique.
  • I cut the paper strips to the right size following the tutorial and glued them onto a piece of cardstock that was 3" x 3".
  • After cutting them down into strips and gluing them again, I pop dot mounted the panel over some more of the papers scraps from the same paper collection.
  • I glued that onto a white card base. (my finished card is 4 1/4 x 4 1/4 so it will still fit into a standard size envelope)
  • I found this sentiment sticker in the box that I have had for ages, so I glued it over the patch background.

Thanks again so much for taking the time out of your day to come and visit.

Supplies
Stamps- none
Inks- none
Paper- heavy white (Scribes Nook- Waterloo, Ont.); dp (unknown)
Accessories and Tools- sentiment sticker (Dollar Store); foam tape

Wednesday, 1 December 2021

Pretty Poinsettias


Welcome
Meet today's card.
I am going to describe how I made it the best way I can and I sure hope it makes sense.
I am having a blast playing with this Perfect Poinsettias embossing folder.  

So here's what I did to create my card.
  • I found another piece of cardstock that I had rolled off some red and orange coloured paint onto when I was Gel Plate printing. I have a lot of these as I took a class this summer. I placed it into this Perfect Poinsettia embossing folder and embossed it.
  • Using a sanding block, I went over the panel, sanding gently over the raised areas as to not tear the paper.
  • To help some areas pop, I took some Barn Door and Crackling Campfire Distress Oxide ink and rubbed the pads over the raised areas.  
  • It needed something else, so I inked up the Friendship background stamp with some Versamark ink and stamped right over the panel then white heat embossed it.  As you can see, the words just show up in random areas which adds interest to the bkg.
  • While that dried, I die cut the sentiment, then traced around the outside of the die onto some vellum to cut out and place behind the words as a shadow.
  • I glued it onto a piece of red cardstock, then onto a heavy white card base.
  • I added a cluster of red gems to the center of the poinsettia.

Thanks so much for coming by and taking a look.

Adding my card to these challenges:
Simon Says Wed.- ANYTHING GOES

Supplies
Stamps- Friendship bkg (Hero Arts)
Inks- Distress Oxide; Acrylic paint
Paper- red cardstock, vellum, heavy white (Scribes Nook- Waterloo, Ont.)
Accessories and Tools- Perfect Poinsettias (Altenew); sanding block; Jolly 
Merry Christmas die (Carta Bella); red gems (Dollar Store); Lawn Fawn wh eb powder