Hello and Good Morning.
This new Layered Star stencil from A Colorful Life Designs made for a quick and easy card using it on my Gel Plate.
So, here's what I did to create my card.
- I got out my Gel Plate and brayer, then rubbed some Villainous Potion Distress Oxide ink along the top and bottom edges of my plate. I rubbed some Peacock Feathers DOX ink along the middle area of my plate.
- Using my brayer, I blended the colours smooth, but kept them separated.
- I laid Stencil #1 of the Layered Star stencil onto my plate and rubbed over it with a scrap paper to lift some of the ink. I lifted the stencil off and then rubbed my cardstock front over the plate to get the print. You can see how the areas in the middle of the stars is left white which is what I wanted to have before adding Stencil #2.
- Next, I placed Stencil #2 over the inked panel and used some Peacock Feathers DOX to add the detail to the star centers.
- I die cut the 'joy' from the center of the card front panel and then stamped over that with some Villainous Potion DOX ink.
- I glued the stenciled panel onto a piece of dark purple, then pale mauve and finally onto an A2 white card base.
- I used some foam tape to add the sentiment back into place and put 3 silver gems around that.
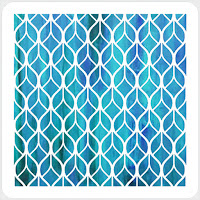
Here is the stencil I used:
Discount Code for A Colorful Life Designs
*Just use the code KarenFan10 to get a discount on your entire order.*
(Affiliate with no extra cost to you)
Thanks so very much for coming by and taking a look.
Adding my card to these challenges:
The Holly and Ivy Christmas Challenge- ANYTHING GOES
Everybody Art- STARS
Use Your Stuff- SHINE BRIGHT
Supplies
Stamps- Oversized Joy (Waffle Flower)Inks- DOX
Paper- heavy white (Scribes Nook- Waterloo, Ont.)
Accessories and Tools- stencils (A Colorful Life Designs), Gel Plate, brayer,
silver gems


