Saturday, 16 October 2021

Ornate Snowflake


Hello and Welcome
I so appreciate that you dropped in for a visit.

Meet today's card.
Very simple to do with lovely results.  
I love to stencil and I find that using this technique just puts the look to the next level by adding a lot of interest...plus you can make use of more of your supplies.

So here's what I did to create my card.
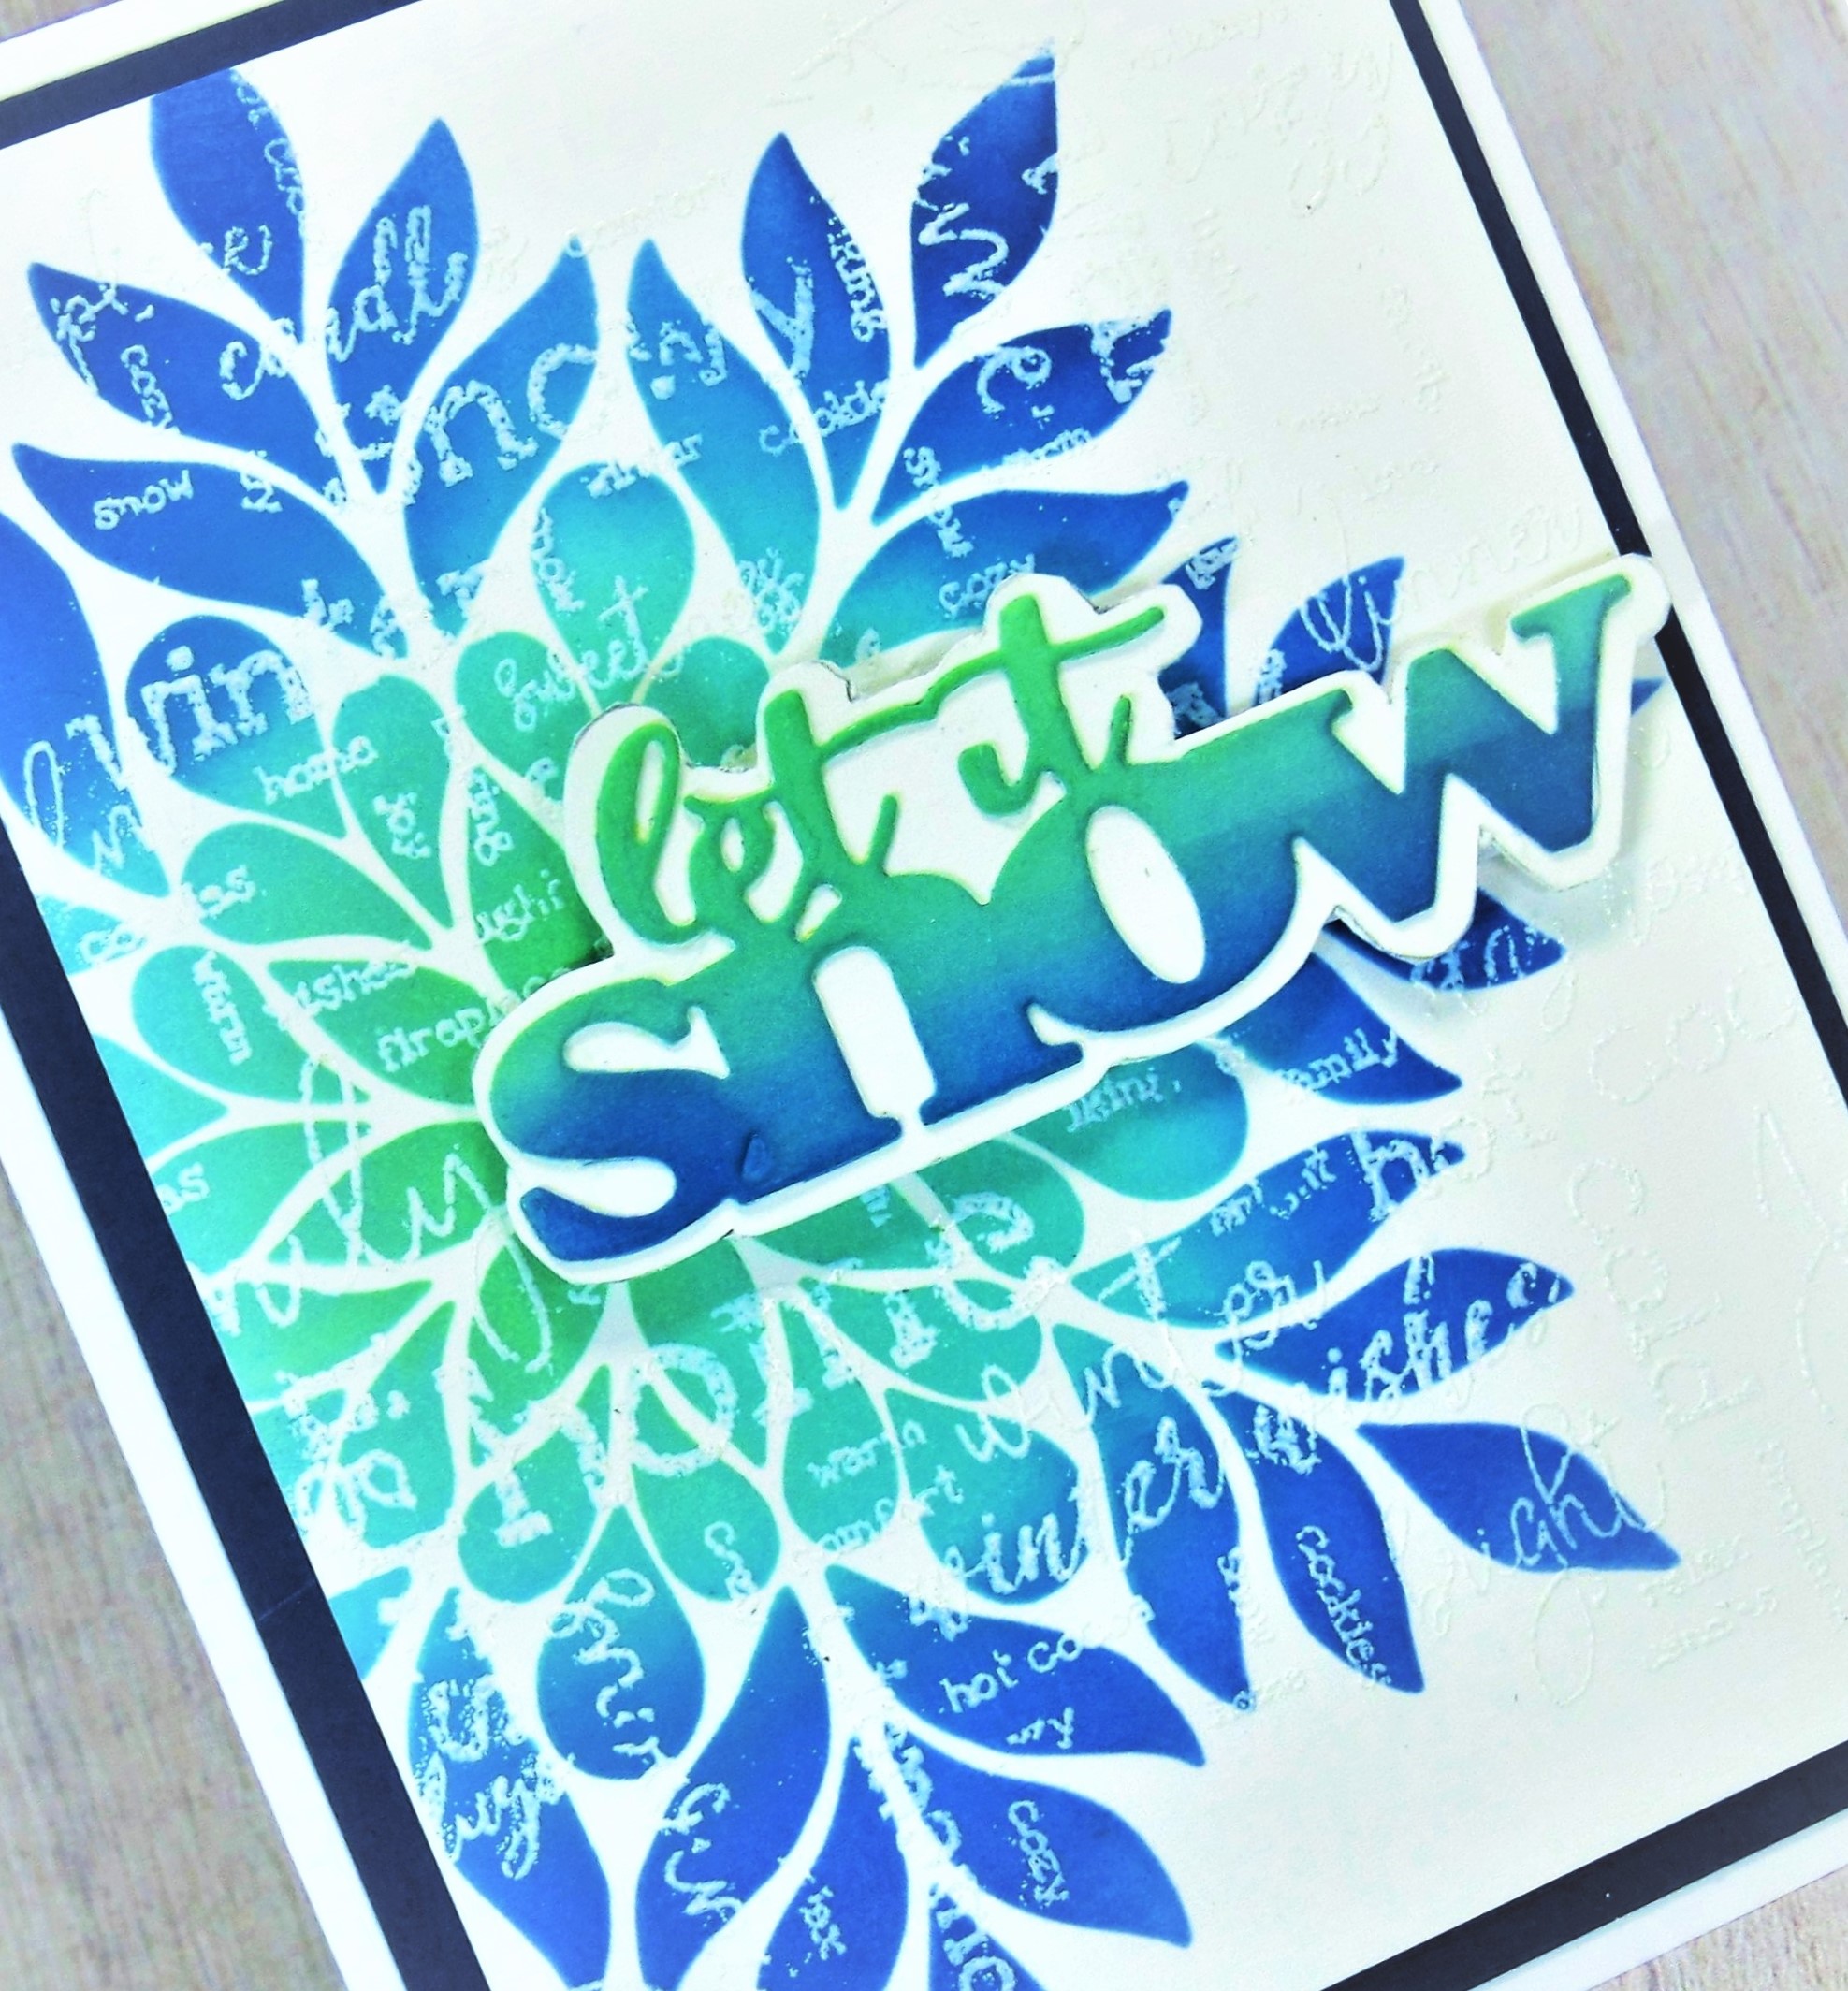
  • I cut my card front panel from a piece of white cardstock.  I placed it into my Misti and stamped  the Snowy Afternoon background stamp from Studio Light with some Versamark, then white heat embossed it.  It has a wonderful design with different fonts and winter words going in different directions.  
  • I took the Elegant Snowflake stencil and positioned it over the script.  Starting at the center of the stencil, I rubbed on some Cracked Pistachio Distress Oxide ink.  Next I rubbed on some Salvaged Patina and finally Prize Ribbon DOX ink along the outer edges. 
  • When I was happy with the inking, I removed the stencil and gently rubbed with a cloth to remove the ink from the white embossing to reveal the script.  The white embossing resists the ink giving detail to anything put over it.
  • Next, I die cut the sentiment from STAMPlorations with some white cardstock.  I inked it up with the above mentioned colours used on the background.
  • After inking the sentiment, it looked lost on the background but I loved the colour so here's what I did to make it pop.  You can do this trick with any die you have.  I took a scrap of white cardstock and traced around the edges with a pencil.  Using a pair of detail scissors, I cut out around the traced lines.  Voila....a shadow for my die!
As you can see from this picture, I do it with many of my dies.
This is just an example of what I did.

  • I glued the inked sentiment over the white shadow piece I had fussy cut and set it aside.
  • I glued the snowflake panel over a piece of navy cardstock, then onto a white card base.
  • I popped the sentiment over the snowflake with pop dots.

Here is the stencil I used:

Discount Code for A Colorful Life Designs
(affiliate with not extra cost to you)


Thanks so very much for coming by and taking a look.
Hope you have a great weekend.

Supplies
Stamp- Snowy Afternoon (Studio Light)
Inks- Versamark; Distress Oxides
Paper- heavy white (Scribes Nook- Waterloo, Ont.)
Accessories and Tools- Elegant Snowflake Stencil (ACLD); TE Blending Brushes; heat tool;
Lawn Fawn EB powder; Let it Snow die (STAMPlorations); pop dots; Nuvo glue;
Misti (My Sweet Petunia)


Tuesday, 12 October 2021

Give Glory


Welcome
More stencil fun on my Gel Plate today.
These split stencils from ACLD are so unique and have so many ways to be used.  
The stencil comes in 2 pieces; the stencil and the mask.

So here's what I did to create my card.
  • I began by getting out my Gel Plate, brayer and Distress Oxide inks (Wilted Violet and Blueprint Sketch)
  • I pressed the pads directly onto the Gel Plate, keeping them apart a bit in the center as not to contaminate the pads.
  • Using my brayer, I blended the colours together and pressed on the Split Bling Swirl stencil being sure to get good contact between the stencil and the Gel Plate.
  • Leaving the stencil in place, I rubbed a piece of white cardstock over the top to lift the print.
  • Next, to add more interest to the background, I used the Twinkle Stars stencil and some more Wilted Violet DOX ink and randomly inked up the open areas with a blending brush.
  • I placed the inked panel into my Misti to stamp the sentiment and clear heat embossed it so it would pop a bit more against the busy background.
  • I glued the panel onto a piece of purple cardstock, then onto a white card base.  
  • I splattered with my white Posca pen, then added 3 little white gems.

Here are the stencils I used:


Discount Code for A Colorful Life Designs
(affiliate with not extra cost to you)

Thanks so much for coming by and taking a look.

Supplies
Stamp- Glory (Impression Obsession)
Inks- Distress Oxide; Versafine Clair
Paper- heavy white (Scribes Nook- Waterloo, Ont.)
Accessories and Tools- Twinkle Stars and Split Bling Swirl stencil (ACLD); 
Gel Plate; Speedball Brayer; clear eb powder; Misti; white Posca pen

Monday, 11 October 2021

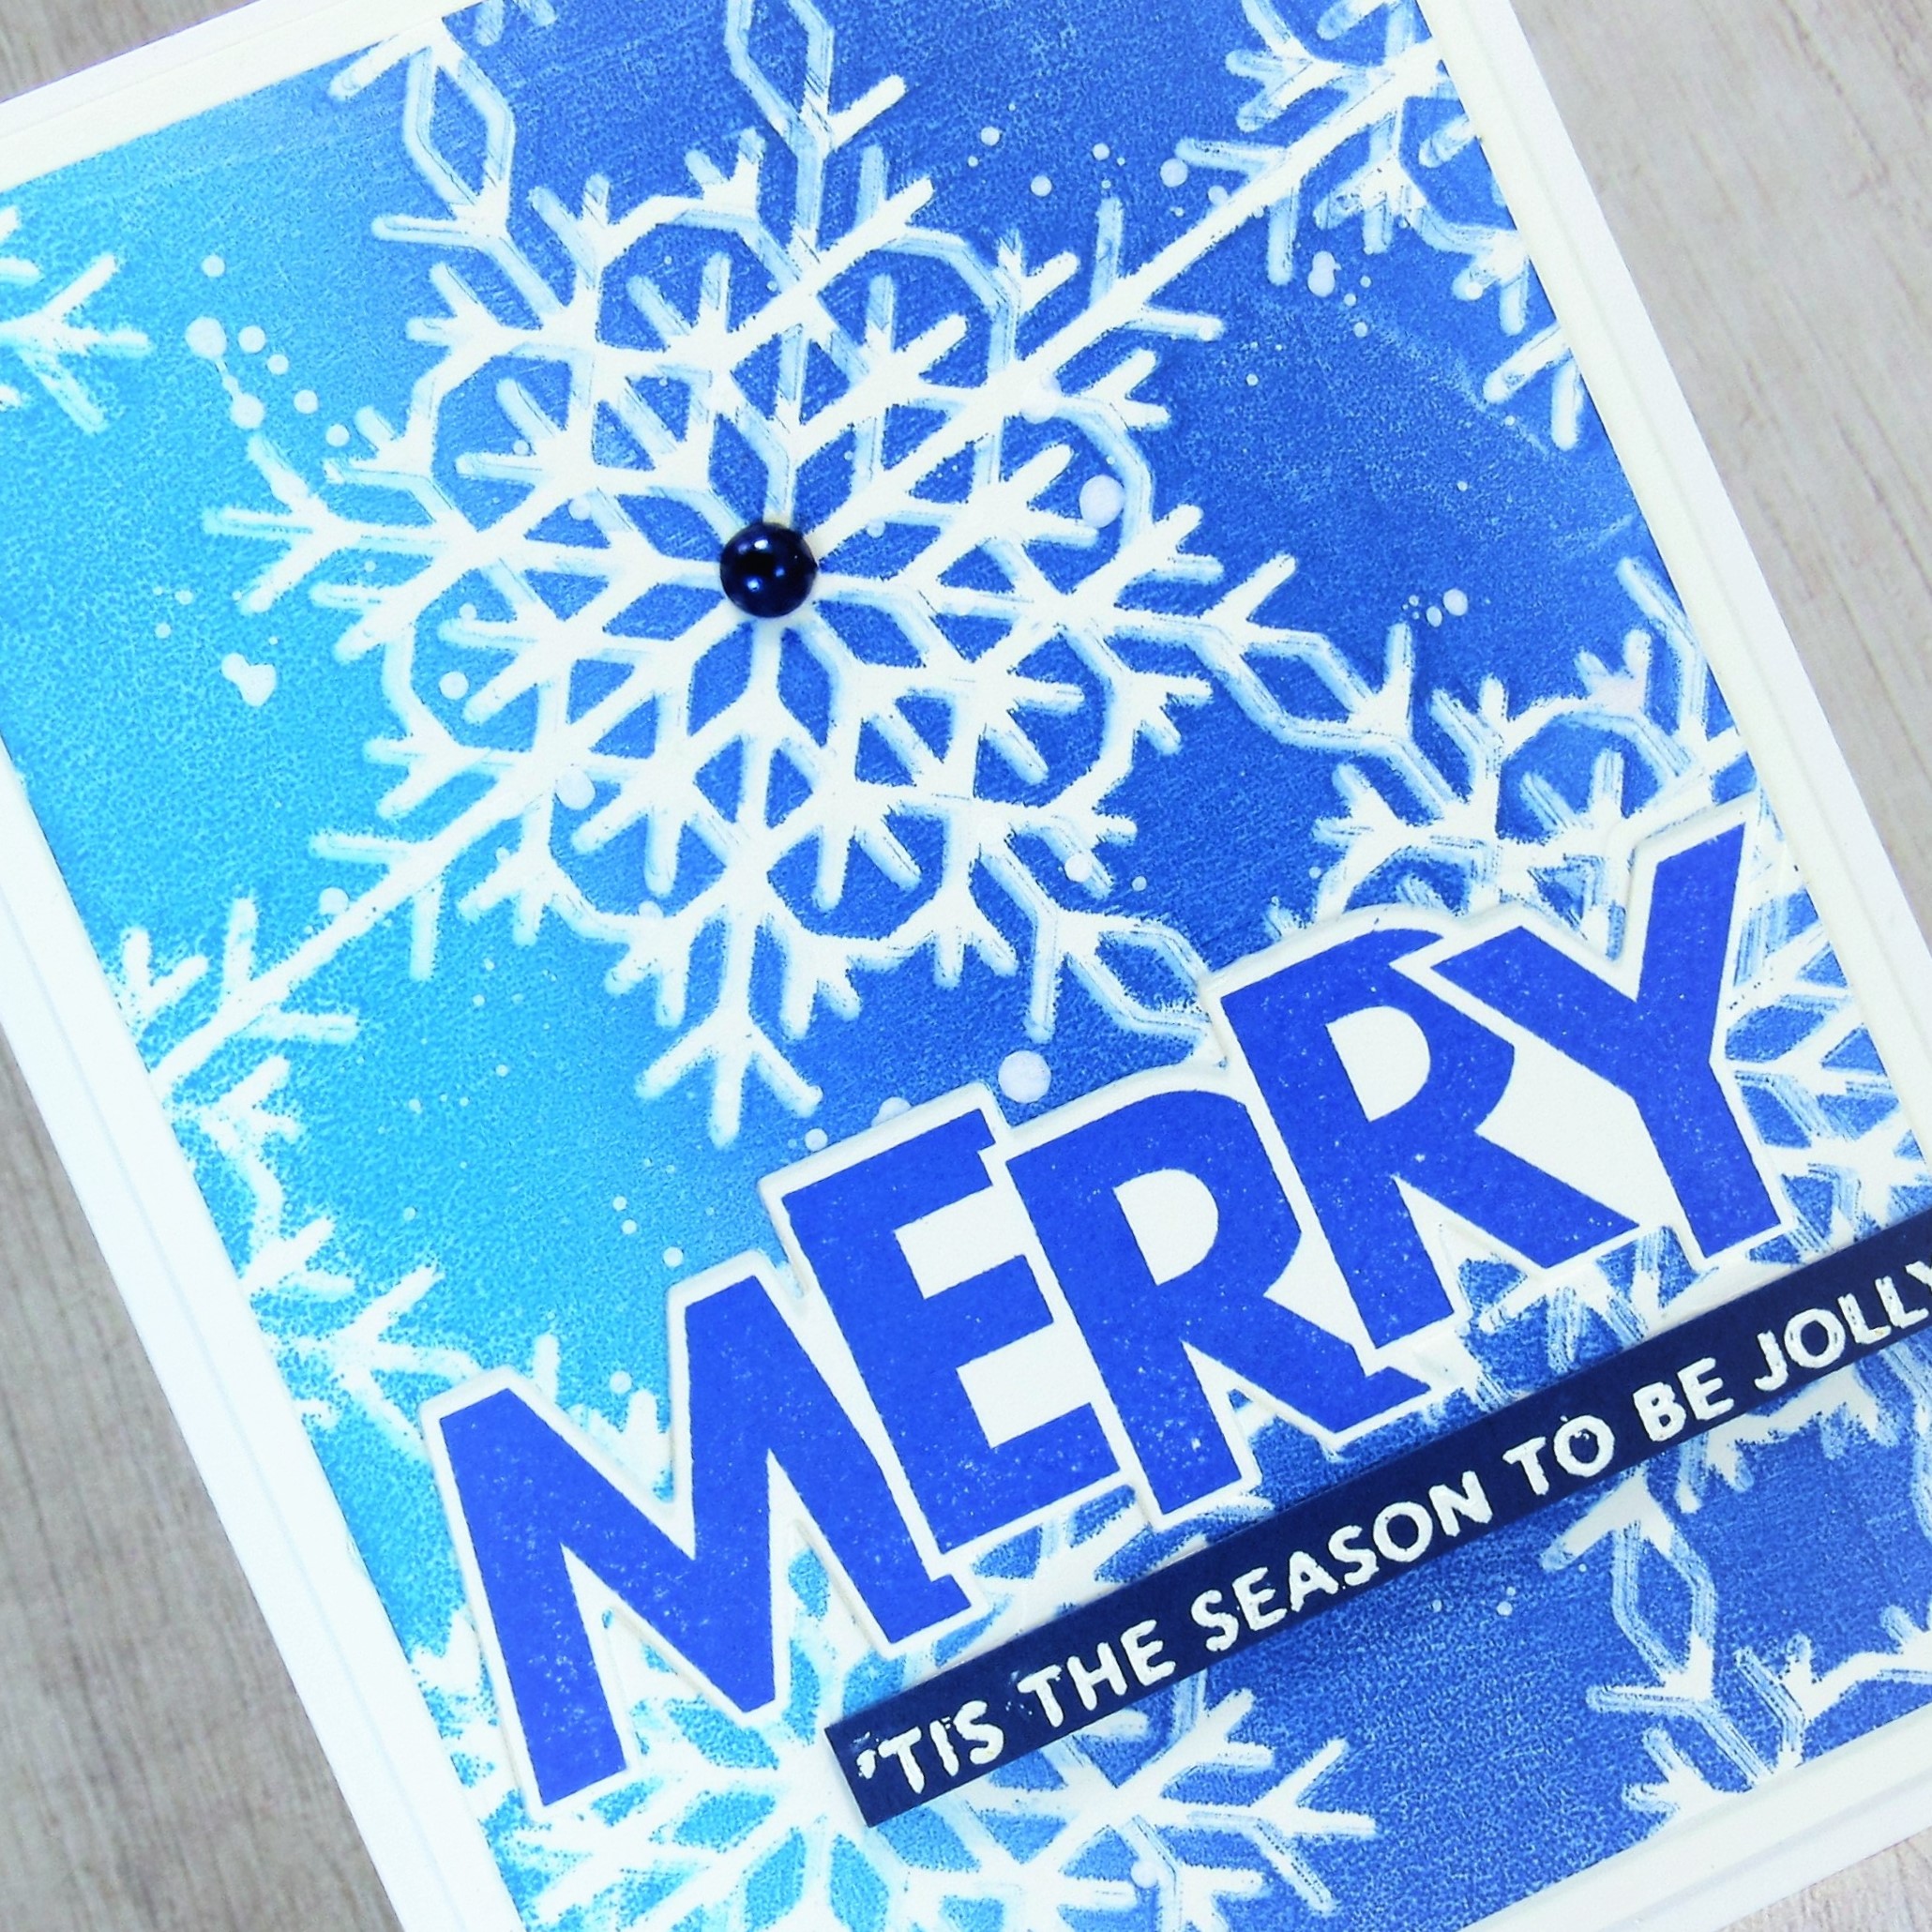
Very Merry


Welcome
I love snowflake cards.  
No, I'm not a fan of the winter but I just like using them to create.
Maybe it's because I like to use lots of shades of blue while making them?
Anyways, I was really to happy to see that ACLD has come out with another great snowflake stencil.  
As soon as I got it, I was off to play.

So here's what I did to create my card.
  • I pulled out my Gel Plate, brayer and 2 colours of Distress Oxide inks...Blueprint Sketch and Peacock Feathers.  I pressed the pads separately on each side of the plate and using my brayer, blended them together.
  • Next, I press the Delicate Snowflakes stencil from ACLD carefully onto the plate, being sure to get good contact all over.
  • I removed the stencil and firmly rubbed a piece of cardstock over the plate to lift the print.
  • While that dried, I stamped the Merry Shadow Stamp using more of the Blueprint Sketch ink onto some white cardstock and die cut it out.
  • I stamped the sentiment strip onto a piece of navy cardstock with some Versamark and white heat set it.
  • I glued the inked panel onto a white card base, then added the sentiment and pop dotted the sentiment strip.  
  • Finally, I splattered with my white Posca pen.

Thanks so much for coming by and taking a look.

Here is the stencil I used:

Discount Code for A Colorful Life Designs
(affiliate with not extra cost to you)

Supplies
Stamps- Merry Shadow and Simple Sentiment Strips Christmas (Taylored Expressions)
Inks- Distress Oxide, Versamark
Paper- heavy white (Scribes Nook- Waterloo, Ont.)
Accessories and Tools- Lawn Fawn white eb powder; Gel Plate; Speedball Brayer;
Delicate Snowflakes Stencil (ACLD); pop dots; Posca pen