Welcome
I've been doing a series of cards over the last few weeks, showing how to use those scraps you know we all have hanging around in our craft space.
I keep all mine in a container as I often have strips leftover when cutting down a Gel Plate print to make them card size. I'm on a mission to use those scraps and hopefully, create some nice looking cards using them.
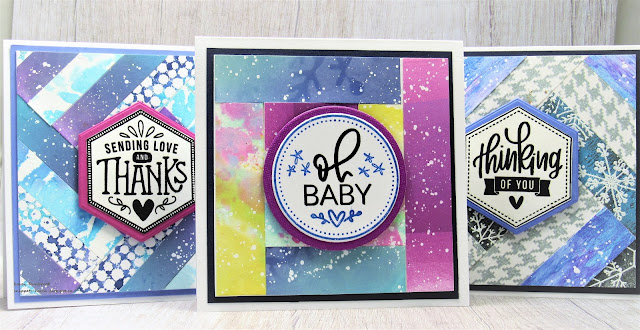
I used the strips to make 3 cards today, all made with scraps and inspired by quilt designs...I love quilts.
To see other cards I have done with scraps, just look above in the tutorials section.
All the paper strips were cut at 1/4 inch wide.
All the cards are 4 1/4 x 4 1/4 inches in size so they fit easily into a standard size envelope.
USE YOUR SCRAPS
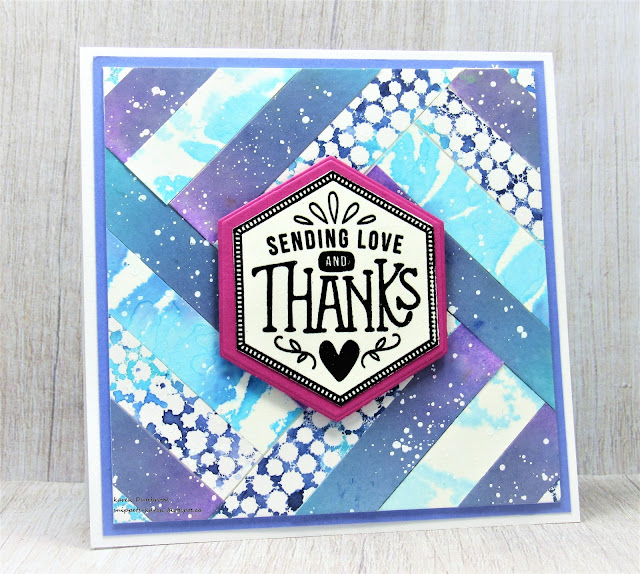
Card #1
For this card I used a variety of scraps including some inked Distress Oxide inked pieces, some stenciled pieces and some stamped.
The pieces are cut at 1/4 inch wide and glued in this 'quilt style' format starting with a square piece of cardstock that you can't see, (it's under the sentiment) right in the middle of the card front panel.
I splattered it with my white Posca pen after all the pieces were glued into place.
I stamped the Sending Love and Thanks in my Misti onto a piece of white cardstock and die cut it using the Hero Arts Hexagon Infinity dies.
I pop dot mounted it over the finished quilt style background.

This one was again a combination of some stamped strips and some inked ones, glued together in the same way as Card # 1. This one has a much more wintery feel to it with the snowflakes and the colours of the strips.
I stamped the sentiment onto some white cardstock and again, cut that out using the Hexagon Infinity dies then was pop dot mounted over the background.
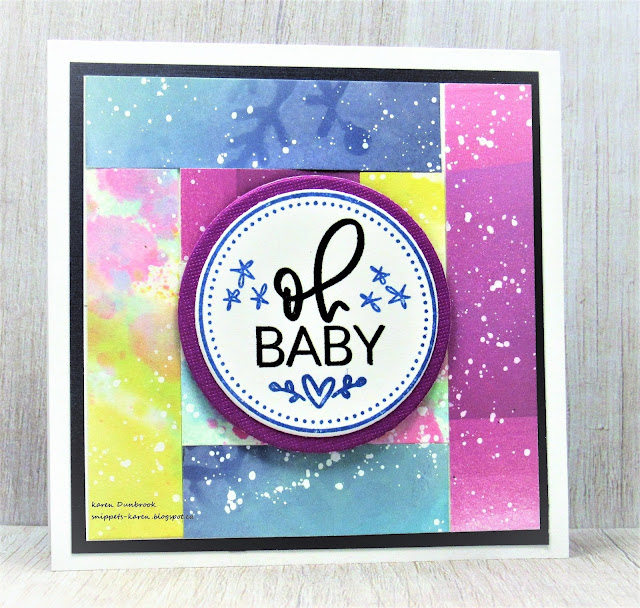
Card #3
This pattern was a bit different then the first two. The strips are laid straight instead of on the diagonal.
I splattered using my white Posca pen on this one too.
I made this one into a baby card by stamping the sentiment and then used a circle die to cut it out and pop dotted it over the background.
Well I hope you enjoy these simply done 'quilt' style cards all done using scraps.
Thanks so much for coming by and taking a look.
Adding my cards to these challenges:
Simon Says Wed.- ANYTHING GOES
Crafter's Cafe- MYO BACKGROUND
A Bit More Time to Craft- ANYTHING GOES
Supplies
Stamps- Hexagon Greetings (SSS); Everyday Circle Tags (Avery Elle)
Inks- Versafine Clair, DOX
Paper- heavy white- Scribes Nook, Waterloo, Ont.
Accessories and Tools- Misti (My Sweet Petunia); white Posca pen; Infinity Circle dies (Hero Arts);
Infinity Hexagon dies (HA); foam tape