Showing posts with label dots. Show all posts

Tuesday, 28 May 2024

Try It On Tuesdays

Welcome
Today, I have the pleasure of being the guest designer at the 


The theme is a fun one:
EMBOSS IT

So, here's what I did to create my card.
  • I cut a piece of white cardstock and beginning at the top of the paper, I blended these Distress Oxide colours together: Fossilized Amber/ Ripe Persimmon/ Picked Raspberry/ Cracked Pistachio/ Peacock Feathers.
  • Next, I embossed the panel with a 3D Burlap folder.  Using a sanding block, I gently sanded over the embossing to add a bit more interest and reveal a bit of the white cardstock.
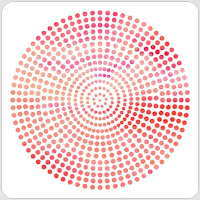
  • I laid the Dot Circle  Dot Circle stencil (one of my favs) over the embossed panel and inked with the same colours as mentioned above.
  • I die cut out the little paint brushes and glued them together.
  • I stamped the sentiment in my Misti and then die cut it out.
  • I glued the embossed panel onto a piece of white, then pink cardstock and finally onto an A2 sized card base.
  • I glued the little paint brushes onto the card front and used some foam tape to add the sentiment.

Here is the stencil I used:

Thanks so much for coming by and taking a look.

Discount Code for A Colorful Life Designs
(Affiliate with no extra cost to you) 

Supplies
Stamps- With All My Art (TE)
Inks- DOX; Versafine Clair
Paper- heavy white (Scribes Nook- Waterloo, Ont.)
Accessories and Tools- stencil (A Colorful Life Designs); 3D Burlap EB Folder (Honey Bee);
Paint the Town dies (TE); foam tape; sanding block

Saturday, 23 December 2023

Joyful Moments


Good Morning
Just a few days until Christmas arrives.  I hope you holiday plans are going well!
Today's card is a fun one using just one part of a layering stencil from A Colorful Life Designs called

So, here's what I did to create my card.
  • I placed a piece of white cardstock onto my Make Art Station and then placed just the berries part of the Layered Holly stencil over that.  I inked it up with some Lumberjack Plaid Distress Oxide ink.
  • I removed the stencil, cleaned it off and flipped it around upside down and placed it back onto my cardstock.  I inked again with some Rustic Wilderness DOX ink.
  • I wiped the stencil clean and then decided to add some more of the dots using some Squeezed Lemonade DOX ink.
  • I still wanted more dots, so using the eraser on the end of a pencil, I added more dots using the red.  Those were a bit bigger then the stenciled ones, which helped balance out the design.
  • Using a white Posca pen, I put dots into the eraser stamped ones to add more interest.
  • When my card front was dry, I die cut the "JOY" sentiment from the center.  I die cut the shadow with some red cardstock and glued the 2 together.
  • I dry embossed a piece of red cardstock as I wanted to add interest to the open part of the sentiment, then I glued the stenciled card front over that and then onto an A2 sized card base.
  • I used some foam tape to pop the sentiment back into place, matching up the stenciled pattern.
  • I added some die cut pieces around the sentiment to finish my card off.

Here is the stencil I used:
(I used just the berries)

Discount Code for A Colorful Life Designs
(Affiliate with no extra cost to you) 

Thanks so much for coming by and taking a look.

Adding my card to these challenges:
Little Red Wagon- UNDER PRESSURE
Cardz 4 Galz- CHRISTMAS CARD

Supplies
Stamps- none
Inks- DOX
Paper- heavy white (Scribes Nook- Waterloo, Ont.)
Accessories and Tools- stencil- A Colorful Life Designs, white Posca pen, 
Make Art Station (Ranger), Big Tidings Dies- (Tim Holtz), Mosaic Angles eb folder (Altenew)

Saturday, 11 November 2023

Big Ornament


Good Morning and Welcome.
Today's card features some stencil layering using 2 newly released stencils from A Colorful Life Designs called:

So, here's what I did to create my card.
  • I cut a piece of cardstock that was 4" square and placed it onto my Make Art Station.  
  • I placed the Big Ornament stencil over my white cardstock and inked it up with some Rustic Wilderness Distress Oxide ink.
  • Leaving the stencil in place, I put the Star Ring stencil over the top and inked that up with some Lumberjack Plaid DOX ink.  Layering the 2 stencils made for a unique and interesting background.
  • I removed both stencils and after the ink had a chance to dry, I added some white dots to the middle of the red circles using my Posca pen.
  • I placed the stenciled card front into my Misti and stamped the sentiment.
  • I glued it onto a 4 1/4" square card base.

Here are the stencils I used:


Discount Code for A Colorful Life Designs
(Affiliate with no extra cost to you) 

Thanks so much for coming by and taking a look.

Adding my card to these challenges:
As You Like It- TRADITIONAL or MODERN
(traditional- so memories of past Christmases)
Crazy Catz- ANYTHING GOES-option: Sparkle
Krafty Chicks- CHRISTMAS

Supplies
Stamps- Christmas Cheer (TT- retired)
Inks- Versafine Clair, DOX
Paper- heavy white (Scribes Nook- Waterloo, Ont.)
Accessories and Tools- stencils (A Colorful Life Designs); TE Blending Brushes;
Make Art Station (Ranger); white Posca pen

Monday, 21 August 2023

Have a Grateful Heart


Good Morning.
Today's card has a great summery feeling to it.
I'm combining the new Dynamic Lines and the Dot Square Grid stencils from A Colorful Life Designs to create my design.

So, here's what I did to create my card.
  • I cut a piece of cardstock 4 inches square and placed it onto my Make Art Station.
  • I decided to use just the corners of the stencil, so I placed just the corner edge of the Dynamic Lines stencil onto one of the corners of my cardstock.  I inked that up with some Peacock Feathers Distress Oxide ink.
  • I repeated that process until all 4 corners were inked up.
  • When I was finished, there was a large white area in the center of the card panel, so I masked it off and stenciled it using the Dot Square Grid with some Blueprint Sketch DOX ink to add a bit of colour variation and interest.
  • I splattered the whole panel with my white Posca pen and set aside to dry.
  • When the panel was dry, I placed it into my Misti to stamp the sentiment.

Here are the stencils I used:


Discount Code for A Colorful Life Designs
(Affiliate with no extra cost to you) 

Thanks a lot for coming by and taking a look.

Adding my card to these challenges:
Simon Says Wed.- CLEAN AND SIMPLE
Happy Little Stampers- ANYTHING GOES STENCILED
The Crafting Challenge- YOUR FAB COLOUR

Supplies
Stamp- Start Each Day (CTMH)
Inks- Versafine Clair, DOX
Paper- heavy white (Scribes Nook- Waterloo, Ont.)
Accessories and Tools- stencils (A Colorful Life Designs); Make Art Station (Ranger);
TE inking brushes; white Posca pen, Misti (My Sweet Petunia)

Friday, 19 May 2023

Wanted to say Hello


Good Morning
Today's card was a fun one using a new stencil for May called Orbits and combined with an older stencil called Dotted Wreath.  
It made for a Clean and Simple card.

So, here's what I did to create my card.
  • I placed a piece of white cardstock onto my Make Art Station and positioned one part of the Orbits stencil over my paper, centering it.  I inked it up with some Uncharted Mariners Distress Oxide ink.
  • I moved the stencil and added one of the smaller rings and inked that up with some Peacock Feathers Distress Oxide ink right into the center part.
  • Next, I removed the Orbits stencil and I placed the Dotted Wreath stencil over the background and inked that up with some more Peacock Feathers DOX ink.
  • I die cut the "Hello' from some blue cardstock and the shadow of the die from white and glued them together, then popped that into the center of the circles.
  • I glued the panel onto a piece of matching blue cardstock, then onto an A2 sized card base.

Here are the stencils I used:


Discount Code for A Colorful Life Designs
(Affiliate with no extra cost to you) 

Thanks so much for coming by and taking a look.

Adding my card to these challenges:
Crafty Addicts- ANYTHING GOES
Addicted to CAS- MONOCHROME
Challenge Up Your Life= CLEAN AND SIMPLE

Supplies
Stamp- none
Ink- DOX
Paper- Scribes Nook- Waterloo, Ont.
Accessories and Tools- stencils (ACLD); Make Art Station (Ranger); 
TE Blending Brushes; Hello die (SSS); foam tape

Thursday, 9 March 2023

Celebrate Dotted Wreath


Welcome
Today's card is a simple CAS using the Dotted Wreath stencil from A Colorful Life Designs.
Just a fun stencil to play around with.

So, here's what I did to create my card.
  • I cut a piece of white cardstock and then laid it onto my Make Art Station.
  • I positioned the Dotted Wreath stencil to one side and inked it up with some Mustard Seed Distress Oxide ink.
  • I wiped the stencil off and moved it over a bit and inked with some Carved Pumpkin DOX ink.  I repeated that process again and inked with some Lumberjack Plaid DOX ink.
  • I removed the stencil and placed the panel into my Misti to stamp the sentiment in the middle.
  • To add more interest, I inked along the edges of the panel with some more of the Lumberjack Plaid.
  • Next, I glued the inked panel onto a piece of white cardstock, then onto a piece of orange then finally onto an A2 card base.
  • I added 3 black gems around the sentiment.

Here is the stencil I used:

Discount Code for A Colorful Life Designs
(Affiliate with no extra cost to you) 

Thanks so much for coming by and taking a look.

Adding my card to these challenges:
Unicorn Challenge- DOTS/STRIPES
Corrosive Challenge- ANYTHING GOES
AAA Birthday Game #47- STRIPES/ DOTS

Supplies
Stamp- Celebrate (IO)
Inks- DOX, Versafine Clair
Paper- Scribes Nook- Waterloo, Ont.
Accessories and Tools- stencil (ACLD); TE Blending Brushes; Misti;
Make Art Station (Ranger)

Saturday, 20 August 2022

Going Around in Circles


Welcome
Today's card features a print I did using my Gel Plate.
This Dot Circle stencil from A Colorful Life Designs has become a favourite.

So here's what I did to create my card.
  • I began by getting out my Gel Plate, brayer, Dot Circle stencil and some blue acrylic paint.
  • I added paint to the plate, brayered it nice and smooth, then placed the stencil over the wet paint.
  • Using the end of a paint brush handle, I gently pushed the stencil onto the plate, making sure it had really good contact.  
  • Next, I rubbed a piece of paper over stencil that was still on the plate which helped lift some off some of the paint.
  • I took the stencil off carefully, then rubbed a piece of white cardstock to get this print.  I set it aside to dry completely.
  • I got out this birthday die and cut the letters from some white cardstock. 
  • I cut the shadow die for the sentiment right from the center area of the print and then glued the Happy Birthday onto that.
  • I glued the Gel Plate print to a piece of white cardstock, then onto an A2 card base.
  • I pop dotted the sentiment by fitting it back into place in the center.
  • I added 3 silver gems to finish off my card.

Here is the stencil I used:
Dot Circle

Discount Code for A Colorful Life Designs
(affiliate with no extra cost to you)

Thanks so much for coming by and taking a look.

Supplies
Stamps- none
Inks- Basics Acrylic paint
Paper- heavy white (Scribes Nook- Waterloo, Ont.)
Accessories and Tools- stencil (ACLD); Gel Plate; Speedball brayer; silver gems (Dollar Tree);
Happy Birthday die (Amazon); paint brush

Wednesday, 3 August 2022

Overflowing Florals


Good Morning
Today's card was a fun one to create as I was playing along with a challenge to do some 'Faux Tearing using stencils' at Splitcoast Stampers.
What an interesting look it gave to the background...I should have taken a picture before I stamped over it.

So here's what I did to create my card.
  • I began with a piece of heavy white cardstock.  Using some copy paper, I tore strips and laid them over my cardstock with some repositionable glue.
  • I laid the  stencil over the torn pieces of paper and inked it up.  The colours of ink I used were:  Cracked Pistachio, Peacock Feathers and some Blueprint Sketch Distress Oxide ink.
  • I removed the stencil and all the strips to reveal the background.
  • I some leftover ink on my blending brushes to ink the edges.
  • Next, I placed the piece into my Misti and stamped the Large Floral Background over the inked piece with some black ink.
  • I die cut the sentiment from some black and then some white cardstock and glued them together.
  • I die cut the word shadow right from the middle of the inked panel and glued them together.
  • I glue it all onto an A2 card base, then pop dotted the sentiment into place over the flowers.

Here is the stencil I used:

Discount Code for A Colorful Life Designs
(affiliate with no extra cost to you)

Thanks so much for coming by and taking a look.

Adding my card to these challenges:
Try it on Tues.- MAKE IT FEMININE
Unicorn Challenge- SUMMERTIME


Supplies
Stamps- Large Floral Bkg (Magenta)
Inks- DOX, Versafine Clair
Paper- heavy white (Scribes Nook, Waterloo, Ont.)
Accessories and Tools- Sending Smiles die (SSS); stencil (ACLD); Misti (My Sweet Petunia); 
scrap paper for tearing; TE Blending Brushes