Saturday 24 February 2024

My Wish for You


Good Morning
Today's card is a fun one using a new for February stencil from A Colorful Life Designs called

Lots of possibilities with this one. 
Good one for layering too and it's big enough for scrapbook pages.

So, here's what I did to create my card.
  • I cut a piece of white cardstock and then measured to find the center point.
  • Instead of laying the whole Spinning Sun stencil onto my cardstock, I laid just half of it onto the middle line that I had marked on the panel, then inked it up with some Cracked Pistachio and some Uncharted Mariner.
  • I repeated that process until the whole piece of cardstock was inked.
  • Using my white Posca pen, I splattered the whole thing and set aside to dry.
  • I got out a scrap piece of white cardstock and inked that up with some more of the Cracked Pistachio and some Uncharted Mariner DOX ink and cut the sentiment from that.  I splattered that as well.  I die cut the sentiment shadow with some white and glued the sentiment into place onto that.
  • I glued the stenciled panel onto a piece of blue cardstock, then onto an A2 sized card base and used some foam tape to add the sentiment over the middle.

Here is the stencil I used:

Discount Code for A Colorful Life Designs
(Affiliate with no extra cost to you) 

Thanks so much for coming by and taking a look.

Adding my card to these challenges:
Just Us Girls- ANYTHING GOES STENCIL WEEK
Craft Rocket- BIRTHDAY
As You Like It- MASCULINE OR FEMININE
(I think bold designs work best for men)
My Time to Craft- MAKE YOUR OWN BKGD

Supplies
Stamps- none
Inks- DOX
Paper- heavy white (Scribes Nook- Waterloo, Ont.)
Accessories and Tools- stencil (A Colorful Life Designs); die- SSS; white Posca pen;
foam tape; TE Inking Brushes

Friday 23 February 2024

Bee Happy

Welcome
Today's card was a fun one to create.
I used a couple of new stencils for February from A Colorful Life Designs called
I also used an older stencil called Buffalo Plaid.

So, here's what I did to create my card.
  • I began by cutting a piece of white cardstock, placed the Double Honeycomb stencil over that and inked with some Fossilized Amber Distress Oxide ink.
  • I used a hexagon die to cut the stenciled panel into pieces and set aside.
  • Next, I cut another piece of white cardstock and  placed the Buffalo Plaid stencil over that.  I inked it with some Fossilized Amber DOX ink.  
  • I laid out all the little hexagon die cuts and using the Layered Bees stencil, added a bee to each of the hexagons using some Ripe Persimmon DOX ink and some Versafine Clair for the details.  
  • I added some inking around the outer edges of the hexagons and splattered with my black Posca pen.
  • I glued the Buffalo plaid background onto a 4 1/4" square card base.
  • Using some foam tape, I added the little hexagons over the Buffalo Plaid.
  • I had a piece of black shiny paper (recycled) and die cut the letters for the sentiment from that and glued them over the hexagons.

Here are the stencils I used:


Discount Code for A Colorful Life Designs
(Affiliate with no extra cost to you) 

Thanks so much for coming by and taking a look.

Adding my card to these challenges:
Crafts Galore Encore- ANYTHING GOES
Ellibelle's Corner- I SPY SOMETHING THAT STARTS WITH 'B'
The Creative Crafters- ANYTHING GOES

Supplies
Stamps- none
Inks- Versafine Clair; DOX
Paper- heavy white (Scribes Nook- Waterloo, Ont.)
Accessories and Tools- stencils (A Colorful Life Designs); TE Blending Brushes;
Hexagon Infinity dies (Hero Arts); black Posca pen; Ditsy Letters dies (Photoplay)

Monday 19 February 2024

May Your Wishes Bloom


Good Morning
Meet some more of the new for February stencils from A Colorful Life Designs called
This flowers stencil is a larger one and perfect for scrapbookers, but for my card, I used just one of the flowers.

So, here's what I did to create my card.
  • I cut a piece of white cardstock and placed one of the flowers from the Four Flowers stencil over my paper. 
  • I inked the flower up with some Fossilized Amber Distress Oxide ink in the middle and then blended outwards with some Ripe Persimmon and some Picked Raspberry DOX ink.
  • Leaving the stencil in place, I put new Rocky Path stencil right over it and inked again with the same colours. It added not only more colour but also interest to the flower.
  • I removed both stencils and splattered with my white Posca pen.
  • When the panel was dry, I die cut the sentiment from it and cut the sentiment shadow in white.  I glued the two together.
  • I glued the panel onto a piece of pink cardstock, then onto some orange the onto an A2 sized card base.
  • I used some foam tape to add the sentiment over to the side of the flower and then finally, added a black gem to the middle of the flower head.

Here are the stencils I used:
Four Flowers


Discount Code for A Colorful Life Designs
(Affiliate with no extra cost to you) 

Thanks so much for coming by and taking a look.

Adding my card to these challenges:
2 Sisters on the Blog- SOMETHING WITH THE LETTER 'M'
Beautiful Blossoms- ANYTHING FLORAL

Supplies
Stamps- none
Inks- DOX
Paper- heavy white (Scribes Nook- Waterloo, Ont.)
Accessories and Tools- stencils (A Colorful Life Designs); Make A Wish die (SSS);
TE Blending Brushes; white Posca pen; black gem

Sunday 18 February 2024

Feel Better Soon!


Welcome
Meet the new for February 
from a Colorful Life Designs.

Here's what I did to create my card.
  • As usual, I placed a piece of white cardstock onto my Make Art Station, added the Spinning Sun stencil and inked it up with some Cracked Pistachio Distress Oxide ink right into the center.
  • Next, I added some Broken China and then some Uncharted Mariner DOX right along the outer edges.
  • Use a circle die, I cut a circle right from the middle of the stenciled panel and set aside.
  • I splattered my card front with my white Posca pen and while that piece dried, I stamped the Get Well sentiment onto the circle and glued that onto a larger white cardstock circle.
  • I glued the panel onto a piece of blue cardstock, then glued that onto an A2 sized card base.
  • I used some foam tape to pop the circle sentiment back into place.

Here is the stencil I used:

Discount Code for A Colorful Life Designs
(Affiliate with no extra cost to you) 

Thanks so much for coming by and taking a look.

Supplies
Stamps- Big and Bold Sentiment and die (SSS)
Inks- Distress Oxides
Paper- heavy white (Scribes Nook- Waterloo, Ont.)
Accessories and Tools- stencil (A Colorful Life Designs); TE Blending Brushes;
Make Art Station (Ranger); Infinity Circle Dies (Hero Arts); 
white Posca pen; Misti (My Sweet Petunia)

Saturday 17 February 2024

Arum Lily Sympathy


Welcome
Some more stenciling fun today using some new stencils and an older one from 
A Colorful Life Designs.
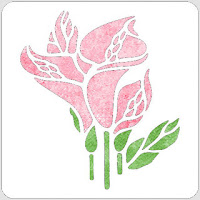
This beautiful new flower is called 
Arum Lily that I paired up with Rocky Path and Script
I thought it would make a lovely sympathy card.

So, here's what I did to create my card.
  • I placed a piece of white cardstock onto my Make Art Station and put the Arum Lily stencil over that, centering it up.
  • I used some Fossilized Amber Distress Oxide ink at the base of the flowers, some Ripe Persimmon next and some Picked Raspberry DOX ink right along the upper edges.
  • I masked around the leaves, then added some Cracked Pistachio DOX ink and a touch of Rustic Wilderness to add some depth.
  • To add a bit more interest to the whole stenciled image, I went over it using the Rocky Path stencil with the same colours I used for the first inking.
  • Next, I laid the Script stencil (an older release) over the lily and inked that carefully around the it with some Cracked Pistachio DOX ink.
  • I placed the stenciled piece into my Misti to stamp the sentiment.
  • I glued the finished panel onto a piece of green cardstock, then onto an A2 sized card base.
  • Finally, I added 5 black gems underneath the sentiment.

Here are the stencils I used:


Thanks a lot for coming by and taking a look.

Discount Code for A Colorful Life Designs
(Affiliate with no extra cost to you) 

Supplies
Stamps- More Sentiments (Avery Elle)
Inks- Versafine Clair, DOX
Paper- heavy white (Scribes Nook- Waterloo, Ont.)
Accessories and Tools- stencils (A Colorful Life Designs); Make Art Station (Ranger);
TE Blending Brushes; black gems

Friday 16 February 2024

Filigree Shamrock

Welcome
Today's card is using a new and most elegant stencil from A Colorful Life Designs called 
I stenciled it multiple times to create an overall design.

So, here's what I did to create my card.
  • I cut a piece of white cardstock, then placed the Filigree Shamrock stencil right into the center of the card panel.
  • I inked up the shamrock with some Cracked Pistachio and some Rustic Wilderness Distress Oxide ink.  I added some Black Soot DOX just into the center to add more depth of colour.
  • I wiped the stencil off and moved it around, inking with the same colours until the whole panel was covered.
  • I splattered with my white Posca pen and set aside to dry.
  • After it dried, I placed it into my Misti and stamped the large sentiment and clear heat embossed it.
  • I stamped the smaller sentiment onto a piece of white cardstock and set aside.
  • I glued the stenciled panel onto a piece of white, then green cardstock, then onto a white A2 sized card base.  
  • I used some foam tape to add the small sentiment over the larger one and then added 3 black gems around the sentiment.

Here is the stencil I used:

Discount Code for A Colorful Life Designs
(Affiliate with no extra cost to you) 

Thanks so much for coming by and taking a look.

Adding my card to these challenges:
A Place to Start- MONOCHROMATIC
The Creative Crafters- ANYTHING GOES
(option- LOVE/HEARTS)

Supplies
Stamps- Scripted Bold Sentiments (Pinkfresh Studios)
Inks- Versafine Clair; DOX
Paper- heavy white (Scribes Nook- Waterloo, Ont.)
Accessories and Tools- stencil (A Colorful Life Designs); white Posca pen; 
Make Art Station (Ranger); foam tape; Misti (My Sweet Petunia); clear eb powder

Thursday 15 February 2024

Happy Birthday Wishes

Good Morning
Doing some stencil layering this morning with 2 new stencils from A Colorful Life Designs called
Combining the 2 made for a fun background.

So, here's what I did to create my card.
  • I placed the Double Honeycomb stencil onto a piece of white cardstock and inked that up with some Cracked Pistachio Distress Oxide ink.
  • I removed that stencil and placed the Clover Trellis stencil over my panel and inked with some Rustic Wilderness DOX ink.  
  • While that dried, I die cut the birthday sentiment with some white cardstock 2 x's, then I die cut it again with a piece of shiny black recycled paper and glued those together.
  • I glued the stenciled panel onto a piece of white cardstock, then onto a piece of green and then onto an A2 sized card base.
  • Finally, I glued the sentiment to the center and added some black gems around it 

Here are the stencils I used:


Discount Code for A Colorful Life Designs
(Affiliate with no extra cost to you) 

Thanks so much for coming by and taking a look.

Adding my card to these challenges:
A Place to Start- MONOCHROMATIC
The Crafty Addicts- ANYTHING GOES
option- love/hearts

Supplies
Stamps- none
Inks- DOX
Paper- heavy white (Scribes Nook- Waterloo, Ont.)
Accessories and Tools- stencils (A Colorful Life Designs); TE Blending Brushes;
Make Art Station (Ranger); Happy Birthday die (Amazon)

Tuesday 13 February 2024

Wanton Daisies

Welcome
Today, I'm doing some more stencil layering, a technique I really enjoy.
I used 2 new stencils from A Colorful Life Designs called:

So, here's what I did to create my card.
  • I placed a piece of white cardstock onto my Make Art Station and placed the Wanton Daisies stencil over that.  I inked it all up with some Ripe Persimmon Distress Oxide ink.
  • Leaving that stencil in place, I put the Spinning Sun stencil right over the top of it and inked it up with some Picked Raspberry DOX ink.
  • I removed the stencils and set aside to dry.
  • I die cut the sentiment with some orange cardstock, then some white and glued those together, offsetting them a bit.
  • I die cut the sentiment shadow from a piece of vellum and glued the stacked sentiment onto it.
  • I glued the stenciled panel onto a piece of orange cardstock, then onto an A2 sized card base.
  • I glued the sentiment into the center and added some silver gems around it to finish my card off.

Here are the stencils I used:


Discount Code for A Colorful Life Designs
(Affiliate with no extra cost to you) 

Thanks so much for coming by and taking a look.

Adding my card to these challenges:
Daisy Chain- FLOWERS
Love to Craft- ANYTHING GOES

Supplies
Stamps- none
Inks- DOX
Paper- heavy white (Scribes Nook- Waterloo, Ont.); vellum
Accessories and Tools- stencils (A Colorful Life Designs); Make Art Station (Ranger);
Happy Birthday die (Amazon); silver gems

Sunday 11 February 2024

Beautiful Day

Welcome
Today, I'm using the new for February stencil from A Colorful Life Designs called 
I haven't played with my Brushos for ages so I got them out too.

So, here's what I did to create my card.
  • I cut a piece of white cardstock and placed it onto my Make Art Station.
  • I placed the Tall Flowers stencil over that and sprayed with some water...not too much as I didn't want it to soak under the stencil.
  • I sprinkled some blue and green Brushos over the whole panel and watched it come to life.  
  • I removed the stencil right away and let the piece dry.  If some areas of the stencil do not show up, use a paint brush with just a touch of water to pull out the colour.
  • When the panel was totally dry, I rubbed over it with a paper towel to brush off any loose Brushos.
  • I placed the piece into my Misti and stamped the sentiment with some Versafine Clair Noir and clear embossed it to help it pop over the colourful background.
  • I glued the finished card front to a piece of blue cardstock, then onto an A2 sized card base.
  • Finally, to finish my card off, I added 3 black gems around the sentiment.

Here is the stencil I used:

Discount Code for A Colorful Life Designs
(Affiliate with no extra cost to you) 

Thanks so much for coming by and taking a look.

Adding my card to these challenges:
Simon Says Mon.- FUN WITH STENCILS
The Crafty Addicts- ANYTHING GOES
Word Power- SENTIMENT IS THE FOCUS

Supplies
Stamps- Live in the Moment (CTMH)
Inks- Versafine Clair; Brushos
Paper- heavy white (Scribes Nook- Waterloo, Ont.)
Accessories and Tools- stencil (A Colorful Life Designs); Make Art Station (Ranger); 
black gems; clear eb powder

Saturday 10 February 2024

Grateful Garden

Welcome
Bringing on some cheerful with this happy card today.
A Colorful Life Designs has done it again with the new for February stencil called 

This set has 4 layering stencils that are so easy to ink up.  You can create a card in minutes.

So, here's what I did to create my card.
  • I cut a piece of white cardstock, placed the Layered Tulip Field Stencil #1 onto my paper and inked that up with some Ripe Persimmon Distress Oxide ink.
  • I removed that stencil, positioned Stencil #2 over the panel and inked that up with some Lumberjack Plaid DOX ink.
  • Next, came Stencil #3 with the leaves that I inked with some Cracked Pistachio DOX ink.  
  • Lastly, Stencil #4, leaf details that I inked with some Rustic Wilderness DOX ink.
  • After inking up all 4 stencils, I decided to add more colour to the background, so using the eraser on the end of a pencil, I stamped in the dots using the same colours as the flower heads.  It added a fun looking element to my card.
  • I placed the stenciled panel into my Misti to stamp the sentiment.
  • I glued the panel onto a piece of red cardstock, then onto an orange piece then finally, onto a white A2 sized card base.

Here is the stencil set I used:

Thanks so much for coming by and taking a look.

Adding my card to these challenges:
Simon Says Mon.- FUN WITH STENCILS
Word Power- SENTIMENT IS THE FOCUS
The Crafty Addicts- ANYTHING GOES

Supplies
Stamps- Be Grateful (Impression Obsession)
Inks- Versafine Clair; DOX
Paper- heavy white (Scribes Nook- Waterloo, Ont.)
Accessories and Tools- stencils (A Colorful Life Designs); Make Art Station (Ranger);
Misti (My Sweet Petunia); pencil eraser

Monday 5 February 2024

Love is in the Air


Morning
Meet the new stencils from A Colorful Life Designs called 
I decided to use them to make a non-traditional Valentine card.

So, here's what I did to create my card.
  • I cut a piece of white cardstock and laid the Fan Blades stencil over it on my Make Art Station.  I inked it up with some Peacock Feathers Distress Oxide ink.
  • Leaving that stencil in place, I put the Rocky Path stencil right over it and inked with some Villainous Potion DOX ink.  It added a fun pattern to the fan blades.
  • While that dried, I inked a scrap of white cardstock with some more Peacock Feathers DOX ink and then I die cut the heart with the dots and used a paper punch to get the smaller one.
  • I glued my card front onto a piece of blue cardstock and then onto a 4 1/4 inch square card base.
  • I glued the hearts over the center of the fan, then stamped the sentiment onto a piece of white cardstock and used some foam tape to pop that over the hearts.

Here are the stencils I used:


Discount Code for A Colorful Life Designs
(Affiliate with no extra cost to you) 

Thanks so much for coming by and taking a look.

Adding my card to these challenges:
Simon Says Monday- HAVE A HEART
Simon Says Wed.- ANYTHING GOES
Die Cut Divas- NON-TRADITIONAL VALENTINE

Supplies
Stamps- Lighter then Air (Alleyway Stamps)
Inks- DOX
Paper- heavy white (Scribes Nook- Waterloo, Ont.)
Accessories and Tools- stencils (A Colorful Life Designs); Make Art Station (Ranger);
TE Blending Brushes; Screen Elements Heart die (SSS); Heart Punch