Showing posts with label Simon Says Stamp. Show all posts

Sunday, 18 February 2024

Feel Better Soon!


Welcome
Meet the new for February 
from a Colorful Life Designs.

Here's what I did to create my card.
  • As usual, I placed a piece of white cardstock onto my Make Art Station, added the Spinning Sun stencil and inked it up with some Cracked Pistachio Distress Oxide ink right into the center.
  • Next, I added some Broken China and then some Uncharted Mariner DOX right along the outer edges.
  • Use a circle die, I cut a circle right from the middle of the stenciled panel and set aside.
  • I splattered my card front with my white Posca pen and while that piece dried, I stamped the Get Well sentiment onto the circle and glued that onto a larger white cardstock circle.
  • I glued the panel onto a piece of blue cardstock, then glued that onto an A2 sized card base.
  • I used some foam tape to pop the circle sentiment back into place.

Here is the stencil I used:

Discount Code for A Colorful Life Designs
(Affiliate with no extra cost to you) 

Thanks so much for coming by and taking a look.

Supplies
Stamps- Big and Bold Sentiment and die (SSS)
Inks- Distress Oxides
Paper- heavy white (Scribes Nook- Waterloo, Ont.)
Accessories and Tools- stencil (A Colorful Life Designs); TE Blending Brushes;
Make Art Station (Ranger); Infinity Circle Dies (Hero Arts); 
white Posca pen; Misti (My Sweet Petunia)

Saturday, 8 July 2023

Bright and Happy Birthday


Good Morning.
Meet this month's new stencil called Viewmaster from A Colorful Life Designs.
So many possibilities.
I paired it up with a June release called Party Lei.

So, here's what I did to create my card.
  • I cut a piece of white cardstock and laid the Viewmaster stencil over that.  I inked it up from the center out using some Mustard Seed, Ripe Persimmon and Picked Raspberry Distress Oxide ink.
  • Leaving the stencil in place, I positioned the Party Lei stencil over it and inked again with the same colours mentioned above.
  • I removed both stencils and set aside to dry.
  • I stamped the sentiment with some Lumberjack Plaid DOX ink onto some white cardstock and die cut it out.
  • I glued the stenciled panel onto a piece of red cardstock, then onto an A2 sized card base.
  • I used some foam tape to add the sentiment and added 3 red gems around it.

Here are the stencils I used:


Discount Code for A Colorful Life Designs
(Affiliate with no extra cost to you) 

Thanks so much for coming by and taking a look.

Supplies
Stamp- Big and Bold Sentiment (SSS)
Inks- DOX
Paper- Scribes Nook- Waterloo, Ont.
Accessories and Tools- stencils (A Colorful Life Designs); Make Art Station (Ranger);
Misti (My Sweet Petunia); TE Blending Brushes; gems (Dollar Store)

Saturday, 3 September 2022

Happy News!


Good Morning
Such a fun new release this month from A Colorful Life Designs.
Most of our new release this month is all about BABIES. 
I used this adorable Onesies stencil to create this simple card.

So here's what I did to create my card.
  • I cut a piece of white cardstock and placed it onto my Mark Art Station.  I laid the Onesies stencil over that and got out some Distress Oxide inks.
  • I decided to make all the onesies different colours so I began by masking one of them and inked it up.  I move the mask and kept inking with different colours of ink until the panel was done.
  • The colours I used to ink were:  Picked Raspberry, Cracked Pistachio, Peacock Feathers and Shaded Lilac.  
  • After I was done stenciling the panel, I decided to add more colour to the background, so I took out a pencil with an eraser on the end and used that to add the dots in the same colours, around the onesies.
  • I set that aside and die cut the banner from some white cardstock and stamped the sentiment in my Misti right over the center area of the banner.
  • I was about to glue the stenciled card front to a piece of white cardstock but it looked so dull.  So instead, I took the white cardstock and the same colours I had used to ink with, and inked all along the edges of the white card.
  • I glued the them all together, then onto an A2 card base.
  • I popped the banner sentiment over the center of the card front and added some matching gems.

Here is the stencil I used:

Discount Code for A Colorful Life Designs
(affiliate with no extra cost to you)

Thanks so much for taking a look.

Adding my card to these challenges:
Simon Says Wed.- ANYTHING GOES
Love the Craft- ANYTHING GOES

Supplies
Stamps- More Sentiments (Avery Elle)
Inks- DOX; Versafine Clair
Paper- Scribes Nook- Waterloo, Ont.
Accessories and Tools- stencil (ACLD); TE Blending Brushes; gems (Dollar Store);
Folded Banner die (SSS); Make Art Station (Ranger); Misti (My Sweet Petunia)

Friday, 12 August 2022

Fancy Fold


Good Morning
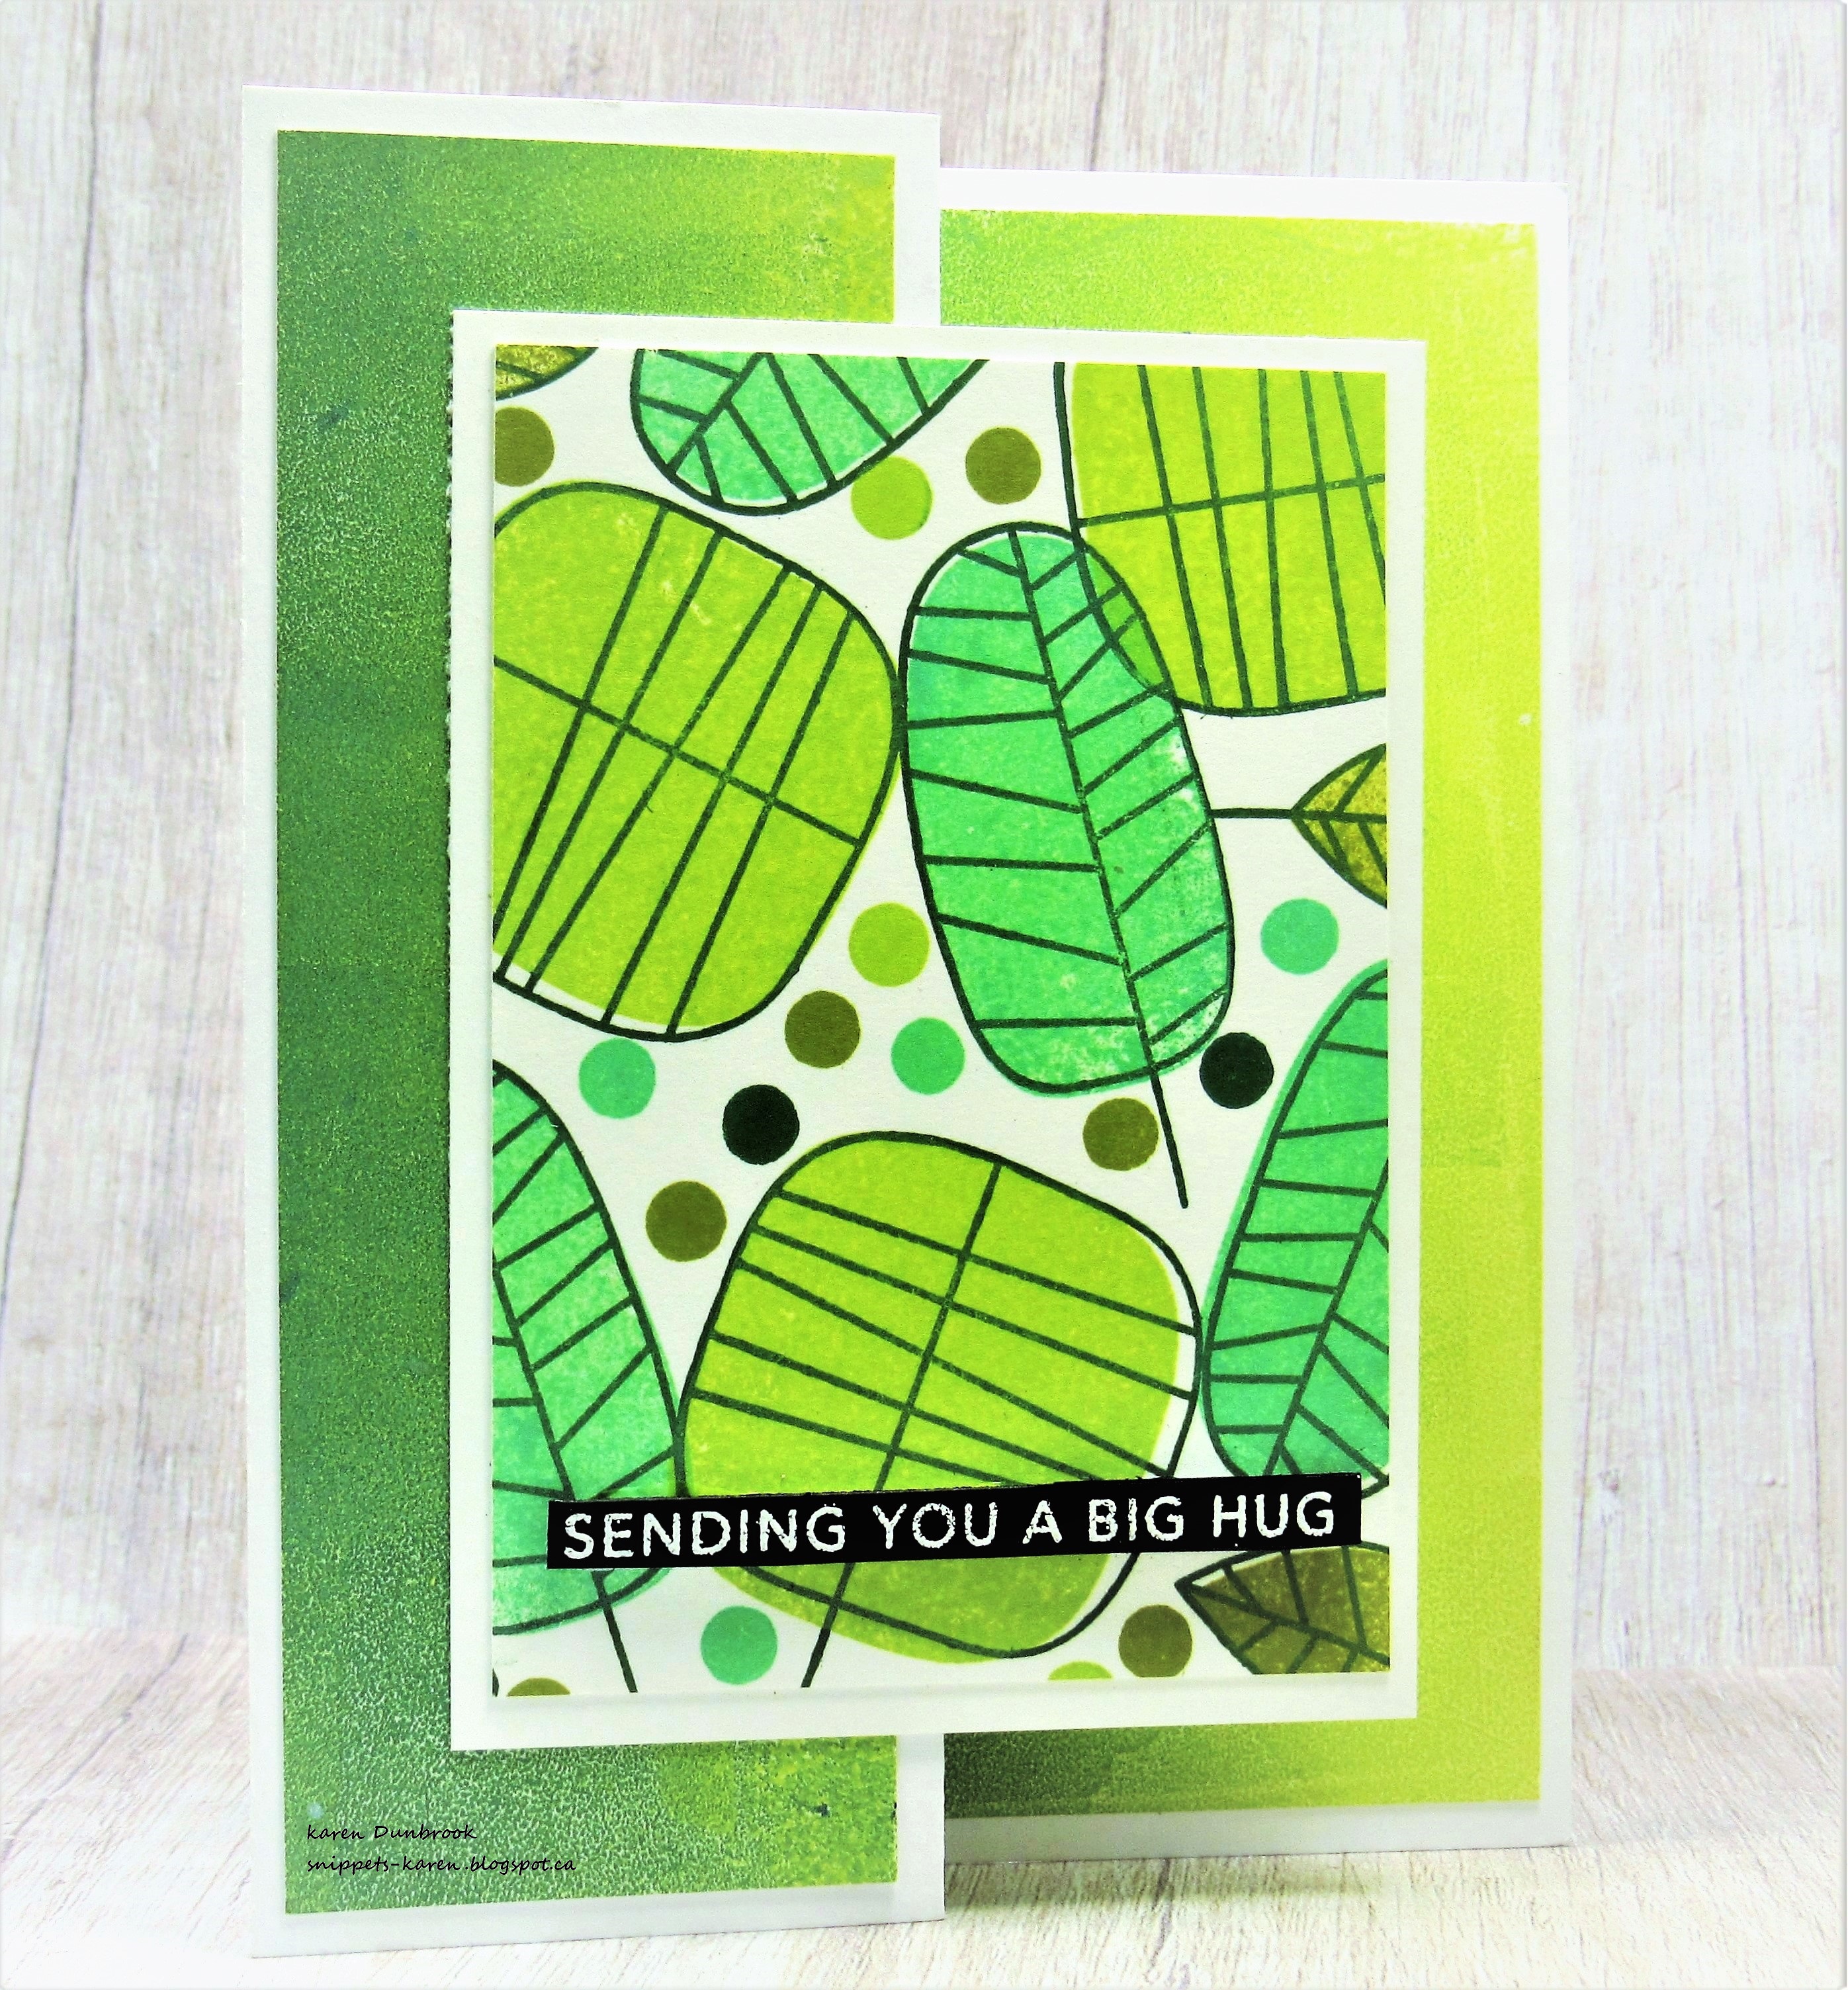
Today's card is a 'Z' fold design.  
It is fun to change it up now and again and this fold is not complicated at all to do.

So here's what I did to create my card.
  • I began by getting my card base ready, a standard A2 size card base that was 5 1/2 x 4 1/4" when folded.  I scored and folded the front side panel in half. It creates a 'Z' fold card. Next, I went in search of the papers I wanted to use and cut them to size to create the back and front pieces.
  • I found this green print that I had done with Distress Oxide inks on my Gel Plate...I don't know what colours I used so I'm going to guess...Twisted Citron, Peeled Paint.  I just rub the ink pad directly onto the plate, use a brayer to smooth it out and then press my paper over to lift the print.
  • I took another piece of white cardstock, placed it into my Misti and randomly stamped the leaves from the Many Thanks set.  This set is a 2 part so I used the same colours as above to fill them in.
  • There was still a lot of white space so I used the end of a pencil eraser to add the dots.  The finished size of this panel was 4 x 3 1/4".
  • I glued the leaves panel onto a piece of white cardstock, then onto the front fold of my card. **Be sure to just add glue to the left hand side of the panel you are adding so the right side is not glued and your card will open. **
  • I stamped the sentiment onto some black cardstock using some Versamark ink and white heat embossed it.  I popped that over the leaves.

Here is what the card looks like open.
(my brayering wasn't the best!)

Thanks so much for coming by and taking a look.


Supplies
Stamps- Everyday Sentiment strips (TE); Many Thanks (SSS)
Inks- Versamark, DOX
Paper- heavy white (Scribes Nook- Waterloo, Ont.)
Accessories and Tools- white embossing powder (Lawn Fawn); foam tape; ScorPal; 
Misti (My Sweet Petunia); Gel Plate; Speedball Brayer; heat tool

Tuesday, 26 July 2022

Striped Hexagon


Good Morning
Meet today's card.
Lots of bright, happy feeling colours using this newly released Striped Hexagon stencil from A Colorful Life Designs.  

So here's what I did to create my card.
  • I cut a piece of heavy white cardstock and placed the Striped Hexagon over it. 
  • I masked off the top and bottom area of the stencil and inked that up with some Mustard Seed Distress Oxide ink.
  • I moved the masks to another area and inked with some Carved Pumpkin DOX then finally some Picked Raspberry in the areas left uninked.
  • I took the finished piece and die cut a hexagon right from the center of the panel.
  • I placed the die cut into my Misti and stamped the border and the sentiment onto it.  I splattered over it with my black Posca pen.
  • Next, I decided to cut out the finished stenciled piece and I popped that onto a piece of white cardstock.  I glued that onto some matching orange cardstock, then onto a white card base.
  • I popped the sentiment back into place over the stenciled background.

Here is the stencil I used:

Discount Code for A Colorful Life Designs
(affiliate with no extra cost to you)

Thanks so much for coming by and taking a look.

Adding my card to these challenges:
We Love StampingAnything Stamped with the option of Hot Sunny Colours
Creative Fingers- ANYTHING GOES

Supplies
Stamps- Hexagon Greetings (SSS)
Inks- DOX, Versafine Clair
Paper- Scribes Nook (Waterloo, Ont.)
Accessories and Tools- Striped Hexagon stencil (ACLD); TE Blending Brushes;
low tack tape; Misti; foam tape; black Posca pen; Infinity Hexagon die (HA)

Friday, 22 July 2022

Sending Smiles


Welcome
I created today's card by using scraps I had in my stash.
The papers were leftover pieces I had made while Gel Plate printing.  

So here's what I did to create my card.
  • I looked through my stash of scraps and found some pieces leftover when I cut down larger pieces of gel prints.  I found 2 that I thought would look good together.
  • Next, I die cut the Plaid Card Front from some white cardstock.  
  • I measured the size of the openings in the plaid, then cut my scraps into strips the right size.
  • I wove the strips through the die cut, overlapping them until all the openings were filled.
  • I glued that onto a piece of white cardstock and set aside.
  • I found another piece of cardstock that I had inked up with some Distress Oxide inks in my stash and die cut the sentiment using that and then cut out the sentiment shadow from some white.
  • I glued the woven panel onto a piece of purple cs then onto a heavy white A2 size card base.
  • I pop dotted the sentiment over the center of the panel.

Thanks so much for coming by and taking a look.

Adding my card to these challenges:
Love to Craft- ANYTHING GOES


Supplies
Stamps- none
Inks- Basics acrylic paint, DOX ink
Paper- heavy white (Scribes Nook- Waterloo, Ont.)
Accessories and Tools- Plaid Card Front die (Concord and 9th), Speedball Brayer; 
Sending Smiles die (SSS); Gel Plate; foam tape