Showing posts with label baby. Show all posts

Saturday, 4 July 2026

Little Toes and Fingers


Good Morning
Today's card is featuring one of the new for July stencils from A Colorful Life Designs called:

So, here's what I did to create my card.
  • I placed the BABY'S HAND stencil over a piece of white cardstock and looked through my Distress Oxide inks to see what colours I wanted to use. These are the DOX colours I decided on:  Picked Raspberry, Peacock Feathers; Ripe Persimmon; Cracked Pistachio; Wilted Violet and Fossilized Amber. I chose lots of rainbow colours to show what life and promise a new baby brings.
  • I inked around the stencil using all the colours mentioned above, adding more concentrated ink around the stencil and dragging my brush outwards near the edges to give a more unique look to the overall design.
  • I splattered the whole panel with my white Posca pen and set aside to dry.
  • When it was nice and dry, I placed the piece into my Misti to stamp the sentiment in the middle.
  • I glued my stenciled card front onto a piece of dark purple cardstock and then onto an A2 sized white card base.
  • I added 3 black gems just under the sentiment to finish off my card.

Here is the stencil I used:

My Discount Code for Your Entire Order from A Colorful Life Designs:

Thanks so much for coming by and taking a look.

Adding my card to these challenges:
Word Power- ANYTHING GOES WITH WORDS AS FOCUS
Allsorts- STENCILS
Shopping Our Stash- YOU'RE SO SWEET

Supplies
Stamp- Little Toes and Fingers (IO- out of business)
Inks- Versafine Clair; DOX
Paper- Solar White; black
Accessories and Tools- stencil (A Colorful Life Designs); TE Blending Brushes;
Misti (My Sweet Petunia); black gems

Friday, 14 November 2025

Little Bunny


Welcome
Today's card was made for a little friend who was turning one. Such a special time.

So, here's what I did to create my card.
  • I began by cutting the Curly Frame from a piece of white cardstock and glued that over a piece of blue cardstock to create my card front.
  • Next, I took another piece of white cardstock, stamped the Bunny in a Wreath in my Misti and coloured it using Copic markers. I fussy cut it out around the wreath and set aside.
  • I stamped the sentiment in my Misti with some Salty Ocean Distress Oxide ink and die cut it out.
  • I glued the bunny onto a small embossed piece of paper that I inked with the Salty Ocean DOX ink.
  • I glued my card front panel onto a white A2 sized card base and then used foam tape to pop the image and the sentiment over the front inside the framed area.

Thanks a lot for coming by and taking a look.

Adding my card to these challenges:
Word Power- ANYTHING WORDS AS FOCUS
The Male Room- FLORAL (masculine)

Supplies 
Stamps- Bunny in a Wreath (IO-out of business); Big and Bold Sentiments (SSS)
Inks- DOX; Copic Markers
Paper- Solar White (Prism)
Accessories and Tools- Loopy Frame (??thrifted); Sweater Knit EB folder; foam tape;
Misti (My Sweet Petunia)

Saturday, 25 May 2024

Sweet New Baby


Welcome
Meet today's card.
It features 3 stencils in total, 2 are new and the other is an older one and all from A Colorful Life Designs.
So meet the new stencils called 

So, here' what I did to create my card.
  • I began by inking up my Gel Plate with some Worn Lipstick and some Spiced Marmalade Distress Oxide ink.
  • I placed the Puzzle Pieces stencil onto the plate and rubbed a piece of white cardstock over the plate to lift the print.
  • Next, I placed the Dotted Lines stencil over the gel plate print and inked that up with some more Worn Lipstick DOX ink.
  • I removed that stencil and replaced it with the Blazing Stars stencil and inked that one with some Picked Raspberry DOX ink.  I splattered over that stencil with my white Posca pen so just the stars would have the splatters.
  • After the panel was dry, I added the sentiment along the bottom in my Misti.
  • I glued the finished card front onto a piece of white, then pink cardstock and then onto an A2 sized card base.

Here are the 3 stencils I used:


Discount Code for A Colorful Life Designs
(Affiliate with no extra cost to you) 

Thanks so much for taking a look.

Adding my card to these challenges:
Just Us Girls- ANYTHING GOES WITH STENCILS

Supplies
Stamps- Welcome Sweet Little One (Impression Obsession)
Inks- DOX, Verafine Clair
Paper- heavy white (Scribes Nook- Waterloo, Ont.)
Accessories and Tools- stencils (A Colorful Life Designs); white Posca pen;
Gel Plate; Speedball Brayer; TE Blending Brushes

Friday, 17 March 2023

Happy New Baby


Welcome
Today's card features this adorable newly released stencil from A Colorful Life Designs called
  Layered Bunny Faces.  Perfect for Easter or I chose to make a baby card using it.

So, here's what I did to create my card.
  • I put a piece of white cardstock onto my Make Art Station and positioned the Part #1 of the Layered Bunny Faces stencil over that.  I inked up the pink bunnies first, down the center of the cardstock panel using some Picked Raspberry Distress Oxide ink.  
  • I cleaned off the stencil and then repositioned it to ink up the blue bunnies along the sides using some Peacock Feathers Distress Oxide ink.
  • I removed Stencil #1 and positioned the second stencil (the face details) over the bunny heads and inked them up with some black ink....so cute
  • Next, I got out the Layered Rainbow Love stencil (January release) as I wanted to fill in some of the open areas.  Using just the hearts from that stencil and some more of the inks mentioned above, I inked up the hearts in the open areas between the bunnies.
  • I removed the heart stencil and used a pencil eraser to add the dots for fun.
  • I got out this fun die from Heffy Doodle and cut the outline of the words from the stenciled panel.  I also cut the sentiment with some white cardstock.
  • I glued the stenciled panel onto a piece of white cardstock, then onto an A2 card base.
  • I glued the sentiment onto the shadow piece and then pop dotted those back into place.

Here are the stencils I used:


Discount Code for A Colorful Life Designs
(Affiliate with no extra cost to you) 

Thanks so much for coming by and taking a look.

Adding my card to these challenges:
As You Like It- FAV EASTER CRITTER AND WHY (bunnies are so soft and gentle)
Critter Crazy- ANYTHING GOES WITH A FEATURED CRITTER


Supplies
Stamps- none
Inks- Distress Oxide
Paper- heavy white (Scribes Nook- Waterloo, Ont.)
Accessories and Tools- stencils (A Colorful Life Designs); Make Art Station (Ranger);
-Happy New Baby die (Heffy Doodles); TE Blending Brushes; Pencil-eraser

Tuesday, 7 February 2023

For Baby


Welcome
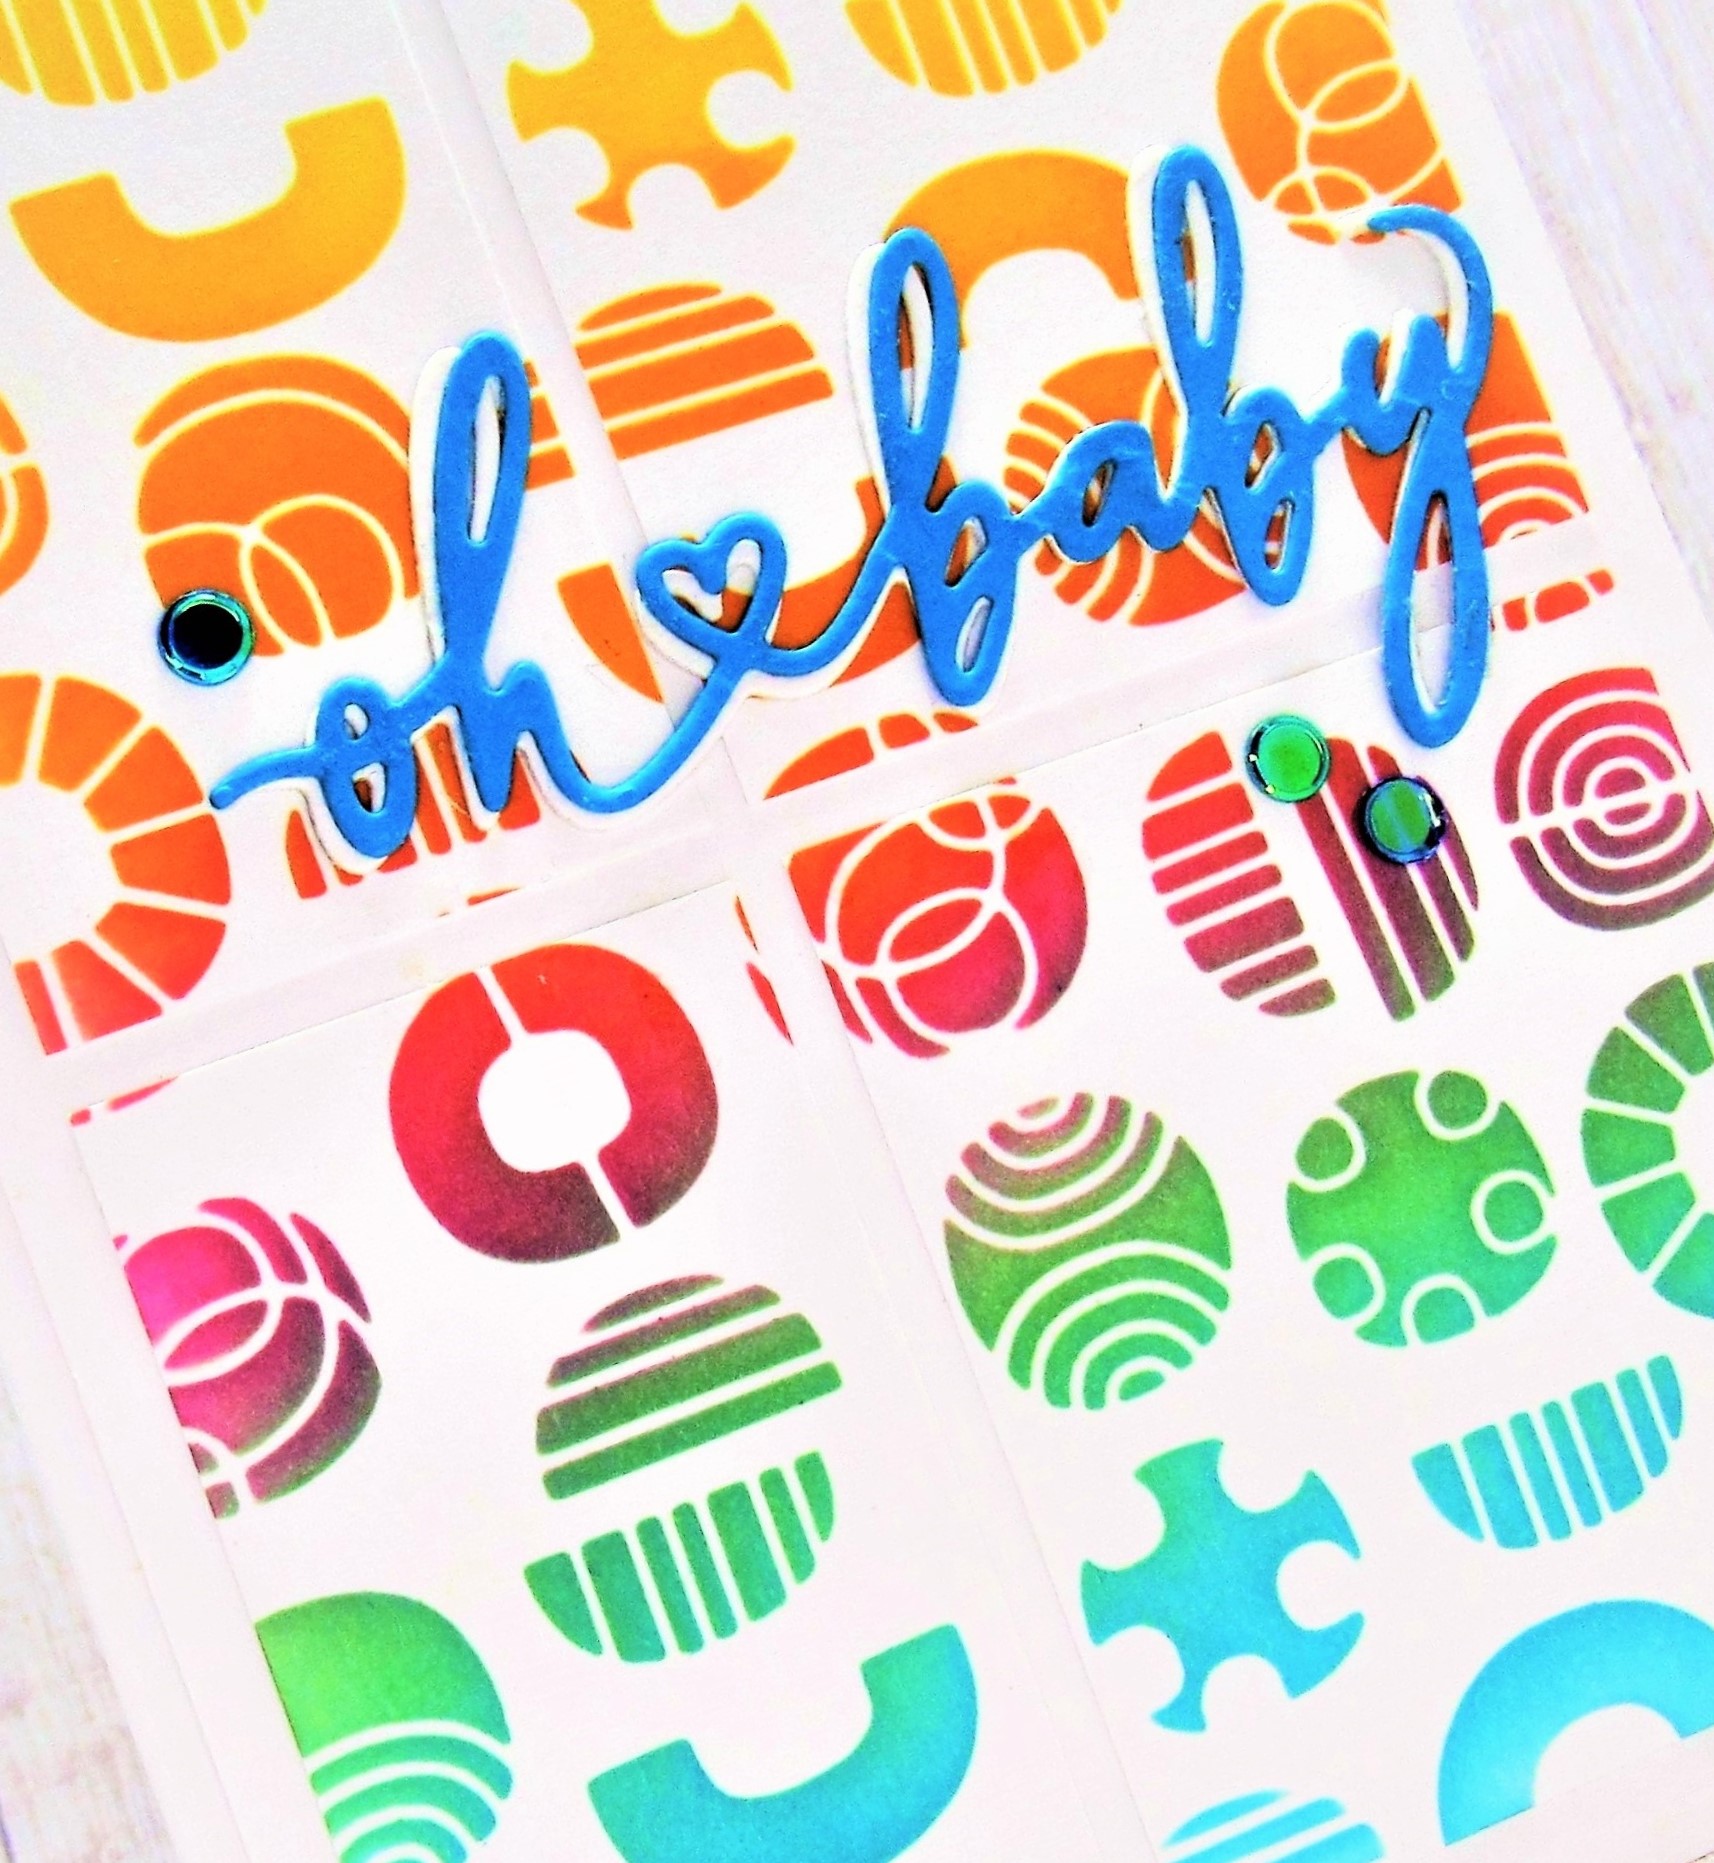
Time for February new releases from A Colorful Life Designs.
When I saw this fun stencil called Crazy Circles, I wanted to use it to make a baby card.

So here's what I came up with.
  • I cut a piece of white cardstock and positioned the Crazy Circles stencil over it on my Make Art Station.
  • I got out some colours of Distress Oxide inks that would give a rainbow effect to my card. Beginning at the top, I inked it up with some Mustard Seed.  I continued inking up the stencil, working my way down with some Carved Pumpkin, Picked Raspberry, Cracked Pistachio and Peacock Feathers.
  • I removed the stencil and cut the panel into 4 pieces just to give a bit of a different look.
  • I glued a piece of heavy cardboard on the back of each cut piece to help pop it up a bit and then glued that onto a white A2 card base.
  • I die cut the sentiment with some blue and then some white and glued them together offsetting them a big.  I glued that over the stenciled background.
  • Finally, I added 3 gems that look weird in the photo because they are so reflective but they are green.


Here is the stencil I used:

Discount Code for A Colorful Life Designs
(Affiliate with no extra cost to you) 


Thanks a lot for coming by and taking a look.

Adding my card to these challenges:
The Creative Crafters- ANYTHING GOES
Crafts Galore Encore- ANYTHING GOES


Supplies
Stamps- none
Inks- Distress Oxides
Paper- heavy white (Scribes Nook- Waterloo, Ont.)
Accessories and Tools- stencil (A Colorful Life Designs); Make Art Station (Ranger); 
TE Blending Brushes; Oh Baby die (MFT)