Saturday 31 December 2022

Pet Sympathy


Welcome
A friend of mine asked me if I could make her a pet sympathy card.
I had never made one of those before so, I decided to take up the challenge although I only have a few animal stamps in my stash.

So, here's what I did to create my card.
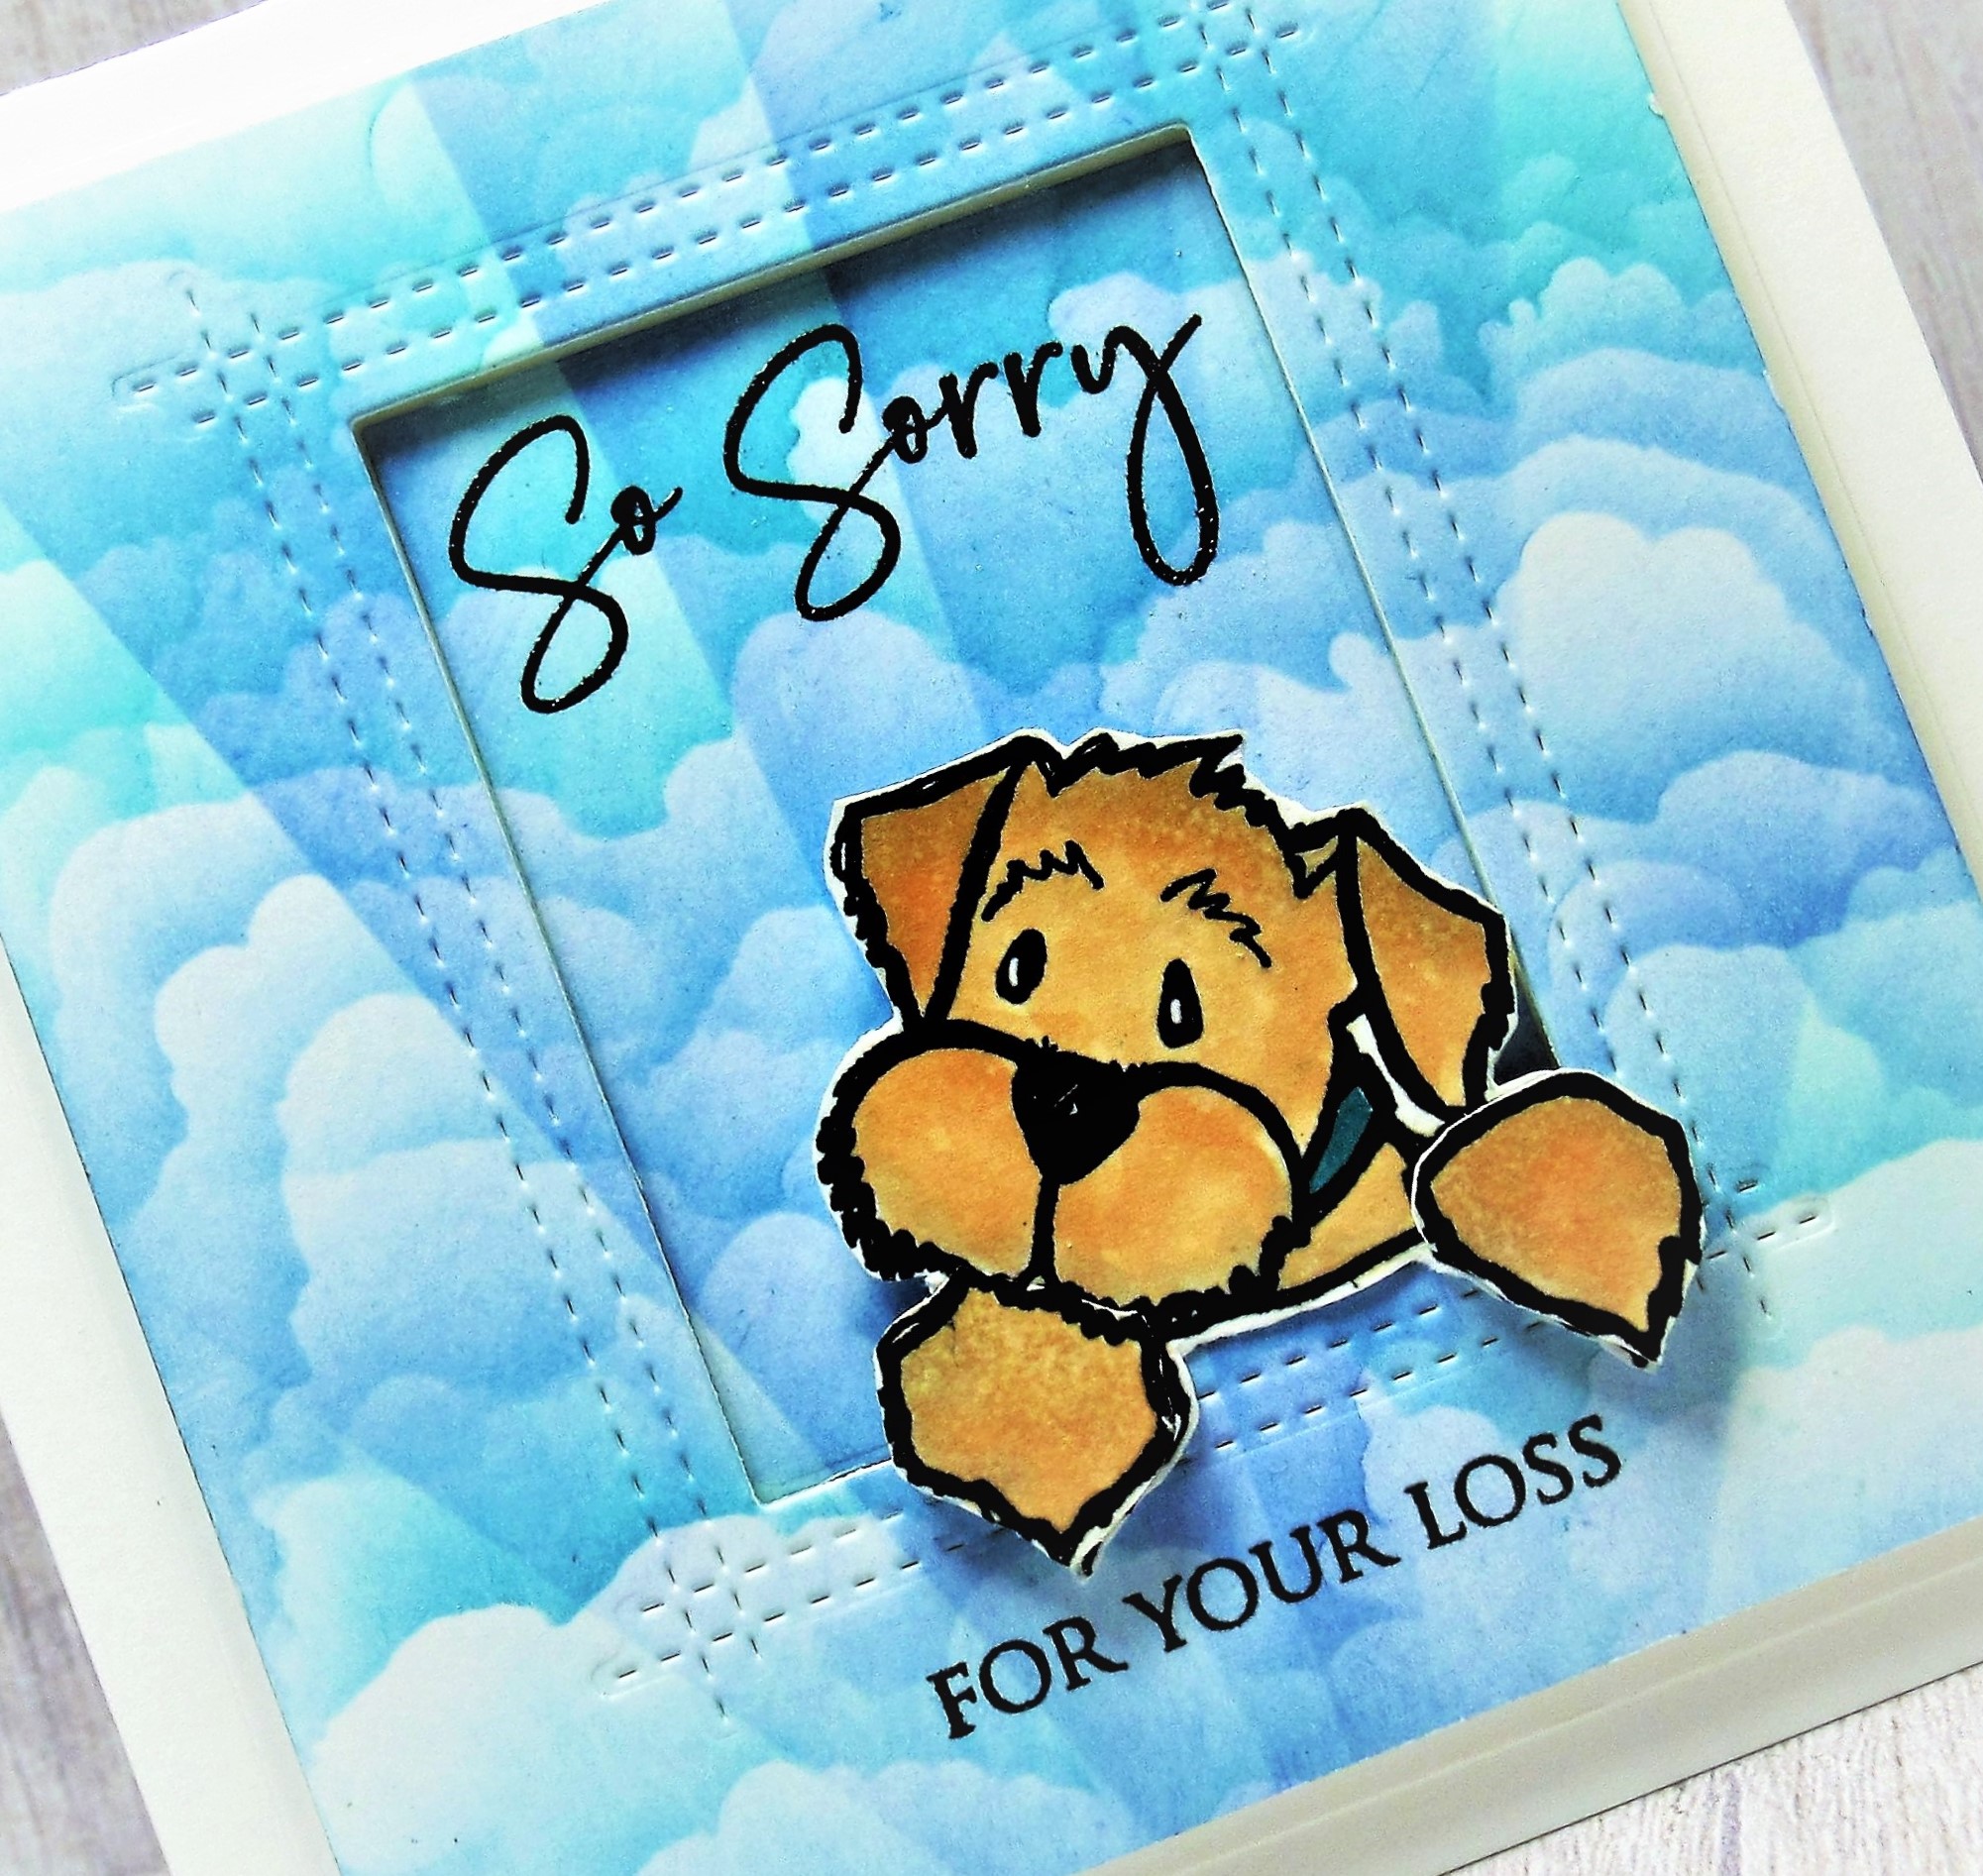
  • I got out my stencil mat and placed a piece of white cardstock onto it.  I positioned the Cloud Edger stencil over that and got out some Distress Oxide inks.
  • Starting at the top of the cardstock, I rubbed on some Broken China DOX ink along the edge of the stencil, moved it down and stenciled again.  
  • I wiped the stencil off and next inked with some Blueprint Sketch near the middle of the panel, again, moving the cloud stencil around to get variations on the clouds.
  • Finally, along the bottom, I inked in the same way with some Peacock Feathers ink.
  • I removed that stencil and placed the Rays stencil over the clouds and inked again using the same colours.
  • I die cut the middle of the square panel using the Rectangle Peek a Boo Window and then stamped the sentiment near the top.
  • I stamped the other sentiment just under the die cut window.
  • I stamped the pup with some black ink and then coloured him in.  I cut him into pieces.
  • To assemble the card, I glued the die cut window onto some white cardstock and then onto a 4 1/4" square card base.  
  • I pop dotted the larger panel over the die cut window and positioned the puppy inside using pop dots.


Here are the stencils I used:


Discount Code for A Colorful Life Designs
(Affiliate with no extra cost to you) 

Thanks so much for coming by and taking a look.

Adding my card to these challenges:
Krafty Chicks- ANYTHING GOES
CRAFT Challenge- ANYTHING GOES
The Paper Shelter- ANYTHING GOES

Supplies
Stamps- Puppy (IO-retired); Sympathy Sentiments (Penny Black)
Inks- DOX, Versafine Clair
Paper- Scribes Nook- Waterloo, Ont.
Accessories and Tools- Stencil Mat (Waffle Flower); Rectangle die (MFT); 
stencils (ACLD); foam tape; TE stencil brushes

Friday 30 December 2022

Christmas- Black Embossed


Welcome
I know, black Christmas cards are not a common thing to see.
I think this one turned out looking very cool and my son loved it.

So, here's what I did to create my card.
  • I got out a piece of black cardstock and embossed it using a Tim Holtz embossing folder. (sorry, I can't seem to find the name of it anywhere)
  • Next, I took the embossed panel and sanded off the raised areas.  
  • I took my Weathered Wood Distress Oxide ink pad and rubbed over the whole panel, giving it a unique look.
  • I set that aside to dry and then using a another piece of black cardstock, I die cut the Merry Christmas sentiment.  I pressed my Versamark ink pad over the die cut and silver heat embossed it.  
  • I glued the main panel onto a piece of white cardstock, then onto a black piece pf cardstock and then finally onto an A2 sized card base.
  • I glued the sentiment over the panel and added 3 silver gems.

Thanks so much for coming by and taking a look.

Supplies
Stamps- none
Inks- Versamark, DOX
Paper- black cardstock
Accessories and Tools-  Embossing Folder; silver embossing powder; silver gems;
Merry Christmas die (SSS)

Sunday 25 December 2022

Merry Christmas!!


Wishing you a very
MERRY CHRISTMAS and HAPPY HOLIDAYS!!!
May the season bless you life with much happiness.


Saturday 24 December 2022

Poinsettia Collage


Welcome
Only one more sleep until the big day!!!
So a fast and easy card today that took no time at all.

So, here's what I did to create my card.
  • I cut a piece of white cardstock and got out my small Lawn Fawn ink cubes.
  • I picked out a few different colours and then press the ink pad directly onto the cardstock creating the little squares of colour.  I tried to vary them as I went down the card front.
  • After the ink had dried, I placed the inked panel into my Misti and stamped the Poinsettia Collage over the background. This stamp included the 'Merry Christmas' sentiment.
  • I glued the inked panel onto a piece of red cardstock, then onto an A2 sized card base.  Super easy and fast card.
  • I added 3 silver gems for more interest.

Thanks so much for coming by and taking a look.

Adding my card to these challenges:
CAS on Friday- CHRISTMAS
Jingle Bells- WRAPPING UP 2022
Winter Wonderland- CHRISTMAS- ANYTHING GOES

Supplies
Stamps- Poinsettia Collage (Stampendous)
Inks- Versafine Clair; Lawn Fawn cubes
Paper- Scribes Nook- Waterloo, Ont.
Accessories and Tools- Misti; silver gems

Tuesday 20 December 2022

Pocket of Wishes


Good Morning
Today's card was such a fun one to create and I was very pleased with the result that were easy to achieve.
I made this card for my son Adam, using an old pair of my husband's jeans....YES, you read that right....not designer paper but made using jeans.
He loved the card!

So, here's what I did to create my card.
  • I began by getting out my Gel Plate, brayer, the old pair of jeans and some cardstock.
  • I pressed my Uncharted Mariner Distress Oxide ink pad directly onto my Gel Plate and used my brayer to smooth and spread it out.
  • Next, I took the pocket portion of the jeans and pressed that onto my Gel Plate.  
  • I removed the jeans, set aside and pressed my cardstock, rubbing over the plate to transfer the print.  I was very pleased with the results, the texture it picked up was amazing!
  • I cut it down to a 4 3/4" square and set aside.
  • I had a piece leftover that I had after I cut the panel down and used that to stamp the sentiment onto.  
  • I cut a small slit in the pocket, then slid the sentiment strip into the pocket.  I popped the banner strip up at the edge using some foam tape.
  • Finally, I glued it onto a 5" square card base.

Thanks so much for coming by and taking a look.

Adding my card to these challenges:
Simon Says Mon.- PARTY TIME
A Place to Start- ANYTHING GOES
We Love to Create- ANYTHING GOES

Supplies
Stamp- Happy Birthday Sentiments (Pinkfresh Studio)
Inks- DOX, Versafine Clair
Paper- Scribes Nook (Waterloo, Ont.)
Accessories and Tools- old jeans, Gel Plate, brayer, foam tape

Sunday 18 December 2022

All the Wishes


Welcome
Just one week until Christmas!
This card came to be after I did some ink smooshing.

So here's what I did to create my card.
  • I began by pressing some Broken China and some Blueprint Sketch Distress Oxide ink onto a sheet of acetate.  I sprayed with a generous amount of water, then smooshed my paper into the ink.  It gave a very random looking colourful background.
  • After the ink had dried, I placed the piece into my Misti and stamped the Holiday Florals Print over the background with some more Blueprint Sketch DOX ink.
  • Next, using my white Posca pen, I coloured in some of the little foliage to lighten it all up.
  • I die cut the sentiment 3 times and glued them together.  
  • I cut a piece of vellum and rounded the corners, then glued the sentiment over that.
  • I glued the stamped panel onto an A2 sized card base, then added the sentiment.
  • Finally, I finished it all off by adding some silver gems.

Thanks so much for coming by and taking a look.

Adding my card to these challenges:
Cut it Up- CHRISTMAS PROJECTS
Simon Says Wed.- ICY COLD

Supplies
Stamp- Holiday Florals Bold Prints (HA)
Inks- DOX
Paper- Scribes Nook (Waterloo, Ont.); vellum
Accessories and Tools- die (SSS); silver gems (Dollar Store); Misti; white Posca pen;
Corner Rounder

Friday 16 December 2022

Simple Christmas Wreath


Good Morning.
Today's card features this lovely new Layered Holly Wreath stencil from A Colorful Life Designs.
A really nice one and perfect to do some stencil shifting to get a nice, full look to the wreath.

So, here's what I did to create my card.
  • I cut a piece of cardstock 4" square.  I placed the Layered Holly Wreath onto my cardstock, centering it in the middle and inked it up with some  Cracked Pistachio Distress Oxide ink.
  • I shifted the stencil slightly and inked it up again, this time using some Lucky Clover and some rustic Wilderness DOX ink.  It made for a fuller looking wreath.
  • I removed the holly stencil and laid the berries over the leaves and inked up with some Candied Apple DOX ink.  I splattered with my white Posca pen.
  • When the piece was dry, I die cut a circle from the center.  
  • I stamped the sentiment onto a circle die cut and set aside.
  • I glued the stenciled piece onto some shiny red cardstock, it looks black but is really red, and then glued it onto a 4 1/4" card base.
  • I popped the sentiment back into the middle area.


Here is the stencil I used:

Discount Code for A Colorful Life Designs
(Affiliate with no extra cost to you) 

Adding my card to these challenges:
Shopping Our Stash- HOLLY and IVY
The Sisterhood of Crafters- TRADITIONAL CHRISTMAS COLORS (red and green)

Thanks so much for coming by and taking a look.

Supplies
Stamps- Merry Christmas (Recollections)
Inks- DOX, Versafine Clair
Paper- Scribes Nook- Waterloo, Ont.
Accessories and Tools- stencil (ACLD); Infinity Circle Dies (Hero Arts); white Posca pen;
foam tape; Misti