Showing posts with label poinsettia. Show all posts

Saturday, 23 November 2024

Layered Poinsettia


Good Morning
This new stencil from A Colorful Life Designs is so pretty and it's called;

It's easy to ink up onto a piece of cardstock, but I took it a step further to give my flower more interest and dimension.

So, here's what I did to create my card.
  • I placed the Layered Poinsettia stencil over a piece of white cardstock and inked it up with some Barn Door, Candied Apple and some Picked Raspberry Distress Oxide ink.
  • I repeated that process on another piece of white cardstock, splattered both flowers with my white Posca pen and set aside to dry.
  • While that dried, I placed the Poinsettia leaves onto another piece of white cardstock and inked that up with some Rustic Wilderness DOX ink.
  • Next, I placed the Merry Christmas stencil over the stenciled leaves and inked that up with some more of the Barn Door DOX ink and splattered that as well.
  • I fussy cut out both of the poinsettias, then used some foam tape to position one of them over the leaves.  
  • I took the second poinsettia and cut out just some of the flower petals, rolled them with a pencil and then used some foam tape to pop them over the larger one.  It really gave lots of great dimension to the flowers by layering the petals.
  • I glued the card base to a piece of burgundy cardstock and then onto an A2 sized card base.
  • Finally, I added some Glossy Accents to the flower center.

Here are the stencils I used:


My Discount Code for A Colorful Life Designs:
KarenFan10

Thanks so much for coming by and taking a look.

Adding my card to these challenges:
CRAFT- CHRISTMAS
Craft Rocket- CHRISTMAS
Time Out- INSPIRED BY WORDS

Supplies
Stamps- None
Inks- DOX
Paper- Scribes Nook- Waterloo, Ont.
Accessories and Tools- stencils (A Colorful Life Designs); white Posca pen; 
Foam tape; TE Blending Brushes; Glossy Accents

Friday, 20 October 2023

Beautiful Poinsettia


Welcome
Today's card features this lovely new stencil from A Colorful Life Designs called 
I used it in a bit of a different way.

So, here's what I did to create my card.
  • I cut a piece of white cardstock and got out the largest stamp from the Simon Hurley Paint Swatches stamp set.  This is what it looks like:  

  • I inked up the stamp pictured above well using some Lumberjack Plaid Distress Oxide ink, then pressed it onto the Beautiful Poinsettia stencil which transferred the pattern onto the stamp.  I stamped that onto the center of my white cardstock.
  • When it was dry, I rubbed over the whole panel with a anti-static powder tool.  This step is important so you don't end up with embossing powder sticking everywhere.
  • I took the stencil and positioned it back into place over the stamped image and rubbed some Versamark ink over that, trying to stay inside the stamped areas.  I used some white embossing powder to emboss the flower.
  • I glued the panel onto a piece of red cardstock, then onto an A2 sized card base.
  • Finally, I added a pre-printed sentiment with some foam tape, over the flower.

Here is the stencil I used:

Discount Code for A Colorful Life Designs
(Affiliate with no extra cost to you) 

Thanks a lot for coming by and taking a look.

Adding my card to these challenges:
Little Red Wagon- PATTERNED PAPER OR NOT


Supplies
Stamp- Paint Swatches (Simon Hurley)
Inks- DOX, Versamark
Paper- heavy white (Scribes Nook- Waterloo, Ont.)
Accessories and Tools- stencil (A Colorful Life Designs); white EB powder;
heat tool; Pre-printed sentiment (SSS)

Saturday, 7 October 2023

Holiday Poinsettia

Good Morning and Welcome
Another card for the holidays featuring some stenciling and fussy cutting.
Some great new releases for October from A Colorful Life Designs.
I used the Beautiful Poinsettia stencil as the focal point of my card.

So, here's what I did to create my card.
  • I placed a piece of white cardstock onto my Make Art Station and put the Beautiful Poinsettia stencil over that.  
  • Starting in the center of the poinsettia, I inked it up with some Lumberjack Plaid Distress Oxide ink.  I moved outwards from the middle and inked with some Crackling Campfire DOX ink going right to the edges of the flower.
  • The center of the flower looked lost, so to give it a pop of colour, I inked over just the middle with some Villainous Potion DOX ink.  It really helped to make it more defined.
  • Next, I fussy cut the flower out, splattered it with my white Posca pen and set aside to dry.
  • I got out another piece of white cardstock and placed the Houndstooth stencil (an older release) over that and inked it up with some more of the red DOX inks.
  • I glued the Houndstooth panel onto a white A2 sized card base, then using some foam tape, popped the poinsettia over that.
  • Finally, I used more foam tape to pop the sentiment over the flower.

Here are the stencils I used:


Discount Code for A Colorful Life Designs
(Affiliate with no extra cost to you) 

Thanks so much for coming by and taking a look.

Adding my card to these challenges:
Simon Says Wed.- STENCIL 
Peace on Earth- ANYTHING GOES OR INSPIRATION BOARD
The Flower Challenge- ANYTHING GOES

Supplies
Stamps- none
Inks- Distress Oxides
Paper- heavy white (Scribes Nook- Waterloo, Ont.)
Accessories and Tools- stencils (A Colorful Life Designs); TE Blending Brushes;
white Posca pen; Christmas Pre-printed sentiment (TE); Make Art Station (Ranger)

Saturday, 24 December 2022

Poinsettia Collage


Welcome
Only one more sleep until the big day!!!
So a fast and easy card today that took no time at all.

So, here's what I did to create my card.
  • I cut a piece of white cardstock and got out my small Lawn Fawn ink cubes.
  • I picked out a few different colours and then press the ink pad directly onto the cardstock creating the little squares of colour.  I tried to vary them as I went down the card front.
  • After the ink had dried, I placed the inked panel into my Misti and stamped the Poinsettia Collage over the background. This stamp included the 'Merry Christmas' sentiment.
  • I glued the inked panel onto a piece of red cardstock, then onto an A2 sized card base.  Super easy and fast card.
  • I added 3 silver gems for more interest.

Thanks so much for coming by and taking a look.

Adding my card to these challenges:
CAS on Friday- CHRISTMAS
Jingle Bells- WRAPPING UP 2022
Winter Wonderland- CHRISTMAS- ANYTHING GOES

Supplies
Stamps- Poinsettia Collage (Stampendous)
Inks- Versafine Clair; Lawn Fawn cubes
Paper- Scribes Nook- Waterloo, Ont.
Accessories and Tools- Misti; silver gems

Saturday, 26 November 2022

Christmas Blessings


Welcome
Today's card came together very quickly, a good thing at this time of year when the final push is on for the holidays.
I used another one of my roll-off sheets I had done when I was Gel Plate printing.

So, here's what I did to create my card.
  • Like I mentioned above, this card started with a piece of cardstock that I had rolled excess paint off of when I was Gel Plate printing.  I save all the 'roll offs' to make simple backgrounds.
  • I placed the panel into the Tim Holtz Poinsettia embossing folder and ran it through my machine.
  • Next, I got out my sanding block and sanded off all the raised areas to reveal the flowers.  
  • I glued it onto a piece of white cardstock.  I also glued a piece of cardboard behind so when I glued it to my A2 card base, it would be raised.
  • I added the pre-printed sentiment and 2 gems on either side.


Thanks so much for coming by and taking a look.

Adding my card to these challenges:
Can You Handle the Pressure?- ANYTHING GOES-OPTION THANKS
The Sisterhood of Crafters- ANYTHING CHRISTMAS OR WINTER
Craft Rocket= CHRISTMAS/WINTER


Supplies
Stamps- none
Inks- paint
Paper- heavy white (Scribes Nook- Waterloo, Ont.)
Accessories and Tools- Poinsettia EB folder (TH); Christmas sentiment strips (SSS); 
foam tape, cardboard; gems

Monday, 21 November 2022

Lots of Holiday Cheer


Welcome
Today, I am playing with 2 new stencils from A Colorful Life Designs.
On the background I used the Dotted Poinsettia and for the bow I used the Christmas Cover stencil.

So, here's what I did to create my card.
  • I cut a piece of white cardstock and placed it onto my Make Art Station with the Dotted Poinsettia stencil over that.
  • I inked it up with some Rustic Wilderness and some Candied Apple Distress Oxide ink.
  • I got another piece of white cardstock and placed the Christmas Cover stencil over my paper and inked that up with more Candied Apple and added a bit of shading to the bow with some Barn Door DOX ink.  I repeated that process as I wanted the bow to be layered up.
  • Next, I fussy cut the bows out, one I cut the whole thing out and the other one just the bow portion without the tails.
  • I splattered with my white Posca pen.
  • I used some foam tape to pop the largest bow over the front of my stenciled panel, then foam taped the bow part from the second piece I had cut out, over that.  It really added great dimension to the overall look of the bow.
  • I glued the main panel onto a piece of red cardstock and then onto an A2 size card panel.
  • I die cut the sentiment and inked just parts of it so it wouldn't get lost against the background.
  • Lastly, I added some red gems for interest.


Here are the stencils I used:


Discount Code for A Colorful Life Designs
(Affiliate with no extra cost to you) 

Thanks so much for coming by and taking a look.

Supplies
Stamps- none
Inks- DOX
Paper- heavy white (Scribes Nook- Waterloo, Ont.)
Accessories and Tools- stencils (ACLD); TE Blending Brushes; Die (WPlus 9)
Make Art Station (Ranger); red gems; foam tape; Posca pen

Sunday, 23 October 2022

Blue Poinsettias


Good Morning.
Had some time to play and got another Christmas card finished.
This one was easy and came together quickly using the beautiful Perfect Poinsettias embossing folder.

So, here's what I did to create my card.
  • I cut a piece of white cardstock and placed it into the Perfect Poinsettias eb folder and ran it through my machine to emboss it.
  • With the raised area facing up, I took my Uncharted Mariner Distress Oxide ink and rubbed over the embossed areas, keeping the pad as flat against the cardstock as possible.
  • After it dried, I sanded it off in a few places to reveal more of the white, then splattered with my white Posca pen.
  • I die cut the sentiment from some white cardstock 3 times and glued them together.
  • This die has a shadow outline, so I cut that from the embossed panel and glued the sentiment into place over that.
  • I glued the panel onto another piece of white cardstock, then onto an A2 sized card base.
  • I popped the sentiment back into place and added a silver gem to the top of the 'jolly'.

Thanks so much for coming by and taking a look.

Adding my card to these challenges:
Dare 2B Artzy- FAVORITE COLOR
Winter Wonderland- LET IT SNOW
CRAFT Challenge- CHRISTMAS- NON-TRADITIONAL COLOuRS

Supplies
Stamps- none
Inks- DOX
Paper- heavy white (Scribes Nook- Waterloo, Ont.)
Accessories and Tools- eb folder (Altenew); white Posca pen; die- Catherine Pooler;
sandpaper; white acrylic paint; silver gem; foam tape

Sunday, 5 December 2021

Joyous Season


Welcome
Meet today's card.
Super simple and came together so quickly using what has become one of my favourite embossing folders this year.

So here's what I did.
  • Once again I went looking through my roll off sheet I did with acrylic paint while taking the Gel Plate printing class this past summer.  I found this one with blue and purple and thought it would work well.
  • I placed the paper into the Perfect Poinsettia embossing folder and ran it through my die cutting machine.  It does help to give the paper a light spritz of water before embossing for a deeper impression.
  • After I embossed it, I used a sanding block to gently sand off the raised areas....so simple but gives great results.  I splattered with my white Posca pen.
  • I die cut the Celebrate 3 times and glued them together.  Using some Blueprint Sketch Distress Oxide ink, I inked up the bottom of the sentiment to add more detail.  I glued that into the bottom corner.
  • I stamped the sentiment strip and pop dotted it over the celebrate.
  • I glue it onto a heavy white card base, then added some shiny gems to the center of the flower.

Thanks so very much for coming by and taking a look.

Adding my card to these challenges:
Simon Says Wed.- HAPPY HOLIDAYS/CHRISTMAS

Supplies
Stamps- Simple Strips Christmas (TE)
Inks- DOX, Versafine Clair, acrylic paint
Paper- heavy white (Scribes Nook- Waterloo, Ont.)
Accessories and Tools- Perfect Poinsettias eb folder (Altenew); Celebrate die (MFT);
inking tool; shiny gems (Dollar Store); foam mounting tape; sanding block, Posca pen

Saturday, 4 December 2021

Flowers for Christmas


Welcome
I love seeing the bright and happy poinsettias at Christmas time.
Using this new to me stencil called Single Poinsettia, I created a cluster of flowers.
A little masking, a little inking can transform the look.

So here's what I did to create my card.
  • I began with a white card panel and positioned the Single poinsettia in the bottom corner.  I masked off the areas I didn't want to ink up using some low tack tape.  
  • I inked up the stencil with some Festive Berries Distress Oxide ink. To darken the middle a bit, I used some Barn Door then right in the center where the berries are, I used a bit of Dusty Concord to darken.
  • I repositioned the stencil up to the side a bit, masked again and then inked with the same inks.  I repeated that process one more time, giving me 3 flowers in the cluster.
  • To add more interest, I stenciled using the Simple Grid and some more Festive Berries DOX ink.
  • I rubbed the ink along the edges as well to add some shading.
  • I splattered with my white Posca pen.
  • While that dried, I die cut the sentiment 3 times and glued them together.
  • I glued the flower panel onto a heavy white card base, then glued the stacked sentiment over the flowers.  
  • Lastly, I added 3 black gems for more interest.


Here are the stencils I used:

Discount Code for A Colorful Life Designs
(affiliate with not extra cost to you)

Thanks so very much for coming by for a visit.

Adding my card to these challenges:
Simon Says Wed.- HAPPY HOLIDAYS/ CHRISTMAS
Crazy 4 Challenges- CHRISTMAS FLOWERS
Alphabet Challenge - 'R' FOR RED


Supplies
Stamps- none
Inks- DOX (TH)
Paper- heavy white (Scribes Nook- Waterloo, Ont.)
Accessories and Tools- stencils- A Colorful Life Designs; Sending Cheer die (WPlus 9); 
TE inking brush; low tack tape; black gems (Dollar Store); Posca paint pen

Wednesday, 1 December 2021

Pretty Poinsettias


Welcome
Meet today's card.
I am going to describe how I made it the best way I can and I sure hope it makes sense.
I am having a blast playing with this Perfect Poinsettias embossing folder.  

So here's what I did to create my card.
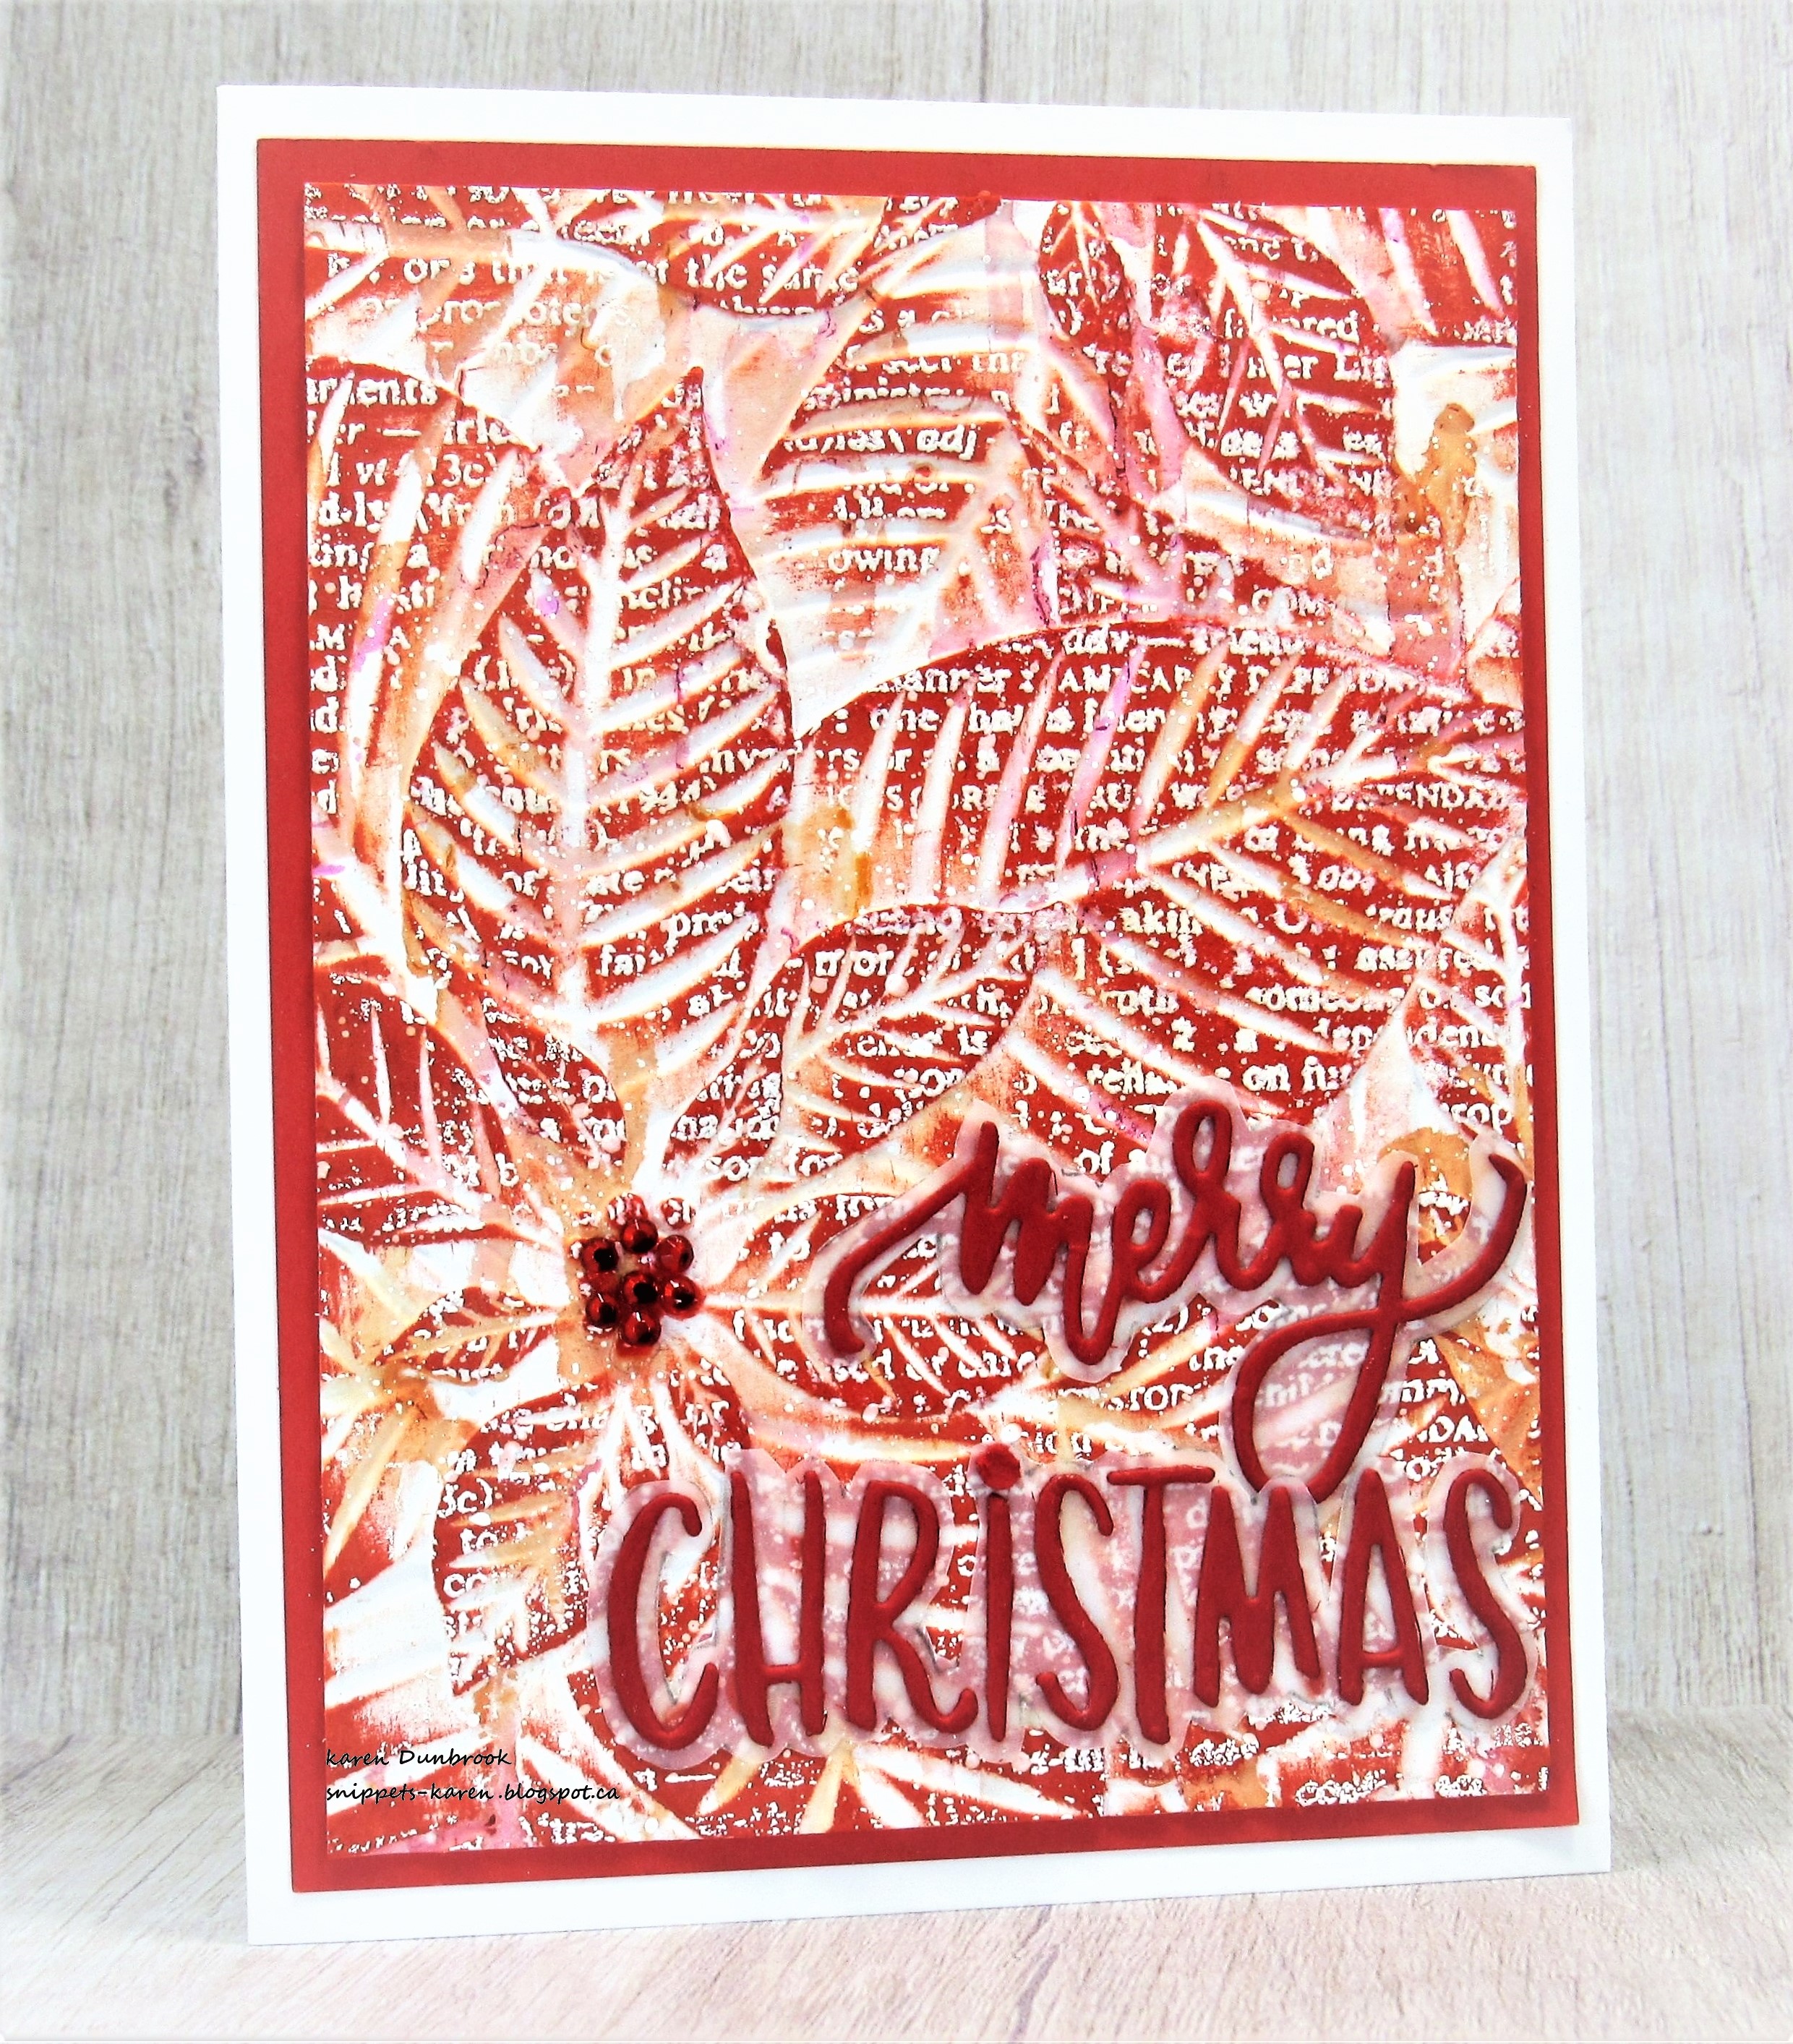
  • I found another piece of cardstock that I had rolled off some red and orange coloured paint onto when I was Gel Plate printing. I have a lot of these as I took a class this summer. I placed it into this Perfect Poinsettia embossing folder and embossed it.
  • Using a sanding block, I went over the panel, sanding gently over the raised areas as to not tear the paper.
  • To help some areas pop, I took some Barn Door and Crackling Campfire Distress Oxide ink and rubbed the pads over the raised areas.  
  • It needed something else, so I inked up the Friendship background stamp with some Versamark ink and stamped right over the panel then white heat embossed it.  As you can see, the words just show up in random areas which adds interest to the bkg.
  • While that dried, I die cut the sentiment, then traced around the outside of the die onto some vellum to cut out and place behind the words as a shadow.
  • I glued it onto a piece of red cardstock, then onto a heavy white card base.
  • I added a cluster of red gems to the center of the poinsettia.

Thanks so much for coming by and taking a look.

Adding my card to these challenges:
Simon Says Wed.- ANYTHING GOES

Supplies
Stamps- Friendship bkg (Hero Arts)
Inks- Distress Oxide; Acrylic paint
Paper- red cardstock, vellum, heavy white (Scribes Nook- Waterloo, Ont.)
Accessories and Tools- Perfect Poinsettias (Altenew); sanding block; Jolly 
Merry Christmas die (Carta Bella); red gems (Dollar Store); Lawn Fawn wh eb powder

Wednesday, 24 November 2021

Joyful Wishes


Hello
So glad you stopped by.
Meet today's card.  
A simple one using a brayered 'roll off' sheet I keep when Gel Plate printing.

So here's what I did to create my card.
  • Once again, I went into my stash of inked up paper and found this one.  I had rolled some acrylic paint onto white cardstock while printing with my Gel Plate.  Like I have mentioned before, I like to keep them even if they look like quite a mess when you are rolling them off.
  • I placed the paper into my Misti and stamped the Poinsettia Collage with some Versafine Clair ink then clear heat embossed it as I wanted to add some more paint over the top and didn't want to smear the ink.
  • The roll off sheet was pretty dark, so I added some white with my Posca Paint pen in places to help the pattern emerge a bit.  I splattered using that pen too.
  • I cut the stamped image out and glued it onto a piece of navy cardstock, then onto a heavy white card base.
  • I glued some pearls onto the flower center and pop dotted the sentiment strip (pre-printed) over the background.


Thanks so much for coming by and taking a look.

Adding my card to these challenges:
Simon Says Wed.- MAKE YOUR OWN BKG


Supplies
Stamps- Poinsettia Collage (IO)
Inks- Versafine Clair
Paper- heavy white (Scribes Nook- Waterloo, Ont.); navy cs
Accessories and Tools- Misti (My Sweet Petunia); Sentiment Strips (SSS);
white pearls; pop dots; white Posca pen