Showing posts with label Altenew. Show all posts

Monday, 11 September 2023

Lined Leaves

Good Morning
Today's card is in honour of those lost in the 911 tragedy.
I'm using a new stencil from A Colorful Life Designs called

So, here's what I did to create my card.
  • I began by embossing my white cardstock with the Angled Mosaic Embossing folder, then I placed it onto my Make Art Station and placed the Lined Leaves stencil over that.
  • I inked over the whole stencil with some Bundled Sage Distress Oxide ink.  I wanted to add a bit of shadow and add to the interest of the background, so I shifted the stencil slightly and inked over it again but this time with some Weathered Wood DOX ink.
  • I removed the stencil and splattered with my white Posca pen.
  • While that dried, I stamped the sentiment and then die cut it out.
  • I glued the dried panel onto a piece of black cardstock, then onto an A2 sized card base.
  • I used some foam tape to pop the sentiment up over the background.

Here is the stencil I used:

Discount Code for A Colorful Life Designs
(Affiliate with no extra cost to you) 

Thanks so very much for coming by and taking a look.

Adding my card to these challenges:
Crafting Happiness- ANYTHING GOES

Supplies
Stamp- Big and Bold Sentiments (SSS)
Inks- DOX
Paper- heavy white (Scribes Nook- Waterloo, Ont.)
Accessories and Tools- stencil (A Colorful Life Designs); Make Art Station (Ranger);
TE Blending Brushes; white Posca pen; Angled Mosaic EB folder (Altenew)

Thursday, 27 July 2023

Fun Time Birthday

Good Morning.
Today's card features the new for July released Atoms stencil from A Colorful Life Designs.
I used this fun stencil in combination with an embossing folder to give it a whole different look.

So, here's what I did to create my card.
  • I cut a piece of white cardstock and embossed it using the Angled Mosaic embossing folder from Altenew.
  • I placed the embossed panel onto my Make Art Station and then inked over the Atoms stencil with some Villainous Potion Distress Oxide ink in the center and then some Uncharted Mariner DOX ink over the rest of the panel. By inking over the embossed panel with the stencil, the raised areas are a bit darker and help show the pattern of the embossing adding extra interest.
  • Next, I die cut the sentiment from some white cardstock, the shadow from some dark purple and glued them together.
  • I glued the stenciled card front onto another piece of dark purple and then onto a whiteA2 card base.
  • Finally, I used some foam tape to add the sentiment over the middle of the card.

Here is the stencil I used:
Atoms

Discount Code for A Colorful Life Designs
(Affiliate with no extra cost to you) 

Thanks so much for coming by and taking a look.

Adding my card to these challenges:
Little Red Wagon- BOYS WILL BE BOYS 
Simon Says Wed.- ANYTHING GOES
Shopping Our Stash- NO STAMPING ALLOWED

Supplies
Stamps- none
Inks- DOX
Paper- heavy white (Scribes Nook- Waterloo, Ont.)
Accessories and Tools- stencil (A Colorful Life Designs); Angled Mosaic (Altenew);
TE Blending Brushes; Happy Birthday die (Amazon)

Thursday, 1 June 2023

Monstera Leaves


Welcome!
I can't believe it's June 1st.  Time flies when you're having fun, I guess.
With a new month comes a whole new release of stencils from A Colorful Life Designs.
The stencil I used today is called Coral Reef.  I used it to add depth and details to my leaves.

So, here's what I did to create my card.
  • I began with a piece of white cardstock.  I inked up the inside of the Monstera Leaves 3D embossing folder from Altenew with some Cracked Pistachio Distress Oxide ink and ran it through my machine.
  • I took that embossed panel and laid it onto my Make Art Station and positioned the Coral Reef stencil over that.  I inked it up with some Lucky Clover Distress Oxide ink that is a bit darker, which picked up the details on the leaves.
  • I die cut the Thanks sentiment from some black cardstock.  This die comes with a shadow so I cut that out of some vellum and glued them together.  By gluing it onto the vellum, it made it easy to add it over the raised, embossed background.
  • I glue the finished panel onto a piece of green cardstock, then onto an A2 sized card base.
  • I glued the sentiment over the center of the card.

Here is the stencil I used:

Discount Code for A Colorful Life Designs
(Affiliate with no extra cost to you) 

Thanks so much for coming by and taking a look.

Adding my card to these challenges:
Simon Says Wed.- ANYTHING GOES
The Paper Funday- EMBOSS IT

Supplies
Stamps- none
Inks- Distress Oxides
Paper- heavy white (Scribes Nook, Waterloo, Ont.); black cardstock
Accessories and Tools- stencil (ACLD); vellum; Embossing folder (Altenew); 
TE Blending Brushes; Markered Messages die (Concord and 9th)

Saturday, 29 April 2023

Happy Wishes


Hello and Welcome
Meet the Chunky Circles stencil, another new one this month from A Colorful Life Designs.
I gave my card added interest by embossing it after I was done with the inking.

So, here's what I did to create my card.
  • I began by going to my stash, where I found this 'roll off' sheet that I had rolled my brayer onto while Gel Plate printing using Distress Oxide inks.  The top was blue and the bottom had some purple on it.
  • I placed that onto my Make Art Station and positioned the Chunky Circles stencil over that. 
  • I inked up the top portion with more blue ink; Uncharted Mariner DOX ink and the bottom part that was purple, with some Villainous Potion DOX ink.
  • I removed the stencil and splattered using my white Posca pen and set aside to dry.
  • When it was dry, I placed it into the Angled Mosaic embossing folder and ran it through my die cutting machine.
  • Next, to help the raised embossing show up a bit more, I lightly sanded it off.
  • I die cut the sentiment with some white cardstock, then I die cut the word shadow right from the center of the panel and glued the two together.
  • I glued the finished panel onto a piece of light blue cardstock, then onto an A2 sized card front.
  • I pop dotted the sentiment back into place in the center of my card.

Here is the stencil I used:

Discount Code for A Colorful Life Designs
(Affiliate with no extra cost to you) 

Thanks so much for coming by and taking a look.

Adding my card to these challenges:
Simon Says Wed.- ANYTHING GOES
Inkspirational- DOTS AND STRIPES
Corrosive Challenge- ANYTHING GOES

Supplies
Stamps- none
Inks- DOX (Ranger)
Paper- Scribes Nook- Waterloo, Ont.
Accessories and Tools- stencil (ACLD); Make Art Station (Ranger); 
Angled Mosaic eb folder (Altenew); sanding block; white Posca pen;
TE Blending Brushes; Happy Wishes die (SSS)

Sunday, 23 October 2022

Blue Poinsettias


Good Morning.
Had some time to play and got another Christmas card finished.
This one was easy and came together quickly using the beautiful Perfect Poinsettias embossing folder.

So, here's what I did to create my card.
  • I cut a piece of white cardstock and placed it into the Perfect Poinsettias eb folder and ran it through my machine to emboss it.
  • With the raised area facing up, I took my Uncharted Mariner Distress Oxide ink and rubbed over the embossed areas, keeping the pad as flat against the cardstock as possible.
  • After it dried, I sanded it off in a few places to reveal more of the white, then splattered with my white Posca pen.
  • I die cut the sentiment from some white cardstock 3 times and glued them together.
  • This die has a shadow outline, so I cut that from the embossed panel and glued the sentiment into place over that.
  • I glued the panel onto another piece of white cardstock, then onto an A2 sized card base.
  • I popped the sentiment back into place and added a silver gem to the top of the 'jolly'.

Thanks so much for coming by and taking a look.

Adding my card to these challenges:
Dare 2B Artzy- FAVORITE COLOR
Winter Wonderland- LET IT SNOW
CRAFT Challenge- CHRISTMAS- NON-TRADITIONAL COLOuRS

Supplies
Stamps- none
Inks- DOX
Paper- heavy white (Scribes Nook- Waterloo, Ont.)
Accessories and Tools- eb folder (Altenew); white Posca pen; die- Catherine Pooler;
sandpaper; white acrylic paint; silver gem; foam tape

Thursday, 4 August 2022

Anniversary Flowers


Welcome
Today's card is done with this beautiful Dahlia layering stencil from Altenew.
So many possibilities and looks can be achieved with this stencil.
I went for a very bold colour.

So here's what I did to create my card.
  • I cut a piece of white cardstock and laid Stencil A onto my paper.  I inked that up with some Peacock Feathers Distress Oxide inks and then over that some Blueprint Sketch, blending them together in some areas.
  • I removed that stencil and positioned Stencil B into place.  I inked that up with some Peeled Paint then some Rustic Wilderness just to add a hint of a shadow.
  • I removed the stencils and splattered with my white Posca pen.
  • While that dried, I die cut the frame using this wonky stitched die.
  • I glued the stenciled panel onto an A2 card base and popped the frame over that.
  • I stamped and die cut the sentiment and pop dotted that over the bkg. and added 2 silver gems just under the sentiment.


Thanks so much for coming by and taking a look.

Adding my card to these challenges:
Addicted to Stamps and More- STENCILS AND DIE CUTS
Unicorn Challenge- SUMMERTIME

Supplies
Stamps- Simple Strips (Taylored Expressions)
Inks- DOX
Paper- heavy white (Scribes Nook- Waterloo, Ont.)
Accessories and Tools- Dahlia Layering Stencil (Altenew); Waffle Flower stencil mat; 
white Posca pen; Stitched frame (YNS); Blending Brushes (TE); silver gems (Dollar Tree)

Wednesday, 1 June 2022

Daisy Notecard


Welcome
Meet today's card.
A simple notecard made using a new to me embossing folder and some Distress Oxide inks.  This eb folder is called Spoon Daisy by Altenew.

So here's what I did to create my card.
  • I cut a piece of white cardstock to use in my eb folder that was 3 3/4" square.
  • I inked up the inside of the folder with some Mustard Seed and Carved Pumpkin Distress Oxide ink just onto the flower center.
  • All around the flower center, I inked up with some Picked Raspberry DOX ink.
  • I gave it a spray of water and ran it through my die cutting machine.
  • I removed the inked piece and splattered with my white Posca pen.  
  • The flower centers needed some light, so I dotted them with my Posca pen to add interest.
  • I glued the dried panel onto some white cardstock, then a piece of pink, then finally onto a 4 1/4" square card base.

Thanks so much for coming by and taking a look.

Adding my card to these challenges:
Inspiration Station- INSPIRED BY A FLOWER SHOP
Crafting Happiness- ANYTHING GOES
Can You Handle the Pressure- ANYTHING GOES-OPTION BUTTERFLY

Supplies
Stamps- none
Inks- DOX
Paper- Scribes Nook- Waterloo, Ont.
Accessories and Tools- Spoon Daisy EB folder (Altenew); white Posca pen; 
Spellbinders Platinum Die Cutting machine

Monday, 28 March 2022

A Simple Palette


Welcome
A simple card today although it looks more complicated then it actually is.
Altenew for the win with this great layering stencil called Dahlia Stencil A and B.

So here's what I did to create my card.
  • I began by cutting a white cardstock panel and got out some Weathered Wood Distress Oxide ink.  I positioned Stencil A over my cardstock on my Stencil Mat and inked it up. 
  • When I was happy with the coverage of ink, I removed Stencil A and positioned Stencil B into place.  Stencil B adds a lot of the flower details.  I inked that up with some Black Soot Distress Oxide ink.
  • I removed that stencil and splattered with my white Posca pen.
  • After the stenciled panel was dry, I die cut the sentiment outline along the bottom, then cut the sentiment from some white cardstock.
  • I glued the stenciled panel onto a piece of white cardstock, then onto a white card base.
  • I glued the die cut sentiment onto the outline die cut and pop dotted it back into place over the front panel.

Thanks so much for coming by and taking a look.

Adding my card to these challenges:
Allsorts- IN THE GARDEN
Corrosive- ANYTHING GOES
Addicted to Stamps and More- DIE CUTS AND/OR STENCILS


Supplies
Stamps- none
Inks- DOX
Paper- heavy white (Scribes Nook- Waterloo, Ont.)
Accessories and Tools- Dahalia stencils A &B (Altenew); TE Blending Brushes; 
white Posca pen; With Sympathy die (SSS); Waffle Flower Stencil Mat; foam dots

Sunday, 9 January 2022

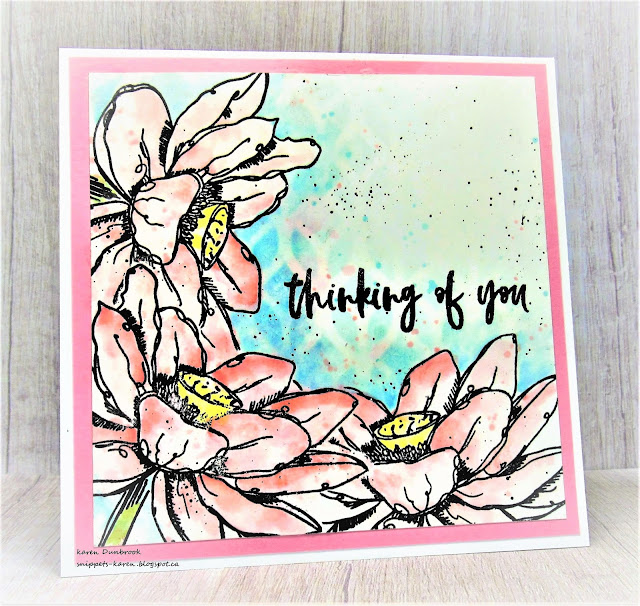
Simple Watercolouring


Hello
Hope you are all doing well.
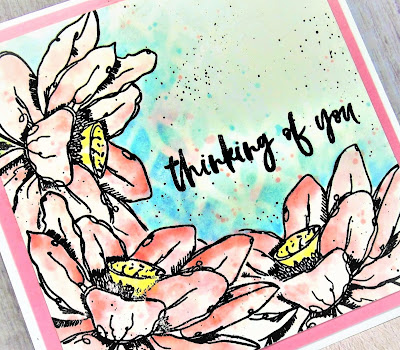
Meet today's card.  I was in the mood to do some watercolouring; something I haven't done for quite awhile.

So here's what I did to create my card.
  • I cut a piece of heavy white cardstock 4 1/2" x 4 1/2".  I took a piece of acetate, rubbed some Spun Sugar Distress ink onto the acetate and sprayed with water.  I bent the acetate and 'kissed' it to my cardstock, then dried the ink.  That gave me a bit of a colour base to start stamping my flowers onto.
  • I positioned the Lotus stamp into the corner of my cardstock, inked with some black Versafine Clair ink and stamped.  I clear embossed it as I knew I wanted to use lots of water and colour and I didn't want it to bleed.
  • I stamped the lotus again onto some sticky paper and fussy cut it out to create a mask.
  • I masked the flower and stamped another one beside and then above it.  I embossed them as well with some clear embossing powder.
  • I rubbed some Abandoned Coral onto my non-stick craft sheet and using a wet paintbrush, diluted it.  I added some clear water to the flowers with my paintbrush, then added some of the colour into the flower petals. 
  • I still had some ink left on my mat, so I splattered it over the flowers to add interest.
  • I dried the flowers before watercolouring in the flower heads with some Squeezed Lemon Distress ink using the same technique I mentioned above, then the stems with some Peeled Paint.
  • After I dried the flowers, I diluted some Tumbled Glass DI ink and painted in the background, adding more ink close to the flowers and blending it out.
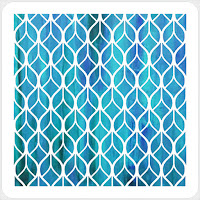
  • To add even more interest to the background, I used the Chain Weavers stencil from ACLD and gently went over the blue area that I had watercoloured using more of the Tumbled Glass ink.
  • When dry, I placed the panel into my Misti and stamped the sentiment from the Lotus set.
  • I glued it onto a piece of pale pink cardstock, then onto a 5" x 5" white card base.


Here is the stencil I used on the background.

Discount Code for A Colorful Life Designs
(affiliate with no extra cost to you)

Thanks so much for coming by and taking a look

Adding my card to these challenges:
Just Us Girls- INKED OR SPRAYED BKGD
CASology- RENEW 
(After making so many Christmas cards, I am renewing my love of florals for Spring)
613 Avenue Create- ANYTHING GOES


Supplies
Stamps- Inked Lotus (Altenew)
Inks- Distress Inks (all mentioned above); Versafine Clair
Paper- heavy white (Scribes Nook- Waterloo, Ont.)
Accessories and Tools- Stencil (ACLD); Lawn Fawn clear eb powder; sponge daubers;
paintbrush; acetate sheet

Saturday, 17 July 2021

Flower Sympathy


Good Morning and Welcome to the Weekend!
Creating time is happy time for me.
So meet today's card.
A friend asked for some sympathy cards so this is one I came up with.  

So here's what I did to create my card.
  • I began by pulling out a monoprint I had done using the Circle Make Circles stencil from A Colorful Life Designs.  To make a monoprint, apply ink to the back of the stencil, spray with water and press onto your paper.  I used Kitsch Flamingo, Wilted Violet and Seedless Preserves Distress Oxide inks.  You will create a more watercoloured look rather then straight ink through the stencil.  
  • Next, I pulled out these Dog Rose Panels A & B dies.  I die cut my monoprinted panel using Panel A and made sure to keep all the cut pieces on a tray, ready to be fitted back into place.
  • I die cut using both A & B panels with some black cardstock.
  • I glued the black Panel A onto a piece of heavy white cardstock and glued the inked pieces I had carefully saved, back into place. I left some white areas open for interest.
  • I glued the black Panel B over that and set it aside.
  • Onto my main panel.  Using my Gel Plate, I rubbed my Wilted Violet and some Seedless Preserves DOX ink pads directly onto the plate.  Using a brayer, I blended the colours together and then rubbed some white cardstock over the plate to get the print.  I thought it looked a bit too bright, so using some diluted white paint, I did some dry brushing to tone down the colour a bit.
  • Also, using my finger, I dabbed white acrylic paint along the edges for interest.
  • While that dried, I took a piece of black cardstock, rubbed it with my Anti-static bag, stamped with some Versamark ink then white heat embossed the sentiment from SU.
  • I glued the Gel print onto a heavy white card base, then the flower panel over that and finally pop dotted the sentiment to the side.  


Here is the stencil I used:

                                                        Discount Code for A Colorful Life Designs
Thanks so much for coming by and taking a look.

Adding my card to these challenges:
Simon Says Wed.- EMBOSS IT
Sweet Stampin- CREATE YOU OWN BKG
Allsorts- FEMININE

Supplies
Stamps- Sympathy (SU)
Inks- Versamark; Distress Oxides (mentioned above)
Paper- bl cardstock (Michaels); heavy white (Scribes Nook- Waterloo, Ontario)
Accessories and Tools- Circle Makes Circle (ACLD); white acrylic paint; paintbrush (for dry brushing);
Dog Rose Panel A&B (Altenew); Gel Plate; Speedball Brayer; Lawn Fawn white eb powder;
Spellbinders Platinum die cutting machine


Sunday, 16 May 2021

Butterfly Wishes


Hello and Welcome
Meet today's card.
A simple one with a bit of a twist.

So here's what I did to create my card.
  • I began with a piece of heavy white cardstock.  I placed the Butterfly Mask from A Colorful Life Designs over my cardstock and grabbed some Distress Oxide inks.
  • Using my TE Blending Brushes, I started at the center of the butterfly and rubbed on some Mustard Seed DOX ink.  I kept blending using Carved Pumpkin and then finally some Picked Raspberry DOX ink. 
  • When I was happy with all the inking, I decided to add a twist.......and cut it out!  I don't usually cut my stencil pieces out but this one worked perfectly for that.  It was super easy to cut out too.
  • I placed the butterfly into my Misti, stamped the sentiment with some black Versafine Clair and clear heat embossed it.
  • Next, I cut my card base from white cardstock, added a pink border and then pop dotted my butterfly to a piece of white and glued that to the card.
  • I added 3 little pearls for the finishing touch.


Here is the mask I used:

Discount Code for A Colorful Life Designs


Adding my card to these challenges:
Sweet Stampin- THINGS WITH WINGS

Thanks so much for coming by and taking a look.

Supplies
Stamps- Fragile Foliage (Altenew)
Inks- DOX, Versafine Clair
Paper- heavy white (Scribes Nook- Waterloo, Ont)
Accessories and Tools- Butterfly Mask (ACLD); Misti (My Sweet Petunia); 
TE Blending Brushes; Wow clear eb powder; heat tool; pearls