Showing posts with label watercolour. Show all posts

Sunday, 30 January 2022

Paper Weaving with a Twist


Hello and Welcome
This week it's my turn to host the TLC (Technique Lover's Challenge) over at Splitcoast Stampers.
It's such a fun challenge where we try new techniques.  I always try and think of presenting a technique that is easy enough to do for everyone and that you will have the supplies needed on hand.
So I'm calling my challenge 
Paper Weaving with a Twist
(the twist being we are going to stamp on top of the weaving)

So here's what I did to create my card.
  • I actually began by scratching my head and try to think about what challenge I would present.  I do love the look of paper weaving.  Lately, as I have been going through all my random strips of paper, these white ones inspired me to use them.  
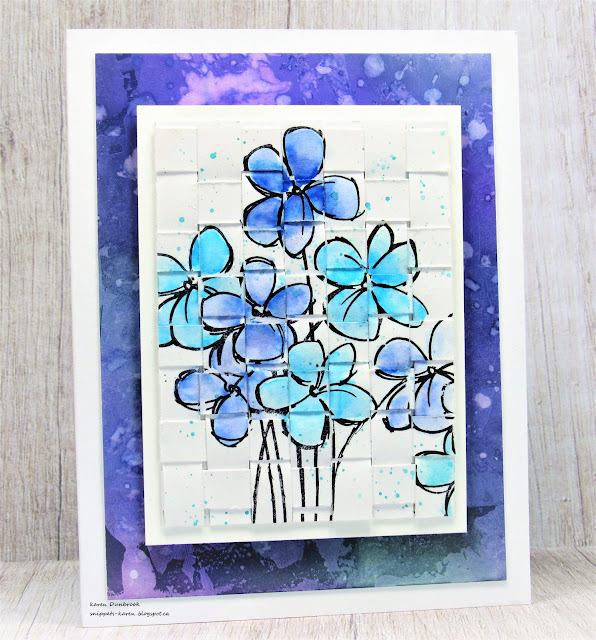
  • I cut a scrap of white cardstock and glued 7 paper strips vertically just along the top edge to hold them in place.  
  • Using the other paper strips, I wove them over and under horizontally until the piece was all woven.
  • I glued all the edges down securely and waited for them to dry.
  • When all was dry, I placed the woven piece into my Misti and stamped the Blossom Bunch right over the weaving with some black Versafine Clair.
  • After the ink had dried, I diluted some Distress Oxide ink (Blueprint Sketch, Peacock Feathers) with some water on my non-stick craft mat and used a paint brush to colour in my flowers.
  • I had some diluted ink left on my mat so I used a wet paint brush to splatter it onto my card front.
  • Now for the background....I found this piece in my stash.  I had put some Gesso onto it with a palette knife and let dry.  I inked it up with Distress Oxide inks, then splattered with water.
Here's what the panel looked like:
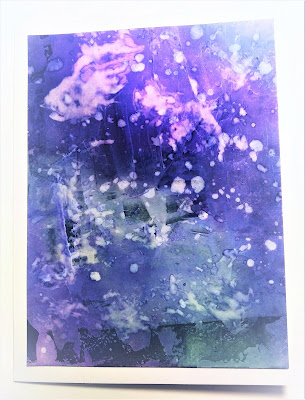
  • You can see how the Gesso resists the ink....I also threw some water on it to lift some of the colour.
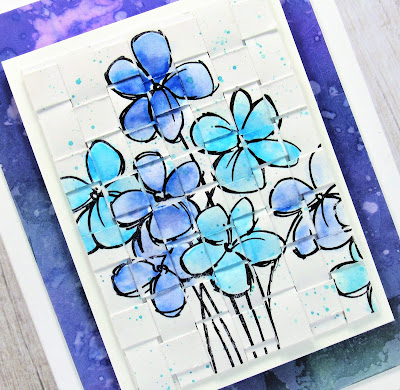
  • I glued the gesso piece onto a white card base and pop dotted the woven flowers over that.
  • I left off the sentiment so you could fully see the weaving in the background.
 

Thanks so much for coming by and taking a look.

Supplies
Stamps- Blossom Bunch (Stampendous)
Inks- Versafine Clair, DOX
Paper- white (Scribes Nook, Waterloo, Ont.)
Accessories and Tools- paper strips; Misti (My Sweet Petunia); paint brush; 
non-stick craft mat; Gesso; palette knife

Sunday, 9 January 2022

Simple Watercolouring


Hello
Hope you are all doing well.
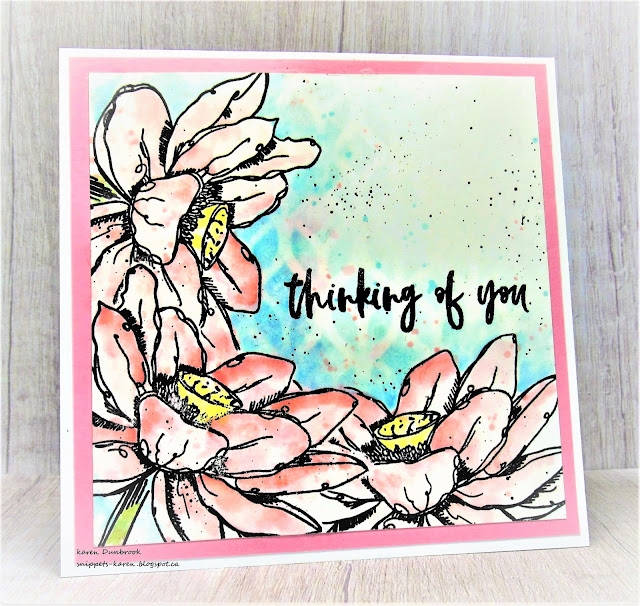
Meet today's card.  I was in the mood to do some watercolouring; something I haven't done for quite awhile.

So here's what I did to create my card.
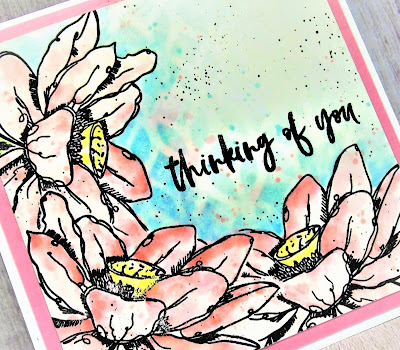
  • I cut a piece of heavy white cardstock 4 1/2" x 4 1/2".  I took a piece of acetate, rubbed some Spun Sugar Distress ink onto the acetate and sprayed with water.  I bent the acetate and 'kissed' it to my cardstock, then dried the ink.  That gave me a bit of a colour base to start stamping my flowers onto.
  • I positioned the Lotus stamp into the corner of my cardstock, inked with some black Versafine Clair ink and stamped.  I clear embossed it as I knew I wanted to use lots of water and colour and I didn't want it to bleed.
  • I stamped the lotus again onto some sticky paper and fussy cut it out to create a mask.
  • I masked the flower and stamped another one beside and then above it.  I embossed them as well with some clear embossing powder.
  • I rubbed some Abandoned Coral onto my non-stick craft sheet and using a wet paintbrush, diluted it.  I added some clear water to the flowers with my paintbrush, then added some of the colour into the flower petals. 
  • I still had some ink left on my mat, so I splattered it over the flowers to add interest.
  • I dried the flowers before watercolouring in the flower heads with some Squeezed Lemon Distress ink using the same technique I mentioned above, then the stems with some Peeled Paint.
  • After I dried the flowers, I diluted some Tumbled Glass DI ink and painted in the background, adding more ink close to the flowers and blending it out.
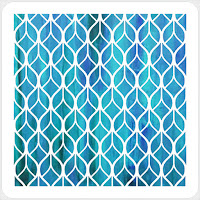
  • To add even more interest to the background, I used the Chain Weavers stencil from ACLD and gently went over the blue area that I had watercoloured using more of the Tumbled Glass ink.
  • When dry, I placed the panel into my Misti and stamped the sentiment from the Lotus set.
  • I glued it onto a piece of pale pink cardstock, then onto a 5" x 5" white card base.


Here is the stencil I used on the background.

Discount Code for A Colorful Life Designs
(affiliate with no extra cost to you)

Thanks so much for coming by and taking a look

Adding my card to these challenges:
Just Us Girls- INKED OR SPRAYED BKGD
CASology- RENEW 
(After making so many Christmas cards, I am renewing my love of florals for Spring)
613 Avenue Create- ANYTHING GOES


Supplies
Stamps- Inked Lotus (Altenew)
Inks- Distress Inks (all mentioned above); Versafine Clair
Paper- heavy white (Scribes Nook- Waterloo, Ont.)
Accessories and Tools- Stencil (ACLD); Lawn Fawn clear eb powder; sponge daubers;
paintbrush; acetate sheet

Monday, 31 May 2021

Botan Peony


Hello and Welcome
It's my turn to host the TLC (Technique Lovers Challenge) this week over at Splitcoast Stampers.
For my technique, I am using the Eclipse Technique.
I do love using this technique especially for sentiment on my cards.  After I create a background, I hate to cover it up with a sentiment so this technique is perfect for that.
You can use any die-cut for this technique as long as it's not got too many cuts in it as you will need to glue it all back together into the front of your card.

So here's what I did to create my card.
  • I cut a piece of white cardstock and placed it into my Misti.  I stamped this large Botan Peony with some Versafine Clair Nocture and clear heat embossed it as I knew I was going to watercolour it and didn't want any bleeding with the ink.
  • I got out some Picked Raspberry and some Carved Pumpkin Distress Oxide ink and rubbed them onto my non-stick craft mat.  Using a wet paint brush, I painted in the flower using the Carved Pumpkin, then added some shading and details with the Picked Raspberry.
  • When the piece was totally dry, I splattered with my black Posca pen.
  • I took the panel and die-cut the 'Celebrate' sentiment right in the center of the card.  I set that all aside.  I use a little tray to hold all the pieces as you will need them to fit back into the cut away areas.
  • I took some leftover white paper scraps and die-cut the sentiment 3 more times.  I glued them all together and then on the top, glued the one I had cut from my panel.
  • I glued the flower onto a piece of black cardstock, then fitted the die-cut sentiment back into place and all the little cut away pieces.
  • Finally, I glued it onto a heavy white card base and added 3 black enamel dots.


Thanks so much for coming by and taking a look.

Adding my card to these challenges:
Little Red Wagon- SAY IT WITH FLOWERS
Simon Says Wed.- ANYTHING GOES


Supplies
Stamps- Botan Peony (Picket Fence)
Inks- Distress Oxide (mentioned above), Versafine Clair 
Paper- heavy white (Scribes Nook- Waterloo, Ontario)
Accessories and Tools- Celebrate Die (MFT); Spellbinder Platinum; paintbrush; Posca pen; 
Nuvo glue; black enamel dots; clear embossing powder; heat tool

Sunday, 21 March 2021

Embedded Happy Birthday


Hello and Welcome
I'm happy to be back with a fun card using this great stamp from Technique Junkies.
It's an older one but I love that it's so easy to make a card using it.  Take a background, stamp the city image and then add a sentiment.

So here's what I did to create my card.
  • I used a piece of Strathmore Bristol watercolour paper for my front panel, then got out my Distress inks (Peacock Feathers, Salty Ocean, Blueprint Sketch, Seedless Preserves and Wilted Violet).  I rubbed the ink pads directly onto my Tim Holtz Glass mat and diluted them with water.
  • Using a large paintbrush, I added water all over the panel.  Then I picked up some Peacock Feathers ink and started added the inks onto the wet panel.  Since these inks are water soluble, they can be easily diluted for watercolouring.
  • I continued with each of the colours mentioned above until the panel was washed with inks.  I set that aside to dry completely.
  • When totally dry, I placed the inked panel into my Misti and stamped the Watercolor NY image with some Versafine Clair Noir and clear heat embossed it.
  • I die cut the Happy Birthday from the panel using a die from Penny Black and set that aside.  
  • I die cut the Birthday again 3 more times and glued them all together.  
  • I glued the inked panel onto a card base and fitted the 'Happy Birthday' back into the cut away on the image for an embedded sentiment.  It's kind of hidden but doesn't take away from the overall look of the image.
  • I added a few white splatters with my Posca pen until it died...ugh.

Thanks so much for coming by and taking a look.

Adding my card to these challenges:
Craft Rocket- USE DIE/SPRING
Cards for Galz- SPRING RAIN
As You Like It- FAV WAY TO CUT YOUR IMAGE AND WHY
(by embedding you can still see the full image)

Supplies 
Stamp- Watercolor NY (Technique Junkies)
Inks- Distress (Tim Holtz); Versafine Clair
Paper- Strathmore Bristol; heavy white (Scribes Nook, Waterloo Ont.)
Accessories and Tools- Misti (My Sweet Petunia), Wow clear eb powder; heat tool; paintbrush,
Happy Birthday die (PB); Cuttlebug, Posca pen

Sunday, 7 March 2021

Painted Circles


Good Morning
Meet today's card...painted circles.  
I tried my hand at painting some more circles with some of my favourite Distress colours.

So here's what I did to create my card.
  • I began with a piece of Strathmore Bristol watercolour paper, a paintbrush #10, a cup of water and my Distress Oxide inks.
  • I began by pressing my ink pads directly onto my Tim Holtz Glass Mat to transfer some ink there.  Using a wet paint brush with no ink on it, I painted the first circle ring with water at the bottom of my card panel. By doing that first, before adding the ink, I was better able to move the inks around when I added them in multiple layers. 
  • The rest was pretty much straight forward.  I painted a round ring shape then moved to another area of the card panel to paint another while the first one dried.  *to get a good mix of the colours and to be able to blend them well, you must let each one dry before adding the next colour.*  Use your heat tool to dry if you are impatient like me! 
  • I finished painting all the rings of the circles using the different colours seen in the photo below.


  • Using a fine line markers, I doodled lines around all the circles just to give them more presence.
  • I splattered the panel with my white Posca pen for more interest.
  • When the panel was totally dry, I die cut the Celebrate sentiment from MFT in my Cuttlebug right from the center of the circles.  I die cut the sentiment again 3 more times from white cardstock.  I stacked and glued those all together and glued them back into position on the main panel. 
  • I stamped the sentiment strip with some Versamark ink, then white heat embossed it.  I pop dotted that just below the sentiment.
  • I mounted it all onto a heavy white card base.


Thanks so much for coming by and taking a look.

Adding my card to these challenges:
Creative Artiste Mixed Media- ANYTHING MIXED MEDIA

Supplies
Stamps- Tiny Words (SSS)
Inks- Distress Oxides; Versamark
Paper- Strathmore Bristol; heavy white (Scribes Nook)
Accessories and Tools- paintbrush; Celebrate die (My Favorite Things); Wow eb powder;
heat tool (Ranger); Signa fine line pen; Posca white pen; Cuttlebug; pop dots

Monday, 9 November 2020

Snowflake Collage

Good Morning!
Hope you are doing well in your part of the world.
Meet today's card.  
I'm trying to get a few more made before it's time to mail them all out.

So here's what I did to create my card.
  • I began with a piece of heavy white cardstock.  I placed the panel into my Misti and inked up the snowflake from Colorado Stamp with some Blueprint Sketch Distress Oxide ink, sprayed with some water and pressed onto my paper.  I added some Peacock Feathers to just the very center of my snowflake.  I kept moving the panel around until the whole front was stamped.
  • Next, I rubbed some Salty Ocean DOX ink onto my glass mat, added some water to dilute it and watercoloured in the background around the snowflakes. I dried that all using my heat tool
  • Now it was time to add a bit more detail, so I used the Overlapping Texture from AALL and Create and randomly stamped around the snowflakes.
  • I splattered with white using my Posca pen and set aside to dry.
  • I stamped the sentiment from the Santa's List set with some Versafine Clair and backed it with a small piece of white.  I pop dotted that over the bkg. and mounted it all onto a heavy white card base.


 Thanks so much for coming by and taking a look.

Adding my card to these challenges:
Bastel-Traum- BACKGROUND
Creative Craft Cottage- CHRISTMAS/WINTER
Stamping Pals- CHRISTMAS


Supplies
Stamps- Warm Wishes Snowflake (Colorado Stamp); Sentiment (YNS); Overlapping Texture #307 (AALL and Create)
Inks= Distress Oxides (TH); Versafine Clair
Paper- heavy white (Scribes Nook)
Accessories and Tools- Misti (My Sweet Petunia); Posca white pen; pop dots; paintbrush

Monday, 2 March 2020

Luck of the Irish- CAS Watercolour Challenge


Welcome
Well we are into the month of March and it's time for another fun theme at the 

This month we are celebrating The Luck of the Irish!


Everyone's Irish on St. Paddy's Day right?!  So this month lets show some green, it could be shamrocks, meadows, leprechauns (or gnomes!), or use some color with a rainbow or something gold. It doesn't have to say anything about St. Paddy's Day but be inspired by it.
This month we also welcome our Guest Designer:  Hannelie (Desert Diva)

So onto my card details.
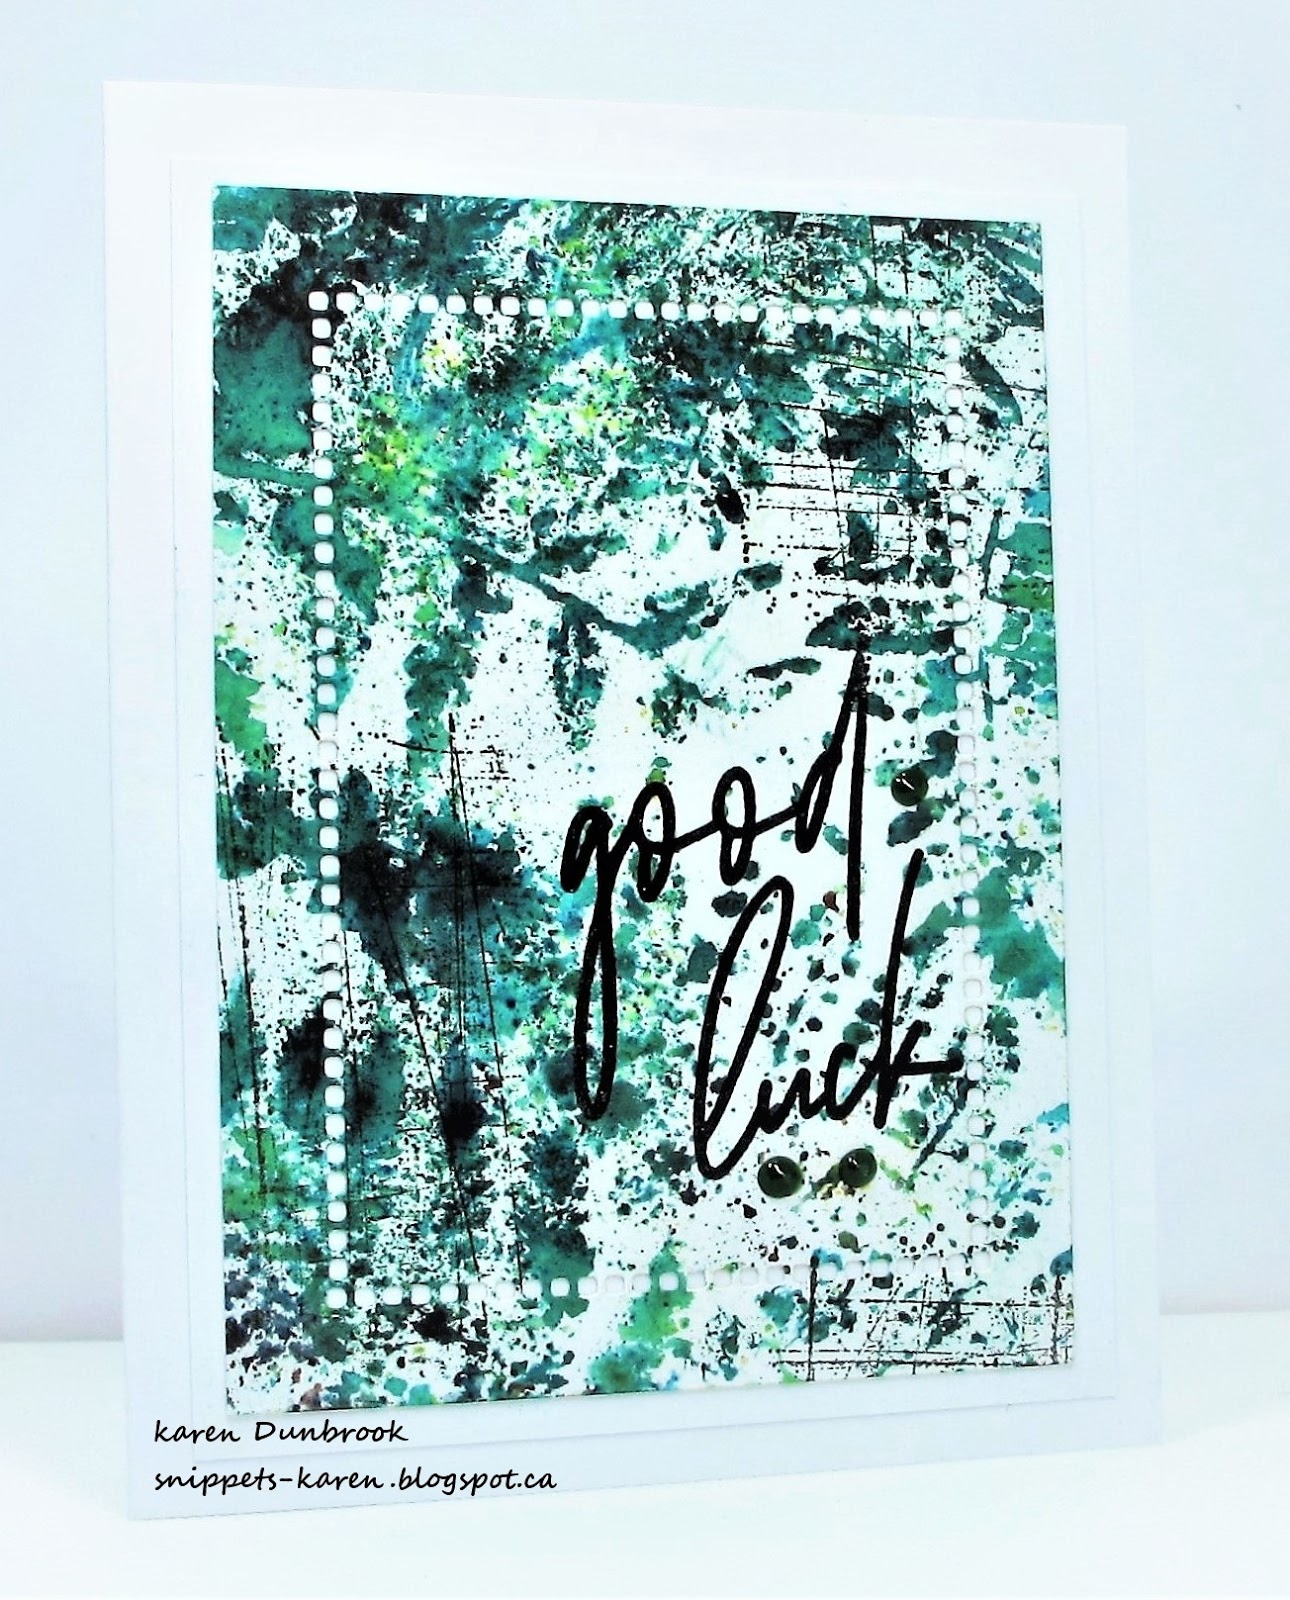
I began with a piece of heavy white cardstock and positioned my Fern Garden stamp into my Misti. I got out my Green Brushos, sprinkled some into my palette then diluted it with a bit of water.  Using a wet brush, I painted the stamp with the green and pressed onto my paper.  I did spray the stamp with some water after the first impression was stamped to use all the little bits of colour still left on the stamp.  It also helps give the overall impression a more watercoloured look.
When all was dry, I die cut the middle area of my card with the hemstitch die to add interest, then stamped the sentiment.  I did add some faint grid stamping in the corners for interest as well.
I simply mounted it onto a heavy white card base.


Thanks so much for coming by and taking a look.


Supplies
Stamps- Fern Garden (Stampendous); Scripted Bold Sentiments (Pinkfresh Studio)
Scratch Bkg (SU-so sorry, but I don't know the name of this stamp)
Inks- Versafine, Brushos
Paper- heavy white (Scribes Nook)
Accessories and Tools- Misti (My Sweet Petunia); Hemstitch Die (Spellbinders); 
Cuttlebug; paintbrush

Saturday, 15 February 2020

The Journey- CAS Watercolour Challenge

Welcome.
You still have time to play along with our Red and Black theme at the 


This month we welcome my talented friend Michele as our GD.
Guest Designer:  Michele (I Card Everyone)

So this is how I created my card.
I began with a piece of heavy white cardstock and positioned it into my Misti with the stamps in the right position.  Using my Tombow markers, I coloured directly onto my stamps, starting with the red first, sprayed with water and stamped.  Without reinking, I moved my paper slightly in my Misti, sprayed and stamped again.  It gave such great fullness to the look of my flowers.
I stamped the sentiment using my Misti again then removed it and rubbed some Candied Apple DOX ink along the edges of one side.  I also used some Black Soot DOX ink over the red to add some depth.  I splattered with some black acrylic paint and when it was all dry, I simply mounted it onto a heavy white card base.


Thanks so much for coming by and taking a look.

Supplies
Stamps- Find Joy (High Hopes); Insightful Meadow (Unity)
Inks- Memento Markers, Versafine, DOX
Paper- heavy white (Scribes Nook)
Accessories and Tools- Misti (My Sweet Petunia); black acrylic paint; blending brush

Thursday, 2 January 2020

Cool Colours- CAS Watercolour Challenge

Hello and Welcome.
First card of the New Year and a new challenge at the 


This month we are creating using Cool colours.  
Here is a sampling of them:

We also want to welcome our Guest Designer this month:


So onto my card details.
I began with a piece of heavy white cardstock and placed it into my Misti.
I positioned the Peacock Feathers stamp from Technique Junkies over my paper then I painted directly onto the stamp with some diluted Brushos in purples, green and blues.  I pressed onto my paper and added more ink where needed.  It helps to spray your stamp with some water as well to help the colours blend.  The Brushos give such rich colour.
When it was dry, I stamped the sentiment and simply mounted it onto a heavy white cardbase.


Thanks so much for coming by and taking a look.
I hope you will come and play along with us.  We have some great challenges to offer you this year.

Supplies
Stamps- Peacock Feathers (Technique Junkies); Scripted Bold Sentiments (Pinkfresh)
Inks- Versafine Clair Noir; Brushos
Paper- heavy white (Scribes Nook)
Accessories and Tools- Misti (My Sweet Petunia); paintbrush

Saturday, 2 November 2019

Monochromatic- CAS Watercolour Challenge


Hello and Welcome

Time for a new theme at the 
This month, I have the pleasure of hosting so our theme will be Monochromatic.


This month we welcome our guest  

As most of you know, I love creating monochromatic and silhouette cards so this was an easy one to create.

I began with a piece of heavy white cardstock and placed it into my Misti.  Next, I positioned the flower near the bottom portion of my paper.  I coloured the flower with various shades of blue Tombow markers, sprayed with water and pressed onto my paper.  I repeated that process until I was happy with the inking.

When the piece was dry, I took some diluted DOX ink and added a wash of colour around the flower with a paintbrush.  There was a bit of ink left on my mat so I used it to splatter as well, adding to the interest.
When the whole piece was dry, I stamped the sentiment from the PB set called Joy and Merriment then added the blue dot to the flower center.  I simply mounted the piece onto a white card base.


Thanks so much for coming by and taking a look.

Adding my card to these challenges:
Simon Says Wed.- ANYTHING GOES
Craft Stamper Magazine- TAKE IT MAKE IT
Cardz 4 Galz- SOMETHING BEGINNING WITH S (splattered)


Supplies
Stamps- Joy and Merriment (PB); Red Star (PB)
Ink- Tombow Markers; Versafine Nocturne; Peacock Feathers DOX 
Paper- heavy white (Scribes Nook)
Accessories and Tools- Misti (My Sweet Petunia); paintbrush; blue dot (YNS)

Tuesday, 22 October 2019

Sending Happy Thoughts

Good Morning.
I picked up a new flower stamp last month and wanted to play with it.  I loved the scribbled look it had, something different from the norm.

So here's what I did.
I began with a piece of heavy white cardstock and placed it into my Misti.  I inked up the flower with some Versafine black ink and stamped.  I did the sentiment as well then using some diluted DOX inks, I watercolored the flowers loosely as per the scribbled look of the stamp.  
Next, I took the Leaf Lattice stencil from A Colorful Life Designs and added some faint stencilling around the edges of my card front, just to add a bit of interest but not to take away from the image.
When I was happy with the coverage, I mounted it onto a piece of grey cardstock then onto a heavy white card base.


Thanks so much for coming by and taking a look.

Leaf Lattice

Discount Code for A Colorful Life Designs


Supplies
Stamps- Bouquet Large (AALL and Create); Happy Thoughts (SSS)
Inks- Hickory Smoke, Peacock Feathers DOX (TH); Versafine Clair Nocturne
Paper- heavy white (Scribes Nook)
Accessories and Tools- Leaf Lattice (A Colorful Life Designs); Misti (My Sweet Petunia)
paintbrush; inking tool