Showing posts with label paper weaving. Show all posts

Thursday, 18 December 2025

Stenciled Paper Weaving


Good Morning
Today's card features some paper weaving using this fun stencil from A Colorful Life Designs called:

So, here's what I did to create my card.
  • I placed the Tribal Fabric stencil over a piece of white cardstock and inked it up with some Ripe Persimmon Distress Oxide ink.
  • I took another piece of white cardstock and using the same stencil, I inked again but this time with some Picked Raspberry DOX ink.
  • Next, I took both stenciled pieces and cut them into strips. Using the strips, I simply wove them together to create the background. 
  • I die cut the sentiment with some orange cardstock and then again with white cardstock.  I glued those together offsetting them a bit to help make the sentiment more visible.
  • I glued the woven panel onto a piece of white cardstock, then onto a piece of orange then onto a white A2 sized card base.
  • I added the sentiment across the front and some orange gems around it.

Here is the stencil I used:


Thanks a lot for taking the time to visit.

Supplies
Stamps- none
Inks- DOX
Paper- Solar White
Accessories and Tools- stencil (A Colorful Life Designs); TE Blending Brushes;
die (TE); orange gems

Saturday, 3 August 2024

Hello to You!


Good Moring
Meet the new for August stencil from A Colorful Life Designs called:
When I saw this wonderful stencil, I had so many ideas about how I wanted to use it.

So, here's what I did to create my card.
  • I placed the Calibrated Lines stencil over a piece of white cardstock and inked it up with some Peacock Feathers Distress Oxide ink and set it aside.
  • I took another piece of white cardstock, placed the stencil back over it again and this time, inked with some Uncharted Mariner DOX ink.
  • Next, I took the 2 panels and cut them into strips following along with the distinctive line design.
  • I did some paper weaving with the strips, alternating the colours as I went along and glued that onto a piece of white cardstock to stabilize it. I glued that onto a piece of navy cardstock.
  • I die cut the 'HELLO' letters from white cardstock and glued them onto the word shadow that I cut from another piece of navy cardstock.
  • I glued the panel onto an A2 sized card base and used some foam tape to pop the sentiment up.

Here is the stencil I used:

Discount Code for A Colorful Life Designs
(Affiliate with no extra cost to you) 

Thank so much for taking a look, so appreciated.

Adding my card to these challenges:
Word Power- WORD AS FOCUS
Crafty Calendar- ANYTHING GOES
Simon Says- ANYTHING GOES

Supplies
Stamps- none
Inks- DOX
Paper- heavy white (Scribes Nook, Waterloo, Ont.)
Accessories and Tools- stencil (A Colorful Life Designs); TE Blending Brushes;
Hello Die (Markered Messages-Concord and 9th), foam tape

Monday, 21 March 2022

Paper Weaving


Welcome
Meet today's card.
Another one for the series of cards I am doing and calling 
USE YOUR SCRAPS

So here's what I did to create my simple card.
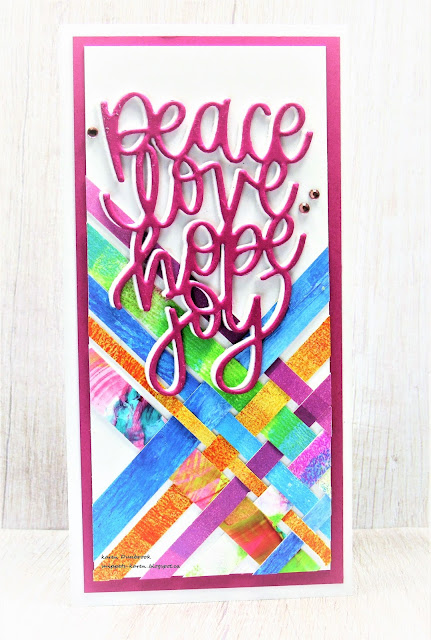
  • I decided on making a slimline card.  This is a fun size to create, a bit smaller then a regular sized slimline.  A standard Slimline card is size is 8 1/2 x 3 1/2 whereas a Mini Slimline is 6" x 3". To see how I made another mini slimline and an envelope to fit it, see THIS POST.
  • I began by cutting a piece of cardstock for my front panel which was a bit smaller then the finished card base.  I got out all my paper scraps and started to weave them together across my card front panel. 
  • When I was happy with the look, I glued the pieces down to secure them.
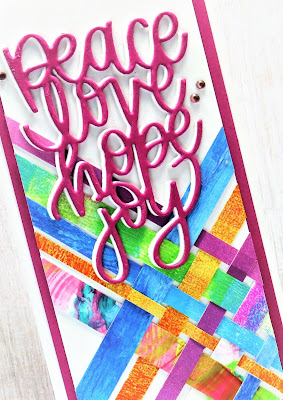
  • Next, I die cut the sentiment from some matching pink cardstock and then some heavy white.  I glued them together, offsetting them a bit so the white would peek out from behind the pink.
  • I glued the woven panel onto a piece of pink cardstock that matched the die cut sentiment, then glued that onto my card base.
  • I glued the sentiment over the background and finally I added 3 silver gems to add interest and finish off my card.


Thanks so much for coming by and taking a look.

Adding my card to these challenges:
Simon Says Wed.- FAVOURITE THING
(being able to use my paper scraps in new ways is one of my fav. things)
Simon Says Mon.- BRIGHT AND CHEERFUL


Supplies
Stamps- none
Inks- various DOX inks, acrylic paints
Paper- heavy white (Scribes Nook- Waterloo, Ont.)
Accessories and Tools- Peace die (Simon Says); paper scraps; silver gems (Dollar Store)

Sunday, 30 January 2022

Paper Weaving with a Twist


Hello and Welcome
This week it's my turn to host the TLC (Technique Lover's Challenge) over at Splitcoast Stampers.
It's such a fun challenge where we try new techniques.  I always try and think of presenting a technique that is easy enough to do for everyone and that you will have the supplies needed on hand.
So I'm calling my challenge 
Paper Weaving with a Twist
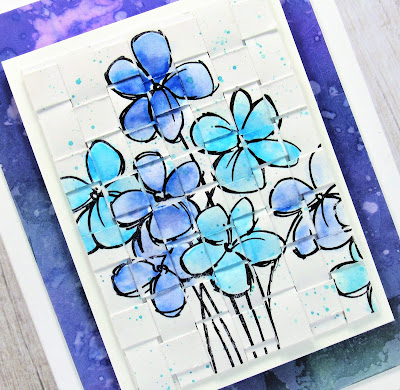
(the twist being we are going to stamp on top of the weaving)

So here's what I did to create my card.
  • I actually began by scratching my head and try to think about what challenge I would present.  I do love the look of paper weaving.  Lately, as I have been going through all my random strips of paper, these white ones inspired me to use them.  
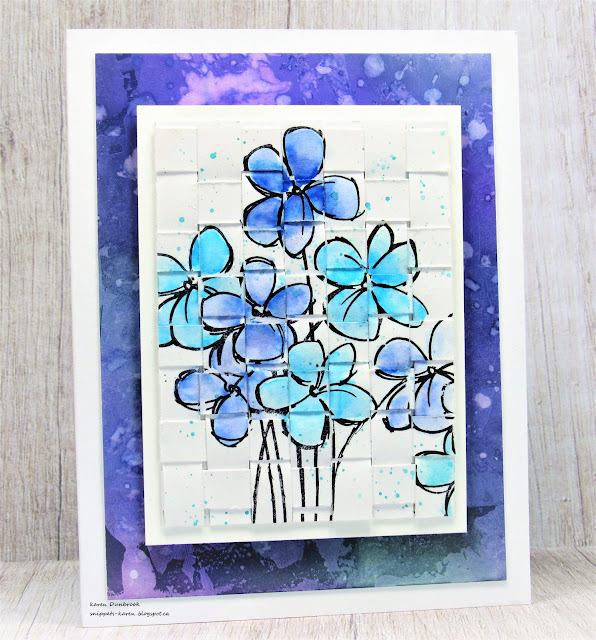
  • I cut a scrap of white cardstock and glued 7 paper strips vertically just along the top edge to hold them in place.  
  • Using the other paper strips, I wove them over and under horizontally until the piece was all woven.
  • I glued all the edges down securely and waited for them to dry.
  • When all was dry, I placed the woven piece into my Misti and stamped the Blossom Bunch right over the weaving with some black Versafine Clair.
  • After the ink had dried, I diluted some Distress Oxide ink (Blueprint Sketch, Peacock Feathers) with some water on my non-stick craft mat and used a paint brush to colour in my flowers.
  • I had some diluted ink left on my mat so I used a wet paint brush to splatter it onto my card front.
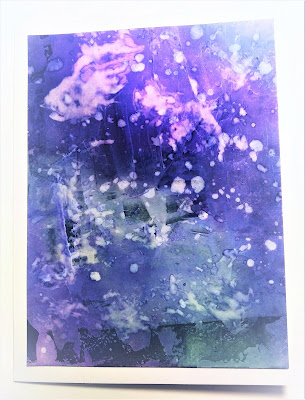
  • Now for the background....I found this piece in my stash.  I had put some Gesso onto it with a palette knife and let dry.  I inked it up with Distress Oxide inks, then splattered with water.
Here's what the panel looked like:
  • You can see how the Gesso resists the ink....I also threw some water on it to lift some of the colour.
  • I glued the gesso piece onto a white card base and pop dotted the woven flowers over that.
  • I left off the sentiment so you could fully see the weaving in the background.


Thanks so much for coming by and taking a look.

Supplies
Stamps- Blossom Bunch (Stampendous)
Inks- Versafine Clair, DOX
Paper- white (Scribes Nook, Waterloo, Ont.)
Accessories and Tools- paper strips; Misti (My Sweet Petunia); paint brush; 
non-stick craft mat; Gesso; palette knife

Friday, 13 August 2021

Woven Paper Wishes


Hello and Welcome
Scraps...do you save them?
I like to save mine in the hope that I will be able to use them to make a card.
That's how this card came to be.

So here's what I did to create my card.
  • I began by taking a look in my scrap pile of pieces leftover from other cards.  I like to keep them just in case I can come up with something to do with them.  I found three of them, all done with stencils from A Colorful Life Designs (see below) and my Distress Oxide inks.  I cut the pieces into strips of different sizes for interest and set them aside.
  • Using a piece of heavy white cardstock, I embossed it using a folder from Darice to use as my main panel.
  • I figured out how I wanted to arrange my strips and wove them together, leaving room for a sentiment.  When I was happy with the pieces put together, I glued them in place over the embossed white panel.
  • Next, I cut a circle from another leftover stenciled piece and stamped the greeting from Avery Elle in my Misti.  I glued that onto a piece of matching cardstock.  It looked flat and needed something more, so I inked up a piece of cardstock and die cut the flower from Tim Holtz.
  • I glued the whole panel onto a piece of cardstock, then onto a heavy white card base.
  • I pop dotted the sentiment to the side.


Thanks so much for coming by and taking a look.

Here are the stencils I used:


Discount Code for A Colorful Life Designs

Thanks so much for coming by and taking a look.

Adding my card to these challenges:
Cardz 4 Galz- TEXTURE
Try it on Tuesday- KEEP IT SIMPLE

Supplies
Stamps- Everyday Circle Tags (Avery Elle)
Inks- Versafine Clair; Distress Oxides (Peeled Paint, Blueprint Sketch, Broken China, Shabby Shutters)
Paper- heavy white (Scribes Nook- Waterloo, Ont)
Accessories and Tools- stencils (ACLD); TE Blending Brushes; Numbers Embossing folder (Darice);
pop dots; Infinity Circle dies (HA); Wildflower die (TH); Misti  

Thursday, 22 April 2021

Happy Earth Day


Happy Earth Day!
Meet today's card using some pieces of inky goodness I had in my stash.  
One of the things I love to recycle and use on my cards is bubble wrap.  It gives such fun circle patterns when all inked up and easy to get with all the deliveries we have had of late!

So here's what I did to create my card.
  • I began by looking through my stash of inky backgrounds.  I tried to choose some that were similar in colour to create a more cohesive looking card.  After I found a few that I thought would work together, I cut them into strips.
  • Strips- The circle one is the bubble wrap that I inked up using some Peeled Paint and Rustic Wilderness Distress Oxide ink, sprayed with water and pressed onto my cardstock.  One of the strips is ink that I dragged with an old gift card.  The other one is a resist I did using a stamp from Penny Black. 
  • I took a good look at the strips and figured out how I wanted to weave them together.  I found this sketch online and decided to use that as my inspiration.

  • Next I needed to make a base for it all, so using a piece of white cardstock, I embossed it using a folder from Carabelle in my Cuttlebug.  I arranged the strips, then glued them in place.  I did pop dot some of the edges for interest.
  • I die cut a circle and placed that into my Misti.  I stamped the sentiment from the Avery Elle set and coloured in the little heart with my Copic markers.
  • I glued the panel onto a heavy white card base, then pop dotted the sentiment over that in the corner. I added some green Nuvo drops for interest.


Thanks so much for coming by and taking a look.

Supplies
Stamps- Everyday Circle Tags (Avery Elle)
Inks- Distress Oxides, Versafine
Paper- heavy white (Scribe's Nook Waterloo, Ont. Canada
Accessories and Tools- Letters EB Folder (Carabelle); bubble wrap; old gift card; pop dots;
clear eb powder; Copic marker; Nuvo drops; Cuttlebug

Wednesday, 22 August 2018

Woven Background

Scraps, scraps and even more scraps.
Do you save your scraps like I do, then scratch your head and wonder why you saved them?
Well, here is just one idea about what to do with them.

I decided to create a woven background.
Super easy and fun too.

Here's what I did.
I began by cutting my 'scraps' into strips of different width.  Some were 1/2" and some were a 1/4" wide.  I placed a piece of tape along the top of a piece of white cardstock then laid down my vertical strips in a colour combination I was happy with.  Then I took the coordinating strips and wove them horizontally into the first ones by going over and under. 
When I was done weaving them together, I glued the ends in place then used a stitched die to cut the piece out.  I simply glued that onto a white base then die cut the flowers to add to the front.


I hope you will give it a try.
Thanks so much for coming by and taking a look.

Adding my card to these challenges:
Cards 4 Galz- PUNCHES AND DIES
Crafting by Design- ANYTHING GOES


Supplies
Stamps- none
Inks- DOX, DI
Paper- heavy white (Scribes Nook-Waterloo, Ont)
Accessories and Tools- paper scraps= Dandelion Posies die (Creative Expressions)= Cuttlebug


Saturday, 24 February 2018

Paper Weaving

Good Morning and Happy Saturday.
Meet today's card.

Yesterday over at Splitcoast Stampers, one of the challenges was to use recycling on your card.  Today's Challenge was all about Antique Farmhouse which I absolutely love!! My love of antiques got me also thinking about the quilts I have collected over the years and from there, my card was created.

I loved doing paper weaving when I was a kid, so I decided to give it a go for my card front.
I began by finding an old magazine and cut some of the pages into 1/4" strips.
I lined up the first set of strips at the top of my card going down and glued them just at the very ends to help hold them in place.  Then I was ready to start weaving the other set of paper strips over and under the ones glued in place.
I think the colours and patterns made for a happy look.
I die-cut the large olive branch and glued that over the top.
That's it!


Hope you have a wonderful weekend and thanks so much for taking time to come and see what I have been up to.

Adding my card to these challenges:
Simon Says Wed.- MAKE YOUR OWN BKG
Simply Papercraft- ANYTHING GOES
A Bit More Time to Craft- ANYTHING GOES
2 Sisters on the Blog- A MAN'S CARD

Supplies
Stamps- none
Inks- none
Paper- heavy white (local store)
Accessories and Tools- old magazine; Large Olive Branch (Memory Box); Cuttlebug; Mono glue