Showing posts with label Use Your Scraps. Show all posts

Sunday, 11 June 2023

Faux Paper Weaving


Welcome
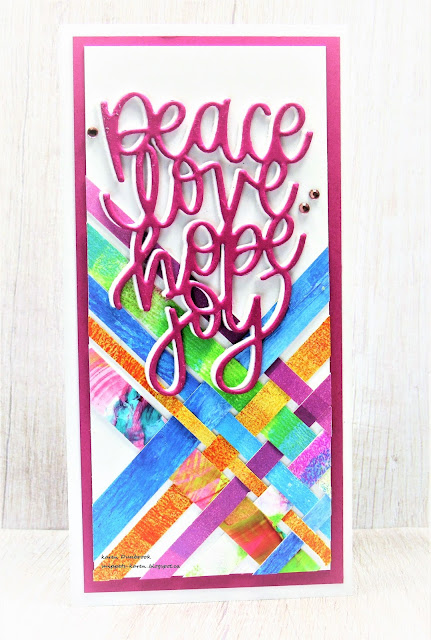
Today's card is all about using leftover strips that I keep in my stash.  
Most were done on my Gel Plate or were roll off sheets while I was printing.

So, here's what I did to create my card.
  • I began by looking through all my scrap paper strips and picked out some that I thought would work well together.
  • I glued the strips onto a piece of white cardstock being sure all were firmly secured and touching each other.
  • After the glue was dry, I cut the panel into strips so that each strip included all the different scraps paper. 
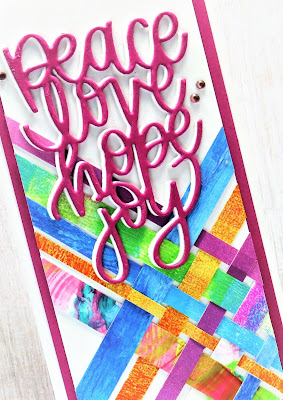
  • Using another piece of white cardstock, I glued the strips down, offsetting them each time to give the panel the look of some 'faux paper weaving'.
  • I glued the finished panel onto a piece of white cardstock, then onto a piece of red and then finally, onto an A2 sized card panel.
  • I die cut the sentiment from some white cardstock and the word shadow from some of the red and glued them together.
  • I glued that over the faux weaving and added 3 red gems.

Thanks so much for coming by and taking a look.

Adding my card to these challenges:
Allsorts- BIRTHDAY or ANYTHING GOES
We Love 2 Create- ANYTHING MIXED MEDIA GOES
Just Us Girls- USE THE WORD HELLO

Supplies
Stamps- none
Inks- DOX and Acrylic paints on my Gel Plate
Paper- heavy white (Scribes Nook- Waterloo, Ont.)
Accessories and Tools- scraps of paper; Hello sentiment (SSS); red gems (Dollar Store)

Sunday, 24 April 2022

Scrappy Heart


Welcome
Today, I have another card to add to the series of cards featuring
USE YOUR SCRAPS

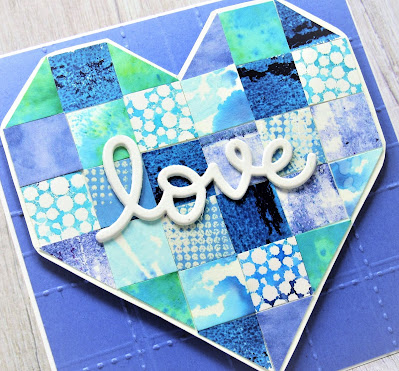
This one looks complicated but it really isn't. 
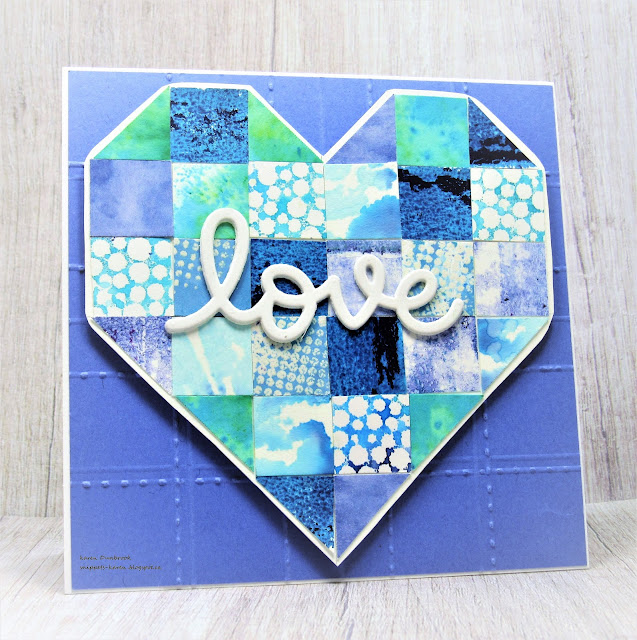
It is just a series of squares and triangles made using my little leftover strips cut into pieces.

So here's what I did to create my card.
  • I started by cutting a piece of white cardstock that I would use for the base of the heart to glue all my squares onto. My finished card is a 5 x 5" square.
  • I cut all my scrap pieces into 3/4" squares using colours that I thought would work well together.
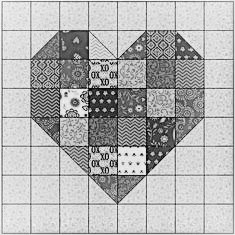
  • I started the heart shape by gluing the center squares first, then continued on outwards with the pattern till I completed the heart shape.  Here is the pattern I used for my card:
I added this as it is easier to see the pattern that I followed.

  • After I had all the pieces glued into place, I fussy cut around the heart, leaving a bit of a white border from the cardstock underneath.
  • Next, I found a piece of matching cardstock for the base of my card,  I used my ScorPal and my ScorBug to draw some lines onto the cardstock to add interest, then glued that onto a 5" square white card base.
  • I die cut the 'love' 3 times and glued them all together.  I glued that over the heart.


Thanks so very much for coming by and taking a look.

Adding my card to these challenges:
Daring Cardmakers- THE TIME OF YOUR LIFE
(vintage inspiration- quilt)
Crafting Happiness- ANYTHING GOES

Supplies
Stamps- none
Inks- Distress Oxides, Acrylic paint
Paper- white (Scribes Nook- Waterloo, Ont.)
Accessories and Tools- TH paper cutter; Love die (Paper Smooches); ScorPal; ScorBug

Monday, 21 March 2022

Paper Weaving


Welcome
Meet today's card.
Another one for the series of cards I am doing and calling 
USE YOUR SCRAPS

So here's what I did to create my simple card.
  • I decided on making a slimline card.  This is a fun size to create, a bit smaller then a regular sized slimline.  A standard Slimline card is size is 8 1/2 x 3 1/2 whereas a Mini Slimline is 6" x 3". To see how I made another mini slimline and an envelope to fit it, see THIS POST.
  • I began by cutting a piece of cardstock for my front panel which was a bit smaller then the finished card base.  I got out all my paper scraps and started to weave them together across my card front panel. 
  • When I was happy with the look, I glued the pieces down to secure them.
  • Next, I die cut the sentiment from some matching pink cardstock and then some heavy white.  I glued them together, offsetting them a bit so the white would peek out from behind the pink.
  • I glued the woven panel onto a piece of pink cardstock that matched the die cut sentiment, then glued that onto my card base.
  • I glued the sentiment over the background and finally I added 3 silver gems to add interest and finish off my card.


Thanks so much for coming by and taking a look.

Adding my card to these challenges:
Simon Says Wed.- FAVOURITE THING
(being able to use my paper scraps in new ways is one of my fav. things)
Simon Says Mon.- BRIGHT AND CHEERFUL


Supplies
Stamps- none
Inks- various DOX inks, acrylic paints
Paper- heavy white (Scribes Nook- Waterloo, Ont.)
Accessories and Tools- Peace die (Simon Says); paper scraps; silver gems (Dollar Store)

Sunday, 6 March 2022

Seeing Green- Use Your Scraps


Welcome
Two more cards today as I continue my series called 
Use Your Scraps

It's been fun trying to think of all the fun ways to use my scraps.  
Both of these cards use a lot of pieces I had leftover while Gel Plate printing.  
Some used acrylic paint on my Gel Plate and some were just inked or roll off sheets while printing.

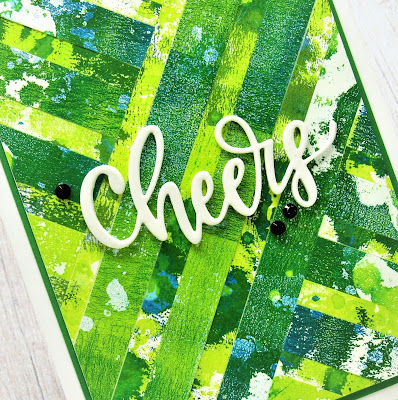
So here's what I did to create card # 1
  • I began by cutting a white cardstock panel and pulled out scraps that were similar in colour.  (I even remembered to take picture of the larger scrap pieces before I cut them down.)

  • I cut all my strips into 1/4 and 1/2 " pieces and laid them all out together.  Like I mentioned above, some were also scraps of inked paper from larger pieces I cut down to use as card front.
  • First, I glued the horizontal pieces down the front from the top right hand side of the white cardstock panel down to the bottom left hand corner.
  • When I was happy with that arrangement, I glued the smaller pieces going in the opposite diagonal direction.  
  • While that dried, I die cut the 'Cheers' from some white cardstock 3x's and glued them all together.
  • When the patchwork panel was dry, I glued it onto a piece of green cardstock, then onto a heavy white card base.
  • I glued the sentiment over the middle and added 3 black gems.


Ok...now for card #2 using the same colours and leftover scraps.


  • This time I cut a white cardstock panel and then cut it into 4 equal parts.  
  • I glued more of the scraps I had left onto the white panels, again going in a diagonal direction.
  • I used some foam tape to pop the panels up over the white cardstock base.
  • I stamped the sentiment in my Misti, clear heat embossed it, then mounted it over the background.

Well thanks so much for coming by and taking a look.
I hope you feel inspired to use your scraps.

Adding my card to these challenges:
Simon Says Wed.- ADD A DIE CUT


Supplies
Stamps- Words and Ideas (Impression Obsession)
Inks- Distress Oxides, Acrylic paint
Paper- heavy white (Scribes Nook- Waterloo, Ont.)
Accessories and Tools- Gel Plate, brayer, scraps from previous projects,
Lawn Fawn cl eb powder, Cheers die (MFT), black gems, foam tape

Sunday, 27 February 2022

Paper Quilts- Use Your Scraps


 Welcome
I've been doing a series of cards over the last few weeks, showing how to use those scraps you know we all have hanging around in our craft space.  
I keep all mine in a container as I often have strips leftover when cutting down a Gel Plate print to make them card size.  I'm on a mission to use those scraps and hopefully, create some nice looking cards using them.
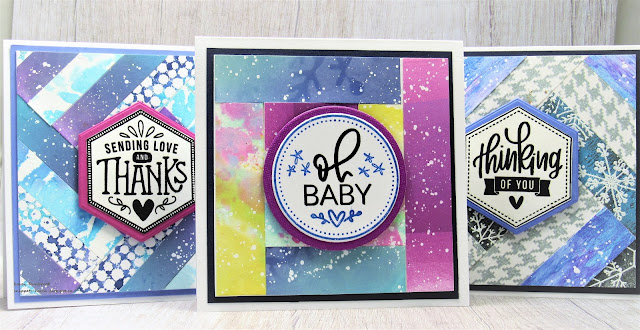
I used the strips to make 3 cards today, all made with scraps and inspired by quilt designs...I love quilts.
To see other cards I have done with scraps, just look above in the tutorials section.
All the paper strips were cut at 1/4 inch wide.
All the cards are 4 1/4 x 4 1/4 inches in size so they fit easily into a standard size envelope.

USE YOUR SCRAPS


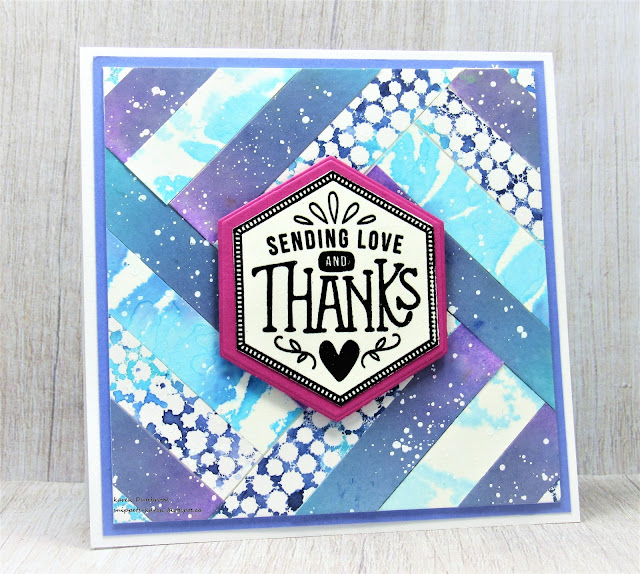
Card #1
For this card I used a variety of scraps including some inked Distress Oxide inked pieces, some stenciled pieces and some stamped.  
The pieces are cut at 1/4 inch wide and glued in this 'quilt style' format starting with a square piece of cardstock that you can't see, (it's under the sentiment) right in the middle of the card front panel. 
I splattered it with my white Posca pen after all the pieces were glued into place.
 I stamped the Sending Love and Thanks in my Misti onto a piece of white cardstock and die cut it using the Hero Arts Hexagon Infinity dies.
I pop dot mounted it over the finished quilt style background.


Card #2
This one was again a combination of some stamped strips and some inked ones, glued together in the same way as Card # 1. This one has a much more wintery feel to it with the snowflakes and the colours of the strips.
I stamped the sentiment onto some white cardstock and again, cut that out using the Hexagon Infinity dies then was pop dot mounted over the background.


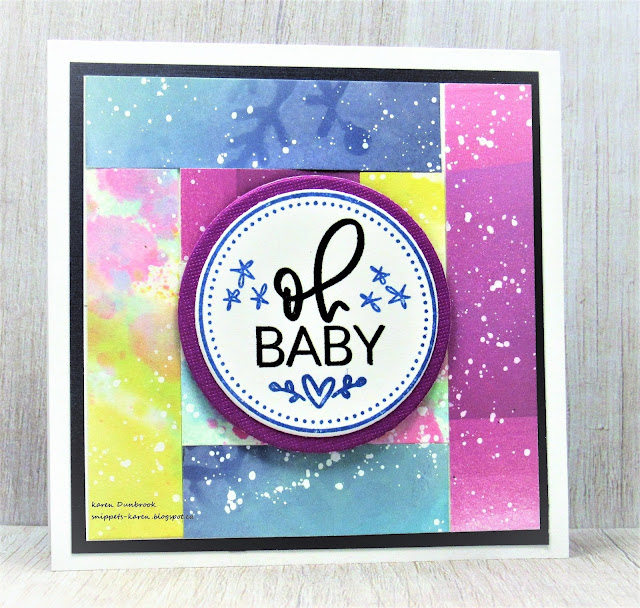
Card #3
This pattern was a bit different then the first two.  The strips are laid straight instead of on the diagonal.
I splattered using my white Posca pen on this one too.
I made this one into a baby card by stamping the sentiment and then used a circle die to cut it out and pop dotted it over the background.  

Well I hope you enjoy these simply done 'quilt' style cards all done using scraps.

Thanks so much for coming by and taking a look.

Adding my cards to these challenges:
Simon Says Wed.- ANYTHING GOES
Crafter's Cafe- MYO BACKGROUND


Supplies
Stamps- Hexagon Greetings (SSS); Everyday Circle Tags (Avery Elle)
Inks- Versafine Clair, DOX
Paper- heavy white- Scribes Nook, Waterloo, Ont.
Accessories and Tools- Misti (My Sweet Petunia); white Posca pen; Infinity Circle dies (Hero Arts);
Infinity Hexagon dies (HA); foam tape

Thursday, 17 February 2022

Thoughts of You- Use Your Scraps


Good Morning
I seldom play along with sketch challenges, but yesterday I found one on Splitcoast Stampers that worked out for me to try.  You can see it below.
It is also a great chance to add another card to the series I'm doing called 
USE YOUR SCRAPS.

So here's what I did to create my card.
  • I looked through my stash of scraps and found a small piece of this orange cardstock that I had inked up on my Gel Plate with acrylic paint.  These smaller scraps can come in handy when die cutting a shape.  
  • So I die cut the Daisy from some white cardstock and set it aside, then cut it again using the leftover pieces of the orange and set them aside.  
  • The blue background was done on my Gel Plate using Distress Oxide inks (Salty Ocean, Peacock Feathers)  I simply pressed the pads onto the plate and blended together with my brayer.
  • After the print dried for a few minutes, I splattered with my white Posca pen.
  • When it was dry, I glued the die cut flower outline onto the blue background.
  • I glued the orange flower petals back into place on the daisies.  They really popped inside the white outline.
  • I stamped the sentiment in my Misti, clear heat embossed it and then pop dot mounted it over the bottom of the flowers.
  • I glued it all onto a white card base.


Here is what the sketch looked like:

Thanks so very much for taking the time to visit.

Adding my card to these challenges:
CASology- AFFECTION
Sisterhood of Crafters- FEMININE (FLOWERS)
Corrosive Challenge- ANYTHING GOES


Supplies
Stamps- Word Fragments (Creative Expressions)
Inks- Distress Oxides, Versafine Clair
Paper- white (Scribes Nook- Waterloo, Ont.)
Accessories and Tools- Daisy Circle die (Paper Rose); Misti; foam tape; white Posca pen'
Gel Plate; Speedball brayer; Spellbinder Platinum

Sunday, 13 February 2022

Round and Round- Use Your Scraps


Hello and Welcome
In one of my previous posts, I mentioned that I will be doing a series of cards I'm calling
Use Your Scraps 

I know you most likely have scraps leftover just like me.  Mine have been sitting in a container for so long and now I'm happy that I will be using them to create.

So here's what I did to create my card.
  • Like I said above, this card was made with lots of scraps I have saved from cutting down pieces done on my Gel Plate, pieces I have inked or even some sheets I rolled off my brayer when printing....too good to toss in the garbage.
Hey look....I even remembered to take a picture of some of the prints I had made before cutting them down.  They were done on a Gel Plate with acrylic paint.  I splashed water onto them to see how the paint would react, pretty ugly eh?
But I saved them anyways.


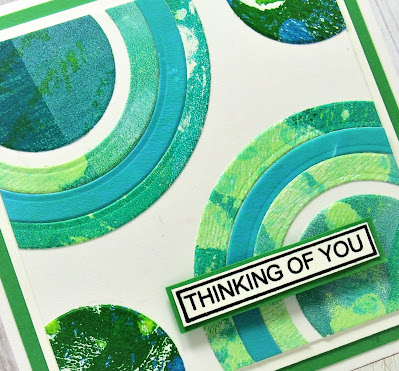
  • I gathered up bits and pieces and using my Hero Arts Infinity circle dies, I cut numerous circles using the leftover papers.  (I just love this die set...It's a winner for me!)
  • I cut a white panel to 3 3/4 x 3 3/4 inches and just started randomly gluing the circles onto my cardstock.  I thought it made for a fun look.
  • While the glue dried, I stamped the sentiment with some black Versafine ink and clear heat embossed it.  I cut it out and glued it onto a piece of green cs.
  • I glued it all together onto a 4 1/4 inch square card base.

So simple to do.
Thanks so much for coming by and taking a look and I hope you get to 
Use Your Scraps.

Adding my card to these challenges:
Snippets Playground- USE LOTS OF SNIPS


Supplies
Stamps- Word Fragments (Creative Expressions) 
Inks- Versamark Clair, Distress Oxides, acrylic paint
Paper- heavy white (Scribes Nook- Waterloo, Ont.)
Accessories and Tools- Scraps, Infinity Circle Dies (HA); foam tape; 
clear eb powder; heat tool

Thursday, 10 February 2022

Paper Scraps- Use Your Scraps


Good Morning
I've decided to do a series of cardmaking over the next few weeks, showing how to use those paper scraps you know we all have hanging around in our craft space. 
I keep all mine in a container as I often have strips leftover when cutting down a Gel Plate print to make it card size.  I'm on a mission to use those scraps and hopefully, create some nice looking cards using them.
To see all the cards I will include in this series go to the tutorials bar above and find
USE YOUR SCRAPS

So here's what I did to create my card.
  • I began by cutting 4 squares that were 2 1/4 x 2 1/4" from white cardstock to use as the base for gluing all the strips onto.
  • I got out my container with all the paper strips that I save.  Like I mentioned above, they are stenciled, stamped, gel plate printed or just just plain inked pieces that I got when cutting down larger panels to make my card fronts.
  • I cut the strips down; some are 1/2" and some are 1/4" wide.  I randomly glued them onto the 4 white cardstock squares that I had cut from above.
  • I splattered the panels with my white Posca pen.
  • While they dried, I stamped the sentiment and die cut it out.  I cut a slightly larger circle from some bliue cardstock and glued them together.
  • I cut my card base- finished card size is 5"x 5".  
  • I glued the 4 squares together onto another piece of white cardstock and then glued that onto my card base.
  • I pop dot mounted the sentiment into the center of my card.

Thanks so much for coming by and taking a look.

Supplies
Stamps- Everyday Circle Tags (Avery Elle)
Inks- Versafine Clair; (many Distress Oxide inks; acrylic paint etc used on strips)
Paper- white (Scribes Nook- Waterloo, Ont.)
Accessories and Tools- Infinity Circle dies) HA; pop dots; white Posca pen