Showing posts with label Get Well. Show all posts

Saturday, 23 August 2025

Wishing You Well


Hello and Welcome
Today's card is a simple one to create.
I used the newly released stencil from A Colorful Life Designs called:

So, here's how I created my card.
  • I cut a piece of white cardstock and placed the Mid Century Breeze Squares stencil over that.  
  • I wanted to make each square a different colour, so I masked off the first one and inked with some Picked Raspberry Distress Oxide ink.
  • I moved the mask and inked again with some Peacock Feathers DOX ink.  I repeated that same process again, inking this time with some Wilted Violet DOX.  
  • I removed the stencil and I used the Hemstitch die to cut a frame around the edge.
  • I die cut the sentiment with some purple cardstock, then some white cardstock 4 more times as I wanted to make a stacked sentiment.
  • I glued my stenciled card base onto a piece of white cardstock, then purple, then finally onto a white A2 sized card base.
  • I glued the sentiment over the middle area of my card base and added 3 purple gems around it.

Here is the stencil I used:


I appreciated you coming to take a look.

Supplies
Stamps- none
Inks- DOX
Paper- Solar White
Accessories and Tools- stencil (A Colorful Life Designs); Purple gems; TE Blending Brushes;
Hemstitch Rectangle die (Spellbinders); Get Well Die (Frantic Stamper)

Thursday, 8 May 2025

Get Well Wishes

 
Welcome
So much goodness this month as A Colorful Life Designs releases new stencils for May.
So meet this fun new one called
I paired it up with an older release called

So, here's what I did to create my card.
  • I began by placing the Dot Circle stencil over a piece of white cardstock and inked that up with some Broken China Distress Oxide ink.
  • I took that stencil off and placed the Praise Burst stencil over that and inked again with some Villainous Potion DOX ink. By layering the stencils, it gave such a fun looking bkg.
  • Next, I looked through my stash of cast offs and found a piece to use to die cut the frame and leaves.  
  • I stamped the sentiment with some more of the Villainous Potion DOX ink and die cut it out.
  • I decided to cut my stenciled card front into 4 pieces to add interest and glued them onto a piece of white cardstock, then onto a piece of purple and finally, onto a white A2 sized card base.
  • I glued the frame over the stenciled panels and used some foam tape to pop the sentiment up in the bottom corner.

Here are the stencils I used:


My Discount Code for Your Entire Order from A Colorful Life Designs:

Many thanks for coming to visit today.

Adding my card to these challenges:
Simon Says Monday-STENCIL FUN
The Creative Crafters- ANYTHING GOES

Supplies
Stamps- Big and Bold Stamp and die (SSS)
Inks- DOX
Paper- Solar White (Prisma)
Accessories and Tools- stencils (A Colorful Life Designs); TE Blending Brushes;
foam tape; Leaf Frame (Amazon)

Tuesday, 20 August 2024

Twisty Grid

Good Morning
Today's card features a new stencil from A Colorful Life Designs called

So, here's what I did to create my card.
  • I placed the Twisty Grid stencil over a piece of white cardstock on an angle, then inked it up with some Shaded Lilac Distress Oxide ink and the middle area with some Uncharted Mariner DOX ink.
  • I lifted the stencil off and then replaced it straight this time and inked with some Villainous Potion DOX ink.  I made such a fun looking pattern with just using that one stencil.
  • While my card front dried, I stamped the sentiment in some more of the Uncharted Mariner DOX ink and then die cut it out.
  • I glued my card front panel onto a piece of white cardstock and then onto a piece of pale purple.  I glued that onto an A2 sized card base.  
  • I used some foam tape to pop the sentiment over the middle grid area, then finally, added 3 silver gems.

Here is the stencil I used:

Discount Code for A Colorful Life Designs
(Affiliate with no extra cost to you) 

Thanks so much for coming by and taking a look.

Adding my card to these challenges:
We Love StampingFocal sentiment or quote or Anything Goes
The Creative Crafters- ANYTHING GOES
Crafts Galore Encore- ANYTHING GOES

Supplies
Stamp-  Big and Bold Stamp and die (SSS)
Inks- DOX
Paper-  heavy white (Scribes Nook- Waterloo, Ont.)
Accessories and Tools- stencil (A Colorful Life Designs); silver gems;
TE Blending Brushes; foam tape

Monday, 12 August 2024

Get Well Wishes

Good Morning

I hope that today's card will cheer one of my friends up.
I used 2 of the newly released stencils together to create this fun background.
Meet the new  
from A Colorful Life Designs.

So, here's what I did to create my card.
  • I put a piece of white cardstock onto my Make Art Station and then placed the Jigsaw stencil with the Calibrated Lines stencil over that.  
  • Keeping the 2 stencils together, I inked over the layered stencils with 3 different shades of blue Distress Oxide colours: Peacock Feathers, Salty Ocean and Uncharted Mariner.  It created the most fun background.
  • I removed the stencils and used my perforating tool to add the perforated lines between the sections.  It added some nice texture and interest to the background.
  • I found a scrap piece of inked paper in my stash to use to die cut the sentiment.  I also cut the sentiment from white cardstock 4x's and then glued them all together so the sentiment would be raised against the background.
  • I glued the stenciled panel onto a piece of blue cardstock, then onto a white A2 sized card base and glued the sentiment over the middle of that.
  • I found this die cut flower in my stash and glued it just under the sentiment in the corner and added a blue gem to the center.


Here are the stencils I used:


Discount Code for A Colorful Life Designs
(Affiliate with no extra cost to you) 

Thanks a lot for taking a look.

Adding my card to these challenges:
Word Power- SENTIMENT AS FOCUS
Creative Inspiration- ANYTHING GOES
TicTacToe- (FLOWERS/SCORING LINES/DIE CUTS)

Supplies
Stamps- none
Inks- DOX
Paper- heavy white (Scribes Nook- Waterloo, Ont.)
Accessories and Tools- stencils (A Colorful Life Designs); TE Blending Brushes;
Make Art Station (Ranger); perforation tool; Get Well die (Frantic Stamper); 
flower die ?? (gifted to me)

Sunday, 18 February 2024

Feel Better Soon!


Welcome
Meet the new for February 
from a Colorful Life Designs.

Here's what I did to create my card.
  • As usual, I placed a piece of white cardstock onto my Make Art Station, added the Spinning Sun stencil and inked it up with some Cracked Pistachio Distress Oxide ink right into the center.
  • Next, I added some Broken China and then some Uncharted Mariner DOX right along the outer edges.
  • Use a circle die, I cut a circle right from the middle of the stenciled panel and set aside.
  • I splattered my card front with my white Posca pen and while that piece dried, I stamped the Get Well sentiment onto the circle and glued that onto a larger white cardstock circle.
  • I glued the panel onto a piece of blue cardstock, then glued that onto an A2 sized card base.
  • I used some foam tape to pop the circle sentiment back into place.

Here is the stencil I used:

Discount Code for A Colorful Life Designs
(Affiliate with no extra cost to you) 

Thanks so much for coming by and taking a look.

Supplies
Stamps- Big and Bold Sentiment and die (SSS)
Inks- Distress Oxides
Paper- heavy white (Scribes Nook- Waterloo, Ont.)
Accessories and Tools- stencil (A Colorful Life Designs); TE Blending Brushes;
Make Art Station (Ranger); Infinity Circle Dies (Hero Arts); 
white Posca pen; Misti (My Sweet Petunia)

Saturday, 4 February 2023

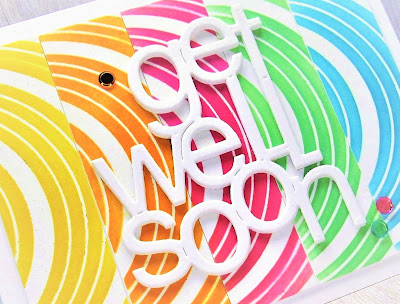
Get Well Rainbow


Good Morning
I'm sending you a rainbow of colours today with the card I created using one of the new releases for February from A Colorful Life Designs called Sound Waves.

So, here's what I did to create my card.
  • I got out some leftover pieces of cardstock and placed one of them onto my Waffle Flower Stencil Mat.  I positioned the Sound Waves stencil over that and I inked the first one up with Mustard Seed Distress Oxide ink. I removed that and cleaned off the stencil.  
  • I took the remaining scraps and repeated the above process using Carved Pumpkin next, Picked Raspberry, Cracked Pistachio and finally Peacock Feathers DOX ink.
  • I cut the pieces into size and glued them one by one onto a piece of white cardstock, creating the look of a rainbow.
  • While that dried, I die cut the sentiment 3 times and glued them all together.
  • I glued the inked panel onto an A2 sized card base, then glued the sentiment over the center area.
  • Finally, I added 3 little matching gems.

Here is the stencil I used:
Sound Waves

Discount Code for A Colorful Life Designs
(Affiliate with no extra cost to you) 

Thanks so much for coming by and taking a look.

Adding my card to these challenges:
Crafters Cafe- COLORS OF THE RAINBOW AND MORE
Crafts Galore Encore- ANYTHING GOES
Love to Craft- ANYTHING GOES

Supplies
Stamps- none
Inks- DOX
Paper- heavy white (Scribes Nook- Waterloo, Ont.)
Accessories and Tools- Stencil (A Colorful Life Designs); Stencil Mat (Waffle Flower);
gems (ACLD); TE Blending Brushes; die (Frantic Stamper)
Saturday, 12 August 2017

Get Well WIshes

Good Morning.

I created a get well card for you today by using the  
Stencil Monoprinting technique for the background.

So for those of you that are not familiar with this technique, you ink the stencil with a water based ink, spray it with water and press it onto your paper.  You will get a more loose, open look from the stencil but I really like the results you can achieve.  It is also another way to get a different look using the stencils you already have on hand.
Next, I placed the flowers stamps from Tim Holtz and Magenta into my Misti, inked with Tuxedo black and stamped.  I filled in some of the areas on the side where the ink didn't quite make it using the Mixed Media stamps from Stamplorations.
The sentiment is from Studio G.


 Have a great weekend and thanks so much for the visit.


Adding my card to these challenges:
Cards and More- DOTS, DOTS, DOTS
Lemon Shortbread- ANYTHING GOES
A Bit More Time to Craft- ANYTHING GOES


Supplies
Stamps- Wildflowers (TH); Mixed Media (STAMPlorations); Flower Silhouette (Magenta)
Get Well- (Studio G)
Ink- Tuxedo Black Memento; Distress- Faded Jeans, Salty Ocean (TH)
Paper- heavy white (local store)
Accessories and Tools- Misti, stencil- burlap (TH); Mister (TH)

Monday, 15 August 2016

Embossed Get Well


 Hello.  
Today's card was made for a friend who is recovering from surgery.  
I am off this week so have got a bit of extra time to play and I am trying to get a few things done before I have some dental surgery on Wednesday.

I love this flower from STAMPlorations and wanted to use it to make a card.  I just love all the details it has and I really wanted to showcase that so had to think about how I could stamp the flowers and keep them white on my card front.  There were 2 ways I could have gone with trying to achieve that look; I could have masked after stamping or embossed the whole flower.  
So, I stamped the flower using black Memento ink then embossed the flowers with clear ink.  The flowers looked a bit dull to me, so my decision was made to emboss them with clear.
I took out my Versamark pen and coloured in the flowers, poured on the clear embossing powder and heat set.  The flowers really popped and had such a lovely sheen which they wouldn't have had if I had just masked them.  It also created a resist for inking up my background.  
I stamped the sentiment from Studio G then embossed it with clear as well.
Next, I inked the whole background with Peacock Feathers and Salty Ocean Distress inks, concentrating more color around the flowers and less around the sentiment to really make them be the focal point of this card.  
I sprayed on some water to lift the color and add depth and interest around the flowers...like little drops of rain.
The last step was to wipe away any ink that remained on the top of the embossed flowers to reveal these bright, white beauties.


 Adding my card to these challenges:

(I opted for no gold)

 CAS Mix Up- STAMPING, SPRAYS (water) and YOUR CHOICE (embossing)

Paper Creator- KEEP IT SIMPLE 

My Time to Craft- EMBOSSING

Brown Sugar- ANYTHING GOES


Thanks so much for coming to take a look.

Supplies:  stamps- STAMPlorations, Studio G/ clear eb powder/ Versamark pen/ heat tool/ ink-Distress, Memento, MISTI


Thursday, 1 August 2013

Caught a Bug??


This week is flying by....the whole summer for that matter....where did July go??  I am adding my card to the challenge today at Splitcoast - ways to use it.  This little 'bug' is a part of a set from The Alley Way Stamps.  
I began by stamping the bottles across the bottom of my card then I masked around one of them so I could stamp that little guy inside of the bottle.  I coloured him and the lids using Copics then I added Glossy Accents to his nose for shine.
We are heading into a long weekend here in Ontario, Canada...looking forward to it!
Thanks so much for coming by and taking a look.

Supplies:  stamps; The Alley Way/ Copics/ Glossy Accents/ twine/ Memento bl

Sunday, 2 June 2013

You Warm My Heart


It's Sunday morning and here is a quick card I made for the Featured Stamper challenge at Splitcoast today.  Simple and straight-forward.  The hot water bottle is coloured with Copics and then I applied Glossy Accents to the center heart to make it pop.  
Enjoy your day and thanks so much for coming by and taking a look.

Supplies:  stamps; The Alley Way, Whipper Snapper/ Glossy Accents/ twine/ pop dots/ Copics

Friday, 10 May 2013

Caught a Bug??


Hi there and Happy Friday!!  Today's card is pretty simple and straightforward.  I played along with a challenge at Splitcoast which was to try something new....something you have never done before.  I thought I would try and emboss only parts of my background, leaving areas open for my image and sentiment.  I did that by placing my paper in the embossing folder, rolled it into my Cuttlebug a bit then moved it and rolled it again etc. etc.  The jar is coloured with Copic markers and then I applies Glossy Accents to the areas that would be glass.  It is then cut out and pop dotted for interest.
Thanks so much for coming by and taking a look.  

Supplies:  stamps; The Alley Way/ eb folder/ Cuttlebug/ twine/ pop dots/ Copics