Showing posts with label mini slimline. Show all posts

Wednesday, 10 December 2025

Sunny Flowers

Welcome
I had fun playing with an older released stencil from A Colorful Life Designs called:

So, here's what I did to create my card.
I decided to make a modified mini-slimline card so here are the measurements I used:
Base:  cut @7" x 6 1/4"
Score @ 3 1/2"
  • I placed the Sunny Flowers stencil over a piece of white cardstock and inked it up with some Wilted Violet Distress Oxide ink into the flower centers and then I added some Picked Raspberry to the rest of the flower.
  • Next, I used an eraser on the end of a pencil to add some dots using the same colour of inks just to fill in some of the open areas.
  • To brighten up the whole design, I used my white Posca pen and added dots to the eraser circles and to the flowers.
  • While that dried, I die cut the sentiment from a scrap piece of embossed white cardstock and rubbed over it with my Picked Raspberry DOX ink pad.
  • I die cut the sentiment 4 more times with white cardstock and glued them all together to create a stacked sentiment.
  • I glued my card front panel onto a piece of white, then pink cardstock and then onto the white card base.
  • I glued the sentiment into the corner to finish my card off.

Here is the stencil I used;


Thanks a lot for taking a look.

Adding my card to these challenges:
Little Red Wagon- J IS FOR JUST ONE WORD
Simon Says Wed.- USE DIES
Beautiful Blossoms- ANYTHING GOES/OPTION MOOD BOARD

Supplies
Stamps- none
Inks- DOX
Paper- Solar White
Accessories and Tools- stencil (A Colorful Life Designs); TE Blending Brushes; 
white Posca pen; Thanks die (TE)

Saturday, 19 February 2022

Fly Away


Good Morning and Welcome to the weekend.
Here is today's card.  
Super simple but I think very fun.
This leftover piece was just big enough to make a mini slimline card which is a bit smaller then the regular size.  
A standard Slimline card is size is 8 1/2 x 3 1/2 whereas a Mini Slimline is 6" x 3".  
(to see an envelope I made the right size for this card, go HERE)

So here's what I did to create my card.
  • I found this inked background in my stash.  It was the bottom cut off from a larger piece.  Now I'm totally guessing about what I did as it has been sitting in my stash for a long time.  I would have to say I did a 'smooshing' technique to add the colour.  Most likely my go-to colours of Distress Oxide inks would have been Peacock Feathers, Salty Ocean and Cracked Pistachio.  When I say smooshing, I mean that I rubbed the inks directly onto my Glass Mat, sprayed with lots of water and smacked my paper into the wet ink.  I like to dry in between and repeat that process to get lots of splatters. I think I may have given it a spray with the blue as well.
  • I placed the inked piece into my Misti and stamped the sentiment with some black ink.  I clear heat embossed it to help make it pop.
  • I set that aside and stamped the vintage airplane onto a piece of white cardstock, then I die cut it out.  I left it white so it would show up better over the colourful background.
  • I glued the inked panel onto a piece of blue cardstock, then onto my card base.
  • I pop dotted the airplane at the top of the card front.


Thanks so much for coming by and taking a look.

Adding my card to these challenges:
Simon Says Wed.- SLIMLINE
Little Red Wagon- MAKE IT MASCULINE
CASology- AFFECTION

Supplies
Stamps- Smile Often (Impression Obsession); Sky is the Limit (SU)
Inks- Versafine Clair, Distress Oxides
Paper- heavy white (Scribes Nook- Waterloo, Ont.)
Accessories and Tools- Misti; Plane die (SU); Glass Mat (TH); Lawn Fawn eb powder; 
heat tool; Misti (My Sweet Petunia)

Tuesday, 4 January 2022

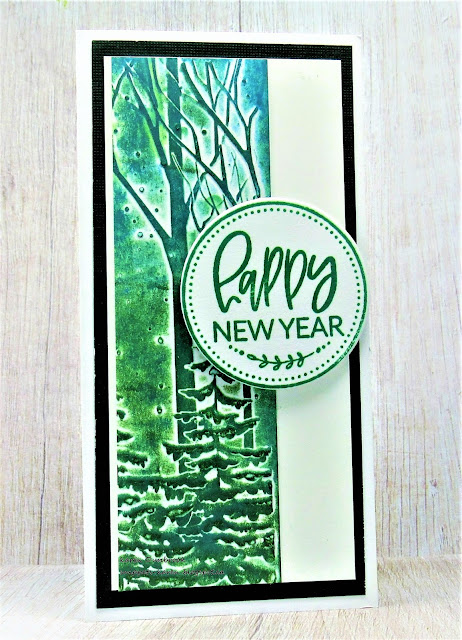
A New Year


Hello and Welcome
I hope your first few days of the New Year have been happy ones.
I had a few days off so was glad to have some time to play with some new Christmas goodies.
I was inspired by a video I watched and decided to try and make my first 'mini' slimline card.
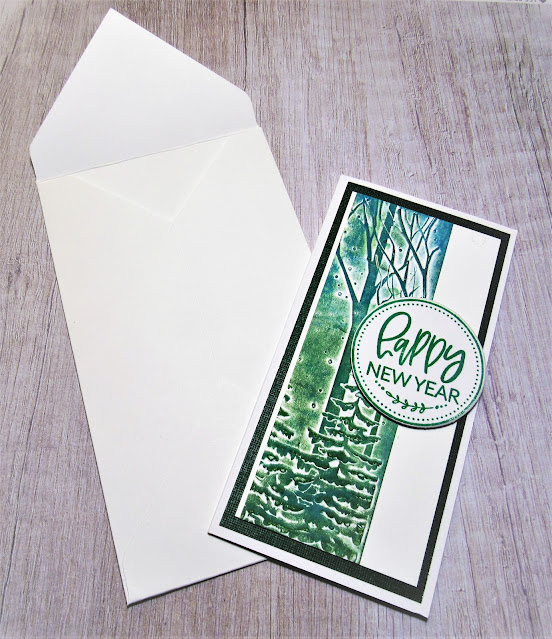
Super easy to make but may be difficult to find the right size envelope so I will add how I made one at the end.
A standard Slimline card is size is 8 1/2 x 3 1/2 whereas a Mini Slimline is 6" x 3".

So here's what I did to create my card.
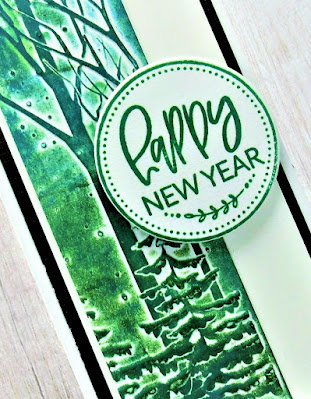
  • I began by embossing a piece of heavy white cardstock using my new Snowy Forest eb folder.  I ran it through my machine to get a good impression.
  • I wanted to add colour so I got out my brayer and rolled some Lucky Clover Distress Oxide ink along the bottom where the trees are.  I cleaned off my brayer and then added some Rustic Wilderness DOX ink over the middle area, overlapping the colours a bit.
  • Finally at the top, I brayered on some Salty Ocean DOX ink to give the sky a hint of blue.
  • While the ink dried, I cut my card base.  For my mini slimline the white cardstock was cut 6 x 6" and scored at 3"and folded in half.
  • I then took the embossed panel and cut it in half so I could make 2 slimline cards (another one coming soon) using the one embossed/inked piece I had made.
  • I glued it to one side of a piece of white cardstock, then onto a dark green that looks black here and finally, onto the white card base.
  • I stamped the sentiment and circle from a new Avery Elle set I got for Christmas using some more Rustic Wilderness ink in my Misti, then die cut out the circle and pop dotted it off to the side.


ENVELOPE:
  • The envelope to mail this card is very simple.  I used my Envelope Punch Board to create it.
  • I cut my lightweight white cardstock to 8 1/4 x 8 1/4".  (I used the lightweight cs as it is easier to fold and not as stiff as the heavy.)
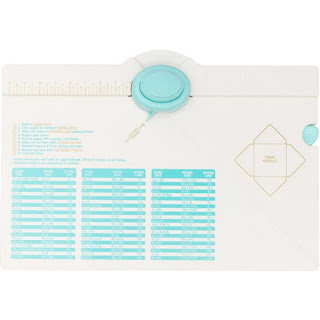
  • I placed it into my Envelope Punch Board and punched the first mark at 3 1/8" and scored along the marked line.  I rotated my cardstock and followed the instructions, continuing around until my envelope was made.  It is so simple to do using this Punch Board.  You can make any size envelope. All the measurements are included on the front of the board.


Here is a picture of the Envelope Punch Board:
Thanks so much for coming by and taking a look.

Adding my card to these challenges:
Simon Says Wed.- TIME TO PARTY
CAS on Friday- HAPPY NEW YEAR
Shopping Our Stash- BEGINS WITH 'S'
(slimline)

Supplies
Stamps- Merry Circle Tags (Avery Elle)
Inks- Distress Oxides (see above)
Paper- cardstock (Scribes Nook- Waterloo, Ont.)
Accessories and Tools- Snowy Forest eb folder (Memory Box); Misti (My Sweet Petunia); 
Speedball Brayer; Envelope Punch Board (We R Memory Keepers); 
Infinity Circle dies (Hero Arts); foam tape