Showing posts with label sky. Show all posts

Tuesday, 23 May 2023

Oh So Happy!


Welcome
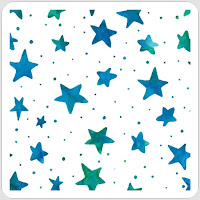
Meet today's card featuring the new for May Night Sky stencil from A Colorful Life Designs.
Also, we have another great stamp set as well called Happy Thoughts.

So, here's what I did to create my card.
  • I began with a piece of white cardstock and got out my salad spinner.  To see how to use the salad spinner go HERE.
  • I placed the white cardstock into the salad spinner, gave a big spray of Peacock Feathers Distress Oxide ink right into the center, placed the lid on and spun away.
  • I removed the cardstock from the spinner and let dry, then laid the Night Sky stencil over the inked background and inked it up with some Peacock Feathers DOX ink.
  • I splattered with my white Posca pen and let it dry.
  • I stamped the sentiment from the Happy Thoughts set, then die cut it into a circle.  I rubbed some Peacock Feathers DOX ink just around the edges.
  • I die cut another circle, slightly larger from white cardstock and glued the 2 circles together.
  • I glued the main panel onto a piece of white cardstock and then onto an A2 sized card base.
  • I popped the circle into the center using foam tape.

Here is the stencil and stamp set I used:


Discount Code for A Colorful Life Designs
(Affiliate with no extra cost to you) 

Thanks so much for coming by and taking a look.

Adding my card to these challenges:
Use Your Stuff- USE A TECHNIQUE
Make My Monday- MASCULINE

Supplies
Stamp- Happy Thoughts (ACLD)
Inks- DOX spray and ink; Versafine Clair
Paper- Scribes Nook- Waterloo, Ont.
Accessories and Tools- stencil (ACLD); Misti; Salad spinner (Dollar Store);
TE Blending Brushes; white Posca pen; foam tape; Infinity Circle dies (Hero Arts)

Monday, 15 May 2023

Star Points


Welcome
Meet today's card using one of the new May released stencils called Star Points from A Colorful Life Designs.
I created an overall pattern by doing some stencil shifting.

So, here's what I did to create my card.
  • I placed the Star Points stencil over a piece of white cardstock on my Make Art Station and then inked it up with some Picked Raspberry Distress Oxide ink.
  • I cleaned off the stencil and moved it over to an open area and inked again with some Mustard Seed DOX ink.  
  • I repeated the above process again and inked lastly with some Ripe Persimmon DOX ink.
  • To help fill the panel and make the pattern look a bit more cohesive, I used an eraser on the end of a pencil, to fill in the open areas using the same colours I used on the stars.  
  • I took the panel and cut out a star from the center.
  • I cut another star from some white cardstock, placed it into my Misti and stamped the sentiment.
  • I glued the stenciled panel onto a piece of orange cardstock, then onto an A2 sized card base.
  • I popped the star back into place, matching up the patterns with some foam tape.
  • Finally, I glued the smaller white star on top of the larger one.

Here is the stencil I used:

Discount Code for A Colorful Life Designs
(Affiliate with no extra cost to you) 

Thanks so much for taking a look.

Adding my card to these challenges:
We Love Stamping- ANYTHING STAMPED-OPTION< IN THE GARDEN
Stamping Sensations- ANYTHING STAMPED- OPTION STENCIL


Supplies
Stamp- Everyday Circle Tags (Avery Elle)
Inks- Versafine Clair; DOX
Paper- Scribes Nook- Waterloo, Ont.
Accessories and Tools- stencil (ACLD); Make Art Station (Ranger); 
TE Blending Brushes; pencil eraser

Tuesday, 31 May 2022

Life Changing


Welcome
Today's card was a fun one to create using the Corner Rays stencil and the Cloud Edger from A Colorful Life Designs.  I thought they worked well together.

So here's what I did to create my card.
  • I cut a piece of white cardstock and laid the Corner Rays stencil over that. Then, I inked it up with some Picked Raspberry Distress Oxide ink in the center, next some Carved Pumpkin and then some Mustard Seed, working my way out on each side of the stencil.
  • Next, I shifted the stencil slightly and inked again using the same colours as I mentioned above.
  • After I was happy with the inking, I got out my Cloud Edger stencil and inked up the top of my card with some Salty Ocean Distress Oxide ink.  * The Cloud Edger is used by inking along the edge, turning it and moving it down to give the look of clouds. This stencil/ mask combo are a really great investment and are so easy to create wonderful looking skies or backgrounds for scenes.*
  • I placed the inked piece into my Misti and stamped the sentiment with some Versafine Clair ink.
  • I glued the panel onto some black cardstock, then onto a heavy white card base.


Here are the stencils I used:


Discount Code for A Colorful Life Designs
(affiliate with not extra cost to you)

Thanks so much for coming by and taking a look.

Adding my card to these challenges:
Simon Says Wed.- ANYTHING GOES
Use Your Stuff- ANYTHING GOES
Addicted to Stamps and More- DIE CUT AND/ OR STENCILS
Simon Says Monday- IT'S UP IN THE AIR

Supplies
Stamp- Footprints (Inkylicious)
Inks- DOX, Versafine Clair
Paper- Scribes Nook- Waterloo, Ont.
Accessories and Tools- Cloud Edger, Corner Rays stencils (A Colorful Life Designs);
Misti (My Sweet Petunia); TE Blending Brushes; Make Art Stay-ation (Ranger)

Sunday, 20 March 2022

Soaring


Hello and Welcome Spring!!
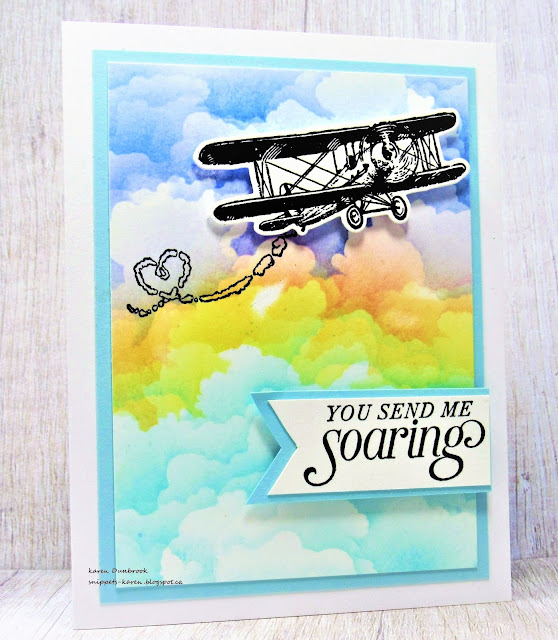
I wanted to create a masculine card for my hubby and this is what I came up with.
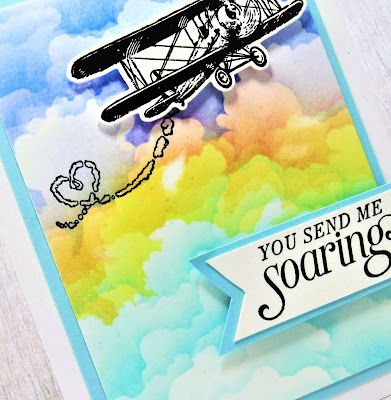
I just love this Cloud Edger Stencil from ACLD.

So here's what I did to create my card.
  • I began by cutting a white cardstock panel that was 3 3/4 x 5" and got out my Cloud Edger stencil and some Distress Oxide inks.
  • Beginning at the top, I positioned the stencil and rubbed on some Salty Ocean DOX ink, moved the stencil down a bit and added more of that ink.  
  • Next I moved the stencil down a bit and added just a hint of Blueprint Sketch ink.  
  • I continued working my way down the white cardstock using some Carved Pumpkin, Mustard Seed, a hint of Cracked Pistachio and then finally a good dose of Peacock Feathers DOX ink along the bottom.
  • While my cloud background dried, I stamped the airplane with some black Versafine Clair ink and die cut it out.
  • I stamped the sentiment from the same set, cut it out and glued it onto a piece of light blue cardstock.
  • I positioned the airplane and stamped the heart trail with some black ink.
  • I glued the cloud background onto another piece of blue cardstock, then onto a white cardstock base.
  • I pop dotted the plane in the sky and then pop dotted the sentiment in the bottom corner.


Here is the stencil I used:

Discount Code for A Colorful Life Designs
(affiliate with no extra cost to you)


Thanks so much for coming by and taking a look.

Adding my card to these challenges:
Bastel-traum- SPRING


Supplies
Stamps- Sky is the Limit (SU)
Ink- Versamark, DOX ink
Paper- heavy white (Scribes Nook- Waterloo, Ont.)
Accessories and Tools- Airplane die (SU): Cloud Edger stencil (ACLD); 
TE Blending Brushes

Saturday, 19 February 2022

Fly Away


Good Morning and Welcome to the weekend.
Here is today's card.  
Super simple but I think very fun.
This leftover piece was just big enough to make a mini slimline card which is a bit smaller then the regular size.  
A standard Slimline card is size is 8 1/2 x 3 1/2 whereas a Mini Slimline is 6" x 3".  
(to see an envelope I made the right size for this card, go HERE)

So here's what I did to create my card.
  • I found this inked background in my stash.  It was the bottom cut off from a larger piece.  Now I'm totally guessing about what I did as it has been sitting in my stash for a long time.  I would have to say I did a 'smooshing' technique to add the colour.  Most likely my go-to colours of Distress Oxide inks would have been Peacock Feathers, Salty Ocean and Cracked Pistachio.  When I say smooshing, I mean that I rubbed the inks directly onto my Glass Mat, sprayed with lots of water and smacked my paper into the wet ink.  I like to dry in between and repeat that process to get lots of splatters. I think I may have given it a spray with the blue as well.
  • I placed the inked piece into my Misti and stamped the sentiment with some black ink.  I clear heat embossed it to help make it pop.
  • I set that aside and stamped the vintage airplane onto a piece of white cardstock, then I die cut it out.  I left it white so it would show up better over the colourful background.
  • I glued the inked panel onto a piece of blue cardstock, then onto my card base.
  • I pop dotted the airplane at the top of the card front.


Thanks so much for coming by and taking a look.

Adding my card to these challenges:
Simon Says Wed.- SLIMLINE
Little Red Wagon- MAKE IT MASCULINE
CASology- AFFECTION

Supplies
Stamps- Smile Often (Impression Obsession); Sky is the Limit (SU)
Inks- Versafine Clair, Distress Oxides
Paper- heavy white (Scribes Nook- Waterloo, Ont.)
Accessories and Tools- Misti; Plane die (SU); Glass Mat (TH); Lawn Fawn eb powder; 
heat tool; Misti (My Sweet Petunia)

Saturday, 25 July 2020

To the Moon and Back


Welcome.
Meet today's card. 
My husband and I are celebrating our 37th Anniversary...where did the years go?
My DH is totally a star gazer; we have seen the NeoWise 3 times this week. NeoWise is a comet only visible for a short time now and won't been seen again for over 6 thousand years they predict.
I thought he would like a starry night card.
So here's what I did to create my card.


  • I began with a piece of heavy white cardstock cut 4 1/2 x 4 1/2 inches, my round acrylic block, Distress Oxide inks, Rays stencil and water mister.
  • I took my round acrylic block, rubbed on some Fossilized Amber DOX ink, sprayed with water and pressed onto my white card panel.  I continued that same process using Peacock Feathers, Seedless Preserves, Salty Ocean, Cracked Pistachio, Carved Pumpkin and Wilted Violet DOX until the panel was covered with colour.
  • I laid the Rays stencil over the inked bkg and rubbed over it with Faded Jeans Archival ink.
  • I stamped the sentiment with some Versafine Clair, then clear heat embossed to help make it pop.
  • I rubbed the edges with some Black Soot DOX inks to intensify the border of the panel.
  • I splattered the edges with water, then white and black paint using my Posca pens.
  • I mounted the panel onto some black cardstock, then onto a heavy white card base.
  • Lastly, I added some black gems.


Thanks so much for coming by and taking a look.

Discount Code for A Colorful Life Designs

Adding my card to these challenges:
Simon Says Wed.- REACH FOR THE STARS
Little Red Wagon- SPOTS OR STRIPES
Time Out- PEACEFUL
Craft Rocket- MEN/BOYS

Supplies
Stamps- To the Moon (Hampton Arts)
Inks- Versafine Clair Noir; Distress Oxides (colours listed above)
Paper- heavy white ( Scribes Nook)
Accessories and Tools- Rays Stencil (A Colorful Life Designs); clear eb powder; heat tool;
Posca Pens; inking tool, black gems, round acrylic block, water Mister (Th)