Showing posts with label stars. Show all posts

Tuesday, 23 May 2023

Oh So Happy!


Welcome
Meet today's card featuring the new for May Night Sky stencil from A Colorful Life Designs.
Also, we have another great stamp set as well called Happy Thoughts.

So, here's what I did to create my card.
  • I began with a piece of white cardstock and got out my salad spinner.  To see how to use the salad spinner go HERE.
  • I placed the white cardstock into the salad spinner, gave a big spray of Peacock Feathers Distress Oxide ink right into the center, placed the lid on and spun away.
  • I removed the cardstock from the spinner and let dry, then laid the Night Sky stencil over the inked background and inked it up with some Peacock Feathers DOX ink.
  • I splattered with my white Posca pen and let it dry.
  • I stamped the sentiment from the Happy Thoughts set, then die cut it into a circle.  I rubbed some Peacock Feathers DOX ink just around the edges.
  • I die cut another circle, slightly larger from white cardstock and glued the 2 circles together.
  • I glued the main panel onto a piece of white cardstock and then onto an A2 sized card base.
  • I popped the circle into the center using foam tape.

Here is the stencil and stamp set I used:


Discount Code for A Colorful Life Designs
(Affiliate with no extra cost to you) 

Thanks so much for coming by and taking a look.

Adding my card to these challenges:
Use Your Stuff- USE A TECHNIQUE
Make My Monday- MASCULINE

Supplies
Stamp- Happy Thoughts (ACLD)
Inks- DOX spray and ink; Versafine Clair
Paper- Scribes Nook- Waterloo, Ont.
Accessories and Tools- stencil (ACLD); Misti; Salad spinner (Dollar Store);
TE Blending Brushes; white Posca pen; foam tape; Infinity Circle dies (Hero Arts)

Monday, 15 May 2023

Star Points


Welcome
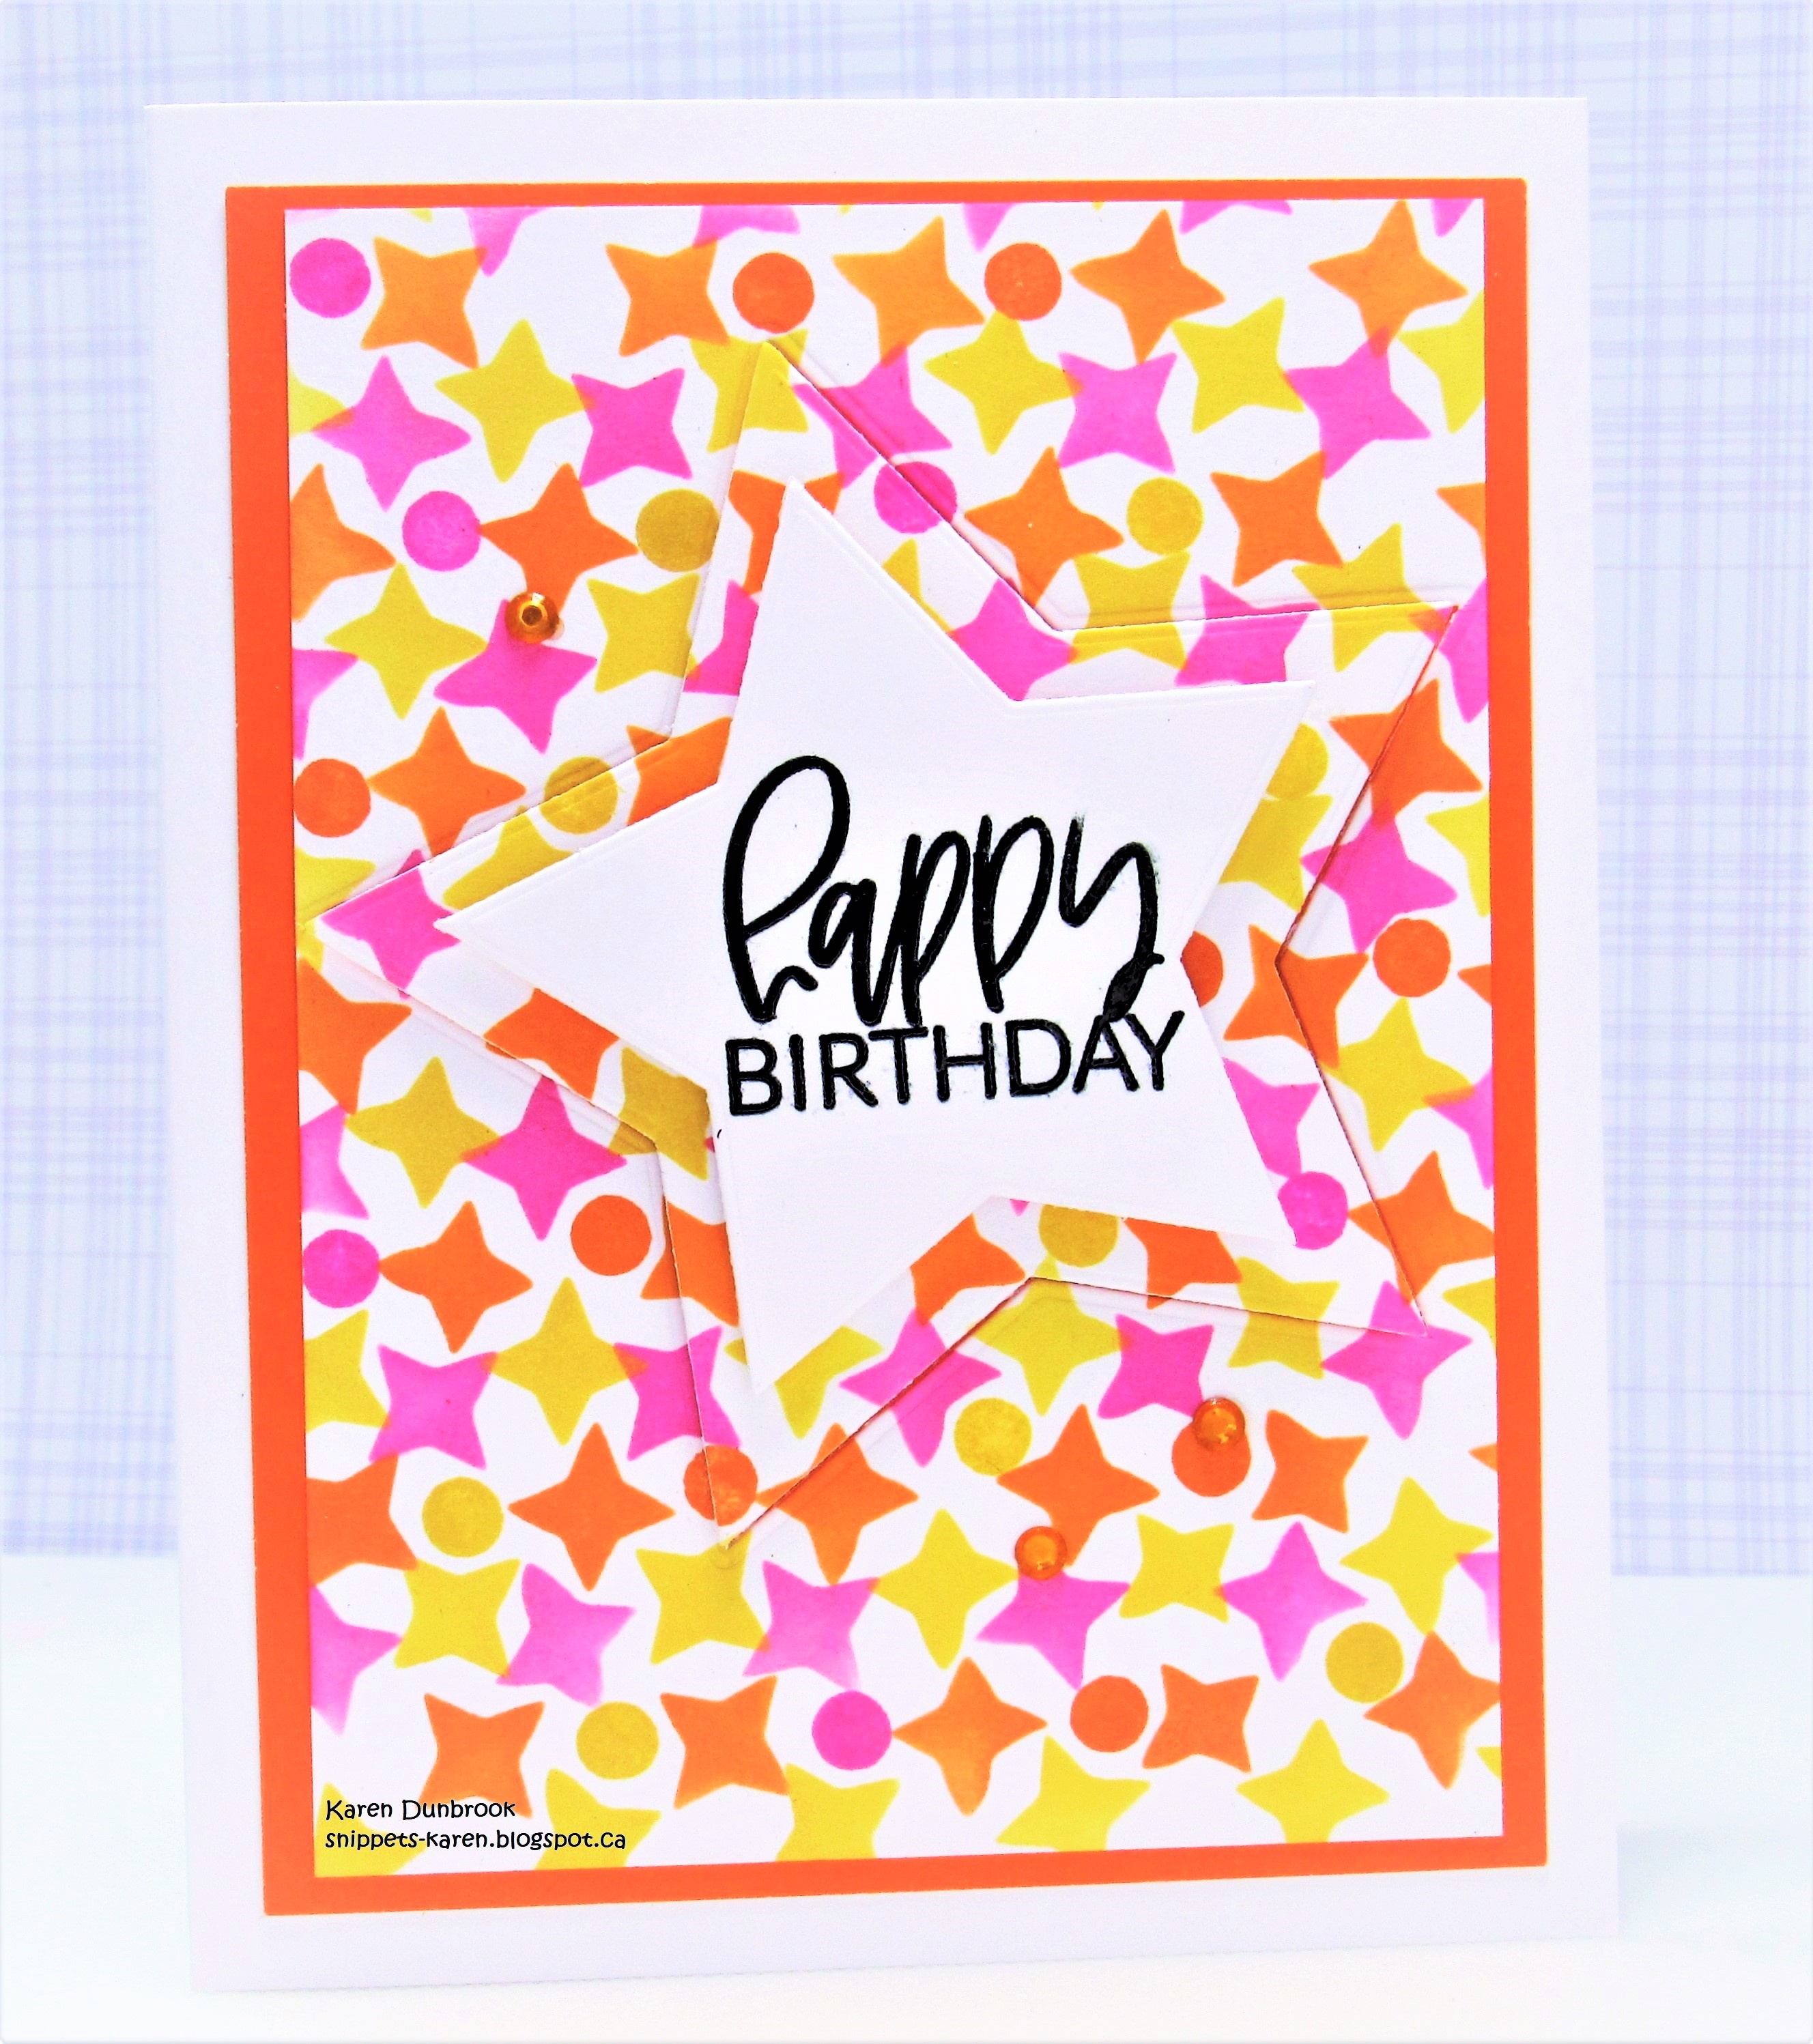
Meet today's card using one of the new May released stencils called Star Points from A Colorful Life Designs.
I created an overall pattern by doing some stencil shifting.

So, here's what I did to create my card.
  • I placed the Star Points stencil over a piece of white cardstock on my Make Art Station and then inked it up with some Picked Raspberry Distress Oxide ink.
  • I cleaned off the stencil and moved it over to an open area and inked again with some Mustard Seed DOX ink.  
  • I repeated the above process again and inked lastly with some Ripe Persimmon DOX ink.
  • To help fill the panel and make the pattern look a bit more cohesive, I used an eraser on the end of a pencil, to fill in the open areas using the same colours I used on the stars.  
  • I took the panel and cut out a star from the center.
  • I cut another star from some white cardstock, placed it into my Misti and stamped the sentiment.
  • I glued the stenciled panel onto a piece of orange cardstock, then onto an A2 sized card base.
  • I popped the star back into place, matching up the patterns with some foam tape.
  • Finally, I glued the smaller white star on top of the larger one.

Here is the stencil I used:

Discount Code for A Colorful Life Designs
(Affiliate with no extra cost to you) 

Thanks so much for taking a look.

Adding my card to these challenges:
We Love Stamping- ANYTHING STAMPED-OPTION< IN THE GARDEN
Stamping Sensations- ANYTHING STAMPED- OPTION STENCIL


Supplies
Stamp- Everyday Circle Tags (Avery Elle)
Inks- Versafine Clair; DOX
Paper- Scribes Nook- Waterloo, Ont.
Accessories and Tools- stencil (ACLD); Make Art Station (Ranger); 
TE Blending Brushes; pencil eraser

Tuesday, 15 November 2022

Twinkle, Twinkle


Good Morning
Here is a quick card I made using the Dream Stars stencil from A Colorful Life Designs.
I decided to go with a rainbow theme.

So, here's what I did to create my card.
  • I cut a piece of white cardstock, placed it onto my Make Art Station and positioned the Dream Stars stencil over that.
  • Next, I got out some Distress Oxide inks in the following colours:  Mustard Seed, Carved Pumpkin, Picked Raspberry, Peacock Feathers and Cracked Pistachio.  
  • Starting at the top of the stencil, I added some colour just to a portion, then continued to do that all the way down the stencil until all the colours were added.
  • I removed the stencil.  I wanted to add splatters in the matching colours around each section of the stars, so to do that, I just pressed each of the above-mentioned ink pads onto my non-stick craft mat, added a bit of water and used a paint brush to flick the colours on.
  • When it was all dry, I placed it into my Misti to stamp the sentiment. 
  • I glued the finished panel onto a piece of pink cardstock and then onto a white card base.

Here is the stencil I used:

Discount Code for A Colorful Life Designs
(Affiliate with no extra cost to you)

Thanks so much for coming by and taking a look.

Adding my card to these challenges:
CRAFT- ANYTHING GOES
Less is More- COLOR WHEEL

Supplies
Stamp- Smile, Sparkle and Shine (Sizzix)
Inks- Versafine Clair, DOX
Paper- Scribes Nook, Waterloo, Ont.
Accessories and Tools- stencil (ACLD); TE Blending Brushes; paint brush; 
Make Art Station (Ranger); Misti

Tuesday, 1 November 2022

Wish Upon a Star


Welcome
Today's card was a fun one to create.
It may look like strips of paper I cut, but actually it's all done using 2 stencils.
 I pulled out the Dream Stars and paired it up with the Layered Bands.

So, here's what I did to create my card.
  • I cut a piece of white cardstock and placed it onto my Make Art Station.
  • I laid the Layered Bands stencil over my paper.  This stencil comes with the masking pieces which was very helpful when inking up the different colours.
  • I used Distress Oxides to ink, masked and inked again.  The colours I used from the top to the bottom:  Wilted Violet, Cracked Pistachio, Prize Ribbon, Peacock Feathers, Picked Raspberry, Carved Pumpkin and Mustard Seed.
  • I cleaned the stencil off and repositioned it over my card panel.
  • I laid the Dream Stars stencil over that and inked with some Blueprint Sketch over the bands of colour.
  • I removed both stencils and die cut the Happy Birthday sentiment shadow from the center of the inked panel and the sentiment from some white cardstock and glued them together.
  • I splattered the panel with my Posca pen for interest.
  • I glued the finished panel onto an A2 card base and popped the sentiment back into place.


Here are the stencils I used:


Discount Code for A Colorful Life Designs
(Affiliate with no extra cost to you)

Thanks so much for coming by and taking a look.

Adding my card to these challenges:
Simon Says Wed.- ANYTHING GOES
Corrosive Challenge- ANYTHING GOES


Supplies
Stamps- none
Inks- Distress Oxides 
Paper- heavy white (Scribes Nook- Waterloo, Ont.)
Accessories and Tools- stencils (ACLD); Make Art Station (Ranger); TE Blending Brushes;
white Posca pen; sentiment (Amazon)