Showing posts with label bird. Show all posts

Sunday, 15 October 2023

Stick Wreath


Good Morning
Today's card is a simple one and I love the way it turned out.
It features the newly released Stick Wreath and the Christmas stamp set from A Colorful Life Designs.

So, here's what I did to create my card.
  • I cut a piece of white cardstock 4 x 4 inches as I wanted to make a square card.
  • I placed the cardstock onto my Make Art Station, placed the Stick Wreath over that and inked it up with some Iced Spruce Distress Oxide ink.
  • I removed the stencil, gave it a wipe and repositioned, shifting it slightly.  I inked it up with some Rustic Wilderness DOX.  
  • I repeated that process one more time, inking with Aged Mahogany DOX ink.
  • While that dried, I die cut the little bird and glued it all together.
  • I wanted the wreath to have some berries, so using the eraser end of a pencil, I inked it up with some Lumberjack Plaid DOX and stamped those in bunches of 3's.
  • I added some more Aged Mahogany DOX ink along the edges just to tone down the white. 
  • I added some white splatters with my Posca pen and placed the panel into my Misti to stamp the sentiment from the new Christmas Stamp set.
  • I glued the finished panel onto a dark red 4 1/4 square card base and glued the bird along the bottom edge.


Here is the stencil I used:


Discount Code for A Colorful Life Designs
(Affiliate with no extra cost to you) 

Thanks so very much for coming by and taking a look.

Adding my card to these challenges:
Simon Says Wed.- CHRISTMAS
Krafty Chicks- CHRISTMAS
ABC Christmas Alphabet= 'U' USE IT UP/'V' VERTICAL 
(used my scraps for the bird)

Supplies
Stamps- Christmas (A Colorful Life Designs)
Inks- DOX, Versafine Clair
Paper- heavy white (Scribes Nook- Waterloo, Ont.)
Accessories and Tools- stencil (A Colorful Life Designs); white Posca pen;
Make Art Station (Ranger); Misti (My Sweet Petunia); pencil eraser; 
Lovely Layer winter Birds (Honey Bee)

Friday, 18 February 2022

Soaking Up the Sun


Good Morning
I just can't wait for some better weather to arrive.  
Big snowstorm here where I live yesterday.  
I do live near a Conservation Area, so this stamp always reminds me of that.

So here's what I did to create my card.
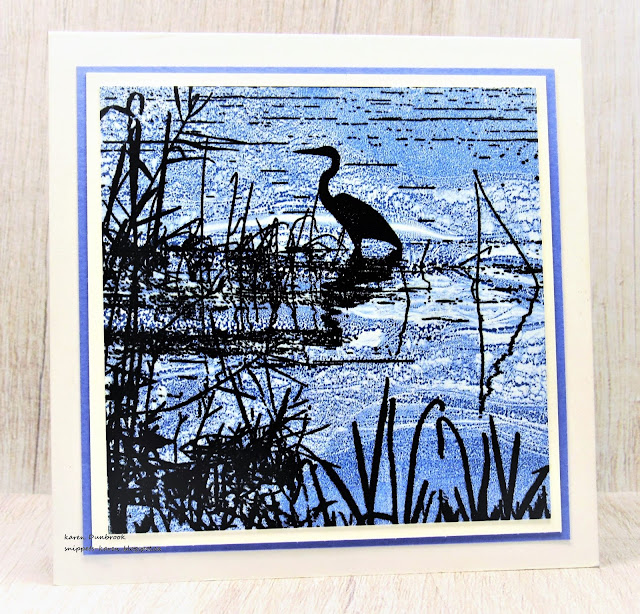
  • I began by creating the background.  I did that using my Gel Plate and a fun technique I first saw Lydia Fiedler do on one of her lives.  
  • So, I pressed Salty Ocean into the center of my plate, then some Blueprint Sketch along the sides and brayered the colours together.
  • Now here's the fun part.......I gently folded my Gel Plate in half, letting the sides touch mostly in the middle.  I opened it back up, laid it flat and then rubbed a piece of white cardstock over the plate to take my print.  It looked so cool...like water.  (To see another bkg I did this way, go HERE)
  • I got out this beautiful Egrets in Reeds and placed it into my Misti.  I inked it up with black ink and stamped over my Gel Plate print.  
  • I cut my card base at 4 1/4 inches square, then glued the panel to a piece of matching cardstock, then onto the card base.


Thanks so much for coming by and taking a look.

Adding my card to these challenges:
Little Red Wagon- MAKE IT MASCULINE
Crafty Animals- ANYTHING WITH AN ANIMAL GOES
Crafter's Cafe- MAKE YOUR OWN BKG


Supplies
Stamp- Egrets in Reeds (Magenta)
Inks- DOX, Versafine Clair
Paper- heavy white (Scribes Nook- Waterloo, Ont.)
Accessories and Tools- Gel Plate; Speedball Brayer; Misti

Sunday, 23 January 2022

Reflections


Good Morning
Meet today's card using the same great Heron stamp from Magenta that I used the other day.
I wanted to try a new technique for the background so I thought this stamp would work perfectly with it.

I don't know about you, but I am often inspired while watching TV shows.  On one of them, I saw a painting in the background that got me thinking.  Basically, the saturation of colour was in the center and then spread out from there.  I put on my thinking cap and tried to figure out how to recreate that look.

So here's what I did to create my card.
  • I began by cutting a piece of Yupo paper.  For anyone who is unfamiliar with Yupo, it is a plastic coated paper used with inks.  
  • I took out some Ranger Alcohol inks and Ranger Blending Solution. Colours:  I'm guessing...Sailboat blue, pool and lettuce by Ranger. I need to get better at writing down the colours. When I get time to create, I just getting into a creating mode and forget!
  • I squeezed a line of the Blending Solution down the center of my Yupo, dropped on some Alcohol inks and using an old gift card, dragged the colours upwards on the panel.
  • I repeated that process again with more Blending Solution and Alcohol inks but this time, pulled the inks downwards.  Very simple process.  I just kept doing that until I was happy with the coverage.
  • The inks dries almost instantly so it was easy to move onto the next step.
  • I placed the panel into my Misti and stamped the Heron along the center of the panel with some Archival Black ink.
  • I glued the panel onto a piece of navy cardstock, then onto a white card base.

Thanks so much for coming by and taking a look.

Adding my card to these challenges:
We Love Stamping- ANYTHING STAMPED OPTION WINGS
CASology- RENEW
(take a deep breathe, try something new and look ahead hopefully)


Supplies
Stamps- Reflective Blue Heron (Magenta)
Inks- Ranger AI; Archival Black
Paper- Yupo (Amazon); white cardstock (Scribes Nook- Waterloo, Ont.)
Accessories and Tools- old gift card; Ranger Blending Solution; Misti (My Sweet Petunia)

Friday, 21 January 2022

Finding Nature


Hello and Welcome
Meet today's card.
I was inspired to use this Reflective Blue Heron stamp from Magenta after seeing some wonderful cards done by my friend Christine Alexander.  You can see them here.
Christine used Alcohol inks on her Gel Plate, but I am going to use some Distress Oxides on mine.

So here's what I did to create my card.
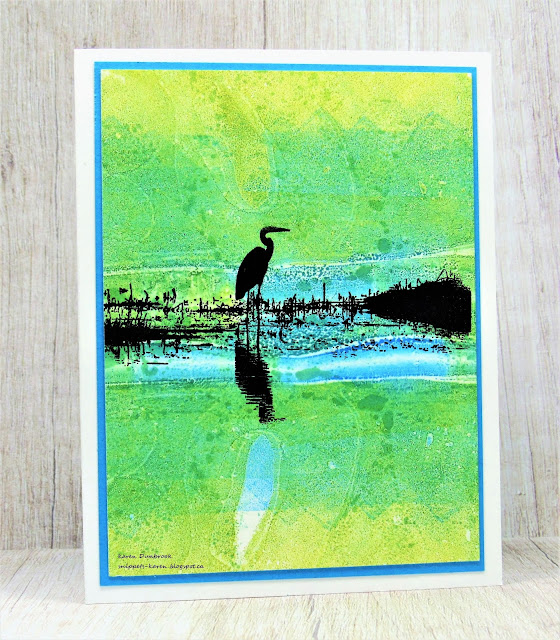
  • I got out my Gel plate and rubbed on some Cracked Pistachio, Peeled Paint, Peacock Feathers  and a bit of Salty Ocean Distress Oxide ink right in the middle of the plate. (I added the ink on the top and bottom like a mirror image)
  • I used my brayer to blend the colours, keeping them separate on each side.
  • Now as a disclaimer, this is not my original idea but I watched Lydia Fiedler do this on one of her lives...are you ready for it?  I carefully folded my Gel Plate in half, being sure that the center areas touched each other.  Crazy right!
  • I laid the plate flat and then rubbed my white cardstock over it to take the print.
  • Next, I placed the inked piece into my Misti and stamped the Heron with some Versafine Clair ink.
  • I glued the panel onto a piece of blue cardstock, then onto a white card base.
  • I debated about whether or not to add a sentiment but decided to leave it as is.

Thanks so much for coming by and taking a look.

Adding my card to these challenges:
As You Like It- FAV COLOURING MEDIUM
(My fav is my Distress Oxide inks.  I can use them on my Gel Plate, watercolour
with them..so many ways to use them)


Supplies
Stamp- Reflective Blue Heron (Magenta)
Inks- Distress Oxides; Versafine Clair
Paper- white (Scribes Nook, Waterloo, Ont.)
Accessories and Tools- Gel Plate, Brayer, Misti (My Sweet Petunia)

Friday, 31 July 2020

It's Your Day


Good Morning
Hope you are all doing well.  
I was recently at the lake for the day with one of my besties which inspired this card.

So here is what I did to create my card.
  • The background is a Gel Plate print so I began by assembling my supplies; Gel Plate, brayer, acrylic paint and a piece of heavy white cardstock.
  • I rolled on a few shades of blue and pale green acrylic paint onto the plate using my brayer.  It was paint from the Dollar Store so a very light bodied paint.
  • I tore a strip of paper from some scrap and laid it over the painted background and took the print.  By laying the scrap paper on, when I took the print, it left a masked off area perfect for stamping onto.
  • I set the piece aside to dry completely which didn't take long as the paint was a thin texture.
  • When dry, I placed the piece into my Misti and stamped the bird.  I love how it looked blended in with the painted background.
  • I left the panel in my Misti and stamped the sentiment. I clear heat embossed the image and sentiment.
  • I added it to a heavy white card base and glued on 3 small black gems right under the sentiment.


Thanks so much for coming by and taking a look.

Adding my card to these challenges:
Simon Says Wed.- ANYTHING GOES
Little Red Wagon- GIVE US YOUR BKG
Sisterhood of Crafters- OCEAN or BEACHY


Supplies
Stamps- Happy Birthday (Stamping Bellas); Crane (Magenta)
Inks- Versafine Clair, acrylic paint
Paper- heavy white (Scribes Nook)
Accessories and Tools- Misti (My Sweet Petunia); Gel Plate, Brayer (Speedball); 
black gems; scrap paper, clear eb powder, heat tool

Friday, 17 May 2019

Reflection

Good Morning.
Meet today's card.

I felt inspired to create a card using a partially inked piece I had in my stash.  By finishing the inking and adding the stamping, I was left with a great card.

So here's how my card was created.
I began with a piece of heavy white cardstock and using a small sponge, I dabbed some Versamark ink across the panel, then heat embossed it using some white eb powder that created a resist and gave it texture.
I rubbed on some Peacock Feathers DOX ink onto the panel then just left it at that and put it away as I didn't know what I was going to do with it.....until now with this great bird image.
I added more DOX inks; Tumbled Glass, Blueprint Sketch, Stormy Sky and Faded Jeans, then did a bit of watercolouring with my Memento markers.  I generously splattered the piece with water to lift the inks then placed it inside of my Misti to stamp the bird with black Memento ink and clear heat embossed.  

I mounted the dry piece another piece of white cardstock then over a piece of purple then onto a plain white card base that I scored along the middle for interest.


Thanks so much for coming by and taking a look.
Have a great weekend, a long one for us here in Canada!

Adding my card to these challenges:
The Male Room- ANYTHING GOES


Supplies
Stamp- Reflective Blue Heron (Magenta)
Inks- DOX (TH); Memento markers; Versamark
Paper- heavy white- Scribes Nook
Accessories and Tools- white and clear embossing powder; sponge; sponging tool (TH); heat tool; 
paintbrush; ScorPal


Saturday, 11 May 2019

Tranquil

Good Morning and Happy Saturday.
Meet today's card.  
One of the quickest cards I have ever made.  You gotta love when a stamped image can stand on it's own over a very simple, inky background.

So here's what I did.
I began by placing the large rectangle acrylic mask from A Colorful Life Designs over my white cardstock.  I use these masks almost every time with great results and love the 'framed' look with the white border it gives to my cards.
I rubbed some Tumbled Glass Distress Oxide ink onto my non-stick craft mat, sprayed with a bit of water then picked up the colour with an old credit card.  I applied some Peacock Feathers in the same way with the credit card.  There was some ink left on my mat so I picked it up with a piece of acetate and applied it to my card front.
You can read more about these techniques here and here.

When it was dry, I place the inked background into my Misti and stamped this great looking bird from Magenta and then clear heat embossed.
I removed the mask and mounted it onto a piece of coordinating cardstock then onto a plain white card base.


Thanks so much for coming by and taking a look.
Discount Code for A Colorful Life Designs


Adding my card to these challenges:
Addicted to CAS- HORIZON
Use Your Stuff- TAGS OR FRAMES
Inkspirational- ADVENTURE

Supplies
Stamp- Reflective Blue Heron (Magenta)
Inks- Peacock Feathers, Tumbled Glass Distress Oxides (TH); Tuxedo Black Memento
Paper- heavy white (Scribes Nook)
Accessories and Tools- Rectangle Mask (A Colorful Life Designs); Misti (My Sweet Petunia); 
old credit card; non-stick craft mat (Ranger);piece of acetate; clear eb powder; heat tool