Monday, 14 July 2025

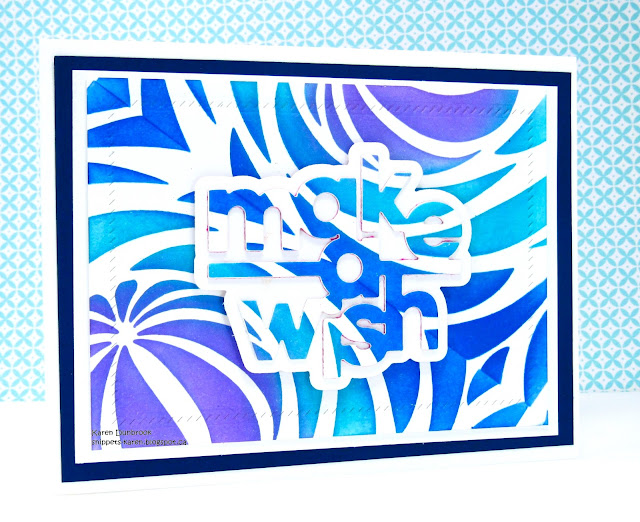
Mirror Image Stenciling

Welcome
Today's card was done in a 'mirror image' style using the new for July stencil from A Colorful Life Designs called:

This is what I did to create my card.
  • I cut a piece of white cardstock, then found the center diagonal point on it and drew a faint line.  I wanted that to be my starting point for placing the stencil down.
  • I placed the Maelstrom stencil on the line and then inked it up with some Wilted Violet, Peacock Feathers and some Prize Ribbon Distress Oxide ink.
  • I lifted the stencil off and placed it onto the other side of line and inked again creating the 'mirror image' design.
  • I added the stitched frame along the edge to add more interest.
  • Next, I took the panel and die cut the sentiment right from the middle.  I glued that onto the white word shadow and set aside.
  • I glued the stenciled panel onto a piece of white cardstock, then navy and then onto an A2 sized white card base.
  • I used some foam tape to pop the sentiment back into place over the front.

Here is the stencil I used:

Thanks so much for coming by and taking a look.

Adding my card to these challenges:
Simon Says Wed.- STITCH IT
A Cut Above- ANYTHING GOES WITH A DIE CUT
Allsorts- FOR A CHILD/ ANYTHING GOES

Supplies
Stamps- none
Inks- DOX
Paper- Solar White
Accessories and Tools- Stencil (A Colorful Life Designs); TE Blending Brushes;
Make a Wish die (SSS); Diagonal Stitch Rectangle Stacklet (TE)

Sunday, 13 July 2025

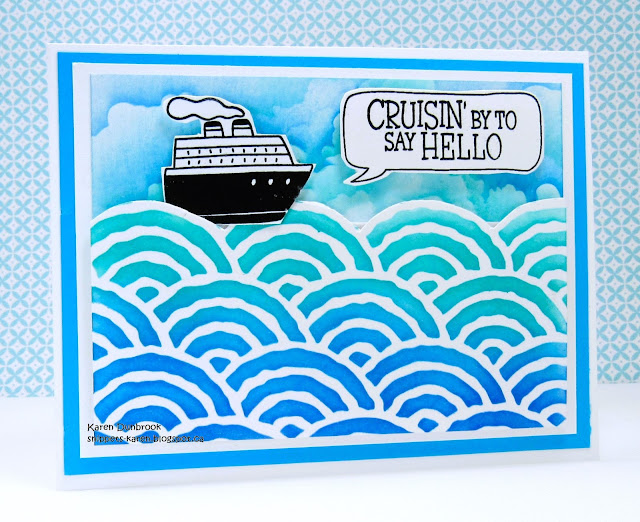
Cruisin' the High Seas

Welcome
Meet my cute little card for today that I made using the newly released stencil from A Colorful Life Designs called:
I paired it up with one of my all time favourite stencils called

So, here's what I did to create my card.
  • I decided to use the stencil as waves, so I placed a piece of white cardstock onto my Make Art Station, then put the Fish Scales stencil over that and secured it well. 
  • Starting at the top, I inked with some Peacock Feathers Distress Oxide ink. I move down and inked with some Salty Ocean DOX ink in the middle and then finished off with some Prize Ribbon DOX ink along the bottom.
  • When the ink was dry, I cut along the scalloped edge and set aside.
  • I took another piece of white cardstock, placed the Cloud Edger stencil down and inked it up with the same colours mentioned above. The Cloud stencil is so easy to use. You ink it up, move it and ink again until you get the look you want.
  • I used some foam tape to add the scallop piece I had cut under the clouds.
  • I stamped the boat and the sentiment, clear heat embossed them and added those to my scene using some foam tape.
  • I glued the panel onto a piece of white cardstock, then blue, then onto an A2 sized card base.

Here is the stencil I used:


Thanks a lot for coming by and taking a look.

Adding my card to these challenges:
Simon Says Wed.- EMBOSS IT
Time Out- TRAVEL

Supplies
Stamps- Cruisin' To Adventure (CTMH); Word Bubbles (HA)
Inks- DOX; Versafine 
Paper- Solar White
Accessories and Tools- stencils (A Colorful Life Designs); Make Art Station (Ranger);
foam tape; TE Blending Brushes; Clear EB powder

Friday, 11 July 2025

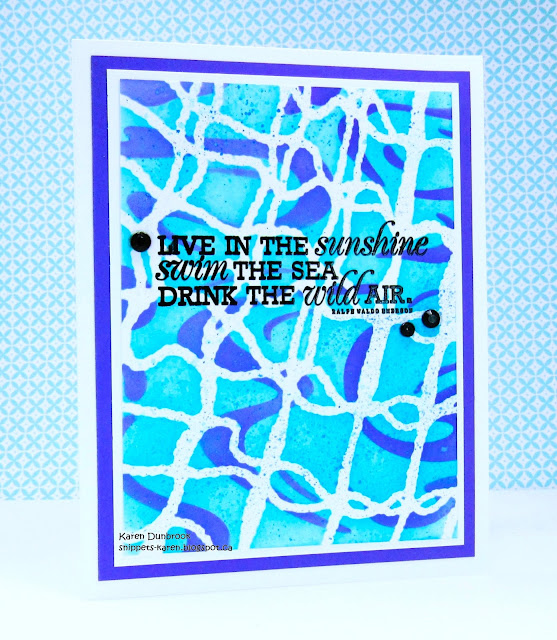
Feel the Summer


Good Morning
I love trying to combine stencils to create unique looking backgrounds.  
This card has an ocean/beach look to it as I combined 2 new stencils for July from A Colorful Life Designs called:

So, here's what I did to create my card.
  • I cut a piece of white cardstock and placed the Sea Net stencil over it and I inked it up with some Peacock Feathers Distress Oxide ink.
  • Leaving that stencil in place, I put the Eddies stencil right over it and inked again with some Prize Ribbon DOX ink creating an interesting, layered background.
  • Next, I diluted some Prize Ribbon ink with water and used a paint brush to splatter the whole panel...like the sea spray. 
  • When the panel was all dry, I placed it into my Misti to stamp the sentiment and clear heat embossed it to help it pop over the busy background.
  • I glued it onto a piece of white cardstock, then a shade of blue cardstock and then finally, onto an A2 sized card base.
  • I finished the card off by adding some black gems around the sentiment.

Here are the stencils I used:


Thanks so much for coming by and taking a look.

Adding my card to these challenges;
Simon Says Wed.- EMBOSS IT
The Crafter's Cafe- ANYTHING GOES/OPTION: Masculine

Supplies
Stamp- Bring on the Sun (Technique Tues.)
Inks- DOX; Versafine Clair
Paper- Solar White
Accessories and Tools- Stencils (A Colorful Life Designs); TE Blending Brushes;
paint brush; EB powder

Thursday, 10 July 2025

Scalloped Edges


Good Morning
So many new releases this month at A Colorful Life Designs.
Meet just one of the new ones called:

I used the stencil to create a scalloped design and here's what I did.
  • I placed the Fish Scales stencil onto a piece of white cardstock.  Starting at the top, I inked with some Prize Ribbon, then some Salty Ocean in the middle and then some Broken China Distress Oxide ink along the bottom edge.
  • I fussy cut along the bottom, creating a scalloped edge.
  • I used some foam tape to add the stenciled panel over a piece of white cardstock, then I glued that onto a piece of navy and then onto a white A2 sized card base.
  • I die cut the sentiment with white cardstock, then glued it onto a navy word shadow. I used some foam tape to pop that up under the scallop.

Here is the stencil I used:

I appreciate your visit to see what I've been up to.

Adding my card to these challenges:
Classic Design- ANYTHING GOES/option: VACATION 
Word Art Wed.- ANYTHING GOES/FAMILY FRIENDLY
The Paper Funday- ANYTHING GOES/ Fun with Stencils

Supplies
Stamps- none
Inks- DOX
Paper- Solar White
Accessories and Tools- stencil (A Colorful Life Designs); TE Blending Brushes;
Loved and Happy die (Concord and 9th)

Sunday, 6 July 2025

The Journey of Life

Good Morning
This lovely new for July stencil from A Colorful Life Designs is called:

This is what I did to create my card.
  • I got out my Gel Plate for this one. I pressed my Picked Raspberry Distress Oxide ink pad directly onto my plate along the middle and then pressed my Ripe Persimmon DOX ink pad along each side of the pink. I brayered the colours together on the plate to blend them together.
  • I placed the Droplet Grid stencil onto the plate and rubbed over it with a scrap piece of paper to remove some of the ink and lifted that off.
  • Next, I took my piece of white cardstock and rubbed it onto the plate to lift the print.
  • When the ink was dry, I place the print into my Misti and stamped the flowers and the sentiment with some black Versafine ink.
  • I splattered just over the flowers with my black Posca pen to add some extra interest.
  • I glued my card front onto a piece of white cardstock, then onto a piece of pink and then onto an A2 sized card base.
  • I added 3 black gems under the sentiment to finish off my card.

Here is the stencil I used:

Many thanks for coming by and taking a look.

Adding my card to these challenges:
Simon Says Wed.- SENDING FLOWERS
Stamping Sensations- SUMMER FLOWERS or ANYTHING GOES
Cardz 4 Gals- Welcome Summer

Supplies
Stamps- Thistle (Art Journey); Just Be Happy (Visible Image)
Inks- DOX; Versafine
Paper- Solar White
Accessories and Tools- stencil (A Colorful Life Designs); Gel Plate; Speedball Brayer;
black gems; black Posca pen

Saturday, 5 July 2025

Let's Get Creative

Good Morning
How fun is this! 
I used the newly released stencil from A Colorful Life Designs called 

I enjoyed creating this one and here's what I did.
  • I decided to go with a 'rainbow' theme and began by placing the Nautilus Swirl stencil over the outside edge of my white cardstock. I inked with some Fossilized Amber, Ripe Persimmon, Picked Raspberry, Wilted Violet and some Salty Ocean Distress Oxide ink.
  • I lifted the stencil, moved it to the side and repeated the process with the same colours.
  • I splattered the panel with my black Posca pen and set it aside to dry.
  • When it was dry, I stamped the sentiment and clear heat embossed it to help make it pop against the colourful background.  
  • I glued the panel onto a piece of white cardstock, then onto a piece of purple the finally onto a A2 sized card base.
  • I added some black gems around the sentiment to finish off my card.

Here is the stencil I used:

Thanks for taking a look.

Adding my card to these challenges:
Little Red Wagon- TO GO BOLDLY
Allsorts- FOR A CHILD or ANYTHING GOES
Cardz 4 Galz- WELCOME TO SUMMER

Supplies
Stamps- Just Be Happy (Visible Image)
Inks- DOX; Versafine Clair
Paper- Solar White
Accessories and Tools- stencil (A Colorful Life Designs); TE Blending Brushes;
Make Art Station (Ranger); black Posca pen, clear EB powder; black gems 

Wednesday, 2 July 2025

Good Times


Good Morning

A new month means a whole new release of stencils at A Colorful Life Designs.  
Lots of summer inspired designs for creating beach/ocean designs as well as many more.
Meet one of the new stencils for July called:

So here are my card details.
  • I placed a piece of white cardstock onto my Make Art Station first.  I started inking the Maelstrom stencil with some Peacock Feathers, then some Salty Ocean and then some Prize Ribbon Distress Oxide inks.
  • The middle area of this stencil reminded me of a beach ball, so after it was all inked up, I used a circle die to cut out just that area.
  • I took the circle and stamped the sentiment onto it in my Misti.  I clear heat embossed it to help make it pop, then splattered with my black Posca pen.
  • I stamped another sentiment onto my card front and clear heat embossed that too.
  • I glue the panel onto a piece of white cardstock, then onto a piece of navy cardstock and then onto an A2 sized card base.
  • I used some foam tape to pop the circle die cut back into place, rotating it.
  • I finished my card off by adding 3 black gems under the bottom sentiment.

Here is the new stencil:


Thanks for coming and taking a look.

Adding my card to these challenges;
Little Red Wagon- TO BOLDLY GO
The Crafters Cafe- MASCULINE/Anything Goes
The Creative Crafters- ANYTHING GOES

Supplies
Stamps- Good Vibes (SSS)
Inks- DOX; Versafine Clair
Paper- Solar White
Accessories and Tools- stencil (A Colorful Life Designs); Make Art Station (Ranger);
Misti (My Sweet Petunia); black Posca pen; Infinity Circle die (HA);
clear EB powder (Lawn Fawn)