Welcome
I can't believe how close we are to the big day!
I had fun creating this card...doing some stencil layering again.
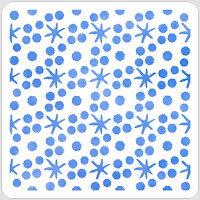
I used 2 stencils from A Colorful Life Designs called:
So, here's what I did to create my card.
- I cut a piece of white cardstock for my card front, then embossed it using a Dot Embossing Folder. Using some Tumbled Glass Distress Oxide ink, I gently rubbed over the embossing to make it show up.
- Next, I placed the Falling Snow stencil over my embossed background and inked with some Peacock Feathers DOX ink.
- I lifted that stencil off and replaced it with the Glittering Heavens stencil and inked again with more Peacock Feathers DOX ink.
- I placed my stenciled card front into my Misti and stamped the large snowflake with some Uncharted Mariner DOX ink right up into the corner.
- While that dried, I stamped the sentiment and then die cut it out.
- I glued the stenciled panel onto a piece of white cardstock, then a piece of navy and then onto an A2 sized card base.
- I used some foam tape to pop the sentiment up near the bottom and finally, added a silver gem to the middle of the snowflake.
Here are the stencils I used:
My Discount Code for A Colorful Life Designs:
KarenFan10
Thanks so much for coming by and taking a look.
Simon Says Monday- USE DIES FOR DIECEMBER
CRAFT- CHRISTMAS, THE LAST STRETCH
(the snow is here now so ready for Christmas)
The Sisterhood of Crafters- CHRISTMAS
Supplies
Stamps- Let it Snow (Visible Image); Holiday Sentiments (Photoplay)
Inks- DOX
Paper- Scribes Nook- Waterloo, Ont.
Accessories and Tools- stencils (A Colorful Life Designs); TE Blending Brushes;
Dot EB Folder (Sizzix); silver gem; Misti (My Sweet Petunia);
foam tape


3 comments:
Having already being a fan of stencils, this creation warms my heart. Well done my friend.
An amazing result, so beautiful Karen. x
I love the look of the grungy snowflake over the two stencils and all in such pretty shades of blue Karen. x
Post a Comment