Showing posts with label rose. Show all posts

Saturday, 16 September 2023

Artichoke Rose


Welcome
Today's card is featuring 2 new stencils for September called

So, here's what I did to create my card. 
  • I cut a piece of white cardstock and place it onto my Make Art Station. 
  • I positioned the Artichoke Rose stencil over my cardstock and inked it up.  I started at the center of the flower with some Cracked Pistachio, then moved outwards with some Worn Lipstick, Shaded Lilac and finally some Villainous Potion Distress Oxide ink along the outer edges.
  • I splattered with my white Posca pen and set aside to dry.
  • I cut another piece of white cardstock, placed it onto my Make Art Station and inked up the top portion using the Lined Leaves stencil with some Worn Lipstick DOX ink.
  • Next, I fussy cut out the Rose and glued it over the stenciled background.
  • I glued the finished panel onto a piece of purple cardstock, then onto an A2 sized card base.
  • I stamped and die cut the sentiment and used some foam tape and placed it at the top of the flower.

Here are the stencils I used:


Discount Code for A Colorful Life Designs
(Affiliate with no extra cost to you) 

Thanks so much for coming by and taking a look.

Adding my card to these challenges:
Addicted to Stamping- ANY OCCASION
The Crafty Addicts- ANYTHING GOES
Tic Tac Toe- SEE BOARD (stencil, free, foliage)

Supplies
Stamps- Big and Bold Sentiments (SSS)
Inks- DOX
Paper- heavy white (Scribes Nook)
Accessories and Tools- stencil (A Colorful Life Designs); TE Blending Brushes;
Make Art Station (Ranger); white Posca pen

Friday, 8 September 2023

Close at Heart

Welcome
Today's card features the beautiful, new for September Artichoke Rose stencil from A Colorful Life Designs.
I paired it up with an older stencil called Simple Grid to create my card.

So, here's what I did to create my card.
  • I placed a piece of white cardstock onto my Make Art Station and positioned the rose part of the Artichoke Rose stencil in the bottom right hand corner as I wanted it to be the largest on my card front.
  • Using some Picked Raspberry Distress Oxide ink, I blended that into the flower center and then added some Festive Berries DOX ink to the rest of the flower.
  • I moved the flower to the side and then to the top corner using the same colours of inks.
  • I removed the stencil and added the square details to the open white areas using the Simple Grid stencil and some more of the Picked Raspberry DOX ink.
  • I placed the stenciled panel into my Misti to stamp the sentiment and clear heat embossed it.
  • I splattered with my white Posca pen.
  • I glued the dried panel onto a piece of deep red cardstock although it looks more blackish in the photo, then onto an A2 sized card base.
  • I added 3 black gems around the sentiment.

Here are the stencils I used:


Discount Code for A Colorful Life Designs
(Affiliate with no extra cost to you) 

Thanks so much for taking a look.

Adding my card to these challenges:
Little Red Wagon- RECTANGLE OR SQUARE
The Crafty Addicts- ANYTHING GOES
Simon Says Wed.- STAMP IT

Supplies
Stamp- Side by Side (IO- retired)
Inks- Versafine Clair; DOX
Paper- heavy white (Scribes Nook- Waterloo, Ont.)
Accessories and Tools- stencils (A Colorful Life Designs); TE Blending Brushes;
Make Art Station (Ranger); black gems; white Posca pen

Wednesday, 8 June 2022

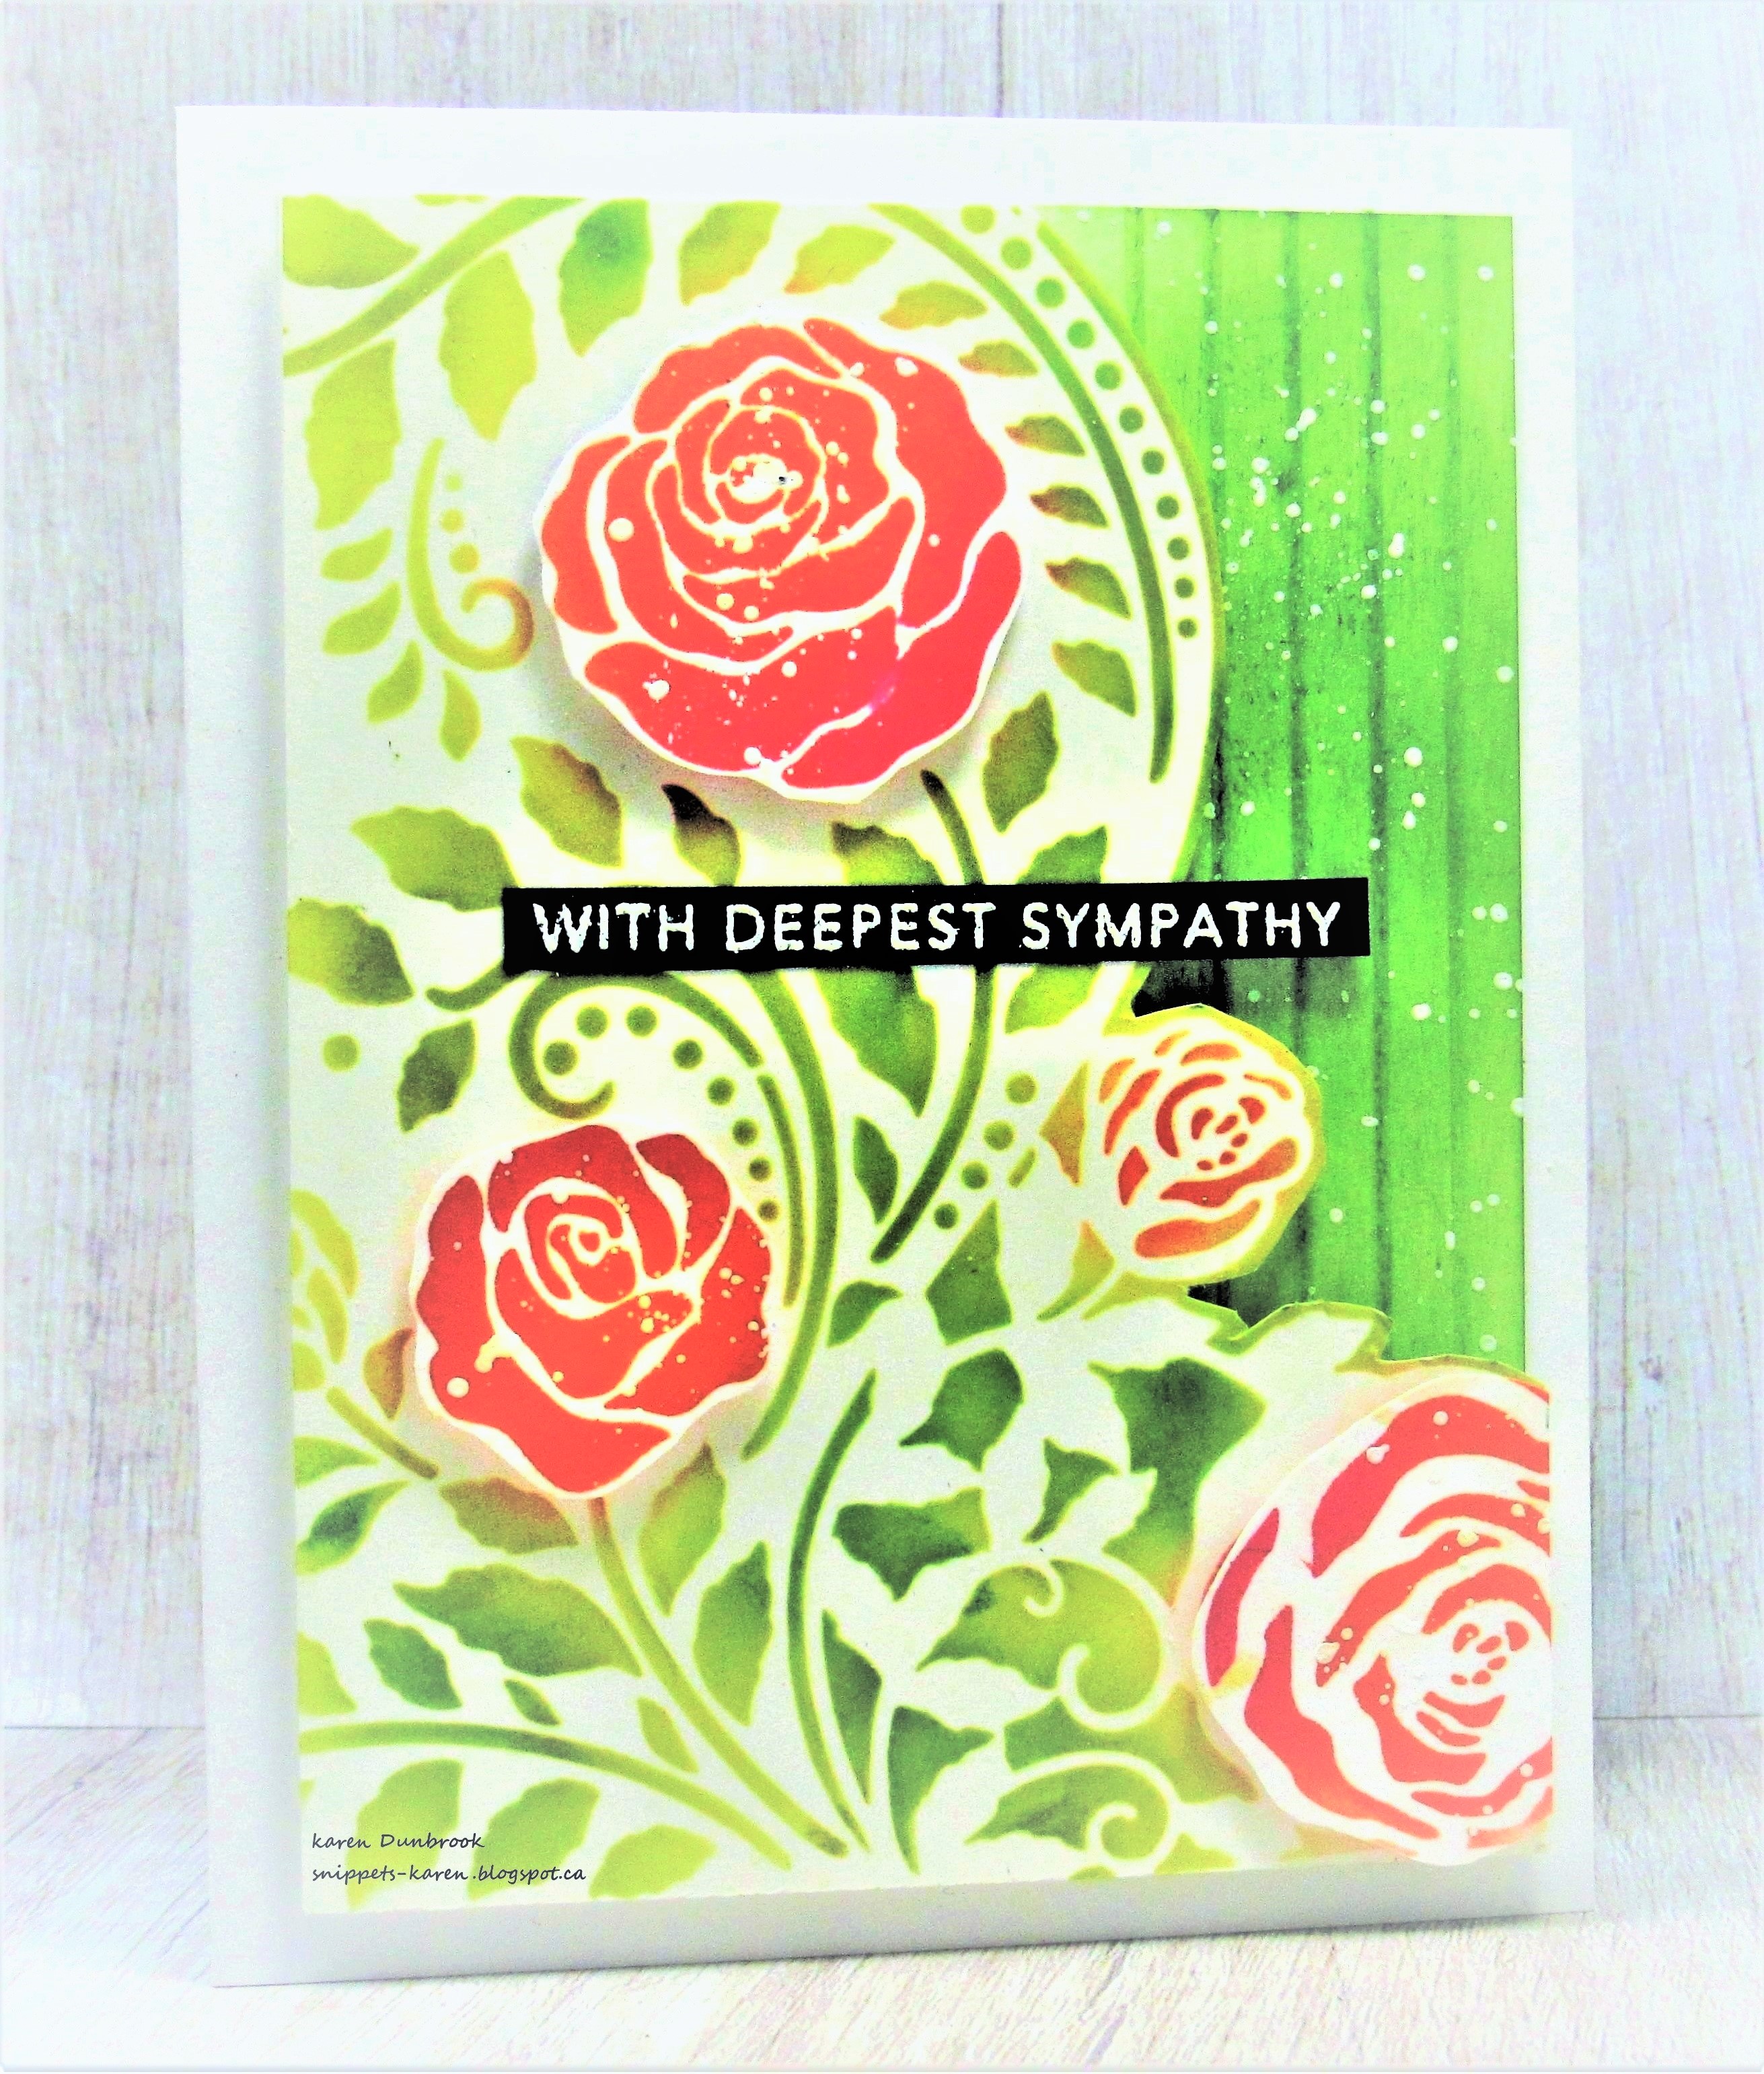
Floral Sympathy


Welcome
I really like to have some sympathy cards on hand as I know most of you do as well.
When I looked at this Split Rose Flourish stencil from A Colorful Life Designs, I thought it would work well for this.

So here's what I did to create my card.
  • I took the Split Rose stencil and laid it onto a piece of white cardstock on my Make Art Station.  I inked up the vines with some Cracked Pistachio Distress Oxide ink, then I did some highlighting using Peeled Paint DOX ink.
  • I removed the stencil and then placed it onto another piece of cardstock and inked up just the roses with some Picked Raspberry and then some Crackling Campfire DOX ink.  
  • Next, I fussy cut the panel with the vines on it along the 'split' edge and then cut out the roses.  I splattered just the cut out roses with my white Posca pen and set aside.
  • I cut a piece of white cardstock that was 3 3/4" x 5" and scored it along the right hand side.  I inked it up with more Peeled Paint DOX ink and splattered with more white.
  • I glued that onto a heavy white card base for my A2 card.
  • Time to assemble....  I pop dotted the vines over the scored front panel and then pop dotted the roses as well. 
  • I stamped the sentiment strip with some Versamark and white heat embossed it.  I popped that over the background.

Here is the stencil I used:

Discount Code for A Colorful Life Designs
(affiliate with not extra cost to you)

Thanks so very much for coming by and taking a look.

Adding my card to these challenges:


Supplies 
Stamps- Simple Strips (TE)
Inks- DOX, Versamark
Paper- Scribes Nook- Waterloo, Ont
Accessories and Tools- stencil (ACLD); TE Blending Brushes; foam tape;
Posca pen; white eb powder, ScorPal; Make Art Station (Ranger)

Tuesday, 4 February 2020

Be Unique- The Flower Challenge

Good Morning.
Are you ready for another fun theme at 

This month we are adding leaves

We also welcome our Guest Designer this month:
Our Guest Designer this month is Galina Filippenko

So onto my card details.
I am still on a mission to use some of the inked backgrounds I have sitting in a box, so I decided to look for one to create this card.  The one I found had been previously inked with Distress Oxide inks, then I had done some stencilling over the top.  It was interesting and had a unique look to it, so I decided to go ahead and use if for my flowers.
I placed the inked piece into my Misti and stamped the Roses with some Versafine black ink.  I removed the stamped roses and leaving the stamp in place inside my Misti, I stamped it again onto some heavy white cardstock with grey ink.  That grey stamped panel would become my card front.
I took the roses that I stamped over the inked piece and fussy cut them out.
I glued them over the grey inked piece and then stamped the large sentiment. Lastly, I splattered the whole front with black acrylic paint to add more interest.
I mounted the piece onto some blue cardstock, then onto a heavy white card base.


Thanks so much for coming by and taking a look.
Hope you will come and play along with us!

Adding my card to these challenges:
Simon Says Wed.- ANYTHING GOES
Arty Divas- ANYTHING GOES
Artsystamper- FLOWERS/HEARTS


Supplies
Stamps- Rosa Eden Roses (Picket Fence); Scripted Bold Sentiments (Pinkfresh Studio)
Inks- Versafine Clair; DOX inks
Paper- heavy white (Scribes Nook)
Accessories and Tools- Misti (My Sweet Petunia); black acrylic paint; paintbrush; stencil

Monday, 5 March 2018

Flower Frenzy

Good Morning.
Meet today's card. 
Keeping it very clean and simple using a new-to-me stamp set from Simon Says.

I began my card by stamping the flowers all over my white cardstock panel.  I started near the centre and stamped outwards being sure to stamp in all the spaces.  That set has a larger image and lots of smalls to fill in with.  
Now most people would just go ahead and colour in the flowers but I decided to go in another direction.  So next, I took a blue Tombow marker and coloured in the background around the flowers which really helped make a fun looking pattern.  I used a curved die to cut the panel and then glued them onto another piece of cardstock.  
I stamped the sentiment, then punched it out with a circle punch, added another flower from the set to the centre and a blue button to the centre of that.  I pop dotted that over the curve.


Have a great week and thanks so much for coming by and taking a look.

Adding my card to these challenges:
Simon Says Wed.- ANYTHING GOES
CASology- FIT
(I moved my stamp around and had to fit the smaller flowers
into the empty areas)
City Crafter- DIE CUT

Supplies
Stamps- Roses for You (SSS); Circle sentiments (SU)
Inks-Tuxedo Black Memento; Tombow marker
Paper- heavy weight white (local store)
Accessories and Tools- circle punch (SU); curved die (SSS); Misti; blue button; Cuttlebug

Tuesday, 27 June 2017

Rose Garden

Hello and Welcome.
Meet today's card inspired by a lovely Victorian Rose Garden I visited on the weekend.
This stamp is actually called Marigolds but they really reminded me of an open rose so I went with that plus I love the open area for watercolouring.

I began by masking the edges of my card front then placing the stamp inside my Misti, inked with Versamark then stamped and white heat embossed onto watercolour paper.  I masked the first flower and repeated that process.
I coloured in just the base of the flowers using my Zigs then using a wet paintbrush, I pulled the colour into the rest of the flower petals.
I stamped the sentiment from Daisy Bucket then sponged in the background using Peeled Paint Distress ink and a sponge applicator.
I think the pink makes for a bright summertime card.


Thanks so very much for all your sweet, kind comments and for the visit.

Adding my card to these challenges:

STAMPlorations- ANYTHING GOES/NEVER ENDING

Make My Monday- SUMMER BRIGHTS
Fashionable Stamping- MAKE IT FEMININE
A Bit More Time to Craft- ANYTHING GOES
My Time to Craft- SUMMERTIME

 
Supplies
Stamps- Marigold (STAMPlorations); Enjoy the Moment 
(Daisy Bucket...no longer in business but you can sometimes find them on Ebay)
Inks- Versamark; Tuxedo Black Memento; Distress (TH)
Paper- Canson Watercolour paper 140lb
Accessories and Tools- MISTI; white eb powder; Zig markers; paintbrush; sponge applicator;
 heat tool; painter's tape