Showing posts with label Woodgrain Tutorial. Show all posts

Sunday, 12 November 2017

Twelve Tags of Christmas

Hello and Welcome.
I am just thrilled to be a part of Loll Thompson's 

http://www.stampingwithloll.com/2017/11/twelve-tags-of-christmas-day-seven.html

This is day seven, so if you haven't seen the rest of the tags this week you need to go check them out.
You will be so inspired!  There are prizes too!

So for this event, you must create a tag any size or shape and it must be a mixed media Christmas tag  which includes stamping, plus two mixed media elements (techniques or products).


So onto what I did for my tag.
For the base of my tag, I used my Woodgrain Tutorial that so many of you have used in the past.  It is a fun way to create a wood looking background with readily available supplies.  I went for blue of course!
(a step by step tutorial can be found on my blog by clicking the above link)
I used a tag die to cut out my tag shape then started added the details.
To add some sparkle to the woodgrain, I stamped some script randomly and embossed it with silver powder.  I added a snowy feel by splattering white acrylic paint all over as well.
Next, I die-cut the snowflakes leaving one white then silver embossing the smaller one.  I layered them then added a drop of blue Nuvo to add interest and pull up the blue of the base.
I die-cut the 'be jolly' and glued it over a piece of silver ribbon along the bottom.  
I cut a blue base to give it more stability then added silver twine and a white bow.

I hope you will be much inspired and come and play along with us.
These tags are like little treasures.


Adding my tag to these challenges:
Simon Says Wed- SNOW WHITE
(snow)
Love to Create- ANYTHING CREATIVE MIXED MEDIA
STAMPlorations- MIXED MEDIA


Supplies
Stamps- Script (PB)
Inks- Peacock Feathers, Stormy Sky, Tumbled Glass, Iced Spruce Distress (TH); Versamark
Paper- heavy white (local store)
Accessories and Tools- Elmer's Glue; ScorPal, Caribbean Ocean Gloss Nuvo;
Silver eb powder; heat tool; snowflake dies- IO, PB; 
be jolly die- STAMPlorations; tag die- MFT; silver ribbon; white acrylic paint; paintbrush

Tuesday, 4 October 2016

Rustic Meets Elegance

Today's the day!
Time to introduce you to a new challenge and who doesn't love a challenge?

Meet The Flower Challenge.
What fun we will have playing with our flower stamps, stencils and die-cuts.


This is the card I created for that challenge using a woodgrain background.  It is very easy to do and back in January, I did a tutorial about how to do it.  Find it here:

The flower are from a SU set that I stamped with Versamark, white heat embossed and watercolored using Brushos.  I love the colour variations you can achieve using the Brushos.
When the flowers were dried, I mounted them onto a white panel and stamped the sentiment.
I pop dot mounted that panel over the woodgrain and added some black jewels to my flower centers.


I hope you will check out our new challenge and come play along with us.

Supplies:  stamps:  SU, (sorry I don't remember who made the sentiment)/ ink: Distress, Memento/ Brushos/ Elmer's Glue/ ScorPal/ paint brush/ MISTI

Saturday, 1 October 2016

Snowy Village


 I am working on getting some cards made for Christmas.  I wanted to make some more woodgrain background pieces so out came the Elmer's Glue.
For those of you that may have missed it, back in January I did a tutorial about how to create this easy, fun woodgrain paper using Elmers's Glue, a scoring tool and some Distress inks.
To see how to do this go here:

 Next, I die-cut the village using a die from Your Next Stamp and stamped the sentiment from the new Penny Black stamp set called Festive Cheer right onto the panel.
I pop dotted that over the woodgrain background and done.


Adding my card to these challenges:

Simon Says- ANYTHING GOES

Addicted to Stamps and More- HOLIDAY

Craftyhazelnut's Christmas- CHRISTMAS

Fab'n'Funky- CHRISTMAS

Sunny Day Crafting- ANYTHING GOES


Thanks so much for coming by to take a look.

Supplies:  stamps- PB/ ink- Memento, Distress/ die- Your Next Stamp/ Elmer's Glue/ Scor-Pal/ pop dots

Saturday, 16 January 2016

Woodgrain Tutorial


Morning.
Today, I am sharing a tutorial that so many of you asked me for about creating a woodgrain background.
It is super easy and fun to create.
(the heart and 'love' die on the above card are from my sweet friend Loll Thompson....thanks Loll!)


Step #1


 Spread Elmer's glue in lines over heavy cardstock.  I like to do it in lines
so that when I go back to score it, the lines mimic the woodgrain.
 I haven't tried other kinds of glues but I am sure they would work too.
I used an old paint brush to spread as my glue wouldn't squirt out of the bottle.

Let the glue dry completely and don't worry if it there are blobs of glue on
your cardstock.


Step #2

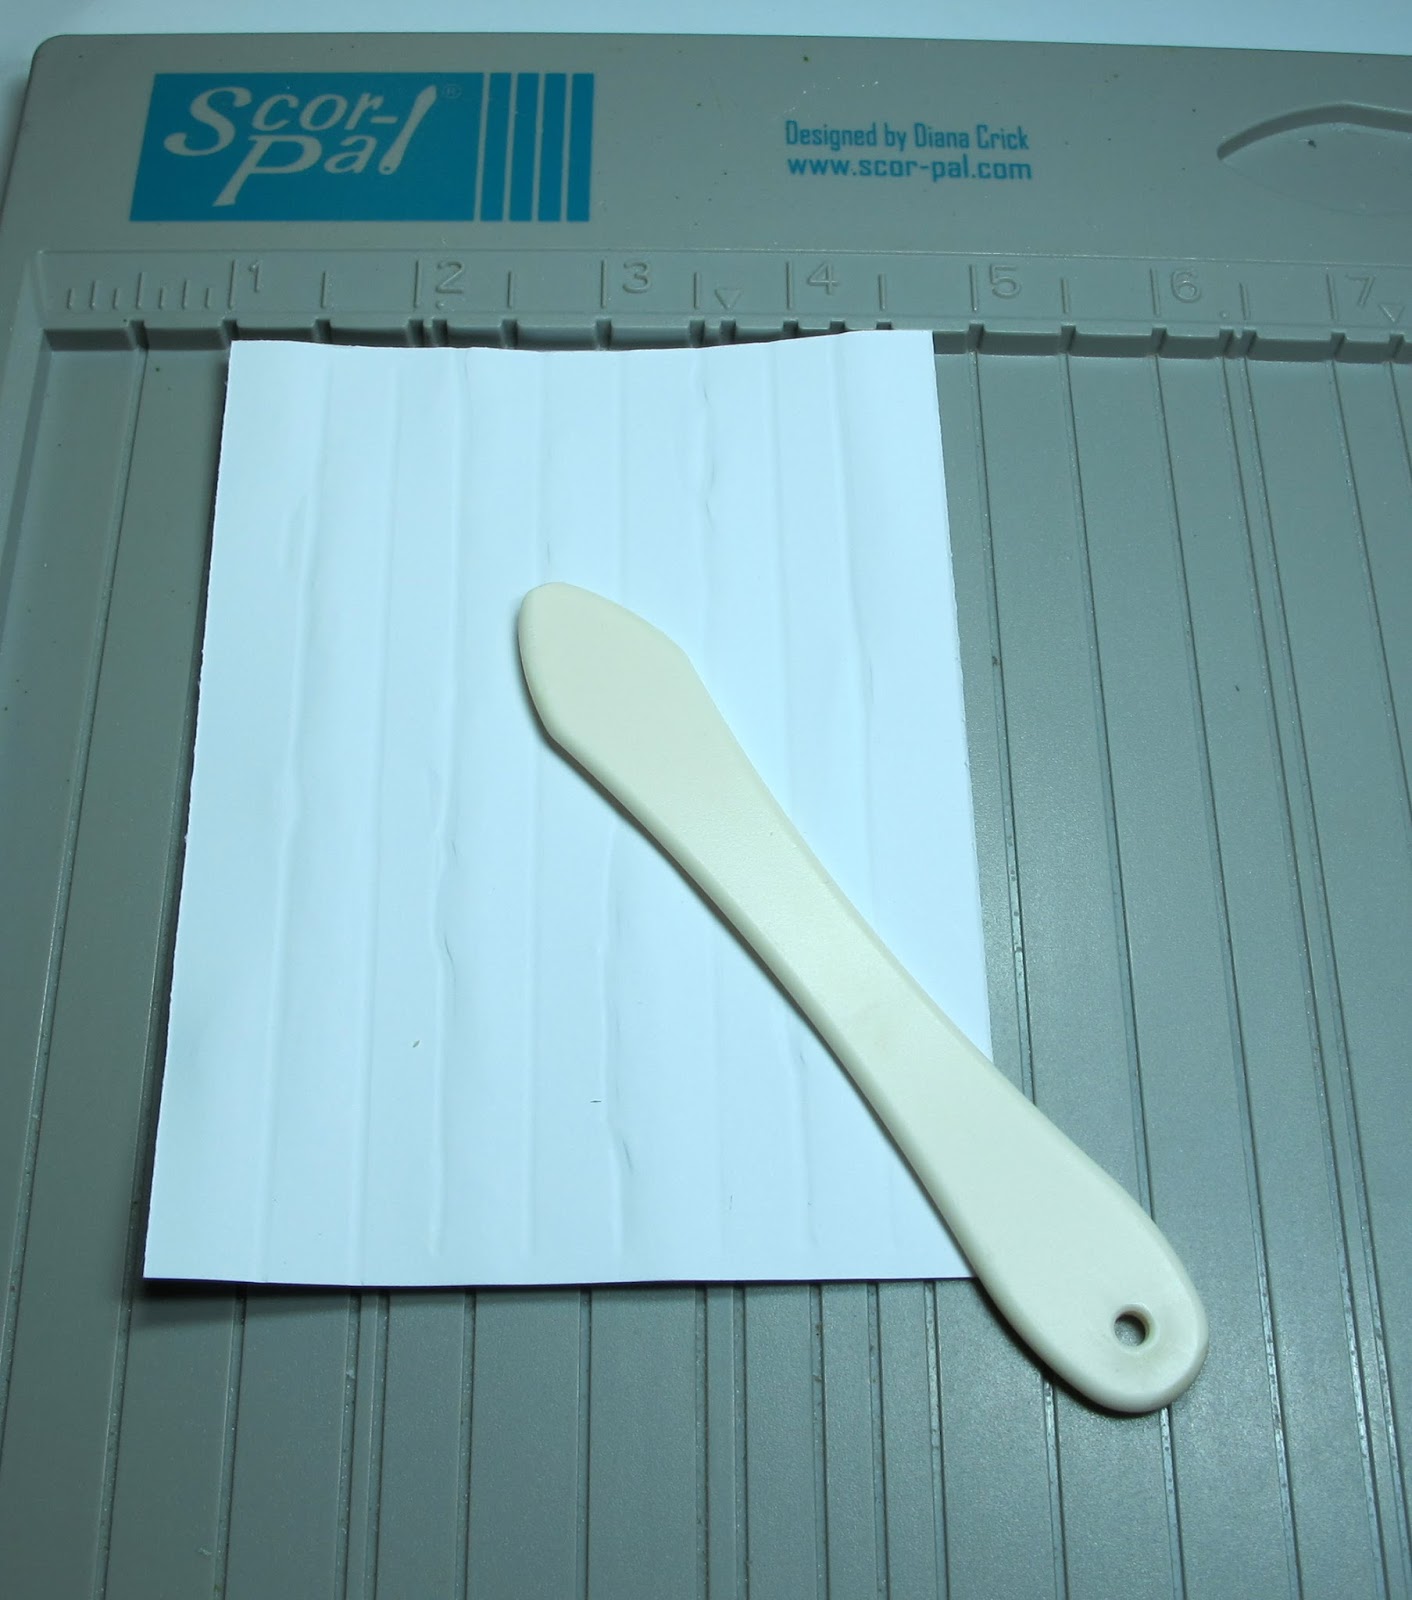
Turn the cardstock over so the glue side is down.  I used my ScorPal
and scored my cardstock at every 1/4 inch.  You could change the
score line measurements to give a different look but for a card front I find
this works the best.
I start at the middle and score outwards.


Step #3

Turn the cardstock back over onto the right side, then rub Antique Linen
Distress ink pad over the whole piece spraying with a bit of water to help blend.

I found it best to apply the ink in the same direction as the scoring.


Step #4

Next, rub Weathered Wood and Rusty Hinge randomly over the top, spraying
again with a bit of water to blend the colours.

Finally:  I like to re-score my lines to add more definition.


I hope you enjoyed this mini tutorial and that you will give it a try.  If you have any questions or want any more information, please email me.
If you get a chance to use this tutorial, let me know.  Would love to see what you create!

To see other cards I have made using this technique, check out these links:

Snowflakes on Woodgrain

Peacefilled Christmas

Woodsy Christmas
 
Country Christmas


Thanks for the visit.
Have a great weekend.