Showing posts with label evergreen. Show all posts

Saturday, 11 October 2025

Sending Joy


Hello and Welcome
Here's a festive holiday card that I made using the newly released stencil from A Colorful Life Designs called

So, here's what I did to create my card.
  • I cut a piece of white cardstock into the banner shape first, then I placed the Christmas Greenery stencil over that. I inked it up with some Rustic Wilderness Distress Oxide ink.
  • I used some Lumberjack Plaid DOX ink to fill in the details and then using the eraser on the end of a pencil, I added the red dots. I also added white dots randomly over the green with my white Posca pen and set that aside to dry.
  • I picked out some striped cardstock, then used that to die cut the sentiment and glued it all together.
  • I glued a piece of red cardstock onto an A2 sized white card base and added the banner shape with some foam tape.
  • I used some more of the foam tape to pop the sentiment over the background.
  • To finish my card off, I added a strip of white and red paper to the top and a red gem to the ornament.

Here is the stencil I used;


Thanks a lot for coming by and taking a look.

Adding my card to these challenges:
The Holly and Ivy- ANYTHING CHRISTMAS GOES
Word Power- SENTIMENT IS FOCUS
Krafty Chicks- CHRISTMAS

Supplies
Stamps- none
Inks- DOX
Paper- DP (?); Solar White (Prism)
Accessories and Tools- stencils (A Colorful Life Designs); white Posca pen;
Christmas Bauble Joy (Paper Rose); pencil eraser; red gem; foam tape

Tuesday, 29 December 2020

Oh Christmas Tree


Welcome
I hope you had a wonderful Christmas despite this nasty virus.
I'm in Ontario, Canada and we are in a lock down again although our numbers are not nearly what they are in the U.S.  I'm so thankful that our Government here has taken mandatory steps to help fight this.
I'm off work for awhile, so card making is on the agenda.
I did make this card a few weeks ago but never had time to post it.

So here's what I did to create this card.
  • I began with a piece of paint roll off from my brayer when I was using my Gel Plate. (*to clarify:  when you are using a Gel Plate, you must brayer off paint from the plate to make it smooth before taking a print.  I always roll onto scrap paper and keep them for card fronts*) I keep all the roll offs to use as backgrounds or even to use for die-cutting.  This one just had a faint bit of greens on it so that was my starting point.
  • I placed the piece into my Misti, then positioned the Evergreen from Darkroom Door, over the painted bkg.  Using my Tombow markers, I coloured directly onto my stamp, sprayed with water and pressed onto the paper.  I repeated that process a number of time using different shades of green inks.  It really does give the appearance of watercolouring.
  • When the branches were dry, I used the end of my paintbrush to dot some red paint over the branches to look like berries.  (for some reason they would not photograph red!)
  • I stamped the sentiment from SU with some Versafine Clair in the bottom corner and clear heat embossed it.
  • To add more interest, I added the green lines using an old credit card rubbed onto my Peeled Paint Distress Oxide pad.  
  • I mounted the piece onto some green cardstock, then onto a heavy white card base.
  • Lastly, I added 3 little black gems under the sentiment.


Thanks so much for coming by and taking a look.

Supplies
Stamps- Evergreen (Darkroom Door); Happy Holidays (SU)
Inks- Tombow markers; Versafine Clair; Distress Ox
Paper- heavy white (Scribes Nook)
Accessories and Tools- Misti (My Sweet Petunia); black gems; Mister (TH); old credit card;
clear eb powder; heat tool; brayer to paint the bkg.

Saturday, 27 June 2020

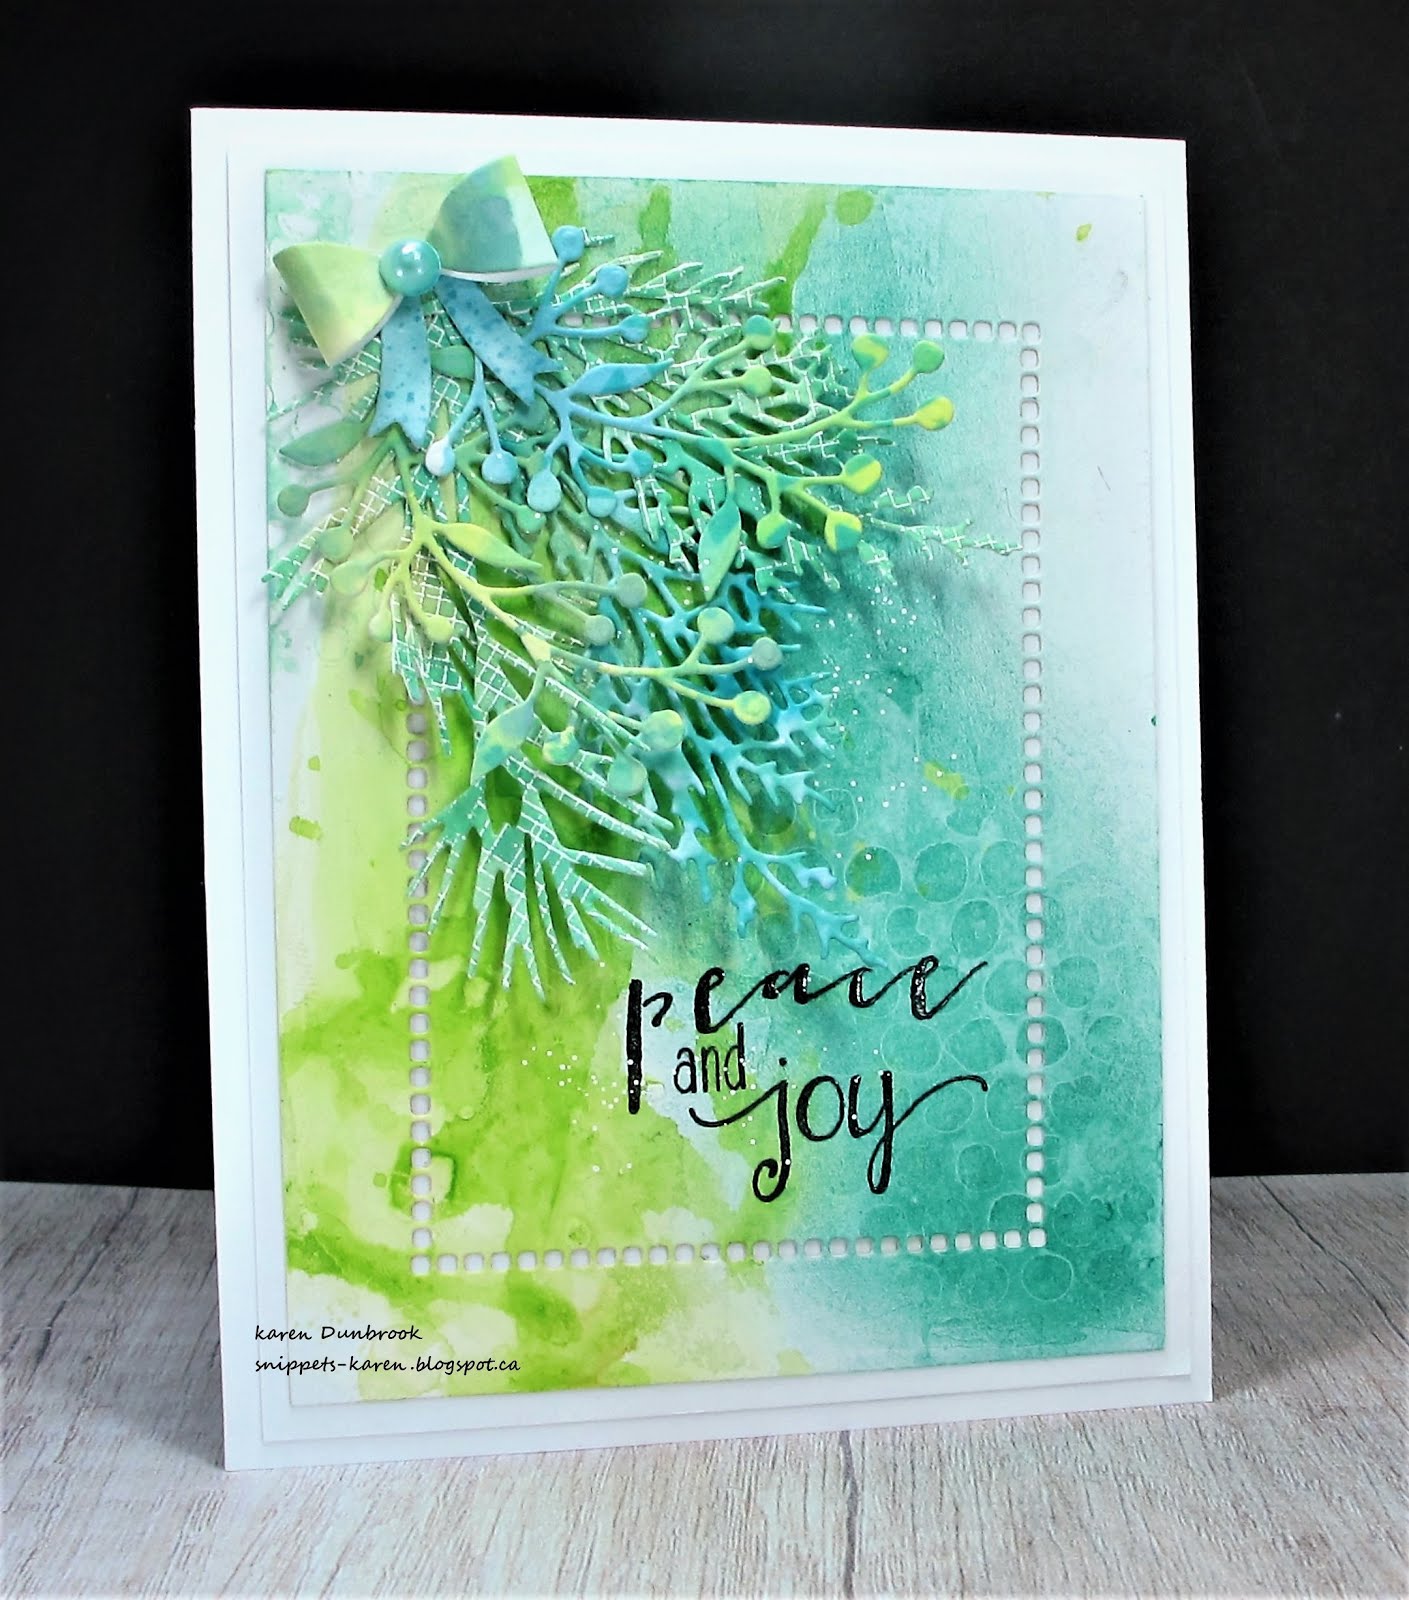
Peace and Joy


Welcome
Meet today's card.
Since I am still not working yet, I've been trying to be productive in my extra time.  I thought it was a good time to start working on a few holiday cards when I heard the guy on the radio said it was 6 months until Christmas.  lol
On another note, I have been watching the Facebook Lives by Vicki Boutin.  I love her fun attitude about creating and 'making magic happen'.  The other night she challenged us to create a background with some blending and watermarking and that is how my background was created. 
If you are interested in seeing any of her 'lives' she posts them all on her FB artist page and also on YouTube.

Here is what the piece looked like:


So onto my card details.
I began with a piece of heavy white cardstock.  I loosely covered it with some Gesso using a palette knife.  Not all the areas are covered, I applied it like I was buttering my toast.  I set that aside and let the whole thing dry.  It dried quickly as the layer of Gesso was pretty thin.  
(you can tell if it's dry when it doesn't feel cool to the touch)
Next, using a piece of acetate, I rubbed some of Vicki's Art Crayons directly onto the acetate, diluted it with water and pressed it onto my panel which you can see on the left hand side.  On the right hand side, I rubbed some VB crayons in blues onto my acetate and without diluting it, I picked up the colour using a stencil brush and rubbed it along the side and up into the green, blending the colours together.
Since the crayons are water soluble, I was able to remove some of the ink with a baby wipe and add some watermarking to the piece using the Messy Dots stencil from A Colorful Life Designs.
I used the Hemstitch die to cut the inner frame then stamped the sentiment from PTI and clear embossed it.
Using a scrap of inky paper, I die-cut the evergreen boughs and glued them at the top.
I finished it off by splattering using my white Posca pen and added the bow at the top of the bough.


Thanks so much for coming by and taking a look.

Adding my card to these challenges:
Simon Says Wed.- ANYTHING GOES
Creative Artiste Mixed Media- ANYTHING GOES
Fab 'n' Funky- CHRISTMAS

Discount Code for A Colorful Life Designs


Supplies
Stamps- Tis the Season (PTI)
Inks- VB Art Crayons; Versafine Clair
Paper- heavy white (Scribes Nook)
Accessories and Tools- Hemstitch die (Spellbinders); Everygreen dies (TH)
Messy Dots stencil (A Colorful Life Designs); sheet of acetate; Mister (TH)