Thursday, 17 November 2022

Christmas Ornament


Welcome
Meet today's simple card for the Holidays.
I wanted to play with this newly released stencil called Dotted Flakes.
By shifting the stencil after the first inking, I was able to create a whole new design.

So, here's what I did to create my card.
  • I began by placing a piece of white cardstock onto my Make Art Station and placed the Dotted Flakes stencil over that.  
  • Using some Peacock Feathers Distress Oxide ink, I inked up the whole stencil.  
  • I wanted to see what kind of design I could create using this stencil, so after inking, I shifted the stencil and inked again with some Blueprint Sketch Distress Oxide ink.  It made a really pretty design for my background.
  • I cut a square piece of white cardstock and then die cut a circle from the center of it.
  • Next, I took a larger piece of white cardstock and inked all along the edges with more of the above mentioned colours to use as the larger background.  
  • I glued the white die cut circle panel over the stenciling and then glued that onto the larger inked background piece.  You can see all the colour variations along the edges of the card.
  • I inked another small piece of cardstock and die cut the ornament hook from that.  
  • I stamped the sentiment on some dark navy cardstock with Versamark and white heat embossed it.  I popped that over the middle of the circle.
  • Finally, I popped dotted the ornament hanger at the top of the circle.


Here is the stencil I used:

                                                         Discount Code for A Colorful Life Designs
(Affiliate with no extra cost to you)

Thanks a lot for coming by and taking a look.

Adding my card to these challenges:
Sunday Stamps- ROUND AND ROUND
Crazy is Our Fame- Stencils are Our Game- ANYTHING- OPTION FALL COLORS

Supplies
Stamps- Christmas Strips (MFT)
Inks- Versamark, DOX
Paper- Scribes Nook- Waterloo, Ont.
Accessories and Tools- stencil (ACLD); Holiday Toppers die (Gina K); 
Infinity Circle die (HA); TE Blending Brushes; foam tape; white EB powder; heat tool

Wednesday, 16 November 2022

Happiest Season


Welcome
Meet today's card.
A simple one using the Festive Flurry stamp from Stampin Up.

So, here's what I did to create my card.
  • I cut a piece of white cardstock and placed it into my Misti.  
  • I inked up the snowflake with some Uncharted Mariner Distress Oxide ink and stamped it onto my white cardstock.
  • I wanted to add some interest around the snowflake, so I took the piece of foam that surrounds the snowflake when you get it in the package and used that as a mask to sponge some Peacock Feathers Distress Oxide ink all around and over the snowflake.
  • I splattered with my white Posca pen.
  • I glued the simple snowflake panel onto a piece of navy cardstock and then onto a 4 1/4" square card base.
  • I added the sentiment with foam tape over the middle of the flake.

Thanks so much for coming by and taking a look.

Adding my card to these challenges:
We Love Stamping- CHRISTMAS
Use Your Stuff- WINTER/SNOW

Supplies
Stamp- Festive Flurry (Stampin Up)
Inks- DOX
Paper- Scribes Nook- Waterloo, Ont.
Accessories and Tools- Misti, Christmas Sentiment strips (SSS), foam tape, white Posca pen

Tuesday, 15 November 2022

Twinkle, Twinkle


Good Morning
Here is a quick card I made using the Dream Stars stencil from A Colorful Life Designs.
I decided to go with a rainbow theme.

So, here's what I did to create my card.
  • I cut a piece of white cardstock, placed it onto my Make Art Station and positioned the Dream Stars stencil over that.
  • Next, I got out some Distress Oxide inks in the following colours:  Mustard Seed, Carved Pumpkin, Picked Raspberry, Peacock Feathers and Cracked Pistachio.  
  • Starting at the top of the stencil, I added some colour just to a portion, then continued to do that all the way down the stencil until all the colours were added.
  • I removed the stencil.  I wanted to add splatters in the matching colours around each section of the stars, so to do that, I just pressed each of the above-mentioned ink pads onto my non-stick craft mat, added a bit of water and used a paint brush to flick the colours on.
  • When it was all dry, I placed it into my Misti to stamp the sentiment. 
  • I glued the finished panel onto a piece of pink cardstock and then onto a white card base.

Here is the stencil I used:

Discount Code for A Colorful Life Designs
(Affiliate with no extra cost to you)

Thanks so much for coming by and taking a look.

Adding my card to these challenges:
CRAFT- ANYTHING GOES
Less is More- COLOR WHEEL

Supplies
Stamp- Smile, Sparkle and Shine (Sizzix)
Inks- Versafine Clair, DOX
Paper- Scribes Nook, Waterloo, Ont.
Accessories and Tools- stencil (ACLD); TE Blending Brushes; paint brush; 
Make Art Station (Ranger); Misti

Sunday, 13 November 2022

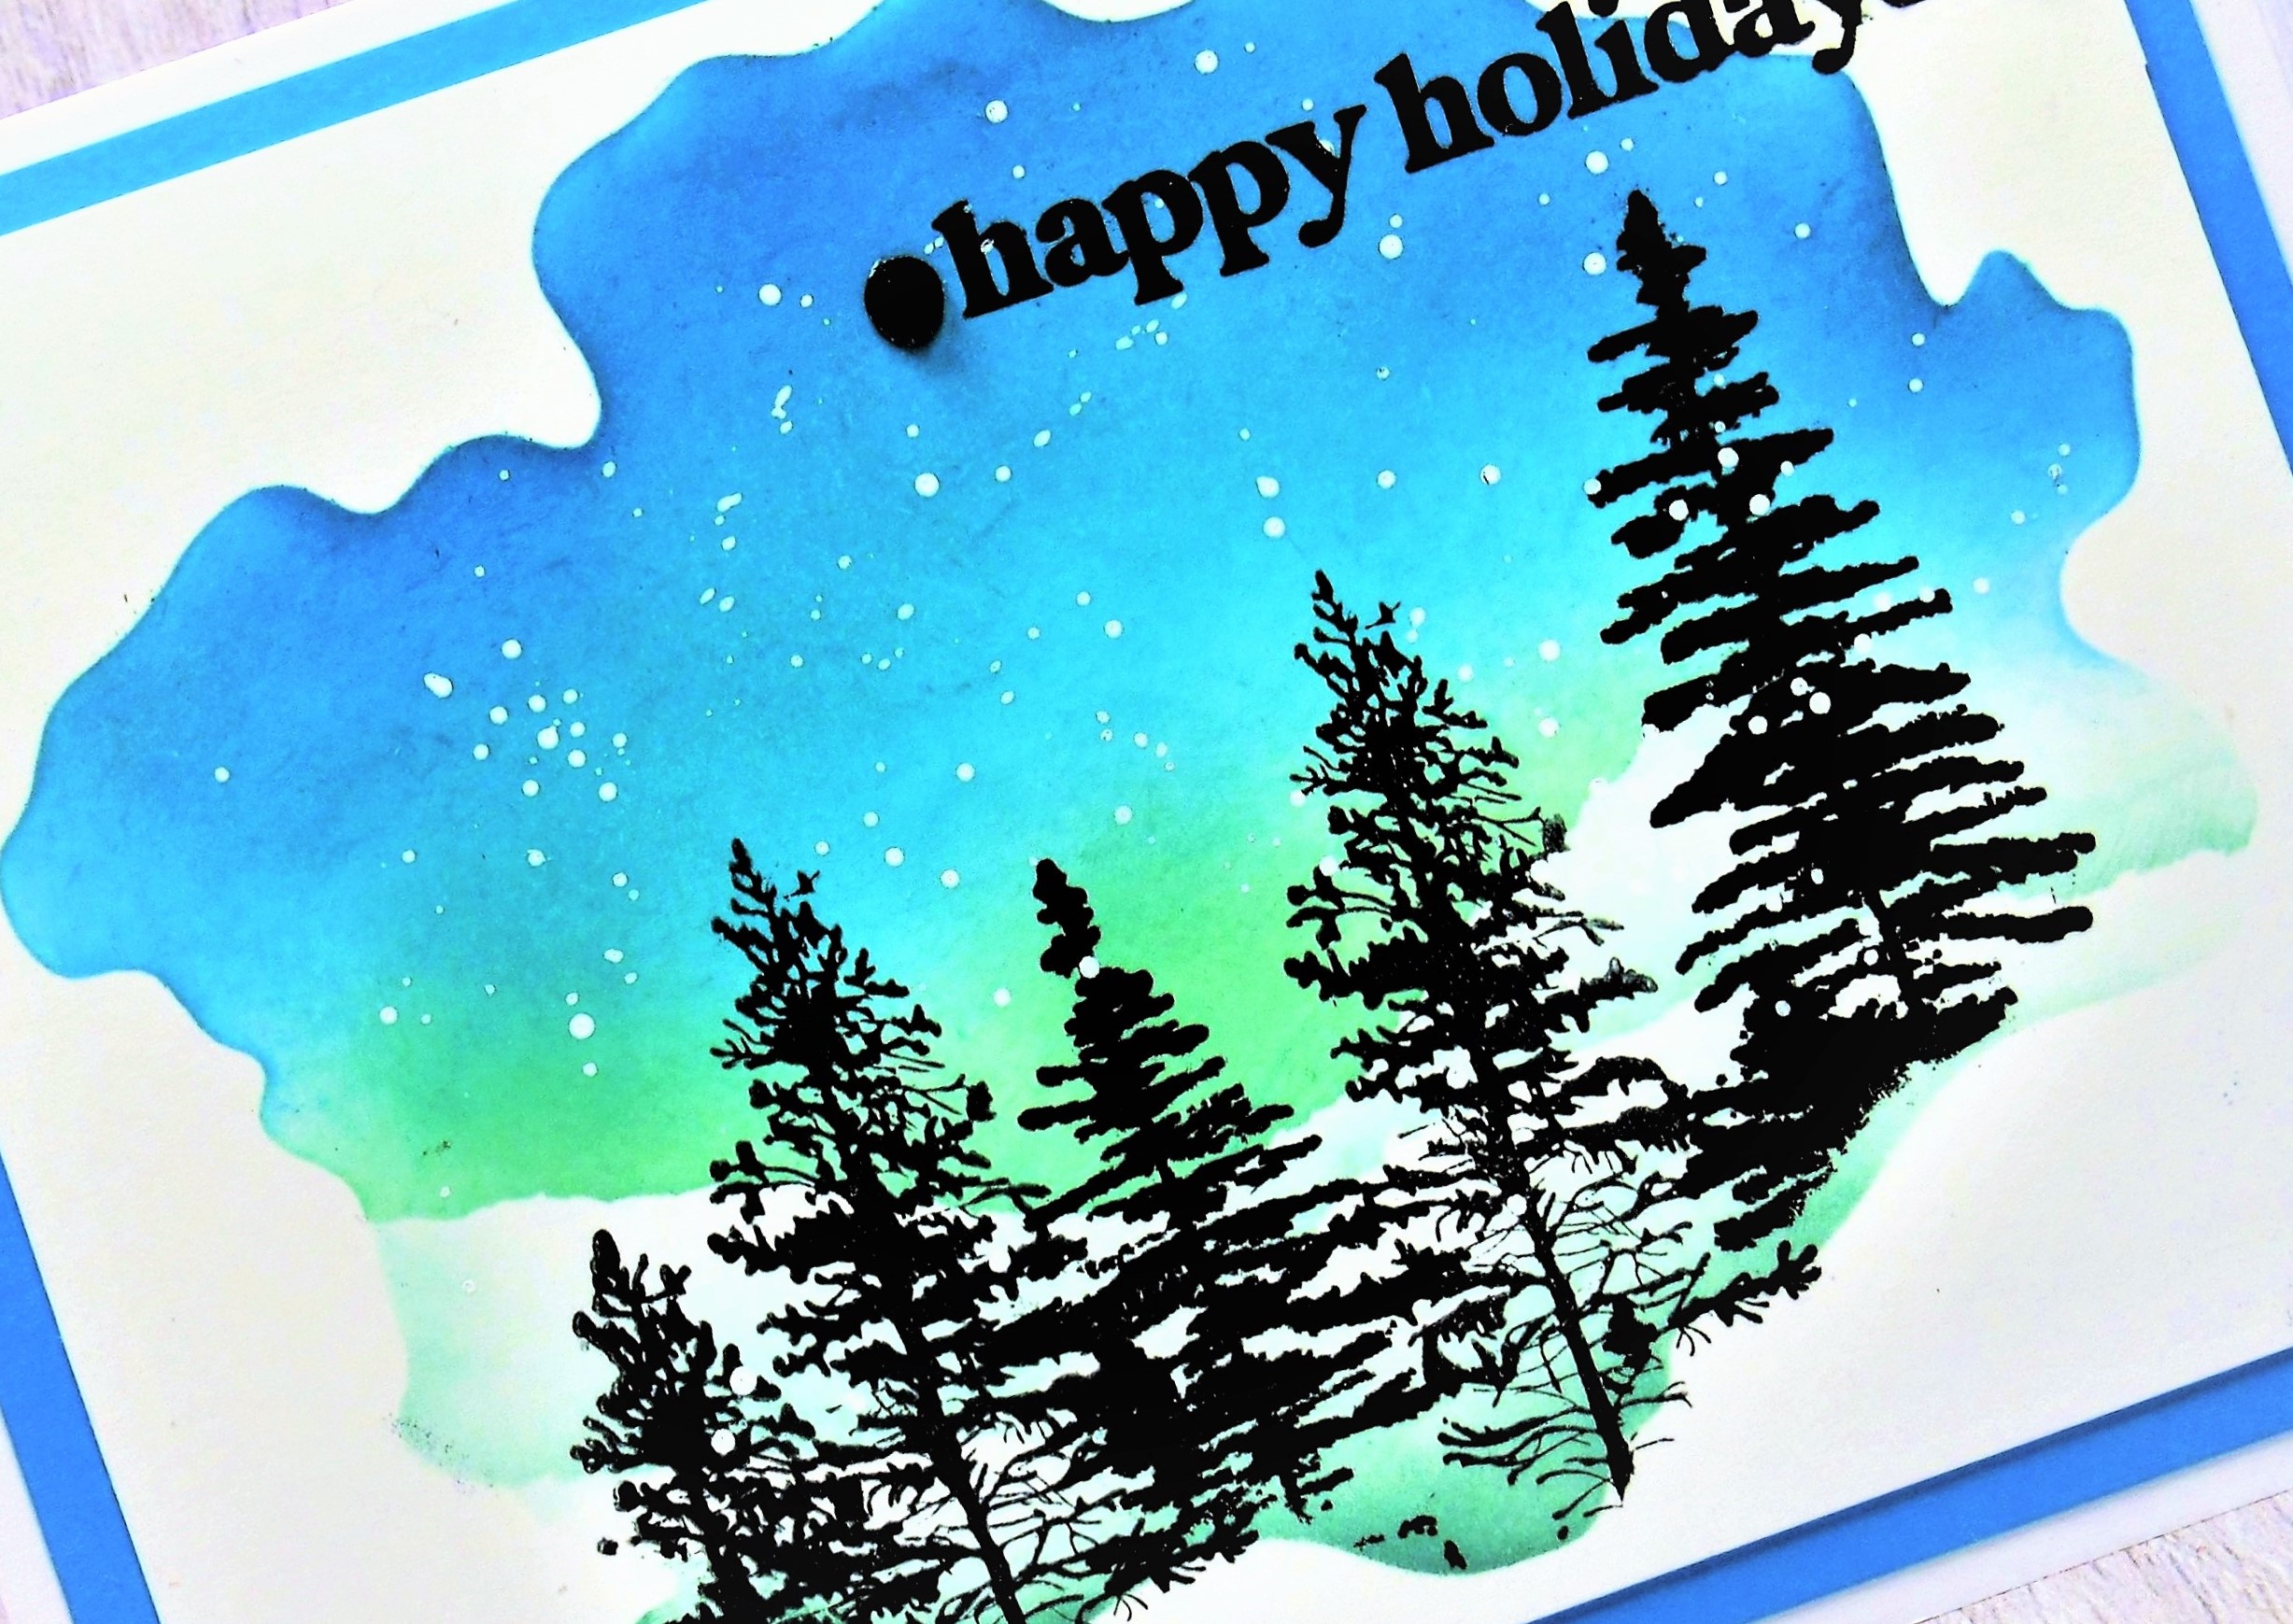
Winter Scene


Welcome
Meet today's card inspired by the snow falling outside.
I'm not a big fan of the snow, but it does look pretty on the trees.

So, here's what I did to create my card.
  • I began with a piece of white cardstock and positioned the Watercolor Wash Free form mask over my paper on my Make Art Station.
  • Next, I tore some paper strips from some scraps that I wanted to use to create the look of snowbanks in the scene.  
  • I began at the top of the masked area and sponged on some Boken China Distress Oxide ink.  I then sponged some Peacock Feathers just under that, leaving the bottom area un-inked.  I darkened the sky a bit at the top with some Uncharted Mariner DOX ink as well.
  • Ok...now for the torn paper strips.  I laid one on and inked above it with some Cracked Pistachio. I removed that and used another one that I had torn to ink again, moving it down and leaving some white space to look like the snowbanks.
  • I removed the torn paper but left the mask in place and stamped the trees using my Misti.
  • I splattered with my white Posca pen and removed the mask.
  • I stamped the sentiment in the top corner.
  • I glued the finished panel onto a piece of white cardstock, then onto an A2 card base.
  • Finally, I added 2 black gems on either side of the sentiment.

Thanks so much for coming by and taking a look.

Adding my card to these challenges:
We Love Stamping- CHRISTMAS
Stamping Sensations- CHRISTMAS CELEBRATIONS

Supplies
Stamps- 3 Pine Trees (Nellie's Choice); Trees (IO); Merry Sentiments (Scrapbook.com)
Inks- Versafine; DOX
Paper- white (Scribes Nook- Waterloo, Ont.)
Accessories and Tools- mask (MFT); Misti (My Sweet Petunia); scrap paper; 
Posca pen; TE Blending Brushes; black gems

Saturday, 12 November 2022

Frosty Christmas


Welcome
I was able to get a great frosty look for today's card using the newly released Driven Snow stencil from A Colorful Life Designs and my Gel Plate.

So, here's what I did to create my card.
  • I began with a piece of white cardstock and got out my Gel Plate and brayer.
  • I pressed my Broken China and Tumbled Glass Distress Oxide pads directly onto my Gel Plate and brayered them out smooth, blending them together.
  • I laid the Driven Snow stencil onto the plate, pressed a piece of scrap paper over the stencil to lift off some of the ink.  I removed the stencil and pressed my piece of cardstock onto the plate to take the print.  It looked so frosty with its unique design.
  • I splattered the inked panel with my white Posca pen.
  • While that dried, I die cut the snowflake from some white cardstock and cut out the sentiment.
  • I glued the stenciled panel onto a piece of white cardstock, then onto an A2 sized card base.
  • I glued the snowflake onto the middle of the card front, adding glue just to the center so the edges of the snowflake could be popped up a bit.
  • I used some foam tape to add the sentiment.

Here is the stencil I used:

Discount Code for A Colorful Life Designs
(Affiliate with no extra cost to you)

Thanks so much for coming by and taking a look.

Adding my card to these challenges:
Krafty Chicks- CHRISTMAS
Craft Rocket- CHRISTMAS/WINTER
As You Like It- FAV NON-TRADITIONAL CHRISTMAS COLOR COMBO and why
(I love the look of shades of blues to give an icy, wintery look to my cards.  Adding in some black, just gives it a pop of colour)

Supplies
Stamps- none
Inks- DOX
Paper- heavy white (Scribes Nook- Waterloo, Ont.)
Accessories and Tools- Driven Snow stencil (ACLD); Snowflake die (Tim Holtz);
Gel Plate; Speedball Brayer; Posca pen; Sentiment strips (SSS)