Thursday, 22 September 2022

Warm Wishes


Good Morning
Meet today's card.
I've been working to get some cards tucked away before the holidays arrive....time is going so fast!
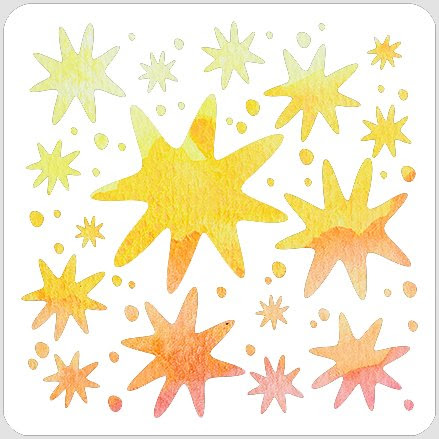
I'm using this newly released stencil called BLAM from A Colorful Life Designs to make a non-traditional looking Christmas card. 
I had fun playing with it.

So here's what I did to create my card.
  • I laid a piece of white cardstock onto my Make Art Station and then placed the Blam stencil over that.
  • I inked up the stencil with some Uncharted Mariner Distress Oxide ink, covering the white cardstock.
  • Next, I moved the stencil slightly and inked again with some Prize Ribbon DOX ink, pressing lightly as not to overpower the first inking.
  • I thought it needed something more, so I pulled out the Grunge Tones stamp set and stamped it over just the stars with more of the same DOX ink to add more interest.
  • There was some ink left on the stencil, so I sprayed it with some water and pressed it onto another piece of white cardstock to use as the background for my sentiment circle.
  • When that was dry, I die cut a circle using it, then placed it into my Misti to stamp the sentiment.  I glued that onto another plain, white circle that was a little larger.
  • I glued the finished panel onto an A2 card base and pop dot mounted the circle sentiment over that.


Here are the stencils I used:
Discount Code for A Colorful Life Designs
(Affiliate with no extra cost to you)

Thanks so much for coming by and taking a look.

Adding my card to these challenges:
The Holly and Ivy- ANYTHING GOES


Supplies
Stamp- Encircled in Warmth (SU); Grunge Tones (Visible Image)
Inks- Versafine Clair; DOX
Paper- heavy white (Scribes Nook- Waterloo, Ont.)
Accessories and Tools- stencil (ACLD); Infinity Circle dies (HA); 
Make Art Station (Ranger)

Monday, 19 September 2022

BFF=Fun


Welcome.
Today's card is a fun one, created using a Bokeh layering stencil and my Distress Oxide inks.
I'm playing along with a Best Friends Challenge over at Splitcoast Stampers.

So, here's what I did to create my card.
  • I cut a piece of white cardstock for my main panel and laid it onto my Stencil Mat.
  • Next, I got out the Bokeh Layering stencil from TE. This set has 3 stencils to it, so I placed the first stencil over my panel.  The stencil mat has a corner which is very useful when doing laying stencil, so you are able to get all the stencils lined up in the right position.  I inked over it with some Mustard Seed DOX ink.
  • I removed that stencil and placed the 2nd one down and inked with some Carved Pumpkin and repeated that process with the final stencil and some Picked Raspberry.
  • When all the stenciling was done, I splattered with my white Posca pen.
  • I decided to cut the finished panel into 2 pieces to add interest and glued them onto a piece of white cardstock, then onto a piece of some matching orange cardstock.
  • I stamped the sentiment in my Misti, die cut it out with a circle and glued that onto a slightly larger orange circle.  
  • I glued the panel onto an A2 card base, then popped the sentiment over to one side.

Thanks so much for coming by and taking a look.

Supplies
Stamps- Everyday Circle Tags (Avery Elle)
Inks- Distress Oxides; Versafine Clair
Paper- 110lb. white-Scribes Nook, Waterloo, Ont.
Accessories and Tools- Bokeh stencil (TE); Waffle Flower Stencil Mat; 
white Posca pen; Misti; Infinity Circle dies (HA)

Monday, 12 September 2022

Ink Lifting


Welcome
Today's card may look tricky, but actually it was very quick and easy to do with some ink blending and then some ink lifting using water.
I am playing with this unique stencil from A Colorful Life Designs called Dot Spokes.

So here's what I did to create my card.
  • I began by cutting a piece of white cardstock and inked it up randomly, with some Distress Oxide inks.  I like using those inks as they really give a nice effect when water is added.  The colours I used were:  Blueprint Sketch, Peacock Feathers and some Wilted Violet.
  • After I was happy with the inking, I sprayed the Dot Spokes stencil with a good amount of water and carefully placed it onto my inked background, being sure the stencil made good contact with the paper.
  • I pressed over the stencil on the paper with some scrap paper so the water would have a good amount of time to saturate and wet the ink.
  • I carefully removed the stencil and set the panel aside to dry.
  • Next, I die cut the sentiment from a piece of navy cardstock, then some white and glued them together.  I offset them a bit for a different look.
  • I splattered the dry panel with my white Posca pen to add interest.
  • When I looked at the finished panel, I thought it needed something more, so I rubbed the edges with my Versamark ink and using some white embossing powder, heated that up.
  • I glued it onto a dark purple piece of cardstock, then onto an A2 size card panel.
  • I glued the sentiment over the bkg. and added some blue gems for more interest.

Here is the stencil I used:

Discount Code for A Colorful Life Designs
(affiliate with no extra cost to you)

Adding my card to these challenges:
Happy Little Stamper- STENCIL ANYTHING GOES
Love to Craft- ANYTHING GOES
Simon Says Mon.- DIE CUT


Thanks so much for coming by and taking a look.

Supplies
Stamps- none
Inks- DOX, Versamark
Paper- heavy white (Scribes Nook, Waterloo, Ont.)
Accessories and Tools- Dot Spokes stencil (ACLD); Mister (Ranger); 
TE Blending Brushes; Just Because die (SSS); white EB powder; gems (Dollar Tree)

Saturday, 10 September 2022

Baby Congrats


Good Morning and Welcome
This month at A Colorful Life Designs, we are celebrating Babies as part of the release.
It is always great to have some baby cards on hand.
This new stencil called Sweet Zoo is so fun.  I decided to go with a rainbow effect.

So here's what I did to create my card.
  • I began by placing a piece of white cardstock onto my Make Art Station and placed the Sweet Zoo stencil over that.
  • Since I wanted to create a rainbow effect look for my card, I began inking from the top down with my Distress Oxide inks.  Here is the order and names of the colours I used:  Mustard Seed; Carved Pumpkin; Picked Raspberry; Peacock Feathers
  • After I was happy with the inking and colour blending, I removed the stencil and got out this alphabet set from Scrapbook.com
  • I placed the letters onto the stenciled card front and die cut them out.
  • I die cut the letters again 4x's on some white cardstock and glued them all together.
  • I glued the stenciled panel onto an A2 card and then glued the letters back into place called the Eclipse Technique.
  • I added some matching coloured gems just under the sentiment.

Here is the stencil I used:

Discount Code for A Colorful Life Designs
(affiliate with no extra cost to you)

Adding my card to these challenges:
CASology- HAPPY
Little Red Wagon- CUTE, CUTE, CUTE
Try It On Tues.- ANIMALS

Supplies
Stamps- none
Inks- DOX
Paper- Scribes Nook- Waterloo, Ont.
Accessories and Tools- Bold Basic Alphabet (Scrapbook.com); Make Art Station (Ranger);
gems (Dollar Store); TE Blending Brushes