Showing posts with label bokeh. Show all posts

Monday, 19 September 2022

BFF=Fun


Welcome.
Today's card is a fun one, created using a Bokeh layering stencil and my Distress Oxide inks.
I'm playing along with a Best Friends Challenge over at Splitcoast Stampers.

So, here's what I did to create my card.
  • I cut a piece of white cardstock for my main panel and laid it onto my Stencil Mat.
  • Next, I got out the Bokeh Layering stencil from TE. This set has 3 stencils to it, so I placed the first stencil over my panel.  The stencil mat has a corner which is very useful when doing laying stencil, so you are able to get all the stencils lined up in the right position.  I inked over it with some Mustard Seed DOX ink.
  • I removed that stencil and placed the 2nd one down and inked with some Carved Pumpkin and repeated that process with the final stencil and some Picked Raspberry.
  • When all the stenciling was done, I splattered with my white Posca pen.
  • I decided to cut the finished panel into 2 pieces to add interest and glued them onto a piece of white cardstock, then onto a piece of some matching orange cardstock.
  • I stamped the sentiment in my Misti, die cut it out with a circle and glued that onto a slightly larger orange circle.  
  • I glued the panel onto an A2 card base, then popped the sentiment over to one side.

Thanks so much for coming by and taking a look.

Supplies
Stamps- Everyday Circle Tags (Avery Elle)
Inks- Distress Oxides; Versafine Clair
Paper- 110lb. white-Scribes Nook, Waterloo, Ont.
Accessories and Tools- Bokeh stencil (TE); Waffle Flower Stencil Mat; 
white Posca pen; Misti; Infinity Circle dies (HA)

Tuesday, 28 June 2022

Starburst


Welcome
Today's card features lots of stars using a recent purchase I made.
The Bokeh Stars from Taylored Expressions was a fun one to play with.  
It is a 3 part layering stencil and so easy to use.

So here's what I did to create my card.
  • I got out my stencil mat and placed the #1 stencil onto my cardstock and ink it up with some Carved Pumpkin and some Picked Raspberry Distress Oxide ink. The stencil mat has a bumper around the corner so it is easy to line up each consecutive stencil as you overlay them.
  • I removed that stencil and replaced it with #2 and inked that up with some Peacock Feathers and some Blueprint Sketch DOX ink.
  • Lastly came stencil #3 that I inked with some Cracked Pistachio DOX ink.  These inks layer so nicely over one another.
  • Using my white Posca pen, I splattered all over the front and let dry. 
  • When it was dry, I used this die cut combo and cut the outline piece right from the center of the stenciled panel.  I cut the sentiment from a piece of navy cardstock and glued them together.
  • To assemble, I glued the star panel onto a piece of navy cardstock, then onto a heavy white card base.  I pop dotted the sentiment back into place and then added 3 navy gems to finish it all off.

Thanks so much for coming by and taking a look.

Adding my card to these challenges:
Simon Says Wed.- CLEAN AND SIMPLE
Dare 2B Artzy- MASCULINE

Supplies
Stamps- None
Inks- DOX
Paper- heavy white (Scribes Nook- Waterloo, Ont.)
Accessories and Tools- Waffle Flower Stencil Mat; Bokeh Stars stencil (TE);
white Posca pen; TE inking brushes; blue gems (Dollar Store); Happy Birthday die (Amazon)

Thursday, 10 March 2022

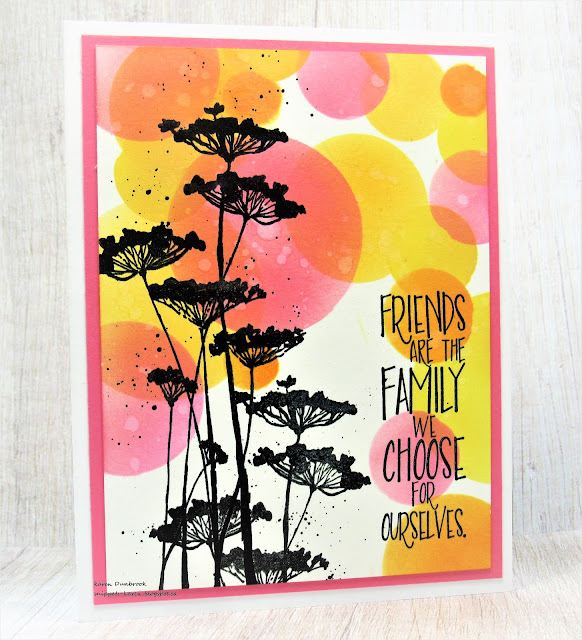
Simple Bokeh


Good Morning
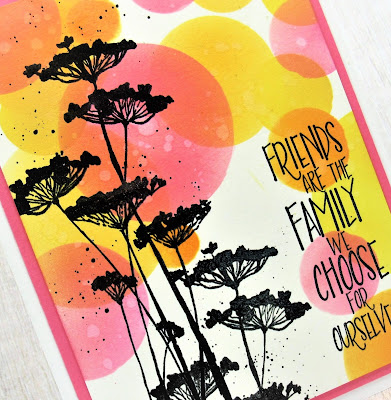
Today's card features a very simple technique called Bokeh.
Basically it is circles of light and dark...gives a fun look to the background.

So here's what I did to create my card.
  • I cut a white cardstock panel for my card front and got out my sheet of acetate that I had used to die cut different sized circles to use for this technique.  
  • I began inking up the circles in different areas using Distress Oxide inks, varying the depth of colours to create the look of bokeh.  I used some Picked Raspberry, Carved Pumpkin and Mustard Seed DOX ink.
  • When I was done with that inking, I splattered the panel with water to lift some of the ink in places and give more interest.
  • I placed the dry panel into my Misti and stamped the flowers and the sentiment with black Verafine ink.
  • Using my black Posca pen, I splattered just over the area of the flowers.
  • I glued the finished panel onto a piece of pink cardstock, then onto a white card base.

Thanks so much for coming by and taking a look.

Adding my card to these challenges:
Crafty Gals Corner- ADD A FLOWER
Unicorn Challenge- DOT and/or STRIPES


Supplies
Stamps- Insightful Meadow (Unity); Friends are Family (Impression Obsession)
Inks- DOX; Versafine Clair
Paper- heavy white (Scribes Nook- Waterloo, Ont.)
Accessories and Tools- Infinity Circle die (Hero Arts); Misti (My Sweet Petunia); 
Posca pen; TE Blending Brushes

Thursday, 3 February 2022

Reflect and Hope


Hello and Welcome
After a long week, I enjoy watching a live on Friday nights hosted by Vicki Boutin.  
For those of you that don't know her, she's a mixed media artist, has her own brand, creates live online for free every Friday night and is a fellow Canadian with a big heart!
(You can catch her videos on FB or YouTube)
Last Friday, she showed one technique for creating Bokeh backgrounds. 
 I haven't done that in awhile so decided to make one.
For those of you that are unfamiliar with the term 'bokeh' basically it is a photographic effect that photographers can give to a photo to make the lights looked blurred and reflective.

So here's what I did to create my card.
  • I cut a piece of white cardstock and placed the Marvelous Masks Rectangle from ACLD over my cut panel.  These masks are so great when you want to have a crisp, white border left around the edge of your inking or stamping.
  • I used my Infinity Circle dies to cut some different sized circles on a sheet of acetate so I could reuse it.
  • Using the different size circles, I inked them randomly using some Blueprint Sketch, Peacock Feathers and Cracked Pistachio.  The DOX inks are opaque so they blend over each other which is great for this technique.
  • I kept blending different sizes of the circles, most without reinking my blending brush to give some a more faded look in the background.  
  • When I was happy with the inking, I removed the Rectangle mask and placed the panel into my Misti.
  • I stamped the dragonfly and the sentiment from the same set.  I clear heat embossed the image to help show more definition to the wings and body.
  • I replaced the mask over the panel, then splattered with my black, then white Posca pen.
  • I glued the inked panel onto a piece of navy cardstock, then onto a white card base.
 

Thanks so much for coming by and taking a look.

Here are the masks I used:

Discount Code for A Colorful Life Designs
(affiliate with no extra cost to you)

Adding my card to these challenges:
Crafts Galore Encore- ANYTHING GOES


Supplies
Stamps- Dragonfly Refection (Visible Image)
Inks- DOX, Versafine Clair
Paper- white (Scribes Nook- Waterloo, Ont.)
Accessories and Tools- Rectangle Mask (ACLD); Misti (My Sweet Petunia); 
Infinity circle die (HA);  Clear eb powder (HA); white and black Posca pen

Friday, 23 August 2019

Imagine


Hello and Welcome
Here is a card I made last week using a 'bokeh' style of background for these cute little fairies.
I like the look of bokeh, I think it makes for an interesting background.

So I began with a piece of heavy white cardstock and inked it up with some Peacock Feathers, Cracked Pistachio and some Tumbled Glass DOX inks.  I blended all the colours together with a makeup blending brush from the Dollar Store.  I dried it a bit, then using the Circle masks from A Colorful Life Designs, I randomly rubbed on some white Color Box ink over the bkg., creating the circles you see.  I splattered with some water to lift the ink and further add interest.
When the piece was dry, I placed it into my Misti and stamped the fairies and the flowers over the inked background then added the sentiment.
I simply mounted it onto a piece of heavy white cardstock and then onto a white card base.


Thanks so much for coming by and taking a look.

Discount Code for A Colorful Life Designs

Adding my card to this challenge:
Lavinia World- ANYTHING GOES


Supplies
Stamps- Star Gazing (Lavinia); Star Burst (Lavinia); Imagine (High Hopes)
Inks- DOX; Tuxedo Black Memento; Color Box white
Paper- heavy white (Scibes Nook)
Accessories and Tools- Marvelous Circle Masks (A Colorful Life Designs); Misti (My Sweet Petunia); makeup brush