Showing posts with label spider. Show all posts

Sunday, 22 September 2024

Halloween House

Good Morning
Today's card features a fun new stencil for September from A Colorful Life Designs called

So, here's what I did to create my card.
  • I inked up the Spooky Web stencil onto a piece of white cardstock using some Black Soot Distress Oxide ink.
  • I splattered the panel with my black Posca pen and set aside to dry.
  • I used a piece of black cardstock to die cut the Halloween house and then added some pieces of yellow cardstock behind the windows and pathway to help them look like they are glowing in the dark.
  • Next, I die cut the 'boo' sentiment and then inked it with some Villainous Potion Distress Oxide ink and some Black Soot DOX ink.  I splattered that with my black Posca pen.
  • I glued the stenciled spider web onto a piece of purple cardstock to match the sentiment and then glued that onto an A2 sized card base.  
  • I glued the Halloween house over the spider web and then added the ghost and the bat.

Here is the stencil I used:

Discount Code for A Colorful Life Designs
(Affiliate with no extra cost to you) 

Thanks a lot for coming by and taking a look.

Adding my card to these challenges:
Simon Says Wed.- MAKE YOUR OWN BKG
Sweet Stampin- FOR A CHILD
Send a Smile 4 Kids- CUTE FALL/HALLOWEEN CARDS 4 KIDS

Supplies
Stamps- none
Inks- DOX
Paper- heavy white (Scribes Nook- Waterloo, Ont.)
Accessories and Tools- stencil (A Colorful Life Designs); black Posca pen;
TE Blending Brushes; sentiment-Vault Gothic Portraits (TH);
Haunted House (Trinity); ghost die (Amazon)

Thursday, 19 September 2024

BOO to You!

BOO and Welcome!
Today's card features the new for September stencil from A Colorful Life Designs called

I added a new to me technique as well, so here's what I did to create my card.
  • I began my card with a technique I've not done before with my hot glue gun.  After my hot glue was hot, I drew the shape of the spider web onto my card front, swirling the glue over the white cardstock. 
  • Before the glue cooled off, I added some black embossing powder onto the web and heat set it.
  • Next, I placed the Spooky Web stencil right over the hot glue web and inked it up with some Black Soot Distress Oxide ink. I splattered the web with my black Posca pen and set aside to dry.
  • I die cut the sentiment from a left over piece of inked cardstock that I found in my stash, then also die cut the spiders and the skeleton.  
  • I glued my card front onto a piece of purple cardstock, then onto an A2 sized card base.
  • I glued the 'BOO' into the top corner and added the details. 

Here is the stencil I used:

Discount Code for A Colorful Life Designs
(Affiliate with no extra cost to you) 

Thanks for coming by and taking a look.

Adding my card to these challenges: 
Simon Says Wed.- MAKE YOUR OWN BKG
Crazy is Our Fame- Stencils are Our Game- FALL FRENZY or ANYTHING GOES
The Creative Crafters- ANYTHING GOES

Supplies
Stamps- none
Inks- DOX
Paper- heavy white (Scribes Nook- Waterloo, Ont.)
Accessories and Tools- stencil (A Colorful Life Designs); TE Blending Brushes;
Vault Gothic Portraits dies (TH); Big Frights (TH)

Friday, 22 September 2023

Spooky Nights


Hello and Welcome
This month at A Colorful Life Designs, we are showing some Halloween fun stencils.
New for this month is the Interactive Drippy Ghosts stencil.
I paired it up with some older released stencils for my spooky card.  

So, here's what I did to create my card.
  • I cut a piece of white cardstock and placed it onto my Make Art Station.  I placed the Pumpkin Patch stencil along the bottom of my panel and then inked with some Ripe Persimmon Distress Oxide ink.
  • I removed that stencil and placed the large Fancy Web stencil over the background and inked with Black Soot DOX ink.  I splattered with water to lift some of the colour and set aside to dry.
  • While that dried, I stenciled one of the little ghosts from the Drippy Ghosts stencil wish a bit of Weathered Wood DOX ink and fussy cut it out.
  • Next, I stamped the spider and the sentiment using my Misti.
  • I added a bit more of the Black Soot DOX ink along the edges to give a more 'spooky' look.
  • I glued the stenciled panel onto a piece of black cardstock and then onto an A2 sized card base.
  • Lastly, I used some foam tape to pop up the little ghost over to the side.

Here are the stencils I used:


Discount Code for A Colorful Life Designs
(Affiliate with no extra cost to you) 

Thanks so much for taking a look.

Adding my card to these challenges:
The Crafty Addicts- ANYTHING GOES
Crafty Gals- SIGNS OF FALL

Supplies
Stamps- Halloween (Craft Smart), Halloween Spider (Recollections)
Inks- DOX, Versafine Clair
Paper- heavy white (Scribes Nook- Waterloo, Ont.)
Accessories and Tools- stencils (A Colorful Life Designs); Make Art Station (Ranger);
TE Blending Brushes

Monday, 18 September 2023

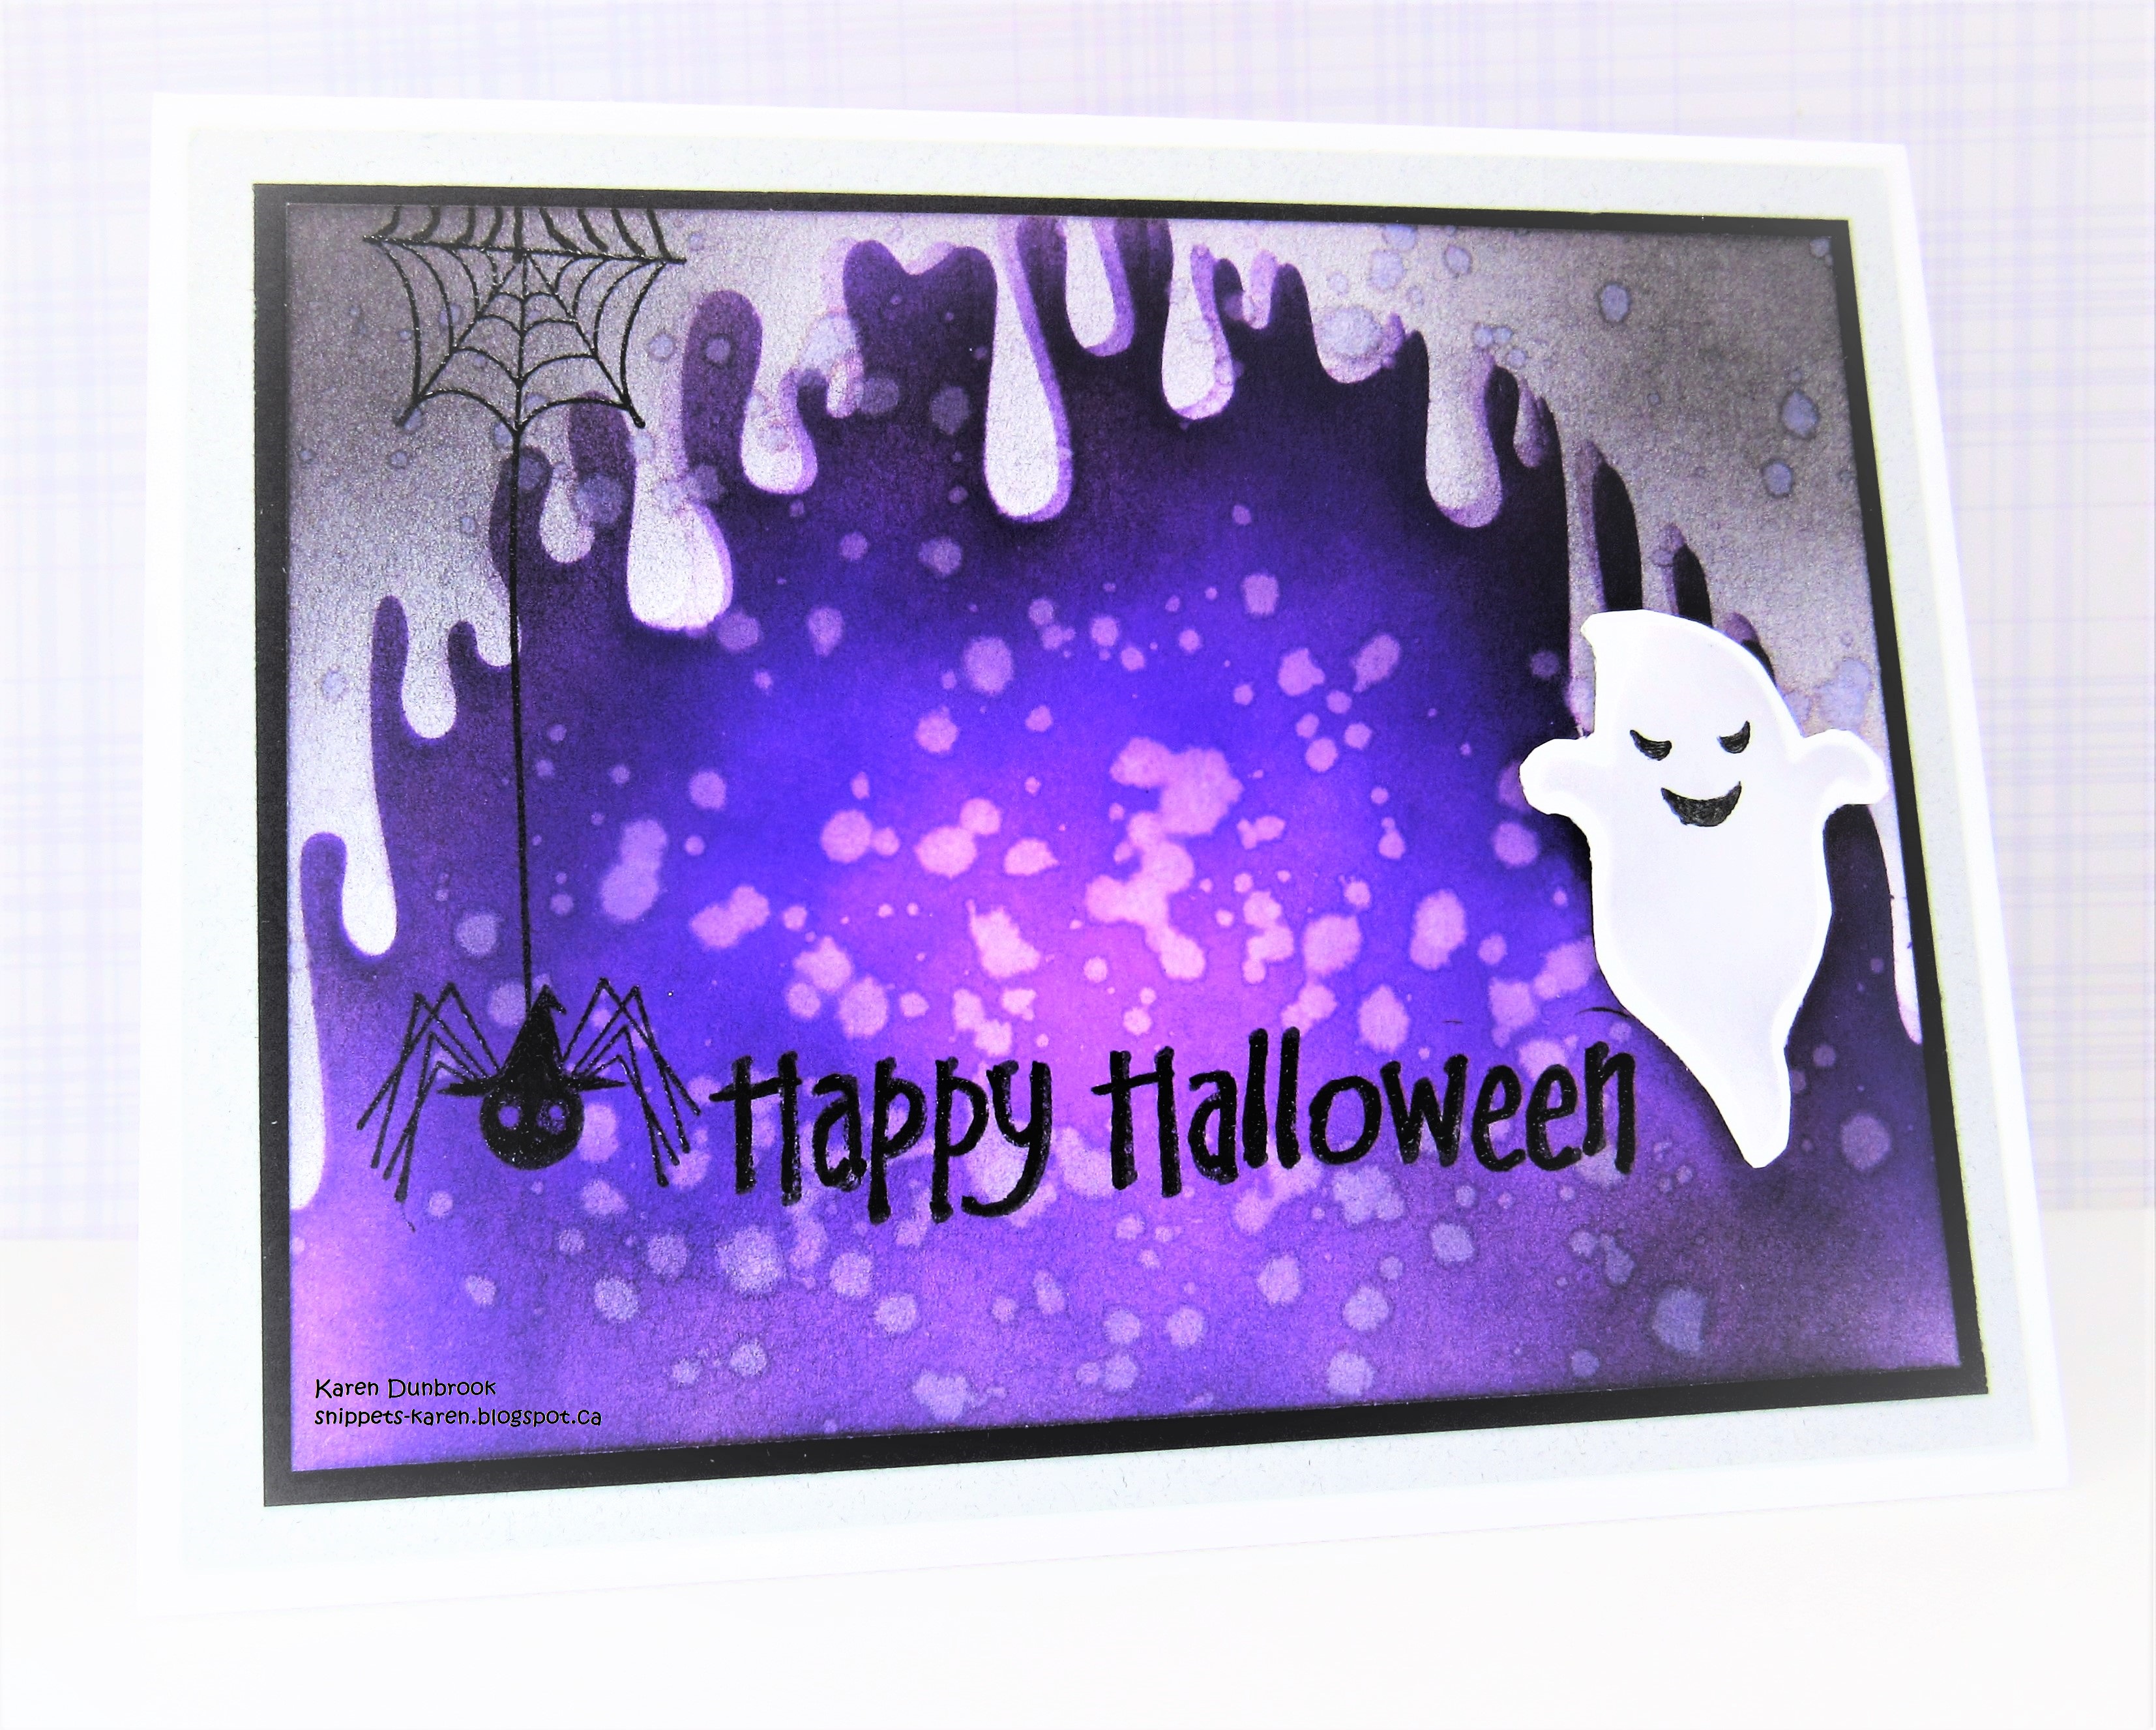
Spooky Halloween


Welcome
I created another Halloween card using 2 new fun stencils from A Colorful Life Designs called

So, here's what I did to create my card.
  • I took a piece of white cardstock and placed the Drippy Arch stencil over it on my Make Art Station. Using some Villainous Potion Distress Oxide ink, I inked up the whole panel.
  • This stencil has 2 parts, a stencil and a mask so I masked the bottom purple area and then went over the top area that was still white with some Weathered Wood DOX ink.
  • I shifted the stencil slightly and added just a hint of the purple along the edges to give a shadow effect.
  • Next, using some Black Soot DOX ink, I inked around all the edges just to add to the effect.
  • I splattered is all with water to lift some of the colour and set aside to dry.
  • While that dried, I stenciled one of the cute little ghost from the Drippy Ghosts set with some Weathered Wood and fussy cut it out.
  • I stamped the little spider and the sentiment and then glued it onto a piece of black cardstock, then onto an A2 sized card base.
  • I used some foam tape to pop the little ghost to the side.

Here are the stencils I used:

Interactive Drippy Ghosts 

Discount Code for A Colorful Life Designs
(Affiliate with no extra cost to you) 

Thanks so much for coming by and taking a look.

Adding my card to these challenges:
Two Old Bats Halloween- ANYTHING HALLOWEEN
Simon Says Wed.- MAKE IT CUTE
2 Sisters on the Blog- AUTUMN or THANKSGIVING

Supplies
Stamps- Halloween (Studio G), Halloween Spider (Recollections)
Inks- DOX; Versafine Clair
Paper- heavy white (Scribes Nook- Waterloo, Ont.)
Accessories and Tools- stencils (A Colorful Life Designs); Make Art Station (Ranger)

Friday, 27 September 2019

Trick or Treat


Morning.
I don't tend to make Halloween cards, but when I saw this great TH set on for a steal at Michaels, I just had to own it.  I love the spider web and the set has some really cute images in it.

So onto my background.
As most of you already know, I love playing around creating bkgs.  I was using some shaving cream and re-inkers for another project and had some leftover on the plate I was using.  I didn't want it to go to waste, so I pressed a piece of cardstock into the inked shaving cream and put the dry piece away in my stash.  I like to have backgrounds ready and waiting for quick card making.
How to do this technique.....spread some shaving cream onto a paper plate (that makes for easy clean-up).  Drop some re-inkers onto the shaving cream and swirl it around.  I used a little spatula but you could use the end of a paint brush or a popsicle stick.  Gently press the paper into the shaving cream, set aside to dry.  Scrape off the excess with an old credit card to reveal a beautiful bkg.

I placed the inked bkg into my Misti and stamped the images and the sentiment. 
To give it an even more eerie look, I rubbed the edges with some Black Soot DOX ink and splattered with some black acrylic paint.
I mounted it onto a piece of white, then black, then onto a heavy white cardbase.


Thanks so much for coming by and taking a look.

Adding my card to these challenges:
Simon Says Wed.- ANYTHING GOES
Craft Rocket- MONOCHROMATIC


Supplies
Stamps- Halloween Cutouts (TH)
Inks- Versafine Clair Nocturne; Black Soot DI (TH); Carved Pumpkin, Dried Marigolds Distress Re-inker (TH)
Paper- heavy white (Scribes Nook); black cs
Accessories and Tools- Misti (My Sweet Petunia); black acrylic paint; shaving cream;