Showing posts with label web. Show all posts

Monday, 7 September 2026

Webby Leaf

Hello and Welcome
Meet another one of the newest releases for September from A Colorful Life Designs called
This unique looking leaf also has a bit of a Halloween/spider web kind of look to it.

Here is what I did to create a simple card.
  • I placed the Webby Leaf stencil over a piece of white cardstock and using my ink dabbers, I simply pounced the brushes over the stencil with these Distress Oxide ink colours...Ripe Persimmon; Lumberjack Plaid; Rustic Wilderness; Cracked Pistachio; Fossilized Amber.
  • While the ink dried, I took another piece of cardstock and scored it (it doesn't show up in the photo) to use as my card front front.
  • Next, I fussy cut out the leaf and glued that over the scored card front.  I then glued that onto a piece of green cardstock and then onto a white A2 sized card base.
  • I wanted a simple sentiment for the front, so I cut out one of the pre-printed sentiments and added it with some foam tape to finish off my card.

Here is the stencil I used:


My Discount Code for Your Entire Order from A Colorful Life Designs:

Much thanks for coming by and taking a look.

Supplies
Stamps- none
Inks- DOX
Paper- Solar White
Accessories and Tools- stencil (A Colorful Life Designs); Sponge ink dabbers (Amazon);
pre-printed sentiment (TE); Scoring Tool; foam tape

Thursday, 19 September 2024

BOO to You!

BOO and Welcome!
Today's card features the new for September stencil from A Colorful Life Designs called

I added a new to me technique as well, so here's what I did to create my card.
  • I began my card with a technique I've not done before with my hot glue gun.  After my hot glue was hot, I drew the shape of the spider web onto my card front, swirling the glue over the white cardstock. 
  • Before the glue cooled off, I added some black embossing powder onto the web and heat set it.
  • Next, I placed the Spooky Web stencil right over the hot glue web and inked it up with some Black Soot Distress Oxide ink. I splattered the web with my black Posca pen and set aside to dry.
  • I die cut the sentiment from a left over piece of inked cardstock that I found in my stash, then also die cut the spiders and the skeleton.  
  • I glued my card front onto a piece of purple cardstock, then onto an A2 sized card base.
  • I glued the 'BOO' into the top corner and added the details. 

Here is the stencil I used:

Discount Code for A Colorful Life Designs
(Affiliate with no extra cost to you) 

Thanks for coming by and taking a look.

Adding my card to these challenges: 
Simon Says Wed.- MAKE YOUR OWN BKG
Crazy is Our Fame- Stencils are Our Game- FALL FRENZY or ANYTHING GOES
The Creative Crafters- ANYTHING GOES

Supplies
Stamps- none
Inks- DOX
Paper- heavy white (Scribes Nook- Waterloo, Ont.)
Accessories and Tools- stencil (A Colorful Life Designs); TE Blending Brushes;
Vault Gothic Portraits dies (TH); Big Frights (TH)

Friday, 22 September 2023

Spooky Nights


Hello and Welcome
This month at A Colorful Life Designs, we are showing some Halloween fun stencils.
New for this month is the Interactive Drippy Ghosts stencil.
I paired it up with some older released stencils for my spooky card.  

So, here's what I did to create my card.
  • I cut a piece of white cardstock and placed it onto my Make Art Station.  I placed the Pumpkin Patch stencil along the bottom of my panel and then inked with some Ripe Persimmon Distress Oxide ink.
  • I removed that stencil and placed the large Fancy Web stencil over the background and inked with Black Soot DOX ink.  I splattered with water to lift some of the colour and set aside to dry.
  • While that dried, I stenciled one of the little ghosts from the Drippy Ghosts stencil wish a bit of Weathered Wood DOX ink and fussy cut it out.
  • Next, I stamped the spider and the sentiment using my Misti.
  • I added a bit more of the Black Soot DOX ink along the edges to give a more 'spooky' look.
  • I glued the stenciled panel onto a piece of black cardstock and then onto an A2 sized card base.
  • Lastly, I used some foam tape to pop up the little ghost over to the side.

Here are the stencils I used:


Discount Code for A Colorful Life Designs
(Affiliate with no extra cost to you) 

Thanks so much for taking a look.

Adding my card to these challenges:
The Crafty Addicts- ANYTHING GOES
Crafty Gals- SIGNS OF FALL

Supplies
Stamps- Halloween (Craft Smart), Halloween Spider (Recollections)
Inks- DOX, Versafine Clair
Paper- heavy white (Scribes Nook- Waterloo, Ont.)
Accessories and Tools- stencils (A Colorful Life Designs); Make Art Station (Ranger);
TE Blending Brushes

Monday, 18 September 2023

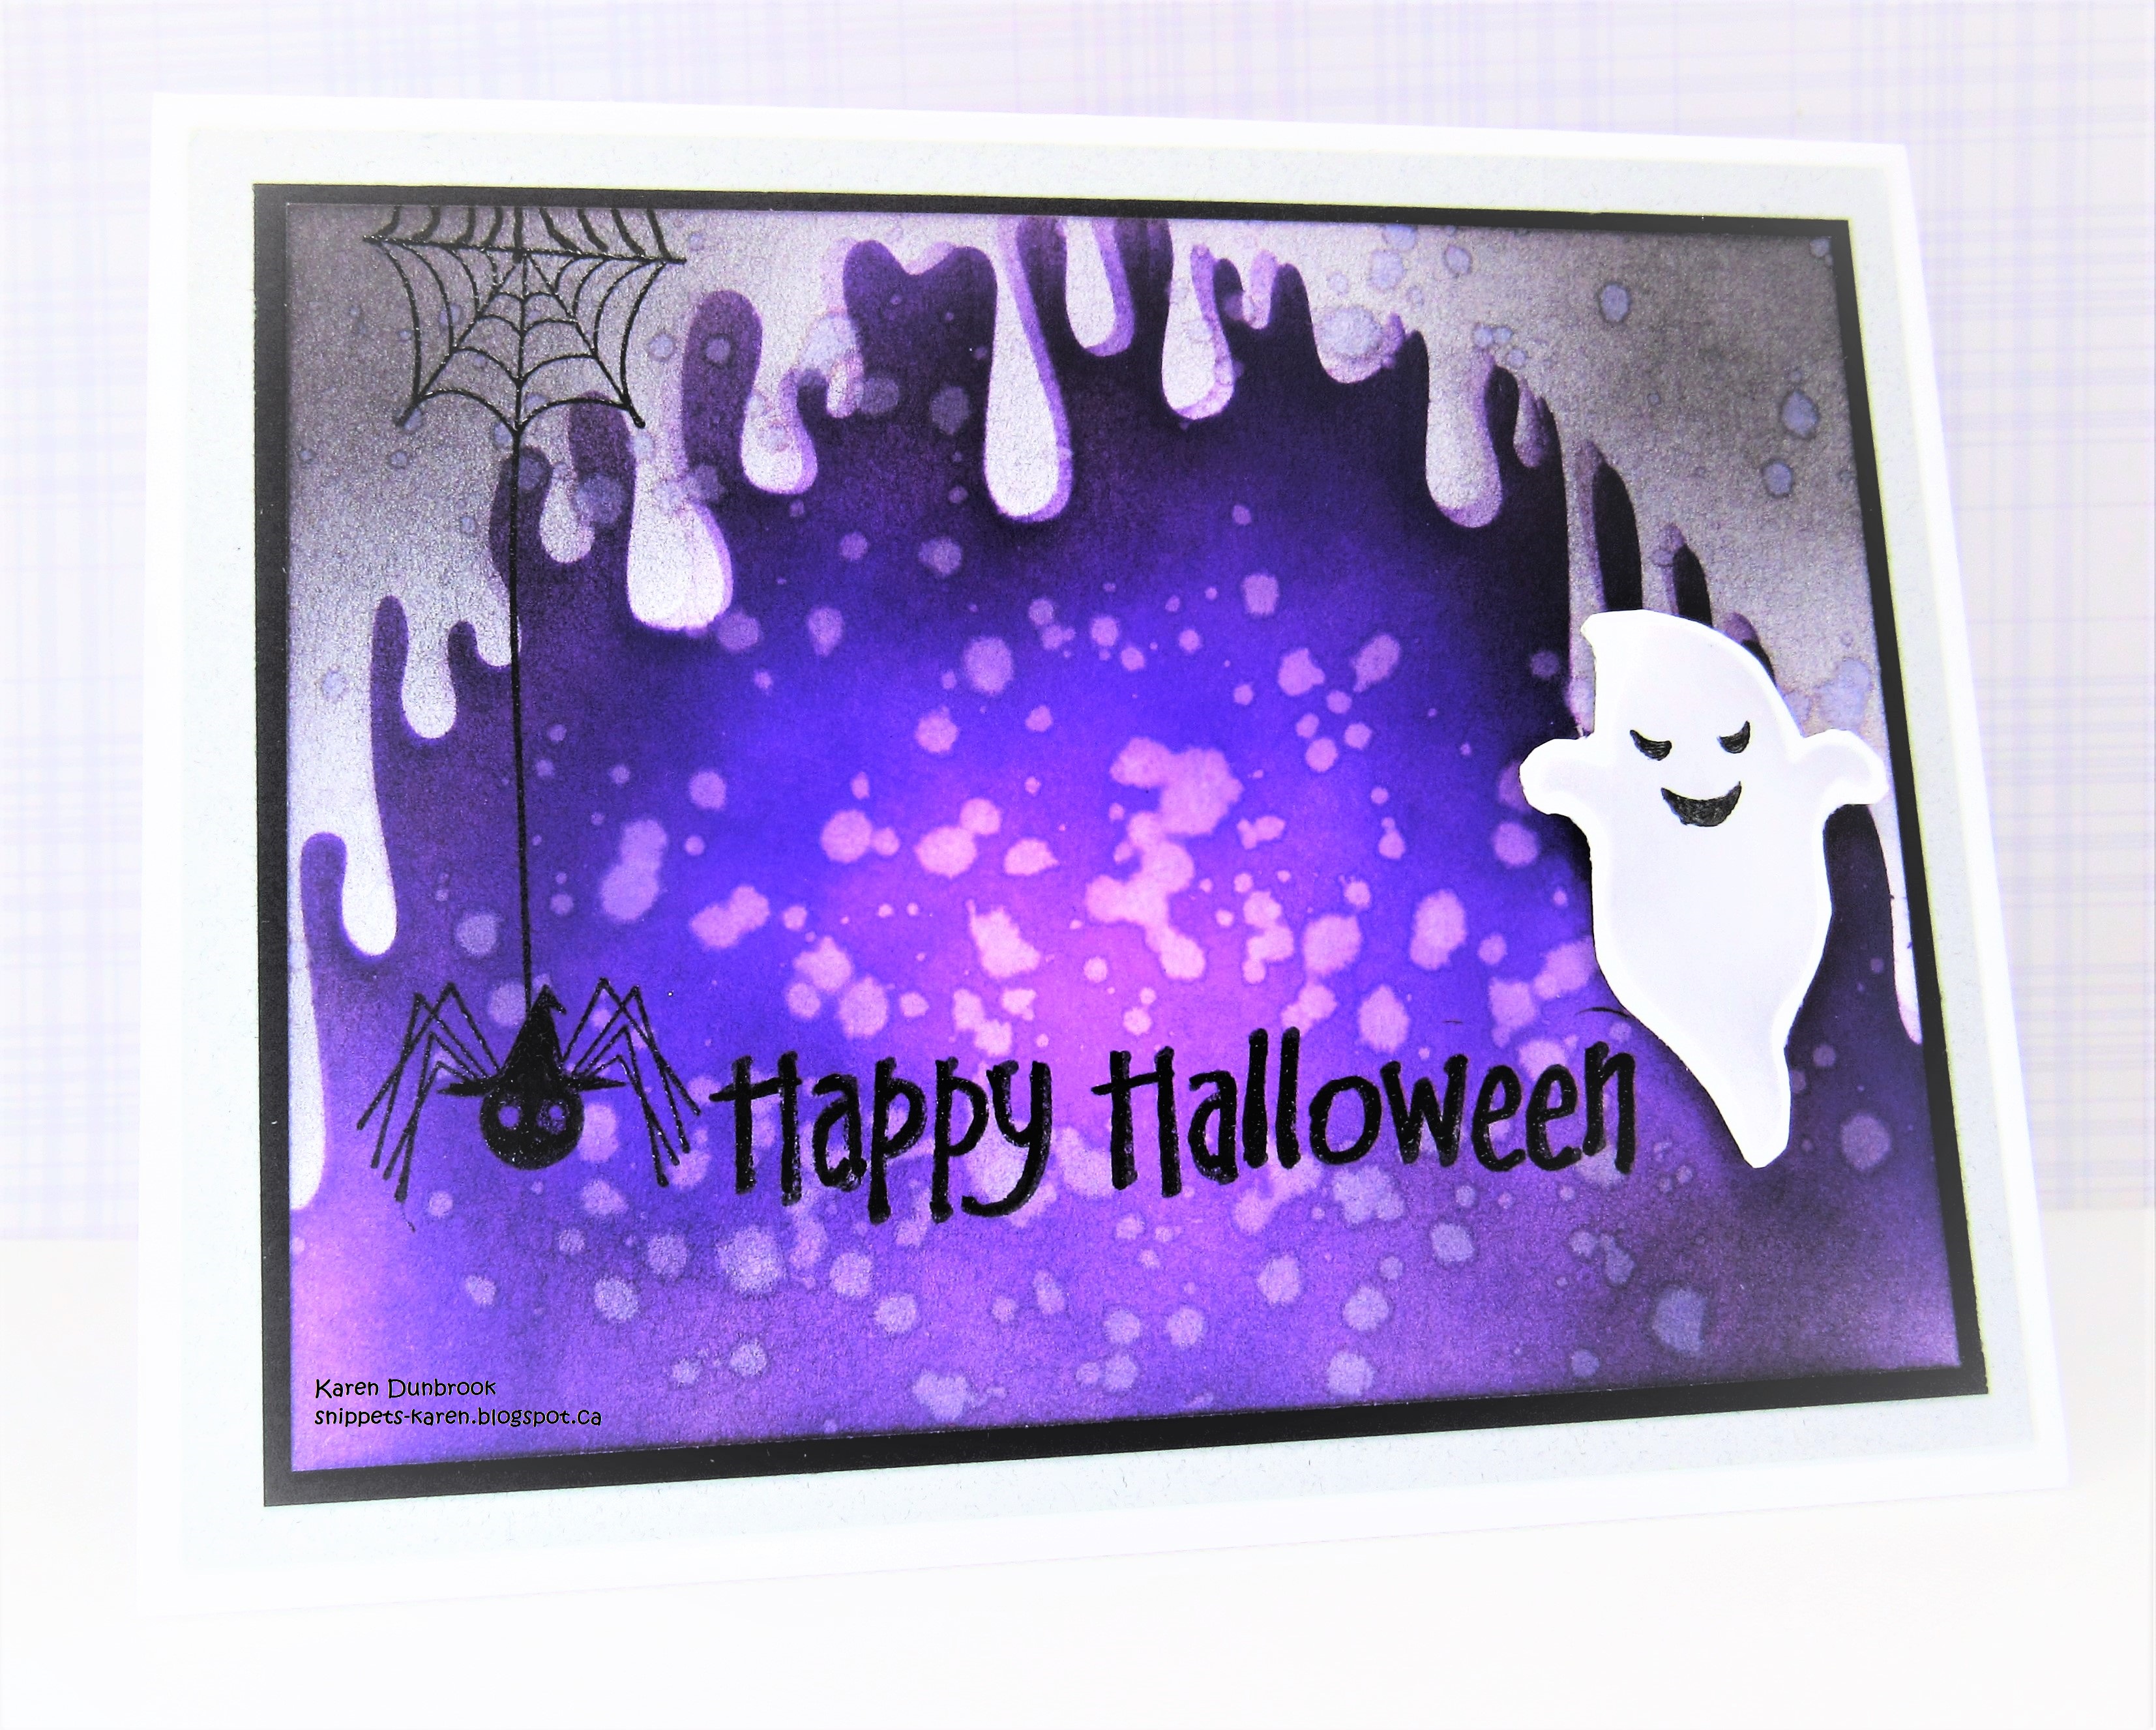
Spooky Halloween


Welcome
I created another Halloween card using 2 new fun stencils from A Colorful Life Designs called

So, here's what I did to create my card.
  • I took a piece of white cardstock and placed the Drippy Arch stencil over it on my Make Art Station. Using some Villainous Potion Distress Oxide ink, I inked up the whole panel.
  • This stencil has 2 parts, a stencil and a mask so I masked the bottom purple area and then went over the top area that was still white with some Weathered Wood DOX ink.
  • I shifted the stencil slightly and added just a hint of the purple along the edges to give a shadow effect.
  • Next, using some Black Soot DOX ink, I inked around all the edges just to add to the effect.
  • I splattered is all with water to lift some of the colour and set aside to dry.
  • While that dried, I stenciled one of the cute little ghost from the Drippy Ghosts set with some Weathered Wood and fussy cut it out.
  • I stamped the little spider and the sentiment and then glued it onto a piece of black cardstock, then onto an A2 sized card base.
  • I used some foam tape to pop the little ghost to the side.

Here are the stencils I used:

Interactive Drippy Ghosts 

Discount Code for A Colorful Life Designs
(Affiliate with no extra cost to you) 

Thanks so much for coming by and taking a look.

Adding my card to these challenges:
Two Old Bats Halloween- ANYTHING HALLOWEEN
Simon Says Wed.- MAKE IT CUTE
2 Sisters on the Blog- AUTUMN or THANKSGIVING

Supplies
Stamps- Halloween (Studio G), Halloween Spider (Recollections)
Inks- DOX; Versafine Clair
Paper- heavy white (Scribes Nook- Waterloo, Ont.)
Accessories and Tools- stencils (A Colorful Life Designs); Make Art Station (Ranger)

Friday, 27 September 2019

Trick or Treat


Morning.
I don't tend to make Halloween cards, but when I saw this great TH set on for a steal at Michaels, I just had to own it.  I love the spider web and the set has some really cute images in it.

So onto my background.
As most of you already know, I love playing around creating bkgs.  I was using some shaving cream and re-inkers for another project and had some leftover on the plate I was using.  I didn't want it to go to waste, so I pressed a piece of cardstock into the inked shaving cream and put the dry piece away in my stash.  I like to have backgrounds ready and waiting for quick card making.
How to do this technique.....spread some shaving cream onto a paper plate (that makes for easy clean-up).  Drop some re-inkers onto the shaving cream and swirl it around.  I used a little spatula but you could use the end of a paint brush or a popsicle stick.  Gently press the paper into the shaving cream, set aside to dry.  Scrape off the excess with an old credit card to reveal a beautiful bkg.

I placed the inked bkg into my Misti and stamped the images and the sentiment. 
To give it an even more eerie look, I rubbed the edges with some Black Soot DOX ink and splattered with some black acrylic paint.
I mounted it onto a piece of white, then black, then onto a heavy white cardbase.


Thanks so much for coming by and taking a look.

Adding my card to these challenges:
Simon Says Wed.- ANYTHING GOES
Craft Rocket- MONOCHROMATIC


Supplies
Stamps- Halloween Cutouts (TH)
Inks- Versafine Clair Nocturne; Black Soot DI (TH); Carved Pumpkin, Dried Marigolds Distress Re-inker (TH)
Paper- heavy white (Scribes Nook); black cs
Accessories and Tools- Misti (My Sweet Petunia); black acrylic paint; shaving cream;