Showing posts with label knit. Show all posts

Friday, 19 December 2025

Merry FaLaLaLa

Welcome
Here's another fun card for Christmas featuring this great stencil from A Colorful Life Designs called;

Here's what I did to create my simple CAS card.
  • I placed the Cozy Knit stencil over a piece of white cardstock and inked it up with some Broken China Distress Oxide ink.
  • I removed the stencil and placed the piece into my Misti to stamp the Christmas Words stamp using some black Versafine Clair ink.
  • I die cut the sentiment with some blue and glued that onto the white word shadows.
  • I glued my stenciled card front onto a piece of white cardstock, then onto a piece of blue and then onto a white A2 sized card base.
  • I used some foam tape to add the sentiment over the background.

Here is the stencil I used:


Hope you are ready for the big day and thanks so much for taking the time to visit!!

Adding my card to these challenges: 
Word Power- WORDS AS FOCUS
Simon Says Mon.- ANYTHING CHRISTMAS GOES
Little Red Wagon- CHRISTMAS CARD

Supplies
Stamps- Christmas Words (IO...out of business)
Inks- Versafine Clair, DOX
Paper- Solar White
Accessories and Tools- stencil (A Colorful Life Designs); Misti (My Sweet Petunia);
TE Blending Brushes; Bold Christmas Words dies (Amazon)

Sunday, 29 October 2023

Cover Die Eclipse


Welcome
This week, it's my turn to host the TLC Challenge (Technique Lovers) over at Splitcoast Stampers.
The technique we will be trying out this week is called

So, here's what I did to create my card.
  • To do this technique, you will need a cover plate die.  I used the Simple Plaid cover plate die from Tim Holtz.   NOTE:  There are variations of this technique using stamping with you Misti and lining up the stamped images. If you don't have any cover dies, you could also use multiple small shape dies to cut the second panel and put them in place
  • I placed a piece of white cardstock onto my Waffle Flower Stencil Mat and inked up the Cozy Knit stencil from A Colorful Life Designs with some Rustic Wilderness and some Lumberjack Plaid Distress Oxide ink.
  • I placed a second piece of white cardstock onto my Stencil Mat and repeated the same process as mentioned above, using the same stencil and inks.
  • Using the Simple Plaid Cover Plate die, I die cut one of the panel.
  • I glued the die cut cover panel over the first panel I stenciled, matching up the pattern. It gave a fun, texture to the piece.  
  • While that dried, I die cut the sentiment from some white cardstock and glued it onto the matching shadow die cut in red.
  • I glued the stenciled panel onto a piece of red cardstock and then onto an A2 sized card base.  
  • I used some foam tape to add the sentiment to the center of the card front.
  • Finally, I added 5 silver gems around the sentiment.

Here is the stencil I used:

Discount Code for A Colorful Life Designs
(Affiliate with no extra cost to you) 

I hope you get a chance to try this technique out and thanks so very much for coming by and taking a look.

Adding my card to these challenges:
Inkspirational- WORD PROMPT COLD
Simon Says Wed.- ANYTHING GOES
The Crafty Addicts- ANYTHING GOES

Supplies
Stamps- none
Inks- DOX
Paper- heavy white (Scribes Nook- Waterloo, Ont.)
Accessories and Tools- stencil (A Colorful Life Designs); Stencil Mat (Waffle Flower);
TE Blending Brushes; Simple Plaid Cover Plate die (TH); 
Holiday Sayings die (Concord and 9th)

Thursday, 11 August 2022

Polar Bear Pal


Hello and Welcome
Meet today's card that I used a combination of a stencil and stamping.
Another one to have on hand to send out for the holidays.

So here's what I did to create my card.
  • I began by cutting a piece of white cardstock, then placed that onto my Make Art Station. 
  • I positioned the Cozy Knit stencil from A Colorful Life Designs over my paper and inked it up with some Peacock Feathers Distress Oxide ink.
  • Next, I pulled out this fun Snowflake Turnabout stamp and positioned it into my Misti over my stenciled cardstock panel.  For those of you that are not familiar with the Turnabout stamps, you ink, turn your paper and ink again until you have turned your paper and stamped on all sides.  A stamp positioner is most helpful when using this type of stamp. I inked it up with some Peacock Feathers DOX ink and stamped.  
  • I turned my paper, cleaned off my stamp and inked again with some Blueprint Sketch and stamped.
  • I repeated that step 2 more times using some Dusty Concord and some Wilted Violet DOX ink.
  • Using a circle die, I cut a circle from the center of my finished panel and set aside.
  • I die cut a slightly larger circle from some white cardstock and glued the two circles together.
  • I stamped the Polar bear onto a piece of white cardstock, then used some diluted DOX ink (same colours as used in the background) and painted in the bear's scarf.
  • I added a slight hint of colour on his fur using a Copic marker and then fussy cut it out.
  • I stamped the sentiment from the same set and then tore the top of the paper to look like snow.  I rubbed a bit of ink along the edge as well.
  • I trimmed the torn paper to fit over the stenciled-inked die cut circle and glued them together.
  • I pop dotted the bear at the top of the circle over the torn edge and then pop dotted the whole larger circle back into place, matching it up with the background.
  • I added it onto an A2 size card panel.

Here is the stencil I used:

Discount Code for A Colorful Life Designs
(affiliate with no extra cost to you)

Adding my card to these challenges:
Krafty Chicks- CHRISTMAS
Time Out- MAKE YOUR OWN BKG

Supplies
Stamps- Snowflake Turnabout (Concord and 9th); Polar Bear Pals (MFT)
Inks- Versafine Clair, DOX, Copic marker
Paper- white (Scribes Nook- Waterloo, Ont.)
Accessories and Tools- Cozy Knit stencil (ACLD); Make Art Station (Ranger);
TE Blending Brushes; Infinity Circle dies (HA); Misti (My Sweet Petunia)

Monday, 27 December 2021

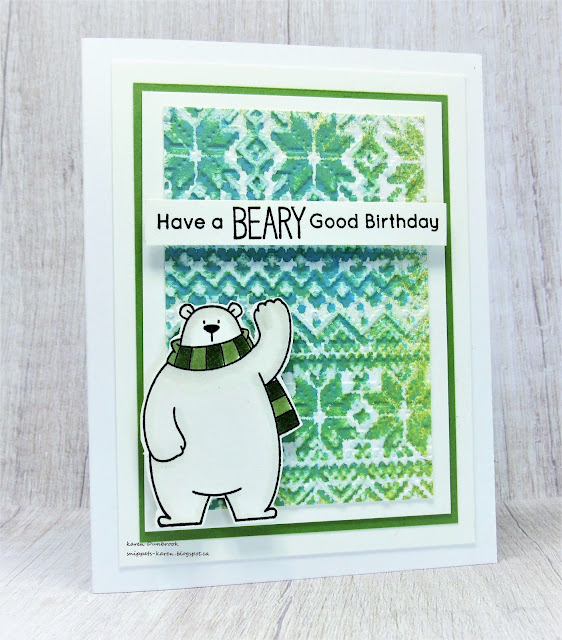
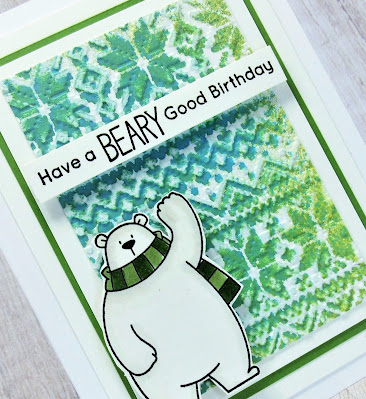
Beary Good Birthday


Happy Hello.
Here's a simple card I made using a background I found in my stash.  
Yes, I keep saying I find these backgrounds in my stash, it is a large collection.  Often when I get time to play, I just make backgrounds, then tuck them away for a future card.

So here's what I did to create my card.
  • Like I mentioned above, I looked through my stash until I found this background.  I had either embossed a Gel Plate roll off sheet or I inked the inside of the embossing folder? (I need to do a better job at writing down what I have done while creating these backgrounds.)
  • I stamped the bear from the Polar Pals set, fussy cut it out and then used my Copic markers to add colour.
  • I stamped the sentiment from the same set on a scrap strip of cardstock.
  • I glued the embossed piece to some white, then onto green cardstock, then onto a heavy white card base.
  • I pop dotted the bear into the corner and added the sentiment strip along the top.

Thanks so much for coming by and taking a look.

Adding my card to these challenges:
Little Red Wagon- DOTS OR STRIPES
Simon Says Wed.- LET'S PARTY
Creative Crafters- ANYTHING GOES
Allsorts- ANYTHING WINTER


Supplies
Stamps- Polar Pals (MFT)
Inks- Versafine Clair, Copic markers
Paper- heavy white (Scribes Nook- Waterloo, Ont.)
Accessories and Tools- Holiday Knit eb folder (Sizzix); foam tape

Sunday, 28 March 2021

Wee One- Sanded Embossed Background


Hello and Welcome

It's my turn to host the TLC Challenge (Technique Lovers) over at Splitcoast Stampers.
I like to try and think of some challenges that would be accessible to everyone and this is the one I came up with.  
I've been going through my background pieces that have been inked or painted that I haven't used for cards or that I just went 'yuck' after I was done.  You know those scenarios don't you?
Well instead of throwing them away, I put them in a bin and keep them for die cutting or for who knows what.  That is how this card started off.....and I watched a video by Jennifer McGuire a few weeks ago too so that helped.  

So here's what I did to create my card.
  • I went through my bin of discarded backgrounds and found this one that was blue and green.  Since I wanted to make a generic baby card, I figured this one might work.  It was a blue and green paint roll off from one of my Gel Plate printing sessions.  (For those unfamiliar with a Gel Plate, you roll paint or ink onto it with a brayer.  Many times, while rolling smooth with a brayer, there is too much paint, so to remove some of it I roll it onto scrap paper.  I keep those scraps for future whatever.)
  • I placed the painted piece into my Cozy Knit embossing folder and ran it through my Cuttlebug to emboss.  I removed the piece and then used a piece of sandpaper to remove the ink from all the high points of the embossing.  It totally transformed the look of the background.  (I wish I would have taken a picture of the before and after....especially since I hated the before!)  I set that aside.
  • Next, I die cut the scalloped circle using a Spellbinder die and placed that into my Misti.  I stamped the Baby Bunny from Impression Obsession with some Versafine Clair Noir ink.  I clear heat embossed it as I wanted to watercolour the bunny and the embossing helps contain the wet ink. 
  • Using some Peacock Feathers and some Cracked Pistachio Distress Oxide inks, I watercoloured in the bunny.  I just press the ink pad directly onto my Tim Holtz Glass mat, spray with water to dilute and use a paint brush to add colour.
  • Next, I stamped the sentiment from the Little One Animals from Photoplay onto some white and fussy cut it out.
  • I glued the sanded background onto a piece of white cardstock, then onto a heavy white card base.
  • I pop dotted the scalloped bunny circle over the background, the glued the sentiment banner over the circle.
 

Thanks so much for coming by and taking a look.
I hope you get a chance to try it out.

Adding my card to these challenges:
Simon Says Wed.- SPRING/EASTER MOOD BOARD
The Crafting Challenge- PASTEL COLOURS


Supplies
Stamps- Baby Bunny (IO); Little One Animals (Photoplay)
Inks- Versafine Clair Noir; Distress Oxides
Paper- heavy white (Scribes Nook-Waterloo, Ont.)
Accessories and Tools- Cozy Knit eb folder (Fun Stampers Journey); Cuttlebug, sandpaper;
acrylic paint (Dollar Tree); pop dots; Scalloped circle die- Spellbinders; paintbrush; TH glass mat;
Misti (My Sweet Petunia), clear eb powder (Wow)