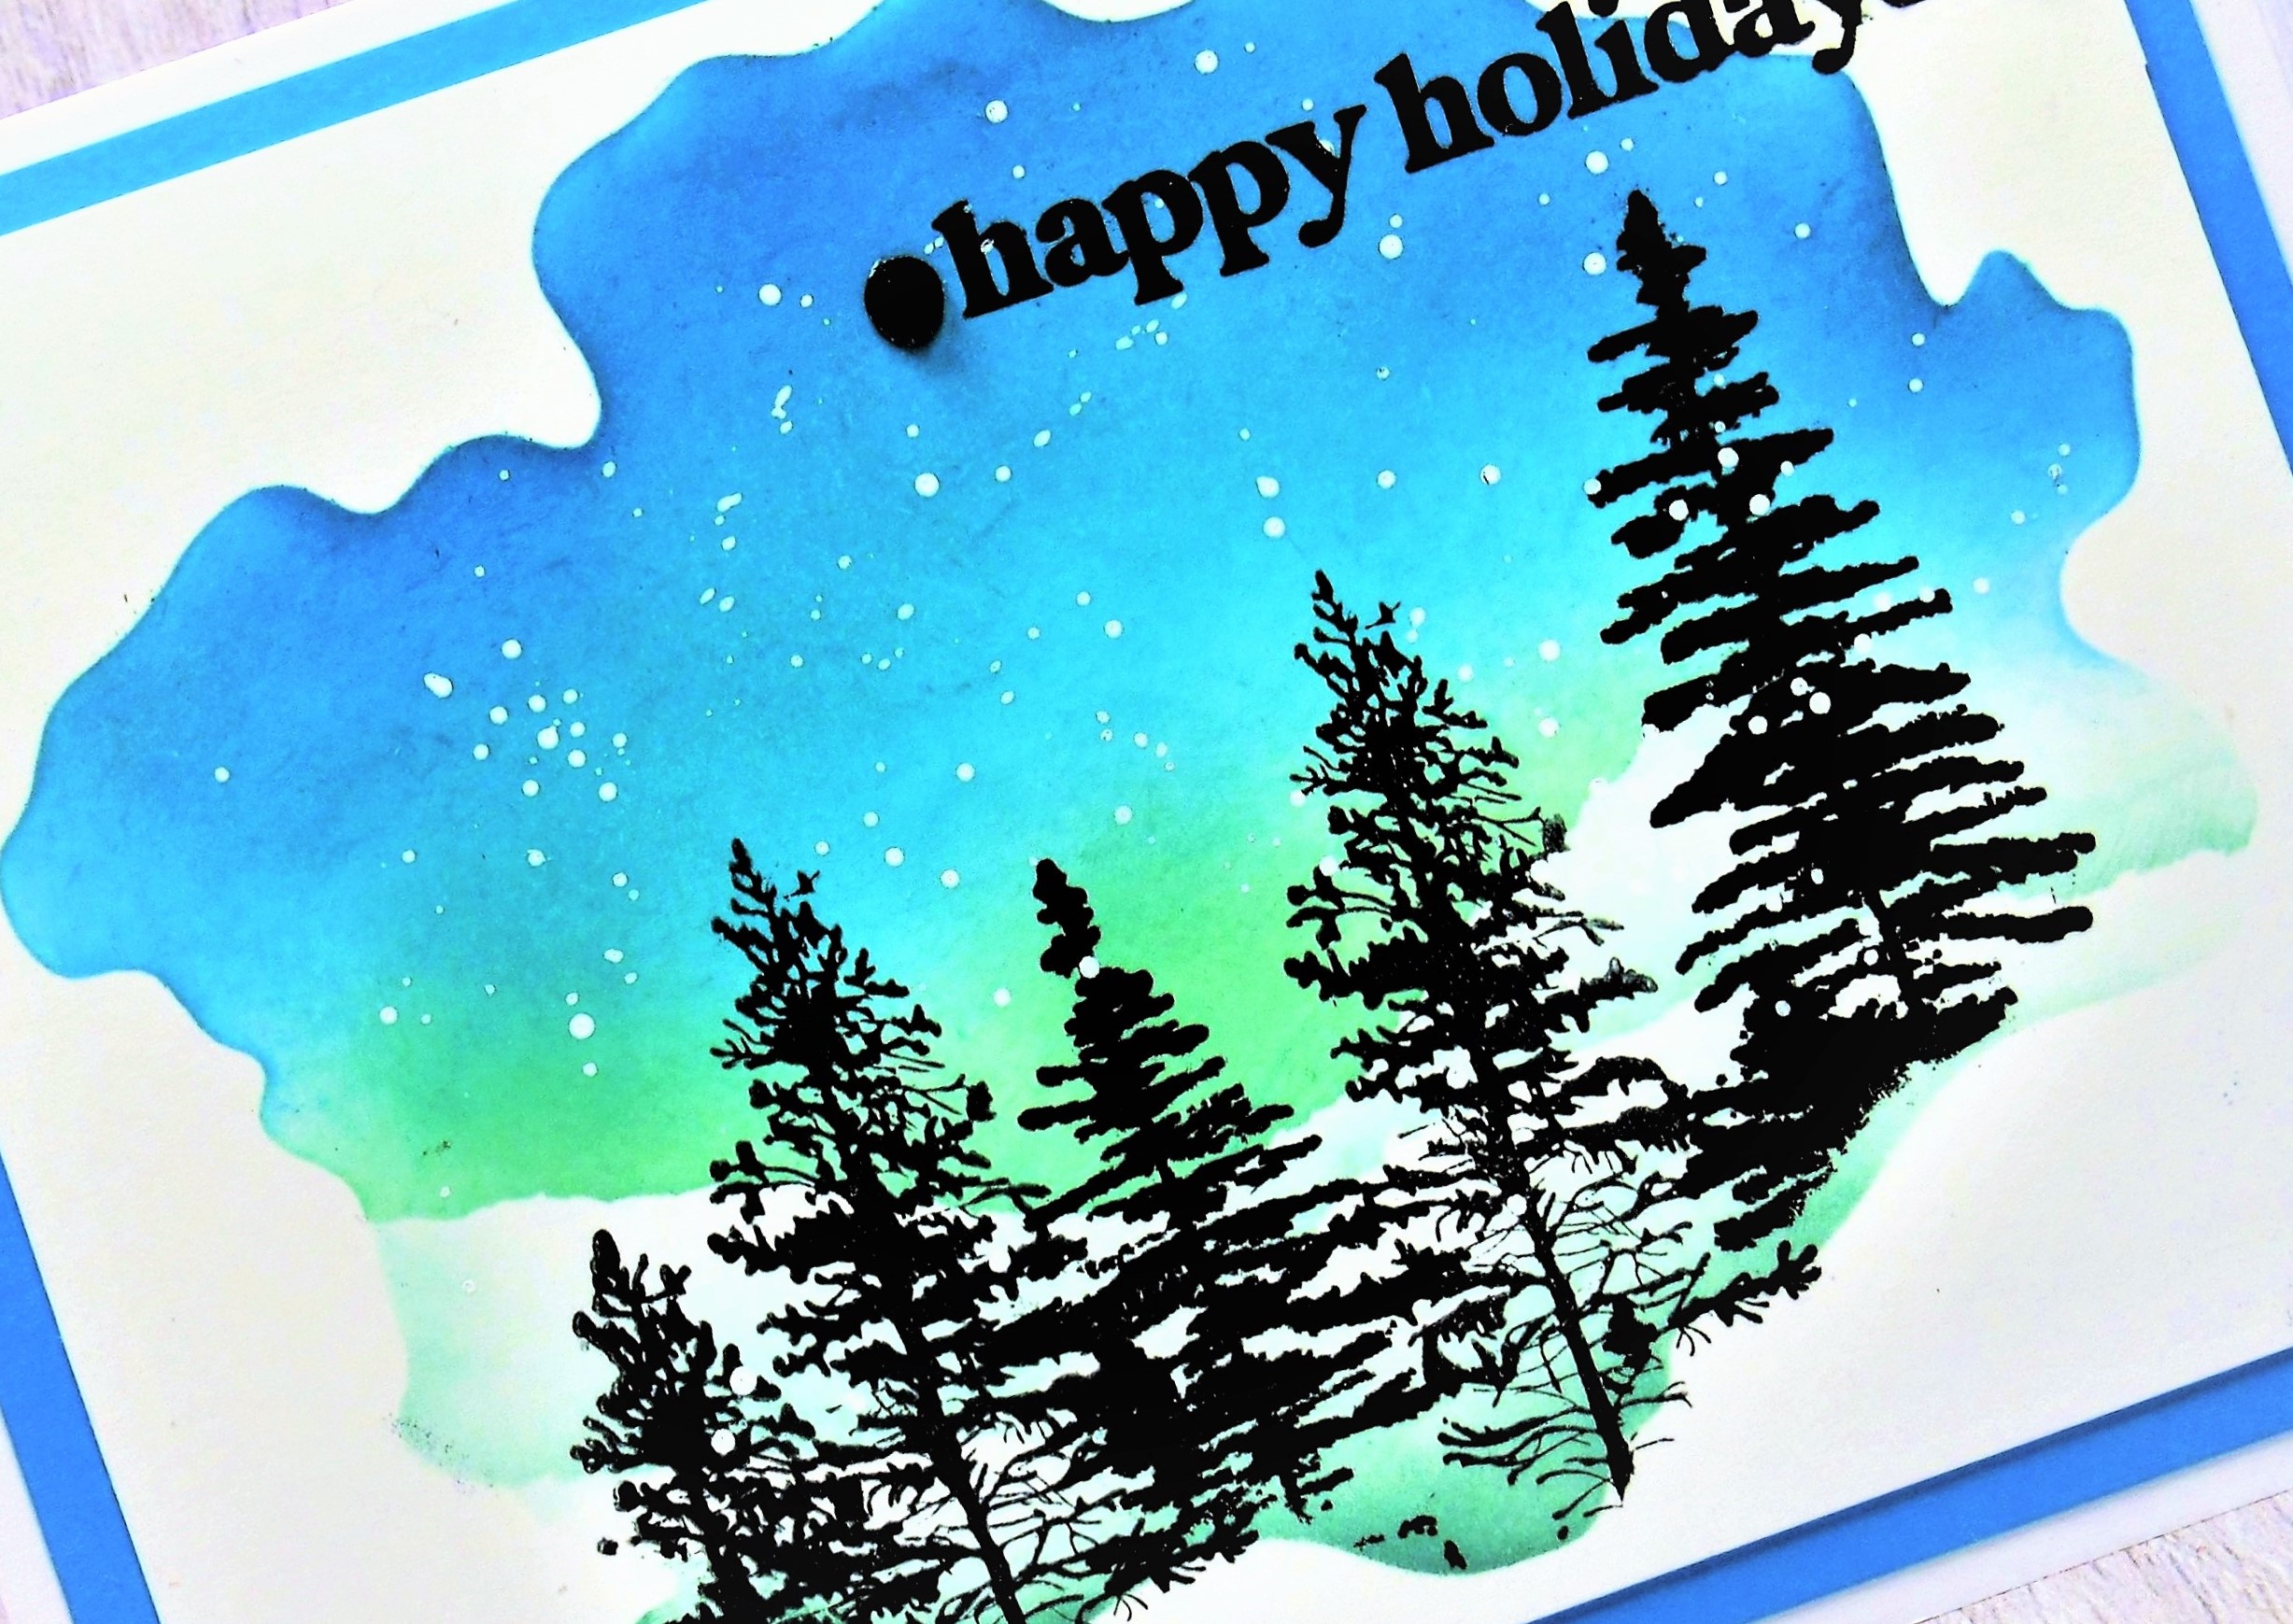
Wednesday, 16 November 2022

Happiest Season


Welcome
Meet today's card.
A simple one using the Festive Flurry stamp from Stampin Up.

So, here's what I did to create my card.
  • I cut a piece of white cardstock and placed it into my Misti.  
  • I inked up the snowflake with some Uncharted Mariner Distress Oxide ink and stamped it onto my white cardstock.
  • I wanted to add some interest around the snowflake, so I took the piece of foam that surrounds the snowflake when you get it in the package and used that as a mask to sponge some Peacock Feathers Distress Oxide ink all around and over the snowflake.
  • I splattered with my white Posca pen.
  • I glued the simple snowflake panel onto a piece of navy cardstock and then onto a 4 1/4" square card base.
  • I added the sentiment with foam tape over the middle of the flake.

Thanks so much for coming by and taking a look.

Adding my card to these challenges:
We Love Stamping- CHRISTMAS
Use Your Stuff- WINTER/SNOW

Supplies
Stamp- Festive Flurry (Stampin Up)
Inks- DOX
Paper- Scribes Nook- Waterloo, Ont.
Accessories and Tools- Misti, Christmas Sentiment strips (SSS), foam tape, white Posca pen

Tuesday, 15 November 2022

Twinkle, Twinkle


Good Morning
Here is a quick card I made using the Dream Stars stencil from A Colorful Life Designs.
I decided to go with a rainbow theme.

So, here's what I did to create my card.
  • I cut a piece of white cardstock, placed it onto my Make Art Station and positioned the Dream Stars stencil over that.
  • Next, I got out some Distress Oxide inks in the following colours:  Mustard Seed, Carved Pumpkin, Picked Raspberry, Peacock Feathers and Cracked Pistachio.  
  • Starting at the top of the stencil, I added some colour just to a portion, then continued to do that all the way down the stencil until all the colours were added.
  • I removed the stencil.  I wanted to add splatters in the matching colours around each section of the stars, so to do that, I just pressed each of the above-mentioned ink pads onto my non-stick craft mat, added a bit of water and used a paint brush to flick the colours on.
  • When it was all dry, I placed it into my Misti to stamp the sentiment. 
  • I glued the finished panel onto a piece of pink cardstock and then onto a white card base.

Here is the stencil I used:

Discount Code for A Colorful Life Designs
(Affiliate with no extra cost to you)

Thanks so much for coming by and taking a look.

Adding my card to these challenges:
CRAFT- ANYTHING GOES
Less is More- COLOR WHEEL

Supplies
Stamp- Smile, Sparkle and Shine (Sizzix)
Inks- Versafine Clair, DOX
Paper- Scribes Nook, Waterloo, Ont.
Accessories and Tools- stencil (ACLD); TE Blending Brushes; paint brush; 
Make Art Station (Ranger); Misti

Sunday, 13 November 2022

Winter Scene


Welcome
Meet today's card inspired by the snow falling outside.
I'm not a big fan of the snow, but it does look pretty on the trees.

So, here's what I did to create my card.
  • I began with a piece of white cardstock and positioned the Watercolor Wash Free form mask over my paper on my Make Art Station.
  • Next, I tore some paper strips from some scraps that I wanted to use to create the look of snowbanks in the scene.  
  • I began at the top of the masked area and sponged on some Boken China Distress Oxide ink.  I then sponged some Peacock Feathers just under that, leaving the bottom area un-inked.  I darkened the sky a bit at the top with some Uncharted Mariner DOX ink as well.
  • Ok...now for the torn paper strips.  I laid one on and inked above it with some Cracked Pistachio. I removed that and used another one that I had torn to ink again, moving it down and leaving some white space to look like the snowbanks.
  • I removed the torn paper but left the mask in place and stamped the trees using my Misti.
  • I splattered with my white Posca pen and removed the mask.
  • I stamped the sentiment in the top corner.
  • I glued the finished panel onto a piece of white cardstock, then onto an A2 card base.
  • Finally, I added 2 black gems on either side of the sentiment.

Thanks so much for coming by and taking a look.

Adding my card to these challenges:
We Love Stamping- CHRISTMAS
Stamping Sensations- CHRISTMAS CELEBRATIONS

Supplies
Stamps- 3 Pine Trees (Nellie's Choice); Trees (IO); Merry Sentiments (Scrapbook.com)
Inks- Versafine; DOX
Paper- white (Scribes Nook- Waterloo, Ont.)
Accessories and Tools- mask (MFT); Misti (My Sweet Petunia); scrap paper; 
Posca pen; TE Blending Brushes; black gems

Saturday, 12 November 2022

Frosty Christmas


Welcome
I was able to get a great frosty look for today's card using the newly released Driven Snow stencil from A Colorful Life Designs and my Gel Plate.

So, here's what I did to create my card.
  • I began with a piece of white cardstock and got out my Gel Plate and brayer.
  • I pressed my Broken China and Tumbled Glass Distress Oxide pads directly onto my Gel Plate and brayered them out smooth, blending them together.
  • I laid the Driven Snow stencil onto the plate, pressed a piece of scrap paper over the stencil to lift off some of the ink.  I removed the stencil and pressed my piece of cardstock onto the plate to take the print.  It looked so frosty with its unique design.
  • I splattered the inked panel with my white Posca pen.
  • While that dried, I die cut the snowflake from some white cardstock and cut out the sentiment.
  • I glued the stenciled panel onto a piece of white cardstock, then onto an A2 sized card base.
  • I glued the snowflake onto the middle of the card front, adding glue just to the center so the edges of the snowflake could be popped up a bit.
  • I used some foam tape to add the sentiment.

Here is the stencil I used:

Discount Code for A Colorful Life Designs
(Affiliate with no extra cost to you)

Thanks so much for coming by and taking a look.

Adding my card to these challenges:
Krafty Chicks- CHRISTMAS
Craft Rocket- CHRISTMAS/WINTER
As You Like It- FAV NON-TRADITIONAL CHRISTMAS COLOR COMBO and why
(I love the look of shades of blues to give an icy, wintery look to my cards.  Adding in some black, just gives it a pop of colour)

Supplies
Stamps- none
Inks- DOX
Paper- heavy white (Scribes Nook- Waterloo, Ont.)
Accessories and Tools- Driven Snow stencil (ACLD); Snowflake die (Tim Holtz);
Gel Plate; Speedball Brayer; Posca pen; Sentiment strips (SSS)

Saturday, 5 November 2022

Retro Christmas


Welcome
Time for a new release at A Colorful Life Designs.
I created this simple card using this fun, new Marvelous Masks Diamond.

So, here's what I did to create my card.
  • I started by cutting a piece of white cardstock and placed one of the medium sized Diamonds into the center of my card panel.  I inked it up with some Candied Apple Distress Oxide ink.
  • I moved the mask over to the left and then the right, inking again with the Distress Oxide ink.
  • I cleaned off the stencil, moved it to the top and then the bottom to ink with some Lucky Clover DOX ink.
  • When the inking was all done, I splattered with my white Posca pen and set aside to dry.
  • When dry, I placed it into my Misti, rubbed over with my anti-static powder and stamped the sentiment.
  • I glued it onto a piece of white cardstock, then popped that over a piece of red cardstock, then onto a white card base.
  • Finally, I added 3 black gems to finish it off.

Here is the stencil I used:

Discount Code for A Colorful Life Designs
(Affiliate with no extra cost to you)

Thanks so very much for coming by and taking a look.

Adding my card to these challenges:
Little Red Wagon- YESTERDAY- VINTAGE
Craft Rocket- CHRISTMAS/WINTER

Supplies
Stamps- XL Christmas Greetings (SSS)
Inks- DOX, Versafine Clair
Paper- heavy white (Scribes Nook- Waterloo, Ont.)
Accessories and Tools- Marvelous Masks Diamond (ACLD); Misti (My Sweet Petunia);
anti-static powder; black gems; Posca pen