Sunday 29 October 2023

Cover Die Eclipse


Welcome
This week, it's my turn to host the TLC Challenge (Technique Lovers) over at Splitcoast Stampers.
The technique we will be trying out this week is called

So, here's what I did to create my card.
  • To do this technique, you will need a cover plate die.  I used the Simple Plaid cover plate die from Tim Holtz.   NOTE:  There are variations of this technique using stamping with you Misti and lining up the stamped images. If you don't have any cover dies, you could also use multiple small shape dies to cut the second panel and put them in place
  • I placed a piece of white cardstock onto my Waffle Flower Stencil Mat and inked up the Cozy Knit stencil from A Colorful Life Designs with some Rustic Wilderness and some Lumberjack Plaid Distress Oxide ink.
  • I placed a second piece of white cardstock onto my Stencil Mat and repeated the same process as mentioned above, using the same stencil and inks.
  • Using the Simple Plaid Cover Plate die, I die cut one of the panel.
  • I glued the die cut cover panel over the first panel I stenciled, matching up the pattern. It gave a fun, texture to the piece.  
  • While that dried, I die cut the sentiment from some white cardstock and glued it onto the matching shadow die cut in red.
  • I glued the stenciled panel onto a piece of red cardstock and then onto an A2 sized card base.  
  • I used some foam tape to add the sentiment to the center of the card front.
  • Finally, I added 5 silver gems around the sentiment.

Here is the stencil I used:

Discount Code for A Colorful Life Designs
(Affiliate with no extra cost to you) 

I hope you get a chance to try this technique out and thanks so very much for coming by and taking a look.

Adding my card to these challenges:
Inkspirational- WORD PROMPT COLD
Simon Says Wed.- ANYTHING GOES
The Crafty Addicts- ANYTHING GOES

Supplies
Stamps- none
Inks- DOX
Paper- heavy white (Scribes Nook- Waterloo, Ont.)
Accessories and Tools- stencil (A Colorful Life Designs); Stencil Mat (Waffle Flower);
TE Blending Brushes; Simple Plaid Cover Plate die (TH); 
Holiday Sayings die (Concord and 9th)

Saturday 28 October 2023

Layered Gingerbread Men


Welcome
Do seeing gingerbread men remind you of Christmas?
Well this newly released 2 part stencil from A Colorful Life Designs called 
is just perfect for creating that look.

So, here's what I did to create my card.
  • I cut a piece of white cardstock, placed it onto my Make Art Station and then put stencil #1 from the Layered Gingerbread Men  (gingerbread men bodies) over my paper.
  • I inked using some Vintage Photo and some Rusty Hinge Distress Oxide ink to add colour.  I found that using 2 shades of the same colour gave the background more interest and detail.
  • I removed that stencil and placed stencil #2 (details) into place and inked it up with some Black Soot DOX ink.
  • I wanted to add some red details, so next I got out the Simple Grid stencil, masked off my card front panel and then added the little squares with some Lumberjack Plaid DOX ink between all the rows of the gingerbread men.
  • I rubbed the edges with some more of the Vintage Photo DOX and then glued the panel onto a piece of kraft cardstock and then onto a red A2 sized card base.
  • I stamped the sentiment onto a piece of red cardstock with some Versamark ink and then white heat embossed it.  I used some foam tape to pop that over the card front.

Here are the stencils I used:


Discount Code for A Colorful Life Designs
(Affiliate with no extra cost to you) 

Thanks so much for coming by and taking a look.

Adding my card to these challenges:
Simon Says Wed.- ANYTHING GOES
Krafty Chicks- ANY OCCASION
Crafty Catz- ANYTHING GOES

Supplies
Stamps- Merry Sentiments (Scrapbook.com)
Inks- DOX; Veramark
Paper- heavy white (Scribes Nook- Waterloo, Ont.)
Accessories and Tools- stencils (A Colorful Life Designs); TE Blending Brushes;
Make Art Station (Ranger); foam tape; white embossing powder

Monday 23 October 2023

Let's Be Merry


Welcome
Today's card is a fun one featuring the newly release stencil from A Colorful Life Designs called
I love the whimsical look of the letters.  I pulled out my Gel Plate to create this one.

So, here's what I did to create my card.
  • I started with a roll off sheet that had some red and green ink on it.  I keep these when I need to roll off my brayer while using my Gel Plate.
  • I got out my Gel Plate and pressed my Lumberjack Plaid Distress Oxide pad right onto the plate along the middle area.  I then pressed some Rustic Wilderness DOX ink along the top and bottom and used my brayer to blend the colours together.
  • I placed the Merry Christmas stencil UPSIDE DOWN (so the script transferred correctly), onto my plate and rubbed the roll off sheet over the plate to lift the pattern from the stencil that was on the plate.
  • Next, I wanted to define the rows of letters, so using the Simple Grid stencil, I added the rows of squares, masking as I went along.
  • To add more details, I added dots and splatters with my white Posca pen.
  • I glued the panel onto a piece of red cardstock, then onto an A2 sized card base.

Here are the stencils I used:
Merry Christmas


Discount Code for A Colorful Life Designs
(Affiliate with no extra cost to you) 

Thanks so much for coming by and taking a look.

Adding my card to these challenges:
The Crafty Addicts- ANYTHING GOES
Creative Inspiration- ANYTHING GOES
Little Red Wagon- PATTERNED PAPER or NOT

Supplies
Stamps- none
Inks- DOX
Paper- Scribes Nook (Waterloo, Ont.)
Accessories and Tools- stencils (A Colorful Life Designs); TE Blending Brushes;
Gel Plate; Speedball Brayer; white Posca pen

Sunday 22 October 2023

Fetching Snowflake


Welcome
Today's card features the newly released Fetching Snowflake stencil from A Colorful Life Designs.
Really fun snowflake to ink up.

So, here's what I did to create my card.
  • I cut a piece of white cardstock and placed it onto my Make Art Station and centered the Fetching Snowflake stencil over my cardstock.  
  • Instead of inking first right over the stencil, I inked up the  large Burlap Background stamp with some Uncharted Mariner Distress Oxide ink and stamped right over the stencil giving the background a lovely, textured look.
  • Keeping the stencil in place, I inked over it with some Salty Ocean DOX ink which outlined the snowflake perfectly.
  • I placed the stenciled panel into my Misti to stamp the sentiment.
  • I glued the inked panel onto a piece of navy cardstock, then onto an A2 sized card base.

Here is the stencil I used:

Discount Code for A Colorful Life Designs
(Affiliate with no extra cost to you) 

Thanks very much for coming by and taking a look.

Adding my card to these challenges:
Little Red Wagon- PATTERNED PAPER OR NOT

Supplies
Stamps- Burlap Background (TE); Christmas Cheer (Technique Tues.)
Inks- Versafine Clair, DOX
Paper- heavy white (Scribes Nook, Waterloo, Ont.)
Accessories and Tools- stencil (A Colorful Life Designs); TE Blending Brushes;
Make Art Station (Ranger); Misti (My Sweet Petunia)

Friday 20 October 2023

Beautiful Poinsettia


Welcome
Today's card features this lovely new stencil from A Colorful Life Designs called 
I used it in a bit of a different way.

So, here's what I did to create my card.
  • I cut a piece of white cardstock and got out the largest stamp from the Simon Hurley Paint Swatches stamp set.  This is what it looks like:  

  • I inked up the stamp pictured above well using some Lumberjack Plaid Distress Oxide ink, then pressed it onto the Beautiful Poinsettia stencil which transferred the pattern onto the stamp.  I stamped that onto the center of my white cardstock.
  • When it was dry, I rubbed over the whole panel with a anti-static powder tool.  This step is important so you don't end up with embossing powder sticking everywhere.
  • I took the stencil and positioned it back into place over the stamped image and rubbed some Versamark ink over that, trying to stay inside the stamped areas.  I used some white embossing powder to emboss the flower.
  • I glued the panel onto a piece of red cardstock, then onto an A2 sized card base.
  • Finally, I added a pre-printed sentiment with some foam tape, over the flower.

Here is the stencil I used:

Discount Code for A Colorful Life Designs
(Affiliate with no extra cost to you) 

Thanks a lot for coming by and taking a look.

Adding my card to these challenges:
Little Red Wagon- PATTERNED PAPER OR NOT


Supplies
Stamp- Paint Swatches (Simon Hurley)
Inks- DOX, Versamark
Paper- heavy white (Scribes Nook- Waterloo, Ont.)
Accessories and Tools- stencil (A Colorful Life Designs); white EB powder;
heat tool; Pre-printed sentiment (SSS)

Monday 16 October 2023

Oh Christmas Tree


Welcome
Meet today's card.
A fun, whimsical one using a new mid-month release from A Colorful Life Designs called 
I paired it up with an older release called Playful Tree.

So, here's what I did to create my card.
  • I got out a piece of white cardstock and placed it onto my Make Art Station.
  • I put the Tall Skinny Tree stencil over the cardstock and inked it up with some Lucky Clover Distress Oxide ink.  I did the star with some Fossilized Amber DOX ink.
  • I removed the stencil and added just the berries from the Layered Holly stencil with some Lumberjack Plaid DOX ink onto the tree.
  • Next, I laid the Playful Tree stencil onto another piece of white cardstock and masked it off as I wanted the tree to be red and green.  I inked it up with some Lumberjack Plaid and some Rustic Wilderness DOX ink.
  • I used my white Posca pen to add some extra details to the trees and then I fussy cut them out.
  • Using another piece of white cardstock, I embossed it using a dot embossing folder and glued that onto a white card panel that I scored on the top and bottom of the embossing as a border.
  • I used some foam tape to pop the trees over each other and added the stamped sentiment.
  • Finally, I glued it all onto an A2 sized card base.

Here are the stencils I used:


Discount Code for A Colorful Life Designs
(Affiliate with no extra cost to you) 

Thanks so much for coming by and taking a look.

Adding my card to these challenges:
Simon Says Wed.- CHRISTMAS
Peace on Earth- ANYTHING CHRISTMAS AND INSPIRATION BOARD
Crafty Addicts- ANYTHING GOES

Supplies
Stamp- Merry Sentiments (Scrapbook.com)
Inks- DOX, Versafine Clair
Paper- heavy white (Scribes Nook, Waterloo, Ont.)
Accessories and Tools- stencils (A Colorful Life Designs); TE Blending Brushes;
white Posca pen; Make Art Station (Ranger); foam tape; dots eb folder (Sizzix)

Sunday 15 October 2023

Stick Wreath


Good Morning
Today's card is a simple one and I love the way it turned out.
It features the newly released Stick Wreath and the Christmas stamp set from A Colorful Life Designs.

So, here's what I did to create my card.
  • I cut a piece of white cardstock 4 x 4 inches as I wanted to make a square card.
  • I placed the cardstock onto my Make Art Station, placed the Stick Wreath over that and inked it up with some Iced Spruce Distress Oxide ink.
  • I removed the stencil, gave it a wipe and repositioned, shifting it slightly.  I inked it up with some Rustic Wilderness DOX.  
  • I repeated that process one more time, inking with Aged Mahogany DOX ink.
  • While that dried, I die cut the little bird and glued it all together.
  • I wanted the wreath to have some berries, so using the eraser end of a pencil, I inked it up with some Lumberjack Plaid DOX and stamped those in bunches of 3's.
  • I added some more Aged Mahogany DOX ink along the edges just to tone down the white. 
  • I added some white splatters with my Posca pen and placed the panel into my Misti to stamp the sentiment from the new Christmas Stamp set.
  • I glued the finished panel onto a dark red 4 1/4 square card base and glued the bird along the bottom edge.


Here is the stencil I used:


Discount Code for A Colorful Life Designs
(Affiliate with no extra cost to you) 

Thanks so very much for coming by and taking a look.

Adding my card to these challenges:
Simon Says Wed.- CHRISTMAS
Krafty Chicks- CHRISTMAS
ABC Christmas Alphabet= 'U' USE IT UP/'V' VERTICAL 
(used my scraps for the bird)

Supplies
Stamps- Christmas (A Colorful Life Designs)
Inks- DOX, Versafine Clair
Paper- heavy white (Scribes Nook- Waterloo, Ont.)
Accessories and Tools- stencil (A Colorful Life Designs); white Posca pen;
Make Art Station (Ranger); Misti (My Sweet Petunia); pencil eraser; 
Lovely Layer winter Birds (Honey Bee)

Saturday 14 October 2023

Fluttering Snow


Hello and Welcome
Today's card is featuring the new Fluttering Snow stencil from A Colorful Life Designs.
The technique I used on my card is called the Cover Die Eclipse. 
I love how it turned out on my card.

So, here's what I did to create my card.
  • I cut 2 pieces of cardstock that were 4 x 4 inches square and put one of them onto my Make Art Station.
  • I placed the Fluttering Snow stencil over my cardstock, then inked it up with some Salty Ocean and some Uncharted Mariner Distress Oxide ink, removed the stencil and set aside to dry.
  • Next, I inked up the second piece of cardstock with the same stencil and this time I used some Salty Ocean and Peacock Feathers DOX ink.
  • I was now left with 2 square panels inked with the same stencil.
  • I took the 2nd panel that I had inked and used the Simple Plaid die to cut it out.
  • I glued the die cut piece over the first one, matching up the pattern. I love the effect.  I glued that onto a 4 1/4" square card base.
  • I added a pre-printed sentiment and then finally added some silver gems to some of the snowflakes.

Here is the stencil I used:

Discount Code for A Colorful Life Designs
(Affiliate with no extra cost to you) 

Thanks so much for coming by and taking a look.

Adding my card to these challenges:
Simon Says Wed.- CHRISTMAS
Supplies
Stamps- none
Inks- DOX
Paper- heavy white (Scribes Nook- Waterloo, Ont.)
Accessories and Tools- stencil (A Colorful Life Designs); TE Blending Brushes;
Make Art Station (Ranger); Simple Plaid die (TH); silver gems (Dollar Store)

Friday 13 October 2023

Candy Stripes


Welcome
Meet today's card.
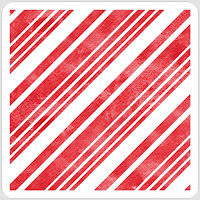
A simple one using the newly released Candy Stripes stencil from A Colorful Life Designs.

So, here's what I did to create my card.
  • I cut a piece of white cardstock and placed it onto my Make Art Station.  
  • I positioned the Candy Stripes stencil over my cardstock and inked it up with some Barn Door Distress Oxide ink.
  • I lifted the stencil off and repositioned it going in the other direction so the stripes would intersect each other.  I inked that with some Lumberjack Plaid DOX ink.
  • I removed the stencil and splattered with my white Posca pen.
  • When it was all dry, I die cut the circle directly from one side of the stenciled background.  I cut a white circle from another piece of cardstock and glued the 2 together.
  • I placed the die cut circle into my Misti to stamp the sentiment and I clear heat embossed it to help it pop.
  • I glued the stiped panel onto a piece of red cardstock and then onto a white A2 sized card base.
  • I used some foam tape to pop the circle back into place, matching up the stripes.
  • Lastly, I added 3 black gems just under the sentiment.

Here is the stencil I used:

Discount Code for A Colorful Life Designs
(Affiliate with no extra cost to you) 

Thanks so much for coming by and taking a look.

Adding my card to these challenges:
Simon Says Wed.- CHRISTMAS
Krafty Chicks- CHRISTMAS

Supplies
Stamps- Holly Jolly (Technique Tues.)
Inks- Versafine Clair; DOX
Paper- heavy white (Scribes Nook- Waterloo, Ont.)
Accessories and Tools- stencil (A Colorful Life Designs); Make Art Station (Ranger);
TE Blending Brushes; clear eb powder; Hero Arts Infinity Circle die; black gems 

Monday 9 October 2023

You Rock


Welcome
Today's card was made for some very special friends who love the music world.
This was a fun one to put together.

So, here's what I did to create my card.
  • I cut a piece of white cardstock for my card panel and placed it into my Misti.  The stamp set I used has a variety of different inchies so I decided which ones I wanted to use.
  • I started at the center and worked my way out, stamping the different images over the panel, trying to center them as best I could.
  • When I was happy with all the stamping, I glued it onto a piece of black cardstock, then onto a white A2 sized card base.
  • I stamped the sentiment and used some foam tape to pop it over the background.

Thanks so much for coming by and taking a lookj.

Adding my card to these challenges:
Allsorts- VINTAGE or ANYTHING GOES
Krafty Chicks- USE STAMPS

 Supplies
Stamps- Music Inchie (Inkadinkadoo); For the Record (Honey Bee)
Inks- Versafine Clair
Paper- heavy white (Scribes Nook- Waterloo, Ont.)
Accessories and Tools- Misti (My Sweet Petunia)

Saturday 7 October 2023

Holiday Poinsettia

Good Morning and Welcome
Another card for the holidays featuring some stenciling and fussy cutting.
Some great new releases for October from A Colorful Life Designs.
I used the Beautiful Poinsettia stencil as the focal point of my card.

So, here's what I did to create my card.
  • I placed a piece of white cardstock onto my Make Art Station and put the Beautiful Poinsettia stencil over that.  
  • Starting in the center of the poinsettia, I inked it up with some Lumberjack Plaid Distress Oxide ink.  I moved outwards from the middle and inked with some Crackling Campfire DOX ink going right to the edges of the flower.
  • The center of the flower looked lost, so to give it a pop of colour, I inked over just the middle with some Villainous Potion DOX ink.  It really helped to make it more defined.
  • Next, I fussy cut the flower out, splattered it with my white Posca pen and set aside to dry.
  • I got out another piece of white cardstock and placed the Houndstooth stencil (an older release) over that and inked it up with some more of the red DOX inks.
  • I glued the Houndstooth panel onto a white A2 sized card base, then using some foam tape, popped the poinsettia over that.
  • Finally, I used more foam tape to pop the sentiment over the flower.

Here are the stencils I used:


Discount Code for A Colorful Life Designs
(Affiliate with no extra cost to you) 

Thanks so much for coming by and taking a look.

Adding my card to these challenges:
Simon Says Wed.- STENCIL 
Peace on Earth- ANYTHING GOES OR INSPIRATION BOARD
The Flower Challenge- ANYTHING GOES

Supplies
Stamps- none
Inks- Distress Oxides
Paper- heavy white (Scribes Nook- Waterloo, Ont.)
Accessories and Tools- stencils (A Colorful Life Designs); TE Blending Brushes;
white Posca pen; Christmas Pre-printed sentiment (TE); Make Art Station (Ranger)