Monday 25 December 2023

Merry Christmas


Wishing you the most special Christmas!!

I hope you day is filled with special moments and many happy memories made.

Saturday 23 December 2023

Joyful Moments


Good Morning
Just a few days until Christmas arrives.  I hope you holiday plans are going well!
Today's card is a fun one using just one part of a layering stencil from A Colorful Life Designs called

So, here's what I did to create my card.
  • I placed a piece of white cardstock onto my Make Art Station and then placed just the berries part of the Layered Holly stencil over that.  I inked it up with some Lumberjack Plaid Distress Oxide ink.
  • I removed the stencil, cleaned it off and flipped it around upside down and placed it back onto my cardstock.  I inked again with some Rustic Wilderness DOX ink.
  • I wiped the stencil clean and then decided to add some more of the dots using some Squeezed Lemonade DOX ink.
  • I still wanted more dots, so using the eraser on the end of a pencil, I added more dots using the red.  Those were a bit bigger then the stenciled ones, which helped balance out the design.
  • Using a white Posca pen, I put dots into the eraser stamped ones to add more interest.
  • When my card front was dry, I die cut the "JOY" sentiment from the center.  I die cut the shadow with some red cardstock and glued the 2 together.
  • I dry embossed a piece of red cardstock as I wanted to add interest to the open part of the sentiment, then I glued the stenciled card front over that and then onto an A2 sized card base.
  • I used some foam tape to pop the sentiment back into place, matching up the stenciled pattern.
  • I added some die cut pieces around the sentiment to finish my card off.

Here is the stencil I used:
(I used just the berries)

Discount Code for A Colorful Life Designs
(Affiliate with no extra cost to you) 

Thanks so much for coming by and taking a look.

Adding my card to these challenges:
Little Red Wagon- UNDER PRESSURE
Cardz 4 Galz- CHRISTMAS CARD

Supplies
Stamps- none
Inks- DOX
Paper- heavy white (Scribes Nook- Waterloo, Ont.)
Accessories and Tools- stencil- A Colorful Life Designs, white Posca pen, 
Make Art Station (Ranger), Big Tidings Dies- (Tim Holtz), Mosaic Angles eb folder (Altenew)

Thursday 21 December 2023

Sending Holly and Jolly


Welcome
Todays card is a fun one using a stencil from A Colorful Life Designs called

So, here's what I did to create my card.
  • I placed a piece of white cardstock onto my Make Art Station and positioned the Flurries stencil over that.
  • I began in the middle of the panel and inked it up with some Peacock Feathers Distress Oxide ink.  I inked on either side of the middle next with some Salty Ocean DOX ink and then some Villainous Potion along the top and the bottom edges.
  • Using the eraser on the end of a pencil, I added some dots into the open areas using the same colours mentioned above.
  • When the panel was dry, I added white dots to the snowflake and then splattered using my white Posca pen.
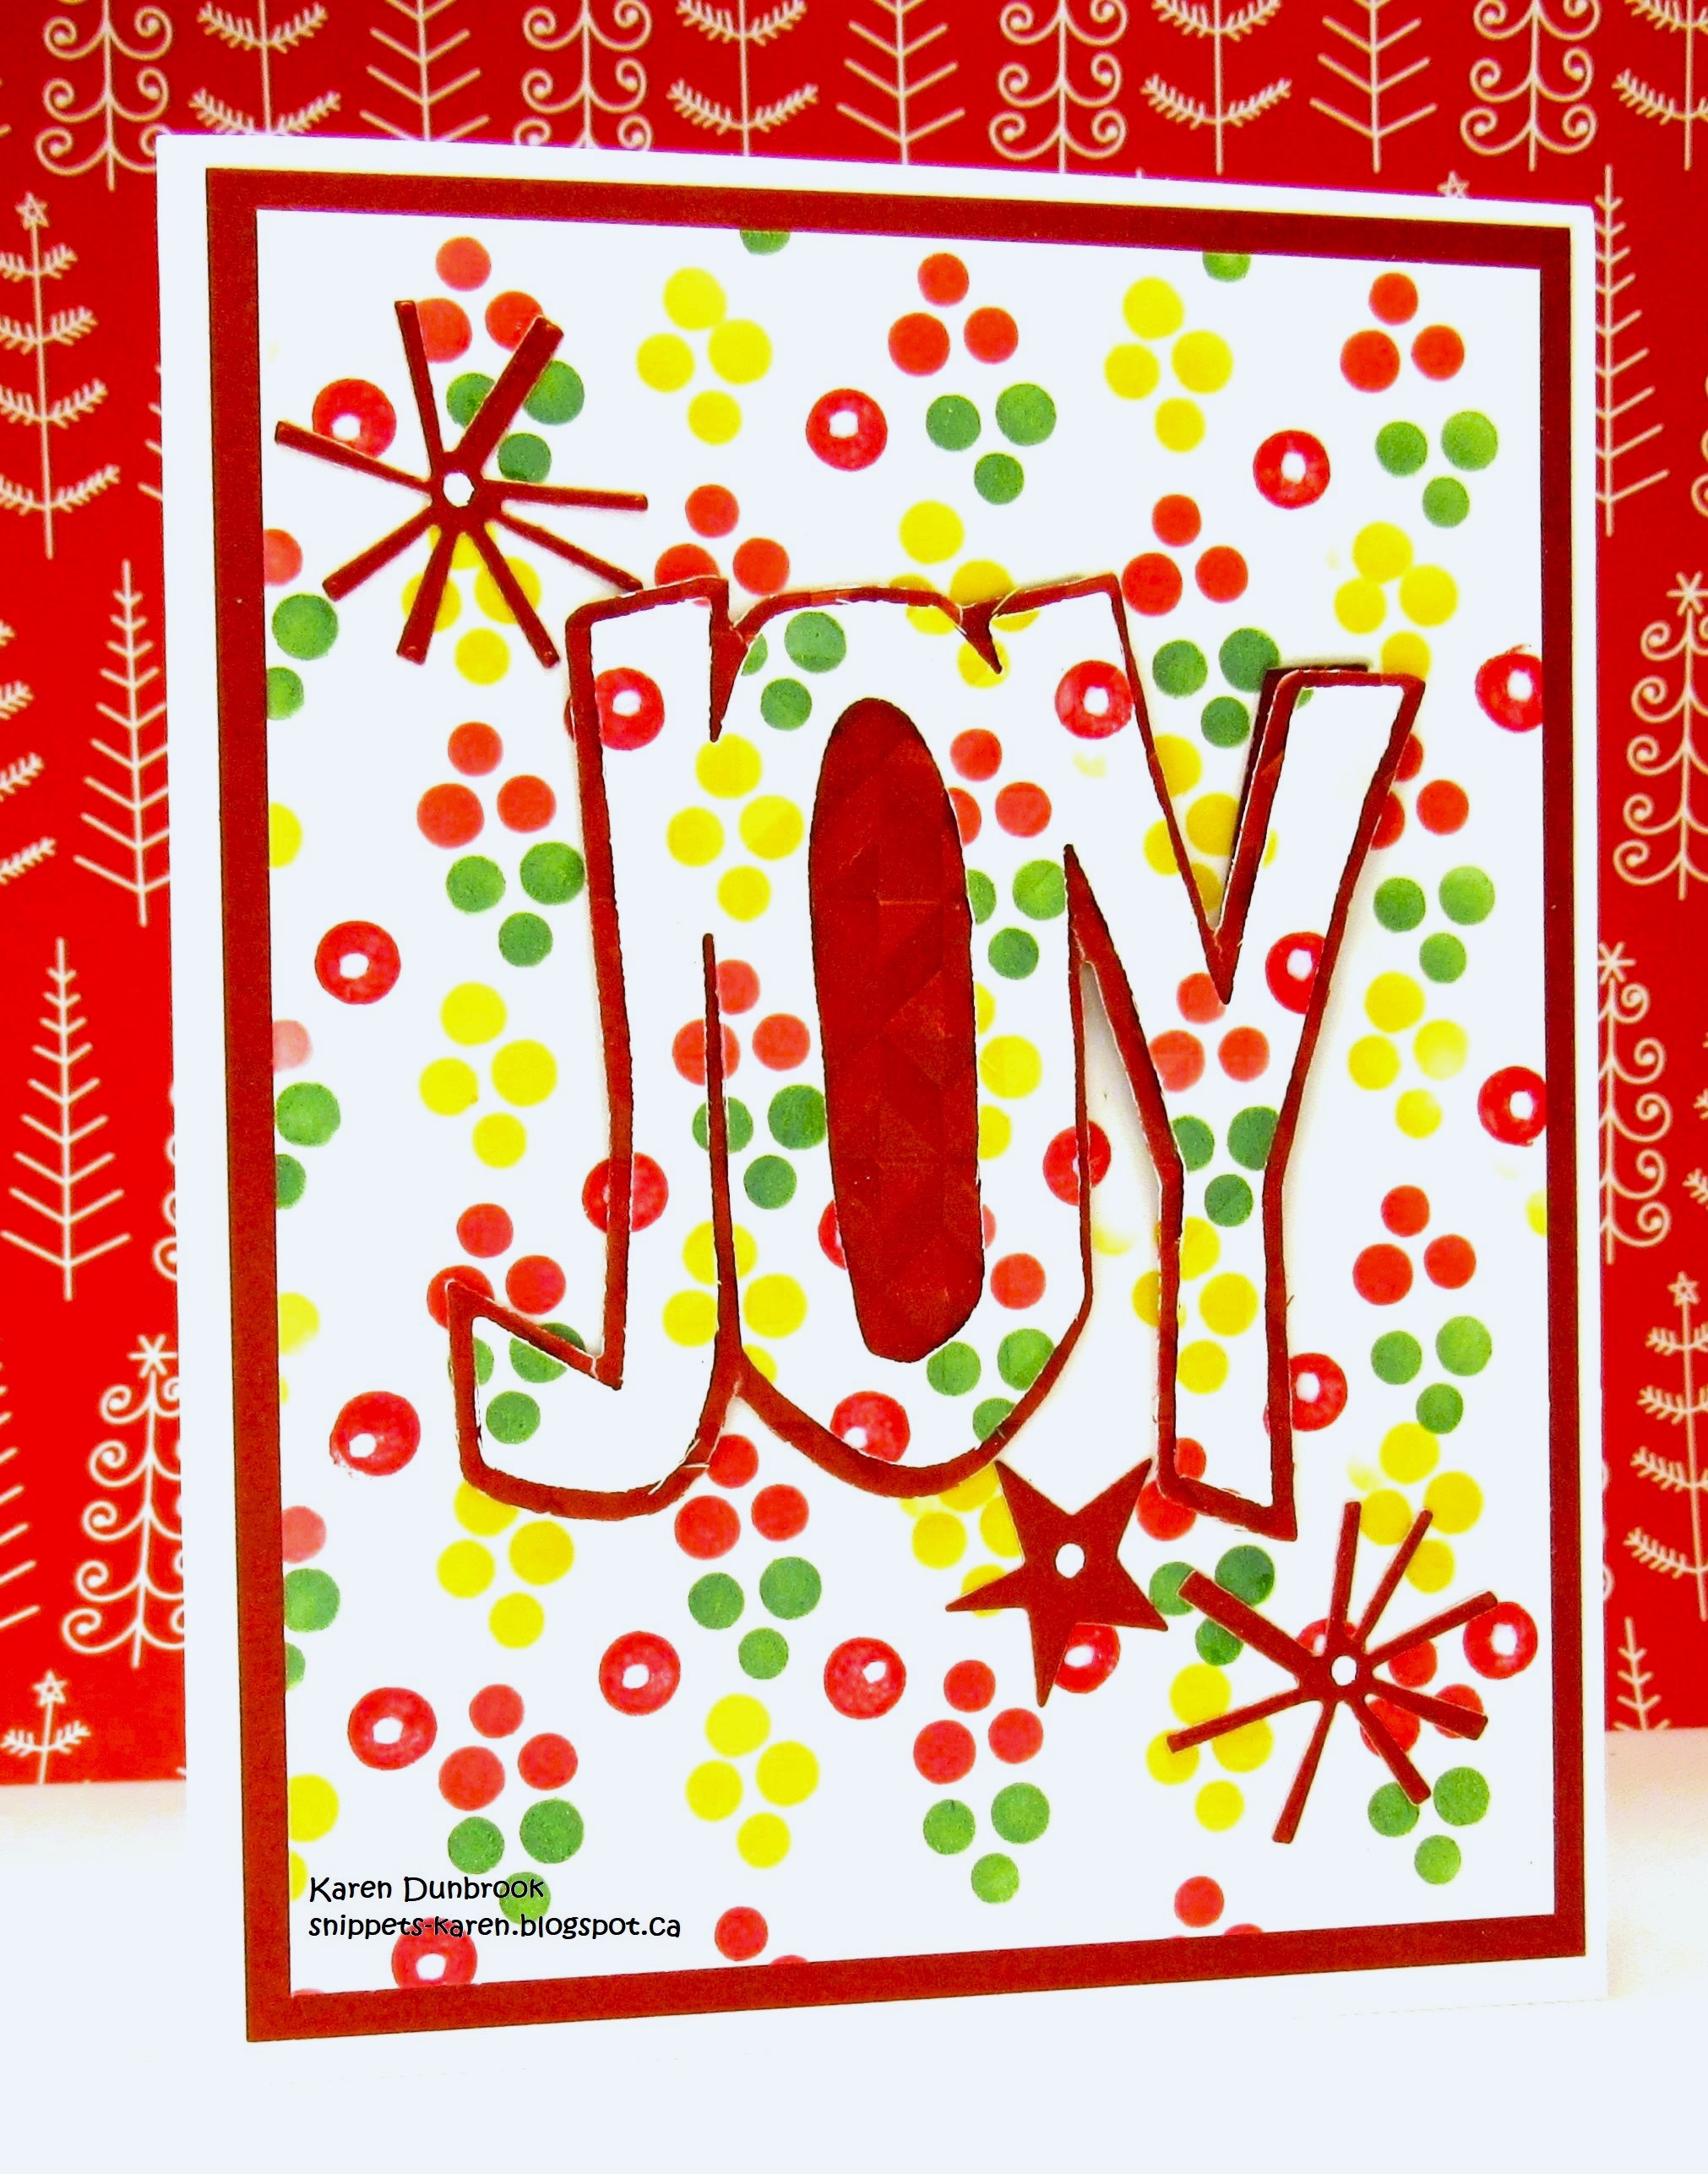
  • I die cut the sentiment shadow from the center of the card front and then cut the letters from some matching inked cardstock.  I glued the sentiment onto the shadow die cut.
  • I glued the panel onto a piece of purple cardstock, then onto an A2 sized card base.
  • Finally, I added the sentiment with some foam tape, matching up the inked pattern.

Here is the stencil I used:

Discount Code for A Colorful Life Designs
(Affiliate with no extra cost to you) 

Thanks so much for coming by and taking a look.

Adding my card to these challenges:
Little Red Wagon- UNDER PRESSURE
Simon Says Monday- LET IT SNOW

Supplies
Stamps- none
Inks- Distress Oxide
Paper- heavy white (Scribes Nook- Waterloo, Ont.)
Accessories and Tools- stencil (A Colorful Life Designs); TE Blending Brushes;
Make Art Station (Ranger); Holly Jolly die (Catherine Pooler); foam tape;
white Posca pen

Sunday 17 December 2023

Very Merry

Welcome
Another snowflake card using this lovely stencil from A Colorful Life Designs called

So, here's what I did to create my card.
  • I looked through my stash and found a piece of cardstock with a faint image on it.  I think it was most likely done on my Gel Plate with a stencil as I rubbed ink off while making a print.
  • I placed it onto my Make Art Station and inked up the Jewel Snowflake with some Mermaid Lagoon Distress Oxide ink.  You can see the faint image from the Gel Plate print in the background.
  • I removed the stencil and splattered heavily with some water to lift some of the ink.  I set the piece aside to dry.
  • When it was dry, I die cut the shadow of the 'very merry' from the middle of the panel and the sentiment from some white cardstock.
  • I glued the card front onto a piece of navy cardstock, then onto an A2 sized card base.
  • I put the sentiment back into the cut away on the card front, matching it up with the pattern.
  • Lastly, I added some silver gems around the sentiment.

Here is the stencil I used:

Discount Code for A Colorful Life Designs
(Affiliate with no extra cost to you) 

Thanks so much for coming by and taking a look.

Adding my card to these challenges:
Little Red Wagon- CHRISTMAS
Simon Says Mon.- DIE CUT
My Time to Craft- CHRISTMAS WITH LETTER 'S' WORDS
(snowflake, snow, splatter, silver gems)

Supplies
Stamps- none
Inks- DOX
Paper- heavy white (Scribes Nook- Waterloo, Ont.)
Accessories and Tools- stencil (A Colorful Life Designs); Make Art Station (Ranger);
TE Blending Brushes; silver gems (Dollar Store); Holiday Sayings die (Concord and 9th)

Friday 15 December 2023

Merriest Wishes

Good Morning
Today's card features some stencil layering and stamping.
I used the 16 Circle Shadow and the Mixed Bars stencils 
from A Colorful Life Designs.

So, here's what I did to create my card.
  • I began with a piece of white cardstock on my Make Art Station and placed the 16 Circle Shadow stencil over that.  I inked it up with some Cracked Pistachio and I shaded with some Peacock Feathers Distress Oxide ink.
  • Leaving the circle stencil in place, I put the Mixed Bars stencil over the top of that and inked with some Rustic Wilderness DOX ink.
  • I removed the stencils but repositioned the circles into the open areas and inked with some more Cracked Pistachio DOX ink.
  • I placed the stenciled panel into my Misti to stamp the pine boughs and the grid patterns into the corners.
  • I splattered the whole panel with my white Posca pen and set aside to dry.
  • I die cut the sentiment from some green cardstock 2 times and then once from some beige cardstock and glued them all together.
  • I glued the stenciled card front onto another piece of beige cardstock, then onto an A2 card base.
  • I glued the sentiment onto the front panel and added 3 silver gems.

Here are the stencils I used:


Discount Code for A Colorful Life Designs
(Affiliate with no extra cost to you) 

Thanks so much for coming by and taking a look.

Adding my card to these challenges:
Little Red Wagon- MERRY CHRISTMAS
Krafty Chicks- CHRISTMAS
Fab 'n' Funky- CHRISTMAS

Supplies
Stamps- Ornamental Pine (SU); Off the Grid (SU)
Inks- DOX
Paper- heavy white (Scribes Nook- Waterloo, Ont.)
Accessories and Tools- stencils (A Colorful Life Designs); Make Art Station (Ranger);
white Posca Pen; Misti (My Sweet Petunia); TE Blending Brushes; 
die and shadow (Photoplay)

Wednesday 13 December 2023

Much Joy


Welcome 

Meet today's card.  Traditional colours but a non-traditional pattern using the 
stencil from A Colorful Life Designs.

So, here's what I did to create my card.
  • I cut a piece of white cardstock and placed it onto my Make Art Station.  I centered up the Flower Grid stencil and inked it up with some Lumberjack Plaid Distress Oxide ink.
  • When I was happy with the inking, I lifted the stencil off and cleaned it off.
  • I repositioned it, shifting it to the side to fill in the open areas and then inked it with some Rustic Wilderness DOX ink.
  • Next, I removed the stencil and die cut the JOY sentiment right from the middle of the stenciled panel.  I cut the shadow for the sentiment with some white cardstock and glued the 2 together.
  • I glued the stenciled panel onto a piece of green cardstock, then onto an A2 sized card base.
  • I popped the sentiment back into place over the card front with some foam tape, matching up the pattern.
  • Finally, I die cut 2 snowflakes with some red cardstock and the star with some green and glued them into place.  I added some white dots using my Posca pen.

Here is the stencil I used:

Discount Code for A Colorful Life Designs
(Affiliate with no extra cost to you) 

Thanks so much for coming by and taking a look.

Adding my card to these challenges:
Little Red Wagon- CHRISTMAS

Supplies
Stamps- none
Inks- DOX
Paper- Scribes Nook (Waterloo, Ont.)
Accessories and Tools- stencil (A Colorful Life Designs); Make Art Station; 
TE Blending Brushes; Joy Die (Tim Holtz); foam tape

Monday 11 December 2023

Golden Snowflake Greetings


Welcome
Today's card was a quick and easy one to create and has a nice shine for the holidays.

So, here's what I did to create my card.
  • I looked through my stash and found this blue 'roll off' sheet that I did while using my Gel Plate.  Anytime I use my Gel Plate, I keep extra cardstock at hand to roll excess ink off my brayer.  They make great backgrounds!
  • I placed the cardstock into the Angled Mosaic embossing folder and dry embossed it.
  • Next, I rubbed some Simon Hurley Lunar Paste over the raised surface of the embossing and set aside to dry.
  • I die cut the snowflake and embossed it as well using the same folder, then rubbed some more of the paste over it .
  • I glued the card front onto a piece of gold cardstock, then onto an A2 sized card base.
  • I used some foam tape to pop the snowflake over the front and added the pre-printed sentiment.

Thanks a lot for coming by and taking a look.

Adding my card to these challenges:
Simon Says Wed.- USE CRAFT DIES
Merry Little Christmas- ANYTHING GOES
The Male Room- CHRISTMAS

Supplies
Stamps- none
Inks- DOX
Paper- heavy white (Scribes Nook- Waterloo, Ont.)
Accessories and Tools- Angled Mosaic eb folder (Altenew); Pre-printed sentiment (SSS)
Simon Hurley Paste (Slippery when Wet); snowflake die-?

Saturday 9 December 2023

Jewel Snowflake

Welcome
More stencil fun with combining 2 stencils together from A Colorful Life Designs.
I used the 
to create this unique looking holiday card.

So, here's what I did to create my card.
  • I cut a piece of white cardstock and placed it onto my Make Art Station.  I put the Jewel Snowflake stencil over my cardstock and inked it up with some Mermaid Lagoon Distress Oxide ink.
  • Leaving that stencil in place, I put the Mixed Bars stencil over that and inked it up with some Villainous Potion DOX ink.
  • I removed both stencils and splattered with my white Posca pen.
  • While that dried, I stamped the sentiment and cut it out.
  • I glued the stenciled card front onto a piece of blue cardstock and then onto an A2 sized card front.
  • Finally to finish my card off, I added some silver gems for some shine.

Here are the stencils I used:


Discount Code for A Colorful Life Designs
(Affiliate with no extra cost to you) 

Thanks so much for coming by and taking a look.

Adding my card to these challenges:
Simon Says Monday- WINTER BLUES
Jingle Belles- CHRISTMAS
Tic Tac Toe- CHRISTMAS (December, Metallic, Free)


Supplies
Stamps- Let is Snow (Visible Image)
Inks- DOX
Paper- Scribes Nook (Waterloo, Ont.)
Accessories and Tools- stencils (A Colorful Life Designs); TE Blending Brushes;
Make Art Station (Ranger); silver gems (Dollar Store)

Friday 8 December 2023

Christmas Snowflake


Welcome
I decided to make a very non-traditional looking card using some purple and these beautiful stencils called
from A Colorful Life Designs.

So, here's what I did to create my card.
  • I found this Gel Plate print in my stash.  I had used some Villainous Potion Distress Oxide ink on my Gel Plate with the Aztec Pattern stencil.
  • I placed the purple print onto my Make Art Station and put the Elegant Snowflake stencil to one side.
  • Next, I got out my Unicorn white ink and pressed it over the stencil, being sure to fill in all the areas of the snowflake, then I white heat embossed it.  
  • I splattered the card front with my white Posca pen and let dry completely.
  • While that dried, I stamped and cut out the sentiment strip. I added some purple inking along the cut edges.
  • I glued the dried panel onto a piece of pale purple cardstock, then onto an A2 sized card base.
  • I used some foam tape to pop the sentiment to the side and added a white pearl gem to the middle of the snowflake.

Here are the stencils I used:

Discount Code for A Colorful Life Designs
(Affiliate with no extra cost to you) 

Thanks so much for coming by and taking a look.

Adding my card to these challenges:
The Crafty Addicts- ANYTHING GOES
The Male Room- CHRISTMAS


Supplies
Stamps- (Dollar Store)
Inks- Unicorn white (Hero Arts); DOX; Versafine Clair
Paper- white (Scribes Nook- Waterloo, Ont.)
Accessories and Tools- stencils (A Colorful Life Designs); Make Art Station (Ranger);
white eb powder; Gel Plate; white Posca pen

Wednesday 6 December 2023

Christmas Holidays


Good Morning
Today's card is interesting as I combined 2 stencils from A Colorful Life Designs called

So, here's what I did to create my card.
  • I cut a piece of white cardstock and placed it onto my Make Art Station.  I inked up the Fluttering Snow stencil with some Tumbled Glass Distress Oxide ink.  
  • Leaving that stencil in place, I put the outline mask of the Fetching Snowflakes stencil right over the Fluttering Snow stencil and inked that up with some Salty Ocean DOX ink.
  • I removed the stencils and splattered with my white Posca pen and set aside to dry.
  • When it was dry, I place it into my Misti to stamp the sentiment.
  • I die cut the little snowflake and glued that over the middle of the large middle snowflake.
  • To finish my card off, I added 3 blue gems.

Here are the stencils I used:


Discount Code for A Colorful Life Designs
(Affiliate with no extra cost to you) 

Thanks so much for coming by and taking a look.

Adding my card to these challenges:
Simon Says Wed.- ANYTHING GOES
Shopping Our Stash- WHATEVER THE WEATHER

Supplies
Stamps- Christmas Cheer (TT- retired)
Inks- Versafine Clair, DOX
Paper- heavy white (Scribes Nook- Waterloo, Ont.)
Accessories and Tools- stencils (A Colorful Life Designs); Make Art Station (Ranger);
white Posca pen; TE Blending Brushes; Snowflake die ?

Monday 4 December 2023

Very Merry

 
Welcome
I'm combining 2 stencils today to create a fun background.
I used the Halftone Circle stencil with the Classic Snowflake from
A Colorful Life Designs.

So, here's what I did to create my card.
  • I cut a piece of white cardstock and placed it onto my Make Art Station.  I put the Classic Snowflake stencil over my paper and inked it up with some Lumberjack Plaid Distress Oxide ink.
  • I lifted that stencil off and placed the Halftone Circle stencil over the inked snowflakes and then inked that stencil with some Crackling Campfire DOX ink.  I rotated the stencil and inked again just to fill in some of the open areas.
  • I rubbed some Lumberjack Plaid ink onto a scrap of white cardstock, splattered with my white Posca pen and then die cut the letters from that.
  • Next, I die cut a circle and glued the sentiment onto that and stamped the holly branches.  
  • I glued my card front onto a piece of dark red cardstock, then onto an A2 sized card base.
  • I used some foam tape to pop the circle over the background.
  • Finally, I added some silver gems under the sentiment.

Here are the stencils I used:


Thanks so much for coming by and taking a look.

Discount Code for A Colorful Life Designs
(Affiliate with no extra cost to you) 

Adding my card to these challenges:
Simon Says Wed- ANYTHING GOES
Crafty Calendar- CHRISTMAS THEMED
Peace on Earth- CHRISTMAS

Supplies
Stamps- Christmas Cheer (TT- retired)
Inks- DOX
Paper- heavy white (Scribes Nook- Waterloo, Ont.)
Accessories and Tools- stencils (A Colorful Life Designs); Make Art Station (Ranger);
white Posca pen; Holiday Sayings Die (Concord and 9th); 
TE Blending Brushes; Infinity Circle Dies; silver gems

Sunday 3 December 2023

Jingle All the Way


Welcome
This card was a fun one using the 
from A Colorful Life Designs.
This stencil is a 2-part one and easy to use.

So, here's what I did to create my card.
  • I cut a piece of white cardstock placed it onto my Waffle Flower stencil mat and put stencil #1 of the Layered Santa Hats over my card front.  I inked that up with some Lumberjack Plaid Distress Oxide ink.
  • I removed that stencil and positioned stencil #2 into place and inked that up with some Rustic Wilderness DOX ink.
  • While that dried, I die cut the sentiment using 3 different colours.  I cut out the word shadow and glued the letters into place over that.
  • Next, I glued the card front onto a piece of red cardstock and then onto an A2 sized card base.
  • Finally, I used some foam tape to pop the sentiment over the card front in the center.

Here is the stencil I used:

Thanks so much for coming by and taking a look.

Discount Code for A Colorful Life Designs
(Affiliate with no extra cost to you) 

Adding my card to these challenges:
Simon Says- ANYTHING GOES
Crafty Calendar- CHRISTMAS THEMED

Supplies
Stamps- none
Inks- DOX
Paper- Scribes Nook- Waterloo, Ont.
Accessories and Tools- Stencils (A Colorful Life Designs); Stencil Mat (Waffle Flower); 
TE Blending Brushes; Jingle Bells die (A Pocket Full of Happiness)

Saturday 2 December 2023

Joy to the World


Welcome
Today's collage style card was a fun one for me.
I have wanted the Off the Grid stamp for many years but just didn't find it at a good price.
Well finally the day came and I grabbed it up.

So, here's what I did to create my card.
  • I cut a piece of white cardstock and placed it into my Misti.  I got out some Catherine Pooler inks this time to try them out.
  • I centered the snowflake and inked up the just the middle of the snowflake with some Suede Shoes ink and pressed onto my white cardstock.
  • I wiped the stamp off and inked the edges with some CP All That Jazz ink and stamped again.  I love the look of the two-tone snowflake.
  • I placed the Off the Grid stamp into my Misti next and added that onto the 4 corners of my card front.
  • Using the same colours that I inked up the snowflake with, I stamped the snow dots all around the snowflake.
  • I glued the panel onto a piece of white cardstock, then onto a piece of navy cardstock.  I added it to an A2 sized card base.
  • Finally, I added the pre-printed sentiment strip with some foam tape right to the middle of the snowflake.

Thanks so much for taking a look.

Adding my card to these challenges:
Simon Says Wed.- ANYTHING GOES
The Crafty Addicts- ANYTHING GOES
CRAFT- CHRISTMAS

Supplies
Stamps- Off the Grid (SU); Let it Snow (Visible Image)
Inks- Versafine Clair, Catherine Pooler
Paper- Scribes Nook (Waterloo, Ont.)
Accessories and Tools- Misti (My Sweet Petunia); Christmas Sentiment strips (SSS)