Showing posts with label holiday. Show all posts

Sunday, 30 August 2026

Christmas Peace

Hello and Welcome
This month it is my turn to host the TLC (Technique Lovers Challenge) at Splitcoast Stampers.
The technique we will be doing this week is called:
It's a fun and easy technique to play around with and I have been wanting to start making some cards for the holidays.

So, here's what I did to create my card.
  • I began by getting out my long acrylic stamping block and I wrapped some different width elastic bands around it in a grid pattern.
  • I pressed the bands wrapped around the block onto my Speckled Eggs Distress Oxide ink pad and stamped over my white cardstock in a few different areas.
  • I wiped off the elastics and repeated that process using some Salty Ocean and some Uncharted Mariner DOX ink until I was happy with the pattern covering my cardstock.
  • I diluted some of the ink mentioned above with water and splattered my whole card front using a paint brush, then set aside to dry.
  • Next, I created my snowflake.  I took a piece of acetate and pressed the DOX inks onto it, sprayed with water and dragged another piece of white cardstock through the wet ink and set that aside to dry.  
  • I splattered the inky cardstock with my white Posca pen and then used that to die cut the snowflakes.  I also used a piece of silver shimmer paper to cut the stars for the centers of the snowflakes.
  • I glued my elastic stamped card front onto a piece of blue cardstock and then onto an A2 white card base.
  • I glued one snowflake at the top and one along the bottom and then I used some foam tape to pop up the stars in the center of the snowflakes.
  • I die cut the sentiment and added it to the center of my card front.

Thanks so much for coming by and taking a look.

Adding my card to these challenges:
Simon Says Wed.- ANYTHING GOES
Simon Says Mon.- LOTS OF LAYERS
Girlz Creative- CHRISTMAS

Supplies
Stamps- none
Inks- DOX
Papers- Solar white; scrap of silver shimmer
Accessories and Tools- rubber bands; long acrylic block; Funky Snowflake die (SSS);
foam tape; Peace die (Amazon)

Saturday, 12 October 2024

Layered Holly Berry Wreath

Good Morning
Meet the new 
from A Colorful Life Designs.

So, here's what I did to create my card
  • I placed the wreath part of the Layered Holly Berry Wreath stencil over a piece of white cardstock and inked it up with some Cracked Pistachio Distress Oxide ink.
  • I wanted to add more variation to the colour so I also added some Rustic Wilderness, Lucky Clover and a hint of Uncharted Mariner DOX ink in random places as well.
  • I splattered the wreath with my white Posca pen to add a snowy effect.
  • I lifted the stencil off, cleaned it and then repositioned the top part of the stencil (the berries) over the wreath and inked with some Lumberjack Plaid DOX ink. 
  • To give the berries more texture and shine, I covered them with some Glossy Accents then set aside to dry.
  • While that dried, I embossed a piece of dark red cardstock with the burlap EB folder and I cut the sentiment from the same red cardstock and glued it onto the die cut white shadow.
  • I glued the red embossed panel onto a piece of white cardstock, then a piece of dark green, then onto an A2 sized card base.
  • After I fussy cut out the wreath, I added it over the embossed panel with some foam tape to pop it up.
  • I used some more foam tape to pop the sentiment under the wreath.

Here is the stencil I used:

Discount Code for A Colorful Life Designs
(Affiliate with no extra cost to you) 

Thanks so much for coming by and taking a look.

Adding my card to these challenges:
Simon Says Wed.- ADD SOME TEXTURE
Krafty Chicks- CHRISTMAS

Supplies
Stamps- none
Inks- Distress Oxides
Paper- Scribes Nook- Waterloo, Ont.
Accessories and Tools- stencil- A Colorful Life Designs; TE Blending Brushes;
Glossy Accents (Ranger); Happy Holidays die (Waffle Flower);
Burlap EB folder (Honey Bee); white Posca pen

Saturday, 2 December 2023

Joy to the World


Welcome
Today's collage style card was a fun one for me.
I have wanted the Off the Grid stamp for many years but just didn't find it at a good price.
Well finally the day came and I grabbed it up.

So, here's what I did to create my card.
  • I cut a piece of white cardstock and placed it into my Misti.  I got out some Catherine Pooler inks this time to try them out.
  • I centered the snowflake and inked up the just the middle of the snowflake with some Suede Shoes ink and pressed onto my white cardstock.
  • I wiped the stamp off and inked the edges with some CP All That Jazz ink and stamped again.  I love the look of the two-tone snowflake.
  • I placed the Off the Grid stamp into my Misti next and added that onto the 4 corners of my card front.
  • Using the same colours that I inked up the snowflake with, I stamped the snow dots all around the snowflake.
  • I glued the panel onto a piece of white cardstock, then onto a piece of navy cardstock.  I added it to an A2 sized card base.
  • Finally, I added the pre-printed sentiment strip with some foam tape right to the middle of the snowflake.

Thanks so much for taking a look.

Adding my card to these challenges:
Simon Says Wed.- ANYTHING GOES
The Crafty Addicts- ANYTHING GOES
CRAFT- CHRISTMAS

Supplies
Stamps- Off the Grid (SU); Let it Snow (Visible Image)
Inks- Versafine Clair, Catherine Pooler
Paper- Scribes Nook (Waterloo, Ont.)
Accessories and Tools- Misti (My Sweet Petunia); Christmas Sentiment strips (SSS)

Tuesday, 14 December 2021

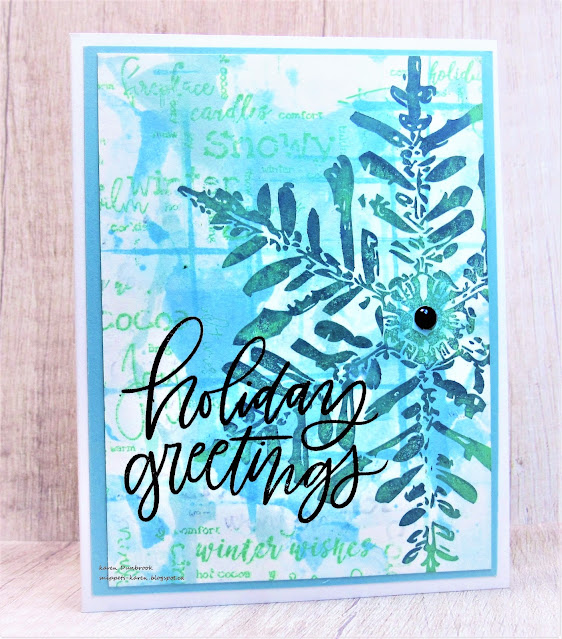
Snowy Afternoon


Welcome
Meet my today's snowflake card.
Lots of inks, smooshing and fun.

So here's what I did to create my card.
  • I cut a piece of white cardstock for my card panel.  I rubbed some Broken China Distress Oxide ink onto my non-stick mat, sprayed with water and rubbed the panel into the wet ink.  I used the leftover ink on my mat to create the lines using the edge of a gift card dipped into the wet ink.
  • After drying the panel, I stamped over it with the Snowy Afternoon background stamp using some Cracked Pistachio DOX ink.  The words added a lot of interest.
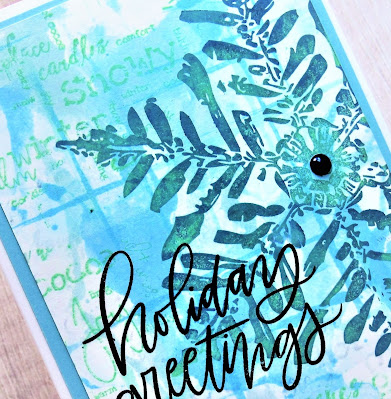
  • I placed the dry panel into my Misti and positioned the large snowflake to one side.  I randomly pressed on some more Broken China DOX ink over the snowflake, sprayed with water and stamped.  I repeated that process using some Rustic Wilderness and Lucky Clover ink.
  • Lastly, I stamped the sentiment in the left hand corner with some black Versafine Clair and clear heat embossed it.  I added the black gem to the center of the snowflake.
  • I glued it onto a pale blue piece of cardstock, then onto a heavy white card base.

Thanks so much for coming by and taking a look.
I hope you holiday preparations are going well.

Adding my card to these challenges:
Simon Says Wed.- COLD AS ICE
A Place to Start- ANYTHING GOES OPTION BLUE
Love to Craft- ANYTHING GOES

Supplies
Stamps- Hand Lettered Holiday Greetings (MFT); Snowy Afternoon (Studio Light); 
Warm Wishes Snowflake (Colorado Craft)
Inks- Distress Oxides; Versafine Clair
Paper- heavy white (Scribes Nook- Waterloo, Ont.)
Accessories and Tools- Misti (My Sweet Petunia); old gift card; non- stick craft mat; 
clear eb powder; Mister (TH)

Wednesday, 8 December 2021

Three Wise Men


Welcome
Playing with a new stencil for my card today.
Here is the lovely Three Wise Men stencil.
It is a 2-part stencil/ mask.  I am just using the mask part today.

So here's what I did to create my card.
  • I began with a piece of white cardstock.  I positioned the mask piece of the stencil along the bottom of my cardstock panel and inked it up.  I began inking at the bottom with some Broken China Distress Oxide ink.  
  • Next, I moved up the card front in this order with these Oxide colours:  Blueprint Sketch, Dusty Concord and some Black Soot just along the top edge.
  • I dried the ink and rubbed over the whole panel with an anti-static bag, then leaving the mask in place, I stamped the Glory to God sentiment randomly over the background with Versamark ink and white heat embossed it.
  • I splattered with my white Posca pen before removing the mask.
  • Using a strip of white cardstock, I inked it up with some more Blueprint Sketch and Dusty Concord to match the background and then splattered with water.  I stamped the sentiment with some Versamark and white heat embossed it.
  • I glued the panel onto a piece of matching cardstock, then onto a heavy white card base.  
  • I pop dot mounted the sentiment in the corner just above the images.


Here is the stencil/mask I used:

Discount Code for A Colorful Life Designs
(affiliate with not extra cost to you)

Adding my card to these challenges:
Simon Says Wed.- Happy Holidays/ Merry Christmas
A Place to Start- ANYTHING GOES/ OPTIONAL BLUE CHRISTMAS
Peace on Earth- ANYTHING CHRISTMAS


Thanks a lot for coming by and taking a look.

Supplies
Stamps- Glory to God (Impression Obsesssion); Simple Strips Christmas (TE)
Inks- Versamark, Distress Oxide
Paper- heavy white (Scribes Nook- Waterloo, Ont.)
Accessories and Tools- stencil (ACLD); Lawn Fawn white eb powder; heat tool;
Blending Brushes (TE); Posca pen; anti-static bag

Wednesday, 1 December 2021

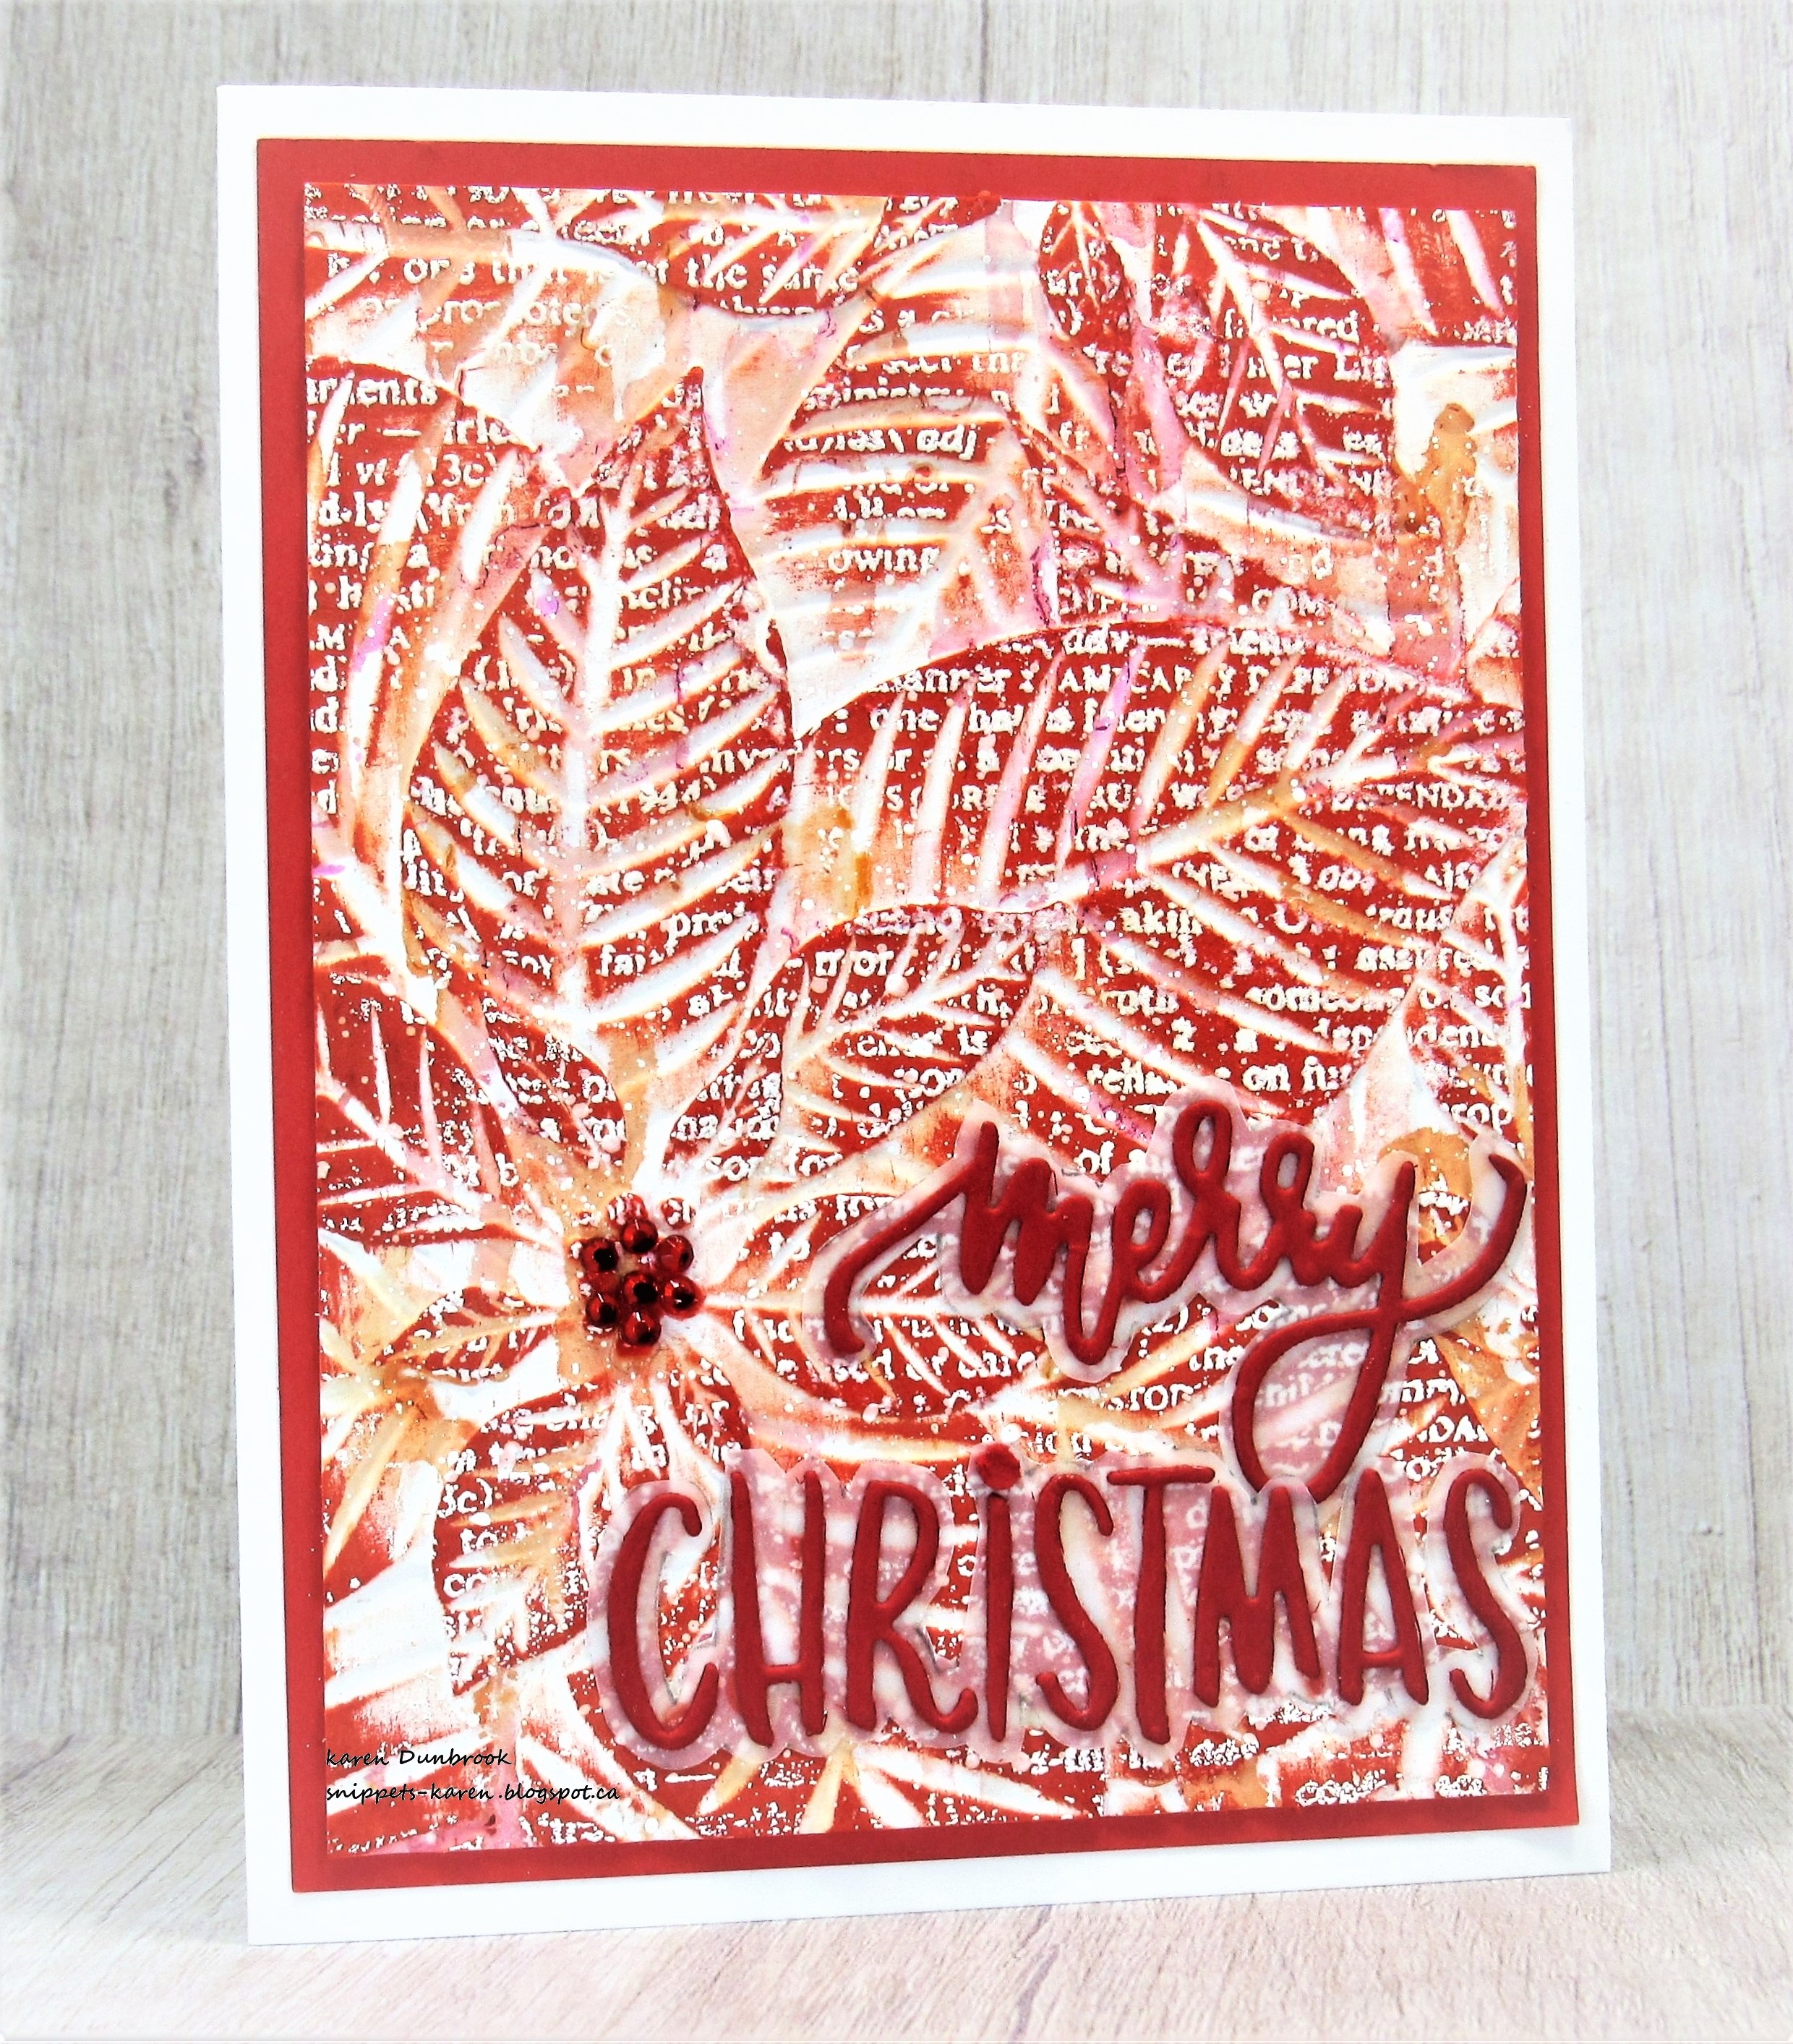
Pretty Poinsettias


Welcome
Meet today's card.
I am going to describe how I made it the best way I can and I sure hope it makes sense.
I am having a blast playing with this Perfect Poinsettias embossing folder.  

So here's what I did to create my card.
  • I found another piece of cardstock that I had rolled off some red and orange coloured paint onto when I was Gel Plate printing. I have a lot of these as I took a class this summer. I placed it into this Perfect Poinsettia embossing folder and embossed it.
  • Using a sanding block, I went over the panel, sanding gently over the raised areas as to not tear the paper.
  • To help some areas pop, I took some Barn Door and Crackling Campfire Distress Oxide ink and rubbed the pads over the raised areas.  
  • It needed something else, so I inked up the Friendship background stamp with some Versamark ink and stamped right over the panel then white heat embossed it.  As you can see, the words just show up in random areas which adds interest to the bkg.
  • While that dried, I die cut the sentiment, then traced around the outside of the die onto some vellum to cut out and place behind the words as a shadow.
  • I glued it onto a piece of red cardstock, then onto a heavy white card base.
  • I added a cluster of red gems to the center of the poinsettia.

Thanks so much for coming by and taking a look.

Adding my card to these challenges:
Simon Says Wed.- ANYTHING GOES

Supplies
Stamps- Friendship bkg (Hero Arts)
Inks- Distress Oxide; Acrylic paint
Paper- red cardstock, vellum, heavy white (Scribes Nook- Waterloo, Ont.)
Accessories and Tools- Perfect Poinsettias (Altenew); sanding block; Jolly 
Merry Christmas die (Carta Bella); red gems (Dollar Store); Lawn Fawn wh eb powder

Sunday, 14 November 2021

Sending Joy


Hello
I hope you are all doing well.
I'm getting there with finishing up some more Christmas cards.  
But, I must admit....once I start making them, I find it hard to stop!!  

Anyways, here's what I did to create my card.
  • I began by pulling out my Lace Doily stencil from A Colorful Life Designs.  I just love the look of this beautiful design.  I positioned it onto a piece of heavy white cardstock, then using a palette knife, I spread a thin layer of Gesso over the stencil.  I wasn't too worried about getting full coverage with the Gesso but just added enough to make the design appear.
  • I removed the stencil and set the cardstock panel aside to dry.  Be sure and wash your stencil asap to remove the Gesso.  If for some reason it sticks on and won't wash off well, I soak mine in some Oxiclean and warm water.
  • When the piece was dry, I got out some Peacock Feathers and Cracked Pistachio Distress Oxide ink and I rubbed over the whole thing with an inking brush.
  • I let that dry for a bit, then carefully, I mean very carefully, I wiped over the top of the piece with a baby wipe to remove some of the colour that sat on top of the Gesso.  If you wipe it too hard or with something that is too wet, the Gesso will move and you will lose your pattern and design.
  • I die cut the 'joy' from Simon Says with a previously inked cardstock. ( I keep all my 'failed' pieces just for this reason.)  It is a 2-part die so I cut the backing in white and glued them together.
  • I cut one snowflake (SSS) from white cardstock, then another from white cardstock (Spellbinders) but I left it in the die and added some ink over to give a bit more detail.
  • I glued the snowflakes into the corner, then added the Joy die with the blue gems.
  • I glued it all onto a matching piece of cardstock, then onto a heavy white card base.


 Here is the stencil I used:


                                                        Discount Code for A Colorful Life Designs
(affiliate with not extra cost to you)

Adding my card to these challenges:
Krafty Chicks- CHRISTMAS
(doilies are vintage I think)
Creative Artiste- ANYTHING MIXED MEDIA

Thanks so much for coming by and taking a look, so very appreciated.

Supplies
Stamps- Taylored Expressions-Simple Strips Christmas
Inks- DOX, Versafine Clair
Paper- heavy white (Scribes Nook- Waterloo, Ont.)
Accessories and Tools- Gesso, Lace Doily stencil (ACLD), palette knife, Blender Brushes (TE), JOY die (SSS),large snowflake (SSS), small snowflake (Spellbinders), gems

Wednesday, 9 December 2020

Sweater Weather


Welcome
Need some last minute card ideas?  I have a simple card to show you today.
I made some plaid using my Copic Markers and a ruler.  Pretty simple but fun to try.
I love all the plaids we see for winter; so cozy and warm.

So here's what I did to create my card.
  • I began with a piece of heavy white cardstock.  Using a red Copic marker, I drew in the lines of my plaid with a ruler.  When I was happy with that, I added a few black lines to add interest....simple so far, right?
  • Next, using this 2 part 'Merry' die from The Stamp Market, I die-cut the letters from the panel and set that aside.
  • I then die-cut the shadow for the die with some black and glued the lettering over the black shadow background die cut.
  • I matched the plaid lettering to the background as best I could and glued it into place.
  • I added some black gems for interest.
  • Finally, I glued it onto a piece of white cardstock, then onto black and then onto a heavy white card base.


Thanks so much for coming by and taking a look.

Adding my card to these challenges:
Simon Says Wed.- FUN WITH DIES
The Male Room- TARTAN, PLAID
Crafting Happiness- MOSTLY RED


Supplies
Stamps- none
Inks- Copic markers
Paper- heavy white (Scribes Nook); black (Michaels)
Accessories and Tools- Merry die (The Stamp Market); Cuttlebug; black gems

Monday, 10 August 2020

Frosty for Christmas


Welcome
Today's card is a frosty one which is too funny considering we have a heat warning.
Anyways, I am really pleased to be getting some holiday cards done. 

So here's what I did to create my card.
  • I began by making the background.  I applied a coat of Gesso over my heavy white cardstock and let that dry.  
  • When it was all dry, I added some Acrylic paint with my brayer and then some Distress inks to give a dark, frosty bkg.  
  • Before stamping the snowflakes, I cut the panel to card size, leaving me with a piece I could later use for the sentiment.
  • I placed the panel into my Misti and stamped the snowflakes from Tim Holtz.  They have a great distressed look to them.
  • I stamped the scripts from the Faded Text set in some of the open areas to add interest.
  • I splattered the panel with my white Posca Pen and set aside to dry.
  • Using the small piece I cut from the panel, I stamped the sentiment, also from the snowflake set, with some Versamark and then white heat embossed it.  
  • I backed the sentiment with a small piece of white, then pop dot mounted it over the frosty panel.
  • I added it all to a heavy white card base.


Thanks so much for coming by and taking a look.

Adding my card to these challenges:
We Love to Create- ANYTHING GOES
Corrosive Challenge- ANYTHING GOES
All Fun- ANYTHING GOES


Supplies
Stamps- Faded Text (TH); Weathered Winter (TH)
Inks- Versamark, DOX (TH); Archival; Acrylic paint (Dollar Store)
Paper- heavy white (Scribes Nook)
Accessories and Tools- Gesso; Misti (My Sweet Petunia); Brayer (Speedball);
Posca Pen; pop dots; white eb powder; heat tool; inking tool (Ranger)

Sunday, 9 August 2020

Pretty in Pink


Good Morning
Meet today's card using this beautiful large Poinsettia stamp from Picket Fence Studios.  If you like to colour, it is the perfect one for that!  

So here's what I did to create my card.
  • I pulled out my Gel Plate to create a simply background.  First I positioned my Marvelous Rectangle mask over my cardstock panel.  (I did that because my Gel plate is larger then the background I wanted and I like the look of the white border when finished.  These masks are just so perfect for this kind of technique as they don't stick to the Gel Plate and can be easily wiped clean after removing.)
  • Using my brayer, I rolled some Candied Apple Distress Ink all over my Gel Plate.  I diluted some Faded Jeans and splattered that along the edges to add interest. *Using your Distress inks on your Gel Plate is a really easy way to get an instant bkg.  
  • I took my masked white cardstock panel and rubbed it over my Gel plate to get the panel inked.
  • I dried that, then leaving the mask in place, I stamped the poinsettia using my Misti.  I then removed the mask and simply wiped it clean with a damp cloth.
  • I rubbed some reds and a bit of purple onto my non-stick craft sheet, and watercoloured areas of the flower for interest.
  • I splattered using my white Posca pen.
  • I stamped the sentiment from Studio G with some Versafine Clair Noir and clear heat embossed it.  I mounted it with some pop dots into the corner of my panel over the flower.
  • I added the panel to some black cardstock, then onto a heavy white card base.


Thanks so much for coming by and taking a look.

Discount Code for A Colorful Life Designs
Adding my card to these challenges:
Simon Says Wed.- USE YOUR FAV TOOL
(Misti)
CAS on Friday- NATURE
Creations in Pink- ANYTHING MOSTLY PINK GOES

Supplies
Stamps- Christmas Poinsettia Star (Picket Fence Studios); Season's Greetings (Studio G)
Inks- Versafine Clair Noir; Candied Apple, Faded Jeans, Barn Door, Dusty Concord Distress
Paper- heavy white (Scribes Nook); black cs (Michaels)
Accessories and Tools- Marvelous Rectangle Mask (A Colorful Life Designs); Misti (My Sweet Petunia); Gel plate; 
Brayer (Speedball); pop dots;
Clear Embossing Powder; paintbrush; White Posca Pen