Showing posts with label star. Show all posts

Sunday, 30 August 2026

Christmas Peace

Hello and Welcome
This month it is my turn to host the TLC (Technique Lovers Challenge) at Splitcoast Stampers.
The technique we will be doing this week is called:
It's a fun and easy technique to play around with and I have been wanting to start making some cards for the holidays.

So, here's what I did to create my card.
  • I began by getting out my long acrylic stamping block and I wrapped some different width elastic bands around it in a grid pattern.
  • I pressed the bands wrapped around the block onto my Speckled Eggs Distress Oxide ink pad and stamped over my white cardstock in a few different areas.
  • I wiped off the elastics and repeated that process using some Salty Ocean and some Uncharted Mariner DOX ink until I was happy with the pattern covering my cardstock.
  • I diluted some of the ink mentioned above with water and splattered my whole card front using a paint brush, then set aside to dry.
  • Next, I created my snowflake.  I took a piece of acetate and pressed the DOX inks onto it, sprayed with water and dragged another piece of white cardstock through the wet ink and set that aside to dry.  
  • I splattered the inky cardstock with my white Posca pen and then used that to die cut the snowflakes.  I also used a piece of silver shimmer paper to cut the stars for the centers of the snowflakes.
  • I glued my elastic stamped card front onto a piece of blue cardstock and then onto an A2 white card base.
  • I glued one snowflake at the top and one along the bottom and then I used some foam tape to pop up the stars in the center of the snowflakes.
  • I die cut the sentiment and added it to the center of my card front.

Thanks so much for coming by and taking a look.

Adding my card to these challenges:
Simon Says Wed.- ANYTHING GOES
Simon Says Mon.- LOTS OF LAYERS
Girlz Creative- CHRISTMAS

Supplies
Stamps- none
Inks- DOX
Papers- Solar white; scrap of silver shimmer
Accessories and Tools- rubber bands; long acrylic block; Funky Snowflake die (SSS);
foam tape; Peace die (Amazon)

Saturday, 4 April 2026

Celebrating Your Special Day!


Good Morning
It's an exciting new month and so many great new stencils at A Colorful Life Designs.
So, meet the newly released stencil called:

This is how I created my card.
  • I placed the Diamond Circle stencil over a piece of white cardstock and inked it up with some Picked Raspberry and some Ripe Persimmon Distress Oxide ink.
  • I die cut the star from a piece of black cardstock and then again from my stenciled piece.
  • I glued the black outline die cut onto a piece of white cardstock and then I glued the pieces of the stenciled panel into the star, matching up the pattern.
  • While that dried, I stamped and die cut the sentiment and the black circle.
  • I glued the star onto a 4 1/4" white card base.
  • I glued the black circle over the middle and used some foam tape to pop up the sentiment over the circle.

Here is the stencil I used:


Thanks for coming by and taking a look.

Adding my card to these challenges:
Little Red Wagon- MASCULINE
Simon Says Wed.- HAPPY BIRTHDAY
Crafty Catz- ANYTHING GOES

Supplies
Stamps- Big and Bold 1 (Simon Says)
Inks- DOX
Papers- solar white, black
Accessories and Tools- stencil (A Colorful Life Designs); TE Blending Brushes;
Star die (Temu); Infinity Circle die (Hero Arts)

Sunday, 4 January 2026

Bring on the New Year


Good Morning
Here is another card I made for the New Year using one of the newly released stencil from A Colorful Life Designs called:
I layered it up with an older stencil to create this fun background.

So this is what I did to create my card.
  • I began by placing an older stencil called Stitched Harlequin over a piece of white cardstock and inked it up with some Salvaged Patina Distress Oxide ink.
  • I removed that stencil and placed the Interconnected Circles stencil sideways over the first inking and inked with some Salty Ocean DOX ink.
  • I removed that stencil and stamped over the circles with the little starburst.
  • Next, I die cut a star right from my stenciled card front and then I die cut a larger one from some navy cardstock and glued those together after I stamped the sentiment over the smaller star.
  • I glued my card front onto a piece of white cardstock and then navy and then onto a white A2 sized card base.
  • To finish my card off, I used some foam tape to pop the star back into place, matching up the pattern.

Here are the stencils I used:


Happy 2026 and thanks a lot for coming by and taking a look!


Adding my card to these challenges:
Crafty Calendar- ANYTHING NEW
We Love Stamping- ANYTHING GOES or ANYTHING NEW
Stamping Sensations- I SPY WITH MY LITTLE EYE SOMETHING BEGINS WITH 'B' (Blue)

Supplies
Stamps- Merry Circle Tags (Avery Elle); Amazing (SSS)
Inks- DOX; Versafine Clair
Paper- Solar White
Accessories and Tools- stencils (A Colorful Life Designs); TE Blending Brushes;
Star die (SBC); foam tape

Sunday, 14 December 2025

Merry Little Christmas

Welcome
This month at A Colorful Life Designs, instead of new releases we are revisiting some of our favourite stencils.
I chose to combine 2 for my card called:

So, here's what I did to create my card.
  • I decided to make a modified MINI SLIMLINE card so here are the measurements that I cut my white card base.  Cut at 7" x 6" and score at 3 1/2".
  • I placed the Stitched Harlequin stencil over another piece of white cardstock and inked that up with some Salvaged Patina Distress Oxide ink.  I lifted that stencil off before doing the next steps.
  • I took the Diagonal Stars stencil and masked around one of the stars and placed that into the middle of my stenciled panel.  I inked that up with some Uncharted Mariner DOX ink.
  • I repeated the star on the other 2 sides until I had 3 across the front.
  • Used the eraser on the end of a pencil, I added some dots and then added more dots with my white Posca pen and set aside to dry.
  • I stamped the sentiment in my Misti and then die cut it out.
  • I glued the panel onto a piece of white cardstock, then onto a piece of blue before adding it to the white card base.
  • To finish my card off, I added the sentiment with some foam dots and then 3 navy gems around the sentiment.

Here are the stencils I used:


Thanks a lot for taking a look.

Adding my card to these challenges:
TIC TAC TOE- BLUE/ FREE/ STENCIL
Crafty Chicks- CHRISTMAS
CRAFT- ANYTHING CHRISTMAS GOES

Supplies
Stamps- Holiday Sentiments (Photoplay)
Inks- DOX 
Paper- Solar White
Accessories and Tools- stencils (A Colorful Life Designs); TE Blending Brushes;
pencil eraser; white Posca pen

Sunday, 16 November 2025

The Big Day

Good Morning and Welcome
For today's card, I used a new stencil with an older one from A Colorful Life Designs.
Meet the newly released:

Here's what I did to create my card.
  • I began by cutting a piece of white cardstock, then placed the older released Stitched Harlequin stencil over that and inked it up with some Cracked Pistachio Distress Oxide ink.
  • I removed that stencil and placed the Diagonal Stars over that and inked it up with some Lumberjack Plaid DOX ink. If you look at the stencil below, you will see that I did do some masking and overlapping stenciling to the design.
  • Next I used a white Posca pen and I added white dots to the circles for more interest.
  • I used a circle die to cut right from the middle of my card front and set aside.
  • I die cut the sentiment with some red cardstock and splattered with my white pen again.
  • I glued my stenciled card front onto a piece of red cardstock, then onto a white A2 sized card base.
  • I used some foam tape to pop the die cut circle back into place, matching up the pattern and then glued the sentiment onto that circle.

Here are the stencils I used:
Diagonal Stars


Thanks so much for coming by and taking a look.

Adding my card to these challenges:
Simply Clean and Simple- HOLIDAYS/WINTER
Krafty Chicks- CHRISTMAS

Supplies
Stamps- none
Inks- DOX
Paper- Prism Solar White
Accessories and Tools- stencils (A Colorful Life Designs); TE Blending Brushes;
white Posca pen; Infinity Circle die (HA); Holiday Sayings die- Concord and 9th

Sunday, 9 November 2025

Star Halo


Good Morning
I have a fun and simple card today, created using a new release with an older one from A Colorful Life Designs.
Meet the new stencil that can be used in so many ways:

Here's what I did to create my card.
  • I cut a piece of white cardstock and placed one of the Marvelous Masks Arch over my paper and inked it up with some Speckled Egg, Shaded Lilac and some Cracked Pistachio Distress Oxide ink.
  • I removed that stencil and placed the new Star Halo stencil over the background and inked with some Wilted Violet DOX ink.
  • I wiped the stencil off, then repositioned it and inked again with some Uncharted Mariner DOX ink. I really like the look of the star over the arch.
  • Next, I die cut the sentiment from some purple cardstock and then glued that onto the white die cut word shadow.
  • I glued my stenciled card front onto a piece of purple cardstock, then onto a white A2 sized card base.
  • I used some foam tape to pop the sentiment over the middle of the star.

Here are the stencils I used:
Star Halo


Thanks a lot for taking a look.

Adding my card to these challenges:
Simon Says Wed.- THINKING OF YOU
CAS on Friday- BIRTHDAY
Krafty Chicks- BIRTHDAY

Supplies
Stamps- none
Inks- DOX
Paper- Solar White (Prism)
Accessories and Tools- stencils (A Colorful Life Designs); TE Blending Brushes;
Wish Big die (SSS)

Friday, 22 August 2025

Better With You


Good Morning.
Here's a simple, monochromatic card I made using the newly released stencil from A Colorful Life Designs called:

So, here's what I did to create my card.
  • I placed the Mid Century Star Balls over a piece of white cardstock and inked using some Picked Raspberry Distress Oxide ink.
  • When the ink was all dry, I used a fine line black marker to draw a border around the edge to add interest.
  • Next, I stamped the sentiment with more of the Picked Raspberry ink and used some clear embossing powder to heat set it. I die cut that out.
  • I glued my stenciled card front onto a piece of white cardstock, the onto a piece of pink and then onto a white A2 sized card base.
  • I popped the sentiment over my card front with some foam dots.

Here is the stencil I used:

Thanks so much for coming by and taking a look.

Adding my card to these challenges:
Little Red Wagon- CIRCLE OF LIFE
Creations in Pink- ANYTHING GOES in MAINLY PINK

Supplies
Stamp- Roadside Messages (HA)
Inks- DOX
Paper- Solar White
Accessories and Tools- stencil (A Colorful Life Designs); TE Blending Brushes;
foam dots; Lawn Fawn clear EB powder; Fine line black marker; foam tape

Sunday, 10 August 2025

When You Wish Upon a Star

Good Morning
Today's card was a fun, simple one using 2 of the new for August stencils from A Colorful Life Designs called:

So, here's what I did to create my layered stencil card.
  • I placed the Bauhaus Poster stencil on an angle over a piece of white cardstock and inked one side with some Ripe Persimmon  Distress Oxide ink and the other side with some Picked Raspberry DOX ink.
  • I wanted to add more interest to the background, so I left that stencil in place and put the Bauhaus Circle Mask right over the top.  I inked over the orange with some Carved Pumpkin and the pink side with some Lumberjack Plaid DOX ink.
  • I place my stenciled card front into my Misti to stamp the image which I clear heat embossed to help it show up better against the busy background.
  • I set that aside and die cut the sentiment 5 times with some black cardstock and glued them together, creating a stacked sentiment.
  • I glued the stenciled panel onto a piece of white cardstock, then some pink and then onto an A2 sized white card base.
  • I glued the sentiment into the top corner to finish off my card.

Here are the stencils I used:


Thanks a lot for coming by and taking a look.

Adding my card to these challenges:
Simon Says Monday- HAPPY BIRTHDAY
Send A Smile 4 Kids- ANYTHING GOES/BIRTHDAY

Supplies
Stamp- Whimsy Silhouette (Jenni Bowlin)
Inks- Versafine Clair; DOX
Paper- Solar White
Accessories and Tools- stencils (A Colorful Life Designs); TE Blending Brushes;
Wish Big die (SSS); Lawn Fawn EB powder

Sunday, 13 October 2024

Grinch Tag

Good Morning
Mr. Grinch is back!!
These fun new stencils from A Colorful Life Designs are just some from the 'Grinch' series this month.
This one is rightly called:
and the sentiment is from the stencil set called:

So, here's what I did to create my tag.
  • I placed the Grinch Season stencil over a piece of white cardstock and inked it up with some Black Soot Distress Oxide ink.
  • Next, I die cut the face using a circle die and then inked the whole face with some Cracked Pistachio and some Rustic Wilderness DOX ink and splattered with my black Posca pen.
  • I used a yellow Paint marker to add a dot to the eyes to make him look more grinchy.
  • I inked up the sentiment with the Stink Stank Stunk stencil and some Rustic Wilderness ink then cut it out.
  • I embossed a piece of red cardstock with the Burlap EB folder, then cut it with the star die.  I cut a piece of printed cardstock with a larger star die and glued the 2 together.
  • I used some foam tape to add the Grinch's face over the stars, then  I added the sentiment using some foam tape as well.
  • Finally, I punched a hole in the top and added some red and white twine.

Here are the stencils I used:


Discount Code for A Colorful Life Designs
(Affiliate with no extra cost to you) 

Thanks so much for coming by and taking a look.

Adding my tag to these challenges:
Simon Says Wed.- ADD SOME TEXTURE
Allsorts- ANYTHING GOES or MAGICAL, MYTHS and/or LEGEND
Krafty Chicks- CHRISTMAS

Supplies
Stamps- none
Inks- DOX
Paper- Scribes Nook- Waterloo, Ont.
Accessories and Tools- stencils (A Colorful Life Designs); inking brushes (Amazon); 
Infinity Circle die (HA); Star die (Scrapbook.com); Burlap EB folder (Honeybee),
paint pen; black Posca pen

Wednesday, 29 November 2023

Layered Stars


Hello and Good Morning.
This new Layered Star stencil from A Colorful Life Designs made for a quick and easy card using it on my Gel Plate.

So, here's what I did to create my card.
  • I got out my Gel Plate and brayer, then rubbed some Villainous Potion Distress Oxide ink along the top and bottom edges of my plate.  I rubbed some Peacock Feathers DOX ink along the middle area of my plate.
  • Using my brayer, I blended the colours smooth, but kept them separated.
  • I laid Stencil #1 of the Layered Star stencil onto my plate and rubbed over it with a scrap paper to lift some of the ink.  I lifted the stencil off and then rubbed my cardstock front over the plate to get the print.  You can see how the areas in the middle of the stars is left white which is what I wanted to have before adding Stencil #2.
  • Next, I placed Stencil #2 over the inked panel and used some Peacock Feathers DOX to add the detail to the star centers.
  • I die cut the 'joy' from the center of the card front panel and then stamped over that with some Villainous Potion DOX ink.
  • I glued the stenciled panel onto a piece of dark purple, then pale mauve and finally onto an A2 white card base.
  • I used some foam tape to add the sentiment back into place and put 3 silver gems around that.

Here is the stencil I used:

Discount Code for A Colorful Life Designs
(Affiliate with no extra cost to you) 

Thanks so very much for coming by and taking a look.

Adding my card to these challenges:
Use Your Stuff- SHINE BRIGHT

Supplies
Stamps- Oversized Joy (Waffle Flower)
Inks- DOX
Paper- heavy white (Scribes Nook- Waterloo, Ont.)
Accessories and Tools- stencils (A Colorful Life Designs), Gel Plate, brayer, 
silver gems

Thursday, 2 November 2023

Christmas Star


Good Morning.
Todays card features a new stencil from A Colorful Life Designs called
The finished panel reminds me of a cozy quilt.

So, here's what I did to create my card.
  • I placed a piece of white cardstock onto my Make Art Station and positioned the Starry Top stencil over my paper.  I inked it up with some Rustic Wilderness Distress Oxide ink over the whole panel, then lifted it to wipe off the ink.
  • I turned the stencil upside down and repositioned it to fill in the white areas and to match up the pattern, then inked it up again with some Lumberjack Plaid DOX ink.
  • I removed the stencil and splattered with my white Posca pen.
  • While that dried, I stamped the sentiment using the same above mentioned ink, clear heat embossed it  and die cut it out.  
  • I die cut another circle from some green cardstock and glued the sentiment onto that.
  • The card front was dry so I glued it onto a piece of red cardstock, then onto an A2 sized card base.
  • I used some foam tape to pop up the sentiment circle into the center of the panel.

Here is the new stencil:

Discount Code for A Colorful Life Designs
(Affiliate with no extra cost to you) 

Thanks so much for coming by and taking a look.

Adding my card to these challenges:
Simon Says Wed.- EMBOSS IT
Use Your Stuff- ANYTHING GOES

Supplies
Stamps- Merry Circle Tags (Avery Elle)
Inks- DOX
Paper- heavy white (Scribes Nook- Waterloo, Ont.)
Accessories and Tools- stencil (A Colorful Life Designs); white Posca pen;
Make Art Station (Ranger); Infinity Circle dies (Hero Arts); clear eb powder

Sunday, 28 May 2023

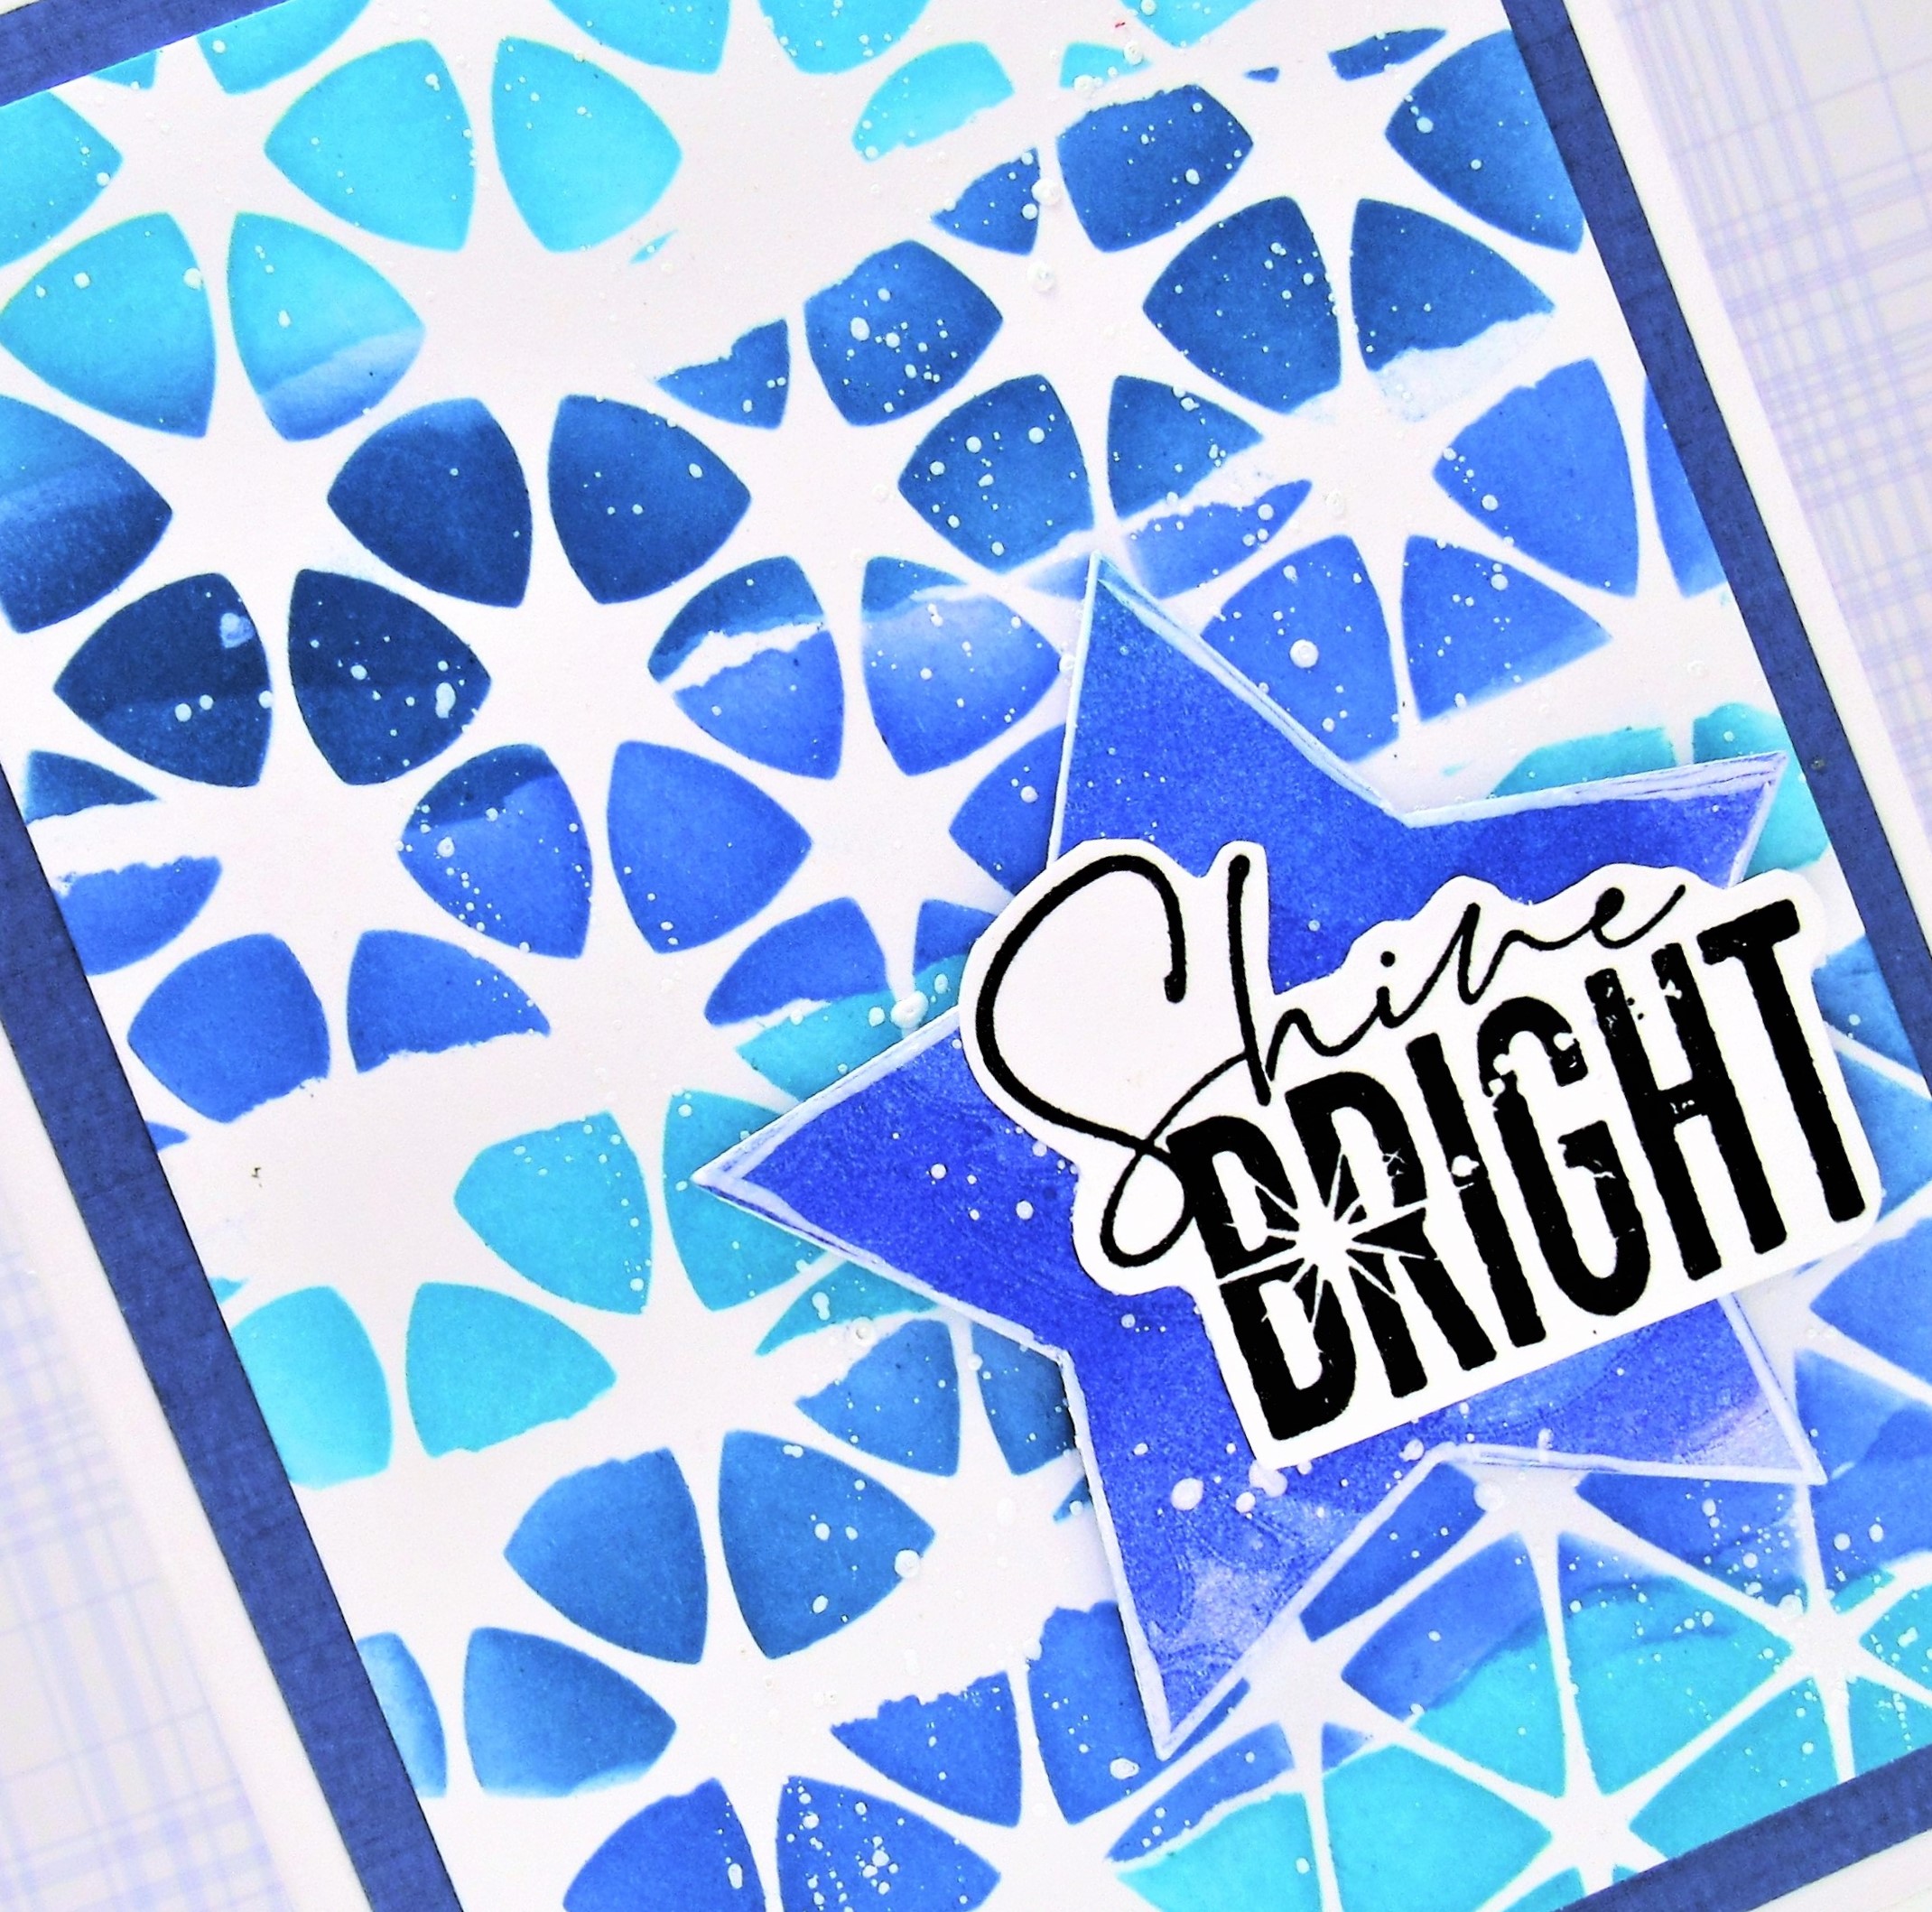
Torn Paper Stenciling- Shine Bright


Hello and Welcome.
I have the pleasure of hosting the TLC Challenge (Technique Lovers) over at Splitcoast Stampers.
So today, I decided to pair up the Star Stretch stencil from A Colorful Life Designs with some torn paper.
It's a fun technique to use to get a totally different look from your stencils.

So, here's what I did to create my card.
  • I cut a piece of white cardstock and using some scraps of paper, I tore strips that I would use as masks with the Star Stretch stencil.
  • I laid the the torn pieces of scrap paper over the white cardstock, then placed the stencil over that and inked it up with some Peacock Feathers Distress Oxide ink. 
  • I removed the stencil and the masks and roughly repositioned them over the areas already inked, matched up the stencil to the pattern already laid down and inked over that with some Uncharted Mariner DOX ink.
  • I repeated the above steps and lastly, inked with some Blueprint Sketch DOX ink.  I think using the torn pieces of paper gave the stencil a very unique look.
  • I removed all the masks and the stencil and splattered with my white Posca pen.
  • I stamped the sentiment onto a piece of white cardstock and fussy cut it out.
  • I inked up another scrap of white paper with some Blueprint Sketch DOX ink, splattered with the white again and die cut a star from that.  I did outline the edges with my white Posca pen to help it be a bit more visible over the background.
  • I glued the stenciled piece onto some navy cardstock, then onto an A2 sized card base.
  • I used some foam tape to mount the star in the corner and glued the sentiment onto that.

Here is the stencil I used:

Discount Code for A Colorful Life Designs
(Affiliate with no extra cost to you) 

Thanks so much for coming by and taking a look.

Adding my card to these challenges:
Simon Says Wed.- ADD A SENTIMENT
Dragonfly Dreams- MAY THE FORCE BE WITH YOU

Supplies
Stamp- Smile, Shine, Sparkle (Sizzix)
Inks- Versafine Clair; DOX
Paper- Scribes Nook- Waterloo, Ont.
Accessories and Tools- stencil (ACLD); star die (Scrapbook.com); white Posca pen;
TE Blending Brushes; scraps of paper for masking; foam tape