Showing posts with label child. Show all posts

Sunday, 10 August 2025

When You Wish Upon a Star

Good Morning
Today's card was a fun, simple one using 2 of the new for August stencils from A Colorful Life Designs called:

So, here's what I did to create my layered stencil card.
  • I placed the Bauhaus Poster stencil on an angle over a piece of white cardstock and inked one side with some Ripe Persimmon  Distress Oxide ink and the other side with some Picked Raspberry DOX ink.
  • I wanted to add more interest to the background, so I left that stencil in place and put the Bauhaus Circle Mask right over the top.  I inked over the orange with some Carved Pumpkin and the pink side with some Lumberjack Plaid DOX ink.
  • I place my stenciled card front into my Misti to stamp the image which I clear heat embossed to help it show up better against the busy background.
  • I set that aside and die cut the sentiment 5 times with some black cardstock and glued them together, creating a stacked sentiment.
  • I glued the stenciled panel onto a piece of white cardstock, then some pink and then onto an A2 sized white card base.
  • I glued the sentiment into the top corner to finish off my card.

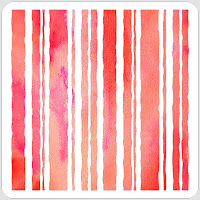
Here are the stencils I used:


Thanks a lot for coming by and taking a look.

Adding my card to these challenges:
Simon Says Monday- HAPPY BIRTHDAY
Send A Smile 4 Kids- ANYTHING GOES/BIRTHDAY

Supplies
Stamp- Whimsy Silhouette (Jenni Bowlin)
Inks- Versafine Clair; DOX
Paper- Solar White
Accessories and Tools- stencils (A Colorful Life Designs); TE Blending Brushes;
Wish Big die (SSS); Lawn Fawn EB powder

Sunday, 19 September 2021

Little Fox Birthday


Welcome
Meet today's card.
I made it awhile ago for a little person having a birthday.
Stencil over stencil...fun technique to try.

So here's what I did to create my card.
  • I began with a piece of white cardstock.  Using the Drizzled Lines stencil from A Colorful Life Designs, I rubbed on some Picked Pistachio Distress Oxide ink.  I rotated the stencil and inked again to create a crisscross pattern.  
  • Leaving that stencil in place, I put the Falling Sticks stencil also from ACLD, right over the top and rubbed on some Peacock Feathers DOX ink.  I love the pattern I was able to make for the background.
  • I placed the stenciled panel into my Misti and stamped the greeting.
  • Using a circle die, I die cut the center of the panel as I wanted to make that my focal point.
  • I placed that circle into my Misti to stamp the circle outline and that little heart.
  • I pop dotted the circle back into the background, matching it up.
  • Next, I stamped this sweet little fox from the Little Ones set by Photoplay with some black ink and fussy cut it out.  I clear heat embossed the image so it wouldn't bleed when I watercoloured it.
  • Using some DOX inks (same colours as above) that I diluted with a bit of water, I painted in the face of the fox.  
  • I mounted the card panel onto a white card base, then pop dotted the little fox head into the stamped circle space.

Here are the stencils I used for the background:


Discount Code for A Colorful Life Designs

Thanks so much for coming by and taking a look.

Supplies
Stamps- Little Ones (Photoplay); Everyday Circle Tags (Avery Elle)
Inks- Distress Oxides, Verafine Clair
Paper- heavy white (Scribes Nook- Waterloo, Ont.)
Accessories and Tools- stencils- ACLD; Misti (My Sweet Petunia); foam tape; 
clear embossing powder; heat tool; TE Blending Brushes; 
Infinity Circle Dies (Hero Arts)

Sunday, 13 June 2021

Swinging By


Welcome
Meet today's card.
I have a few little people in my life that have birthdays coming up so here is one of the cards I made.
I thought it turned out pretty fun!

So here's what I did to create my card.
  • I cut a piece of heavy white cardstock for my base.  I pulled out the Hanging Vines Stencil from A Colorful Life Designs and placed it over my cardstock.  Using some Cracked Pistachio Distress Oxide ink, I inked up the stencil on the top of the panel, then moved it to the bottom and did some more inking. ** I knew what sentiment I wanted to use when I finished the inking, so I was careful to leave some space for it between the vines. **
  • Next, I wiped off the stencil and repositioned it at the top and inked it up with some Peeled Paint DOX ink and repeated that for the bottom.  
  • Lastly, I repeated the whole above process using some Rustic Wilderness DOX ink being sure not to totally covering the first inkings.


  • I had some ink left on my blending brush so rubbed that along the edges and in the center. 
  • I diluted some of the Rustic Wilderness ink and splattered all over the panel with a wet paintbrush and set that aside to dry.
  • I stamped the Mini Monkey from YNS, painted it with some diluted DOX ink and die-cut it out.
  • I stamped the sentiment from Studio G and clear heat embossed it to make it pop against the busy background.  
  • I glued the panel onto a piece of dark green cardstock, then onto a heavy white card base.
  • The last step was that I pop dotted the little monkey to the one side.  


Here is the stencil I used:

Discount Code for A Colorful Life Designs
(affiliate)


Thanks so much for coming by and taking a look

Supplies
Stamps- Mini Monkey (YNS); Happy Birthday (Studio G)
Inks- Distress Oxides; Versafine Clair
Paper- heavy white (Scribes Nook- Waterloo, Ontario)
Accessories and Tools- Hanging Vines (ACLD), clear eb powder; heat tool; TE Blending Brushes;
paintbrush

Sunday, 2 May 2021

I 'Fish' You a Happy Birthday


Good Morning
Meet today's card.  
Just a fun one for a little person in my life.  
I also wanted to have a chance to play with this new stencil called Turbulent Waters from A Colorful Life Designs.

So here's what I did to create my card.
  • I cut a circle mask and placed it onto a piece of heavy white cardstock.  I laid the Turbulent Waters Stencil over the circle and rubbed on some Peacock Feathers Distress Oxide ink.  I then added a touch of Blueprint Sketch to darken it up a bit and dried the circle.  I added some splatters with the same colours of inks.  I set that aside
  • Next, I cut my white card front and laid the Matisse Splash stencil over that and rubbed on some more of the above mentioned inks.  I splashed with water and some more diluted ink to give it a watery look.  
  • Using a circle die from Hero Arts, I die-cut the circle waves that I had masked in the first step.  I pop dotted that over the main panel and glued it all onto a heavy white card base.
  • Onto my little fish....I stamped him in my Misti with some Versafine ink, then die-cut him out.
  • Using some diluted DOX inks (Peacock Feathers, Cracked Pistachio) I watercoloured in the fish using a paint brush.
  • I dried him with my heat tool then added Glossy Accents to his face shield to make it look like glass.  
  • I stamped the sentiment and pop dotted the little fish above that.


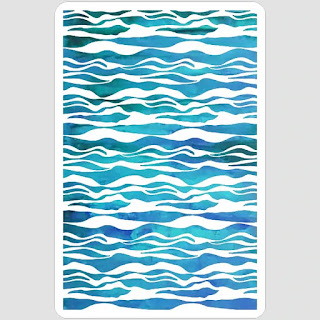
Here are the stencils I used:


Discount Code for A Colorful Life Designs


Thanks so much for coming by and taking a look.

Supplies
Stamps- Happy Birthday (Studio G); Mini Snorkel Fun Fishy (Your Next Stamp)
Inks- Versafine Clair; DOX
Paper- heavy white (Scribes Nook- Waterloo, Ont.)
Accessories and Tools- Stencils- ACLD; pop dots; Glossy Accents; Circle die (HA); TE blending brushes