Saturday, 29 April 2023

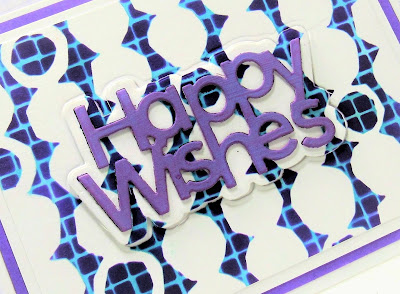
Happy Wishes


Hello and Welcome
Meet the Chunky Circles stencil, another new one this month from A Colorful Life Designs.
I gave my card added interest by embossing it after I was done with the inking.

So, here's what I did to create my card.
  • I began by going to my stash, where I found this 'roll off' sheet that I had rolled my brayer onto while Gel Plate printing using Distress Oxide inks.  The top was blue and the bottom had some purple on it.
  • I placed that onto my Make Art Station and positioned the Chunky Circles stencil over that. 
  • I inked up the top portion with more blue ink; Uncharted Mariner DOX ink and the bottom part that was purple, with some Villainous Potion DOX ink.
  • I removed the stencil and splattered using my white Posca pen and set aside to dry.
  • When it was dry, I placed it into the Angled Mosaic embossing folder and ran it through my die cutting machine.
  • Next, to help the raised embossing show up a bit more, I lightly sanded it off.
  • I die cut the sentiment with some white cardstock, then I die cut the word shadow right from the center of the panel and glued the two together.
  • I glued the finished panel onto a piece of light blue cardstock, then onto an A2 sized card front.
  • I pop dotted the sentiment back into place in the center of my card.

Here is the stencil I used:

Discount Code for A Colorful Life Designs
(Affiliate with no extra cost to you) 

Thanks so much for coming by and taking a look.

Adding my card to these challenges:
Simon Says Wed.- ANYTHING GOES
Inkspirational- DOTS AND STRIPES
Corrosive Challenge- ANYTHING GOES

Supplies
Stamps- none
Inks- DOX (Ranger)
Paper- Scribes Nook- Waterloo, Ont.
Accessories and Tools- stencil (ACLD); Make Art Station (Ranger); 
Angled Mosaic eb folder (Altenew); sanding block; white Posca pen;
TE Blending Brushes; Happy Wishes die (SSS)

Friday, 28 April 2023

Ball Jumble


Welcome
This new Ball Jumble stencil from A Colorful Life Designs is super fun!

So, here's what I did to create my card.
  • For my card, I wanted to use the Ball Jumble stencil and create a resist using it, so I laid the stencil down, spread some Vicki Boutin Gel Medium over the entire stencil using a palette knife.
  • After the stencil was covered with the medium, I flipped it over and pressed it onto a piece of white cardstock.  I removed the stencil and set it aside to dry completely before moving onto the inking.  
  • When the panel was dry, I started inking up it from the top to the bottom with these colours:  Mustard Seed, Ripe Persimmon and Picked Raspberry Distress Oxide ink.  I thought the medium would totally resist the ink but instead, it covered it and gave it a different shade of the ink.
  • I splattered with my white Posca pen and set aside to dry.
  • I stamped the sentiment with some Versamark ink and white heat embossed it onto a piece of pink cardstock and die cut it out.
  • I glued the inked panel onto a piece of pink cardstock and then onto an A2 sized card base.
  • I used some foam tape to pop the sentiment over the background.

Here is the stencil I used:

Discount Code for A Colorful Life Designs
(Affiliate with no extra cost to you) 

Thanks so much for coming by and taking a look.

Adding my card to these challenges:
Simon Says Stamp- ANYTHING GOES
Craft Rocket- LAYER IT UP

Supplies
Stamps- Big and Bold Sentiments (SSS)
Inks- DOX, Versamark
Paper- Scribes Nook- Waterloo, Ont.
Accessories and Tools- stencil (ACLD); TE Blending Brushes; Vicki Boutin Gel Medium;
white Posca pen; white EB powder

Wednesday, 26 April 2023

Repeated Sentiment

Welcome
Today's card was a simple one.  
I used the Big and Bold Sentiment set from Simon Says and lots of fun colours.

So, here's what I did to create my card.
  • I cut a piece of white cardstock then I began by figuring out where I wanted my popped up sentiment to go and got my stamp ready in my Misti.  
  • I randomly stamped the sentiment onto the white panel, moving it and adjusting it in my Misti as I went along.  I used Distress Oxide inks for the stamping.  These are the colours I used:  Mustard Seed, Peacock Feathers, Ripe Persimmon, Lumberjack Plaid and some Cracked Pistachio.
  • After I was done stamping the panel, I decided it needed more, so using the eraser end of a pencil, I added the dots in the same colours as the sentiments.  It made my whole card more fun.
  • I stamped the sentiment and die cut it out.
  • I glued the finished panel onto a piece of red cardstock, then onto an A2 sized card base.
  • Last, I popped the sentiment into the corner using some foam tape.

Thanks so much for coming by and taking a look.

Adding my card to these challenges:
Stamping Sensations- ANYTHING STAMPED WITH A CAS OPTION
Try it on Tuesday- RAINBOW COLORS

Supplies
Stamps- Big and Bold Sentiments (SSS)
Inks- Distress Oxides
Paper- Scribes Nook- Waterloo, Ont.
Accessories and Tools- Misti (My Sweet Petunia); pencil; foam tape

Saturday, 22 April 2023

You're on my Mind


Hello and Welcome
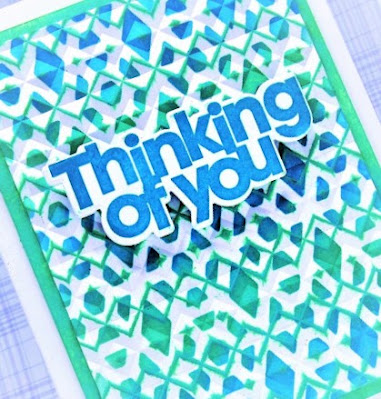
Today's card features a new stencil from A Colorful Life Designs called Graphic Lace.

So, here's what I did to create my card.
  • I placed the Graphic Lace stencil over a piece of white cardstock on my Make Art Station.
  • I inked along the top part with some Peacock Feathers, moved down,, then added some Cracked Pistachio Distress Oxide ink after that. I kept moving my way down the panel inking with just those 2 colours over the stencil until the whole piece of cardstock was inked.
  • Next, I took the piece and embossed it with the Angled Mosaic eb folder from Altenew.  It was really amazing how much it changed the look.
  • To help add more interest, I gently rubbed the Cracked Pistachio ink pad over the raised areas to help reveal even more of the pattern.
  • I stamped the sentiment and then die cut it out. 
  • I glued the panel onto a piece of green cardstock, then onto an A2 sized card base.
  • I used some foam tape to pop up the sentiment.

Here is the stencil I used:

Discount Code for A Colorful Life Designs
(Affiliate with no extra cost to you) 

Thanks so much for coming by and taking a look.

Adding my card to these challenges:
Beyond the Blue- HAPPY BIRTHDAY
The Male Room- STENCILS/and or DIES

Supplies
Stamps- Big and Bold Sentiment (SSS)
Inks- DOX
Paper- Scribes Nook- Waterloo, Ont.
Accessories and Tools- stencil (ACLD); Angled Mosaic EB folder (Altenew);
die (SSS); TE Blending Brushes; Make Art Station (Ranger)

Tuesday, 18 April 2023

Coffee Time


Hello and Welcome
Today's card was a fun one.
I sure do love and appreciate my coffee in the morning.
I used this newly released Coffee Love stencil from A Colorful Life Designs and paired it up with this cute vintage image.

So, here's what I did to create my card.
  • I positioned the Coffee Love stencil onto the middle of a piece of white cardstock on my Make Art Station.  
  • When I was happy with the position of the stencil, I inked it up with some Rusty Hinge Distress Oxide ink.  I added some shadows to the beans by inking just over some areas with Aged Mahogany DOX ink.
  • While that dried, I stamped the image onto a piece of white cardstock with some black ink and then fussy cut it out. 
  • I place the stenciled heart into my Misti to stamp the sentiment over to one side and clear heat embossed it.
  • I glued the panel onto a piece of brown matching cardstock, then onto an A2 sized card base.
  • Lastly, I used some foam tape to the image and popped it to one side of the sentiment.


Here is the stencil I used:

Discount Code for A Colorful Life Designs
(Affiliate with no extra cost to you) 

Thanks so very much for coming by and taking a look.

Adding my card to these challenges:
Less is More- ANYTHING GOES
A Place to Start- ANYTHING GOES/ option- WOMEN OF THE YEAR
Stamping Sensations- ANYTHING STAMPED- option- CAS


Supplies
Stamps- Girlfriends (sentiment- Art Impressions); Coffee and Tea (Crafty Secrets)
Inks- Versafine Clair, DOX
Paper- Scribes Nook (Waterloo, Ont.)
Accessories and Tools- stencil (ACLD); Make Art Station (Ranger); 
TE Blending Brushes; foam tape, Lawn Fawn clear EB powder

Monday, 17 April 2023

Be Happy Birthday


Good Morning
Meet today's card.
Just a happy feeling card with these colours, using the newly released stencil called Faded Lines from A Colorful Life Designs.

So, here's what I did to create my card.
  • I decided to make a square card today, so I cut a piece of white cardstock 3 3/4" square and placed that onto my Make Art Station.
  • I positioned the Faded Lines stencil over that and inked it up with some Mustard Seed, Ripe Persimmon and some Picked Raspberry Distress Oxide ink. 
  • When the whole panel was inked, I rotated the stencil and inked in the other direction.
  • For the sentiment, I found a piece of previously inked up cardstock in my stash that matched the colours on my stenciled background.  I splattered that with my white Posca pen and then die cut the Happy Wishes sentiment from that.
  • I die cut the shadow portion of the die from a piece of white cardstock and then glued the words onto that.
  • I glued the stenciled panel onto a piece of orange cardstock, then onto a 4 1/4" card base.

Here is the stencil I used:


Discount Code for A Colorful Life Designs
(Affiliate with no extra cost to you) 

Thanks so much for coming by and taking a look.

Supplies
Stamp- none
Inks- DOX
Paper- Scribes Nook (Waterloo, Ont.)
Accessories and Tools- stencils (ACLD); Make Art Station (Ranger)
TE Blending Brushes; white Posca pen; die (SSS)

Saturday, 15 April 2023

Big Hello!


Good Morning and Welcome
Today's card features the new Ball Jumble stencil, just released from A Colorful Life Designs.  
I decided to make a rainbow style card with Distress Oxide inks.

So, here's what I did to create my card.
  • I placed a piece of white cardstock onto my Make Art Station and positioned the Ball Jumble stencil over that.  Beginning at the top, I inked up the stencil with some Mustard Seed Distress Oxide ink.
  • I continued inking over the stencil and moving my way down using these colours....Carved Pumpkin, Picked Raspberry, Cracked Pistachio and some Peacock Feathers DOX inks.
  • I removed the stencil and splattered with my white Posca pen.
  • When the piece was dry, I die cut the shadow of the 'hello' from the center area, then die cut the 'hello' letters from some black cardstock.
  • I glued the letters onto the shadow background that comes with the die.
  • I glue the finished panel onto a piece of blue cardstock, then onto an A2 sized card base.
  • I popped the sentiment back into place using some foam tape.

Here is the stencil I used:

Discount Code for A Colorful Life Designs
(Affiliate with no extra cost to you) 

Thanks so much for coming by and taking a look.

Adding my card to these challenges:
Corrosive Challenge- ANYTHING GOES
Crafty Calendar- DIE CUTS


Supplies
Stamps- Markered Messages (Concord and 9th)
Inks- Distress Oxides (Ranger)
Paper- Scribes Nook, Waterloo, Ont.
Accessories and Tools- Stencil (ACLD); Make Art Station (Ranger); TE Blending Brushes;
white Posca pen

Thursday, 13 April 2023

Happy Wishes


Good Morning.
Today's card was a really fun one featuring this new stencil called Chunky Circles from A Colorful Life Designs.
I did some more stencil layering using the Simple Mosaic stencil; you can create some amazing depth and interest using this technique.

So, here's what I did to create my card.
  • I placed a piece of white cardstock onto my Make Art Station and positioned the Chunky circles stencil over that.  I inked it up with some Peacock Feathers Distress Oxide ink.
  • Leaving the stencil in place, I set another stencil called Simple Mosaic over that and inked it up with some Villainous Potion DOX ink.  It created such an interesting background.
  • I die cut the shadow part of this word die right from the center of the inked up panel.
  • I die cut the sentiment 3x's from some purple cardstock, glued those together and then glued it onto the shadow die cut.
  • I glued the background onto another piece of purple cardstock, then onto and A2 sized card base.

Here are the stencils I used:


Discount Code for A Colorful Life Designs
(Affiliate with no extra cost to you) 

Thanks for coming to visit.

Adding my card to these challenges:
The Male Room- STENCILS/ and or DIES

Supplies
Stamps- none
Inks- DOX
Paper- Scribes Nook (Waterloo, Ont.0
Accessories and Tools- stencils (ACLD); Make Art Station (Ranger); 
TE Blending Brushes; die (SSS)

Monday, 10 April 2023

Encouragement


Welcome
Today's card is all about encouragement.  
I think we can all use a bit of that from time to time.
I decided to use this beautiful Spring Foliage stencil from A Colorful Life Designs that has quickly become one of my favourites.

So, here's what I did to create my card.
  • I got out my Gel Plate for this one.  I pressed my Mustard Seed Distress Oxide ink onto onto one side of my Plate, then rubbed some Carved Pumpkin on the other side. 
  • Using my brayer, I blended the 2 colours together.
  • I laid the Spring Foliage stencil onto the plate and rubbed over it with a piece of white cardstock to lift the print.
  • To add some more subtle interest, I rubbed the Carved Pumpkin DOX ink pad onto my non-stick craft mat, sprayed with water and used that to add the splatters you see over the leaves with a paint brush.
  • When the piece was dry, I placed it into my Misti to stamp the sentiment and added some black gems around it.
  • I glued the finished piece onto an A2 sized card base.

Here is the stencil I used:

Discount Code for A Colorful Life Designs
(Affiliate with no extra cost to you) 

Thanks so much for coming by and taking a look.

Adding my card to these challenges:
Little Red Wagon- SPRING/FALL
Creative Inspiration- ANYTHING GOES
Allsorts- SPRING GARDEN

Supplies
Stamp- Sunrise, Sunset (Fairy Hugs)
Inks- Versafine Clair, DOX
Paper- Scribes Nook (Waterloo, Ont.)
Accessories and Tools- stencil (ACLD); Gel Plate, Speedball Brayer; paintbrush;
Misti, black gems

Saturday, 8 April 2023

Perk Me Up!

Good Morning
Meet today's card, something for all the coffee lovers out there which would include me!
A Colorful Life Designs has come out with 2 more fun stencils called Coffee Love and Coffee Pot that I paired up for my card.  There is also a fun new stamp set to go with it called Coffee.

So, here's what I did to create my card.
  • I began by making the background first using the Coffee Love stencil on my Gel Plate.
  • I inked up my Gel Plate by pressing my Rusty Hinge Distress Oxide pad directly onto the plate, laid the stencil over that, then rubbed over it with a piece of white cardstock.  It lifted off some of the ink. 
  • I removed the stencil and rubbed another piece of white cardstock over the whole plate to pull the print that I used for my background.  **I repeated that process twice so I could fill up the whole card front panel. **
  • Next, I took another piece of white cardstock, set it onto my Make Art Station and positioned the Coffee Pot stencil over that. I inked it up with some black ink then I removed the stencil and cut the pot out.
  • I traced the bottom part of the pot which is a separate part of that stencil, onto the cardstock that I had rubbed over the stencil on the Gel Plate and cut that out too.  It wasn't quite dark enough, so I rubbed some more Rusty Hinge over it.  I glued that onto the bottom of the pot to look like the coffee.
  • I set the pot into my Misti to stamp the sentiment from the new Coffee stamp set also from A Colorful Life Designs.
  • I pop dotted the coffee pot over the background and then stenciled in the coffee steam.
  • I glue the finished panel onto a piece of white cardstock, then onto a piece of brown cardstock and finally onto an A2 card base.


Here are the stencils I used:


Stamp Set


Discount Code for A Colorful Life Designs
(Affiliate with no extra cost to you) 

Thanks so much for coming by and taking a look.

Adding my card to these challenges:
Craft Rocket- LAYER IT UP
The Male Room- STENCILS/ and or DIES

Supplies
Stamps- Coffee (ACLD)
Inks- Distress Oxide, Versafine Clair
Paper- Scribes Nook- Waterloo, Ont.
Accessories and Tools- stencils (ACLD); TE Blending Brushes, Make Art Station (Ranger);
Gel Plate, Brayer, Mist

Monday, 3 April 2023

You Are My Cup of Tea

Welcome
It's the beginning of April and that means time for a new and exciting release from A Colorful Life Designs.
Today's card features the Layered Cups, such a fun one for the coffee/tea lover in your life.

So, here's what I did to create my card.
  • I took a piece of white cardstock and laid it on my Make Art Station.  I positioned stencil #1 (cups) of the Layered Cups over my paper and masked the first row of cups.  I inked that up with some Mustard Seed Distress Oxide ink.  
  • I moved the mask and inked the next row with some Ripe Persimmon DOX ink.  
  • I continued down the card front panel, masking and inking with these colours:  Picked Raspberry; Cracked Pistachio; Broken China and Shaded Lilac.
  • After I had all the cups inked, I laid stencil #2 onto the panel and stenciled the details on the cups.
  • While that dried, I stamped the sentiment in my Misti and die cut it into a circle.  I glued that onto a larger purple circle.
  • I glued the inked panel onto a piece of purple cardstock, then onto an A2 sized card base.
  • I popped dotted the sentiment over the center of the cups.

Here is the stencil I used:

Discount Code for A Colorful Life Designs
(Affiliate with no extra cost to you) 

Thanks so much for coming by and taking a look.

Adding my card to these challenges:
Crafts Galore- ANYTHING GOES
Simon Says Wed.- ANYTHING GOES
A Place to StartAnything Goes
with an Optional Twist: Woman of the Year!

Supplies
Stamps- You are My Cup of Tea (Rubbernecker)
Inks- Versafine Clair; DOX
Paper- Scribes Nook- Waterloo, Ont.
Accessories- stencil (ACLD); Make Art Station (Ranger); TE Blending Brushes;
Infinity Circle die (HA)

Sunday, 2 April 2023

Brush off the Dust


Good Morning
Today's card was a fun one.
I created it by doing some stencil layering using the Big Blot stencil and the Paint Strokes stencil, both from A Colorful Life Designs.

So, here's what I did to create my card.
  • I began by cutting a piece of white cardstock and placed it onto my Make Art Station.  I positioned the Big Blot stencil over that and secured it well.  
  • I took the Paint Strokes stencil, laid it over the Splat and inked it up with some Shaded Lilac Distress Oxide ink.  I moved the stencil then inked again with some Peacock Feathers DOX ink.  I kept repeating that process, moving the stencil into different areas and inked with some Cracked Pistachio and a hint of Uncharted Mariner DOX ink.
  • I removed both stencils and splattered with my white Posca pen.
  • I stamped the sentiment in the bottom corner.
  • I glued it onto a roll-off sheet that I had rolled some purple ink off my brayer while Gel Plate printing. I like the look of the mottled background and it matched the purples in the card.
  • I glued that onto an A2 sized card base.

Here are the stencils I used:


Discount Code for A Colorful Life Designs
(Affiliate with no extra cost to you) 

Thanks so much for coming by and taking a look.

Adding my card to these challenges:
Simon Says Monday- STENCIL IT
Simon Says Wed.- ANYTHING GOES


Supplies
Stamps- Art Soul (Hampton Arts)
Inks- Versafine Clair; DOX
Paper- Scribes Nook- Waterloo, Ont.
Accessories and Tools- stencils (ACLD); Make Art Station (Ranger); TE Blending Brushes;
white Posca pen