Showing posts with label Atoms. Show all posts

Sunday, 30 July 2023

Stencil Transfer Stamping


Welcome
Today, I'm playing with the new Atoms stencil from A Colorful Life Designs and trying out a new technique as I host the TLC over at Splitcoast Stampers I'm calling 
Making Your Stencils into Stamps
Basically, you use your stencil as a stamp...fun to try out.

So, here's what I did to create my card.
  • I looked through my stamps and picked out a larger solid background stamp.  It's important that it's a solid stamp as you will be transferring the stencil design onto the stamp.
  • I then laid the Atoms stencil onto my non-stick craft mat and inked up my solid background stamp with some Blueprint Sketch Distress Oxide along the top and some Peacock Feathers DOX on the bottom.  Here is what the stamp looks like:

  • Next, I pressed the stamp onto the stencil with firm pressure to transfer the pattern onto the stamp and pressed the stamp onto my card front panel.
  • I let that dry and then I stamped the fern along one side.
  • I stamped the sentiment with some Versamark ink in my Misti and white clear embossed it.
  • I mounted the finished panel onto a piece of navy cardstock, then onto a white A2 sized card base.

Here is the stencil I used:

Discount Code for A Colorful Life Designs
(Affiliate with no extra cost to you) 

Thanks so much for coming by and taking a look.

Adding my card to these challenges:
Simon Says Wed.- ANYTHING GOES
AAA Cards- MONOCHROME
Inkspirational- USE STENCILS

Supplies
Stamps- Paint Swatches (Simon Hurley); Large Fern (Hero Arts); Friends (IO- retired)
Inks- DOX, Versafine Clair; Versamark
Paper- heavy white (Scribes Nook- Waterloo, Ont.)
Accessories and Tools- stencil (A Colorful Life Designs); white eb powder; Misti

Thursday, 27 July 2023

Fun Time Birthday

Good Morning.
Today's card features the new for July released Atoms stencil from A Colorful Life Designs.
I used this fun stencil in combination with an embossing folder to give it a whole different look.

So, here's what I did to create my card.
  • I cut a piece of white cardstock and embossed it using the Angled Mosaic embossing folder from Altenew.
  • I placed the embossed panel onto my Make Art Station and then inked over the Atoms stencil with some Villainous Potion Distress Oxide ink in the center and then some Uncharted Mariner DOX ink over the rest of the panel. By inking over the embossed panel with the stencil, the raised areas are a bit darker and help show the pattern of the embossing adding extra interest.
  • Next, I die cut the sentiment from some white cardstock, the shadow from some dark purple and glued them together.
  • I glued the stenciled card front onto another piece of dark purple and then onto a whiteA2 card base.
  • Finally, I used some foam tape to add the sentiment over the middle of the card.

Here is the stencil I used:
Atoms

Discount Code for A Colorful Life Designs
(Affiliate with no extra cost to you) 

Thanks so much for coming by and taking a look.

Adding my card to these challenges:
Little Red Wagon- BOYS WILL BE BOYS 
Simon Says Wed.- ANYTHING GOES
Shopping Our Stash- NO STAMPING ALLOWED

Supplies
Stamps- none
Inks- DOX
Paper- heavy white (Scribes Nook- Waterloo, Ont.)
Accessories and Tools- stencil (A Colorful Life Designs); Angled Mosaic (Altenew);
TE Blending Brushes; Happy Birthday die (Amazon)

Saturday, 22 July 2023

The Best of Wishes


Welcome
Today's card features the new Atoms stencil from A Colorful Life Designs.
I decided to do an ombre inking after I messed up the first panel I was stenciling.  
Glad I could rescue this one, will tell you about it below.

So, here's what I did to create my card.
  • I placed a piece of white cardstock onto my Make Art Station and placed the Atoms stencil over that, turning it to one side so the point was facing outward on my card panel.  I inked that up with some Cracked Pistachio Distress Ink.  
  • I continued inking across my card front and then oops....the stencil moved on me and the inking was blurry on the one side.  So I set that aside thinking I would trash it.
  • So.....I started all over again inking this time with some Cracked Pistachio and then some Rustic Wilderness DOX ink. To add some depth of colour, I inked the edges of the panel with some Tumbled Glass DOX ink.
  • Now, I looked at the piece I had messed up and thought that I could cut it down and use the part that was clearly inked ok, to add interest of my card with a popped up panel.
  • I stamped the sentiment and clear heat embossed it on the larger stenciled panel.
  • I glued the stenciled card front with the sentiment, onto a piece of white cardstock and then popped the smaller section that I had cut from the oops piece, over to the side with some foam tape, matching up the pattern.
  • Finally, I glued it onto an A2 sized card base and added 3 black gems.

Here is the stencil I used:

Discount Code for A Colorful Life Designs
(Affiliate with no extra cost to you) 

Thanks so much for coming by and taking a look.

Adding my card to these challenges:
Addicted to Stamps and More- DIE CUTS AND/OR STENCILS
Corrosive Challenge- ANYTHING GOES
Crafting Happiness- ANYTHING GOES

Supplies
Stamp- Scripted Bold Sentiments (Pinkfresh Studios)
Inks- Versafine Clair; DOX
Paper- Scribes Nook- Waterloo, Ont.
Accessories and Tools- stencil (A Colorful Life Designs); Make Art Station (Ranger);
TE Blending Brushes, Misti (My Sweet Petunia); black gems (Dollar Store); foam tape

Saturday, 1 July 2023

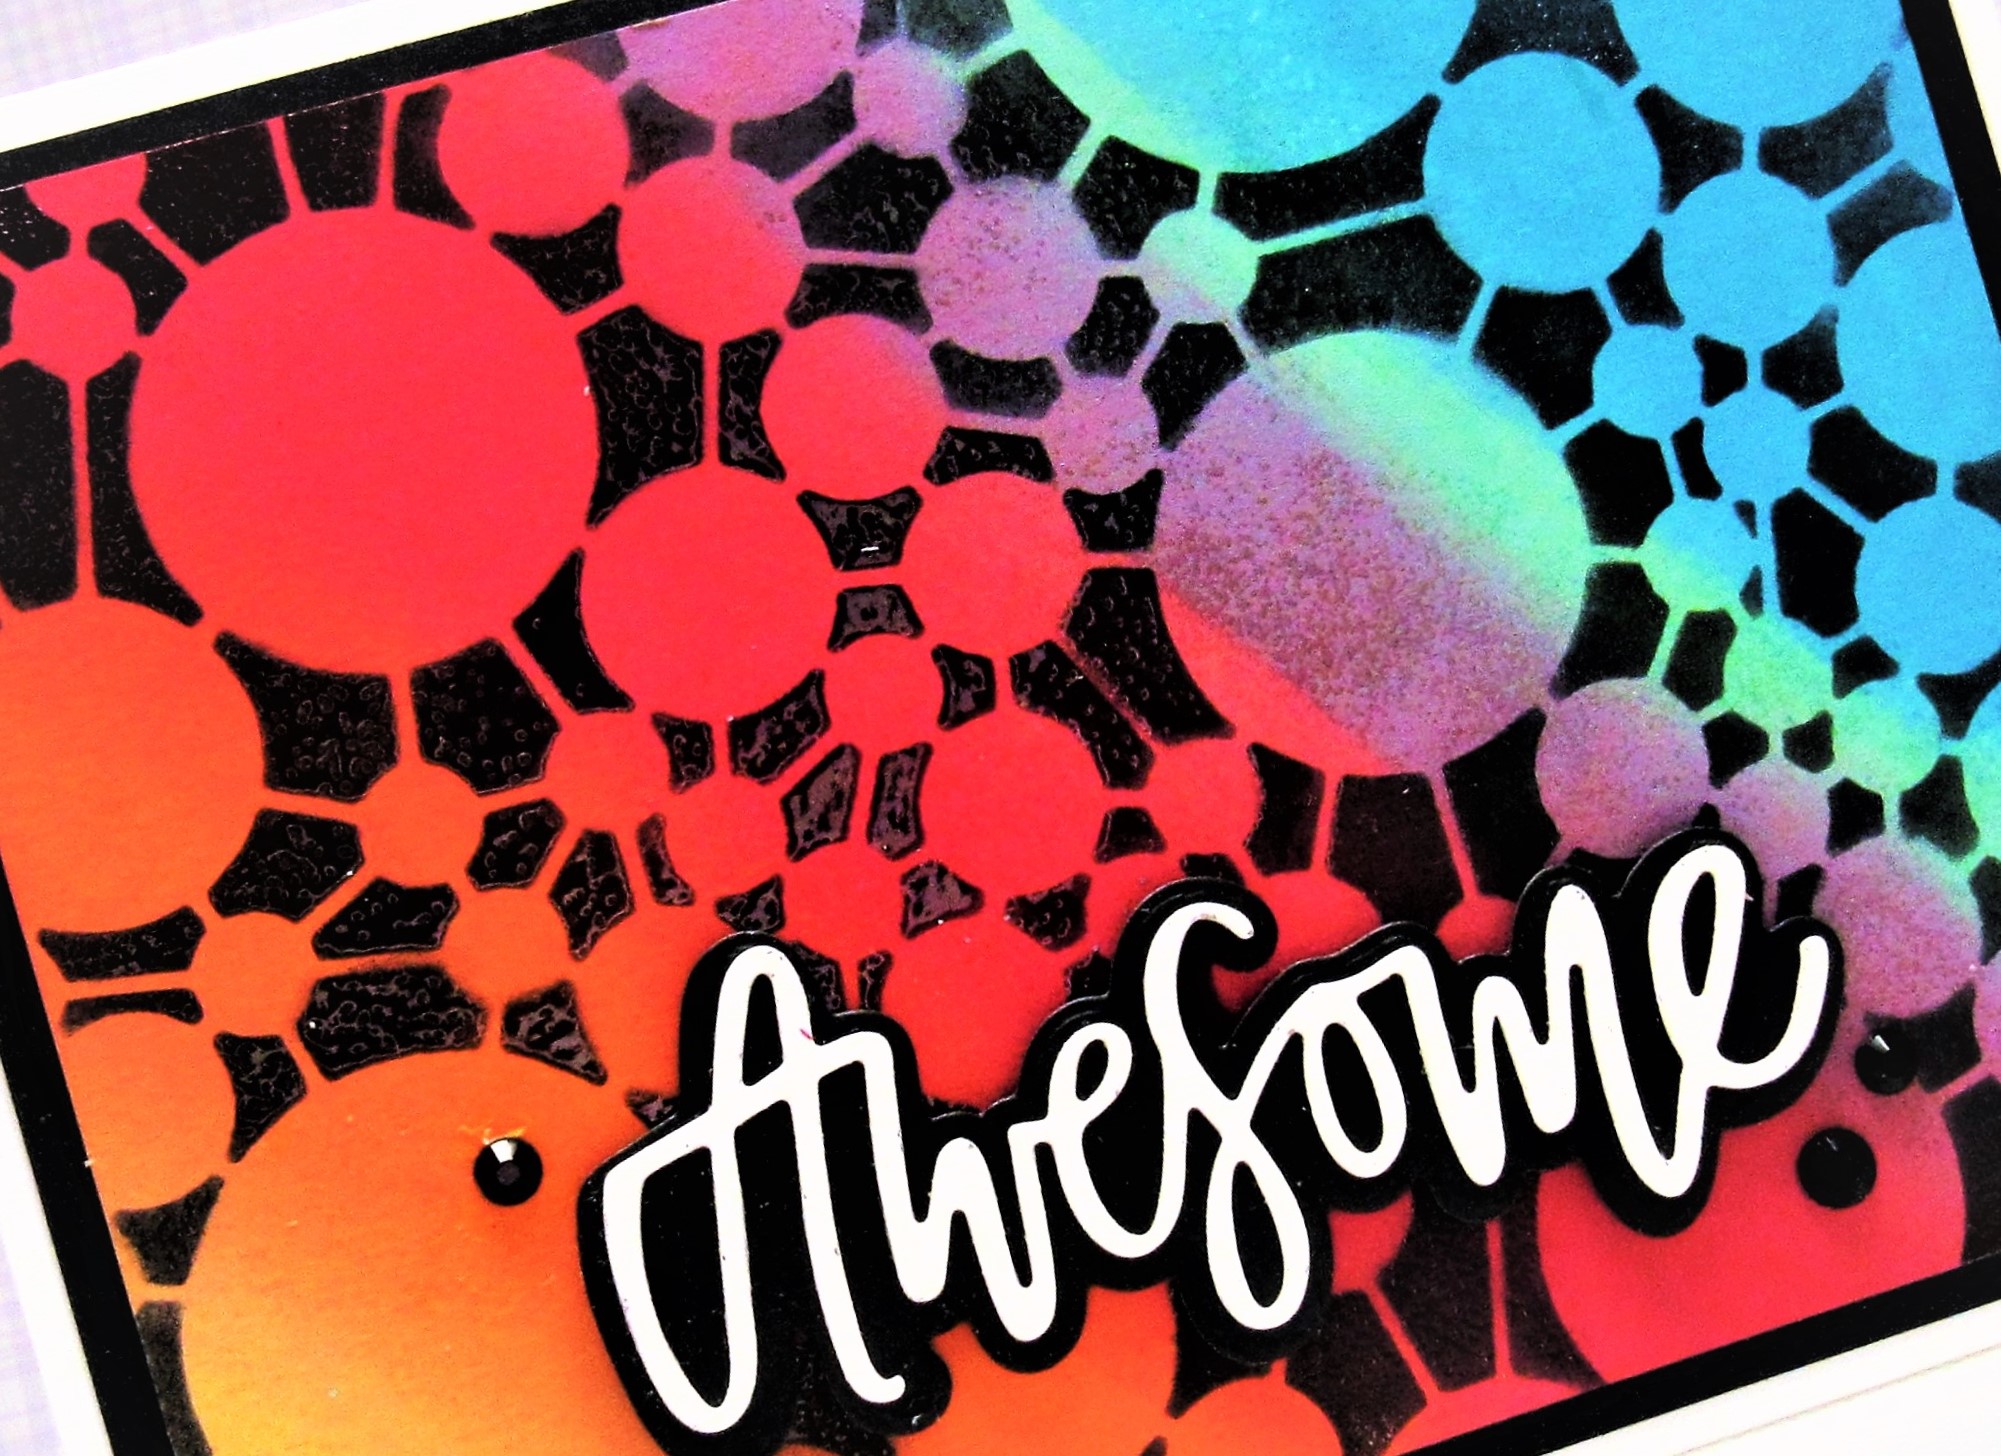
Awesome You!

Welcome
Happy Canada Day!!

Today's card is just filled with fun.
I used the new Atoms stencil from A Colorful Life Designs.

So, here's what I did to create my card.
  • I decided to use the 'Joseph's Coat' technique for my card so I began with a piece of white cardstock and inked that up from left to right with these Distress Oxide inks...Mustard Seed, Ripe Persimmon, Picked Raspberry, Lumberjack Plaid, Cracked Pistachio and Peacock Feathers.
  • I dried the inked panel and then placed it onto my Make Art Station.  I positioned the Atoms stencil over the background and inked it up with some Versafine Clair Black ink and clear heat embossed it.
  • While the panel cooled, I die cut the sentiment in white and glued it to the black shadow.
  • I glued the panel onto a piece of black cardstock and then onto an A2 white card base.
  • I used some foam tape to pop the sentiment along the bottom and added 3 black gems.

Here is the stencil I used:
Atoms

Discount Code for A Colorful Life Designs
(Affiliate with no extra cost to you) 

Thanks so much for coming by and taking a look.

Adding my card to these challenges:
Simon Says Wed.- ANYTHING GOES
Crafty Calendar- ANYTHING GOES
Tic Tac Toe Challenge- Circles/Encouragement/ Die cuts


Supplies
Stamps- none
Inks- DOX
Paper- Scribes Nook- Waterloo, Ontario
Accessories and Tools- stencil (A Colorful Life Designs); TE Blending Brushes; 
Awesome die (Neat and Tangled), black gems (Dollar Store); clear EB powder (Lawn Fawn)