Showing posts with label emboss resist. Show all posts

Friday, 12 November 2021

Tall Trees


Welcome
Meet today's card.
Pretty simple to create using this lovely stencil called Pine Tree Duo.  It's just one of the new releases from A Colorful Life Designs.  
There are a few different designs and I think they would make wonderful all season or even great masculine cards.

So here's what I did to create my card.
  • My card is an A2 size (4 1/4 x 5 1/2) so I cut a piece of white cardstock 3 3/4 x 5.  I like to have a border around my card base.
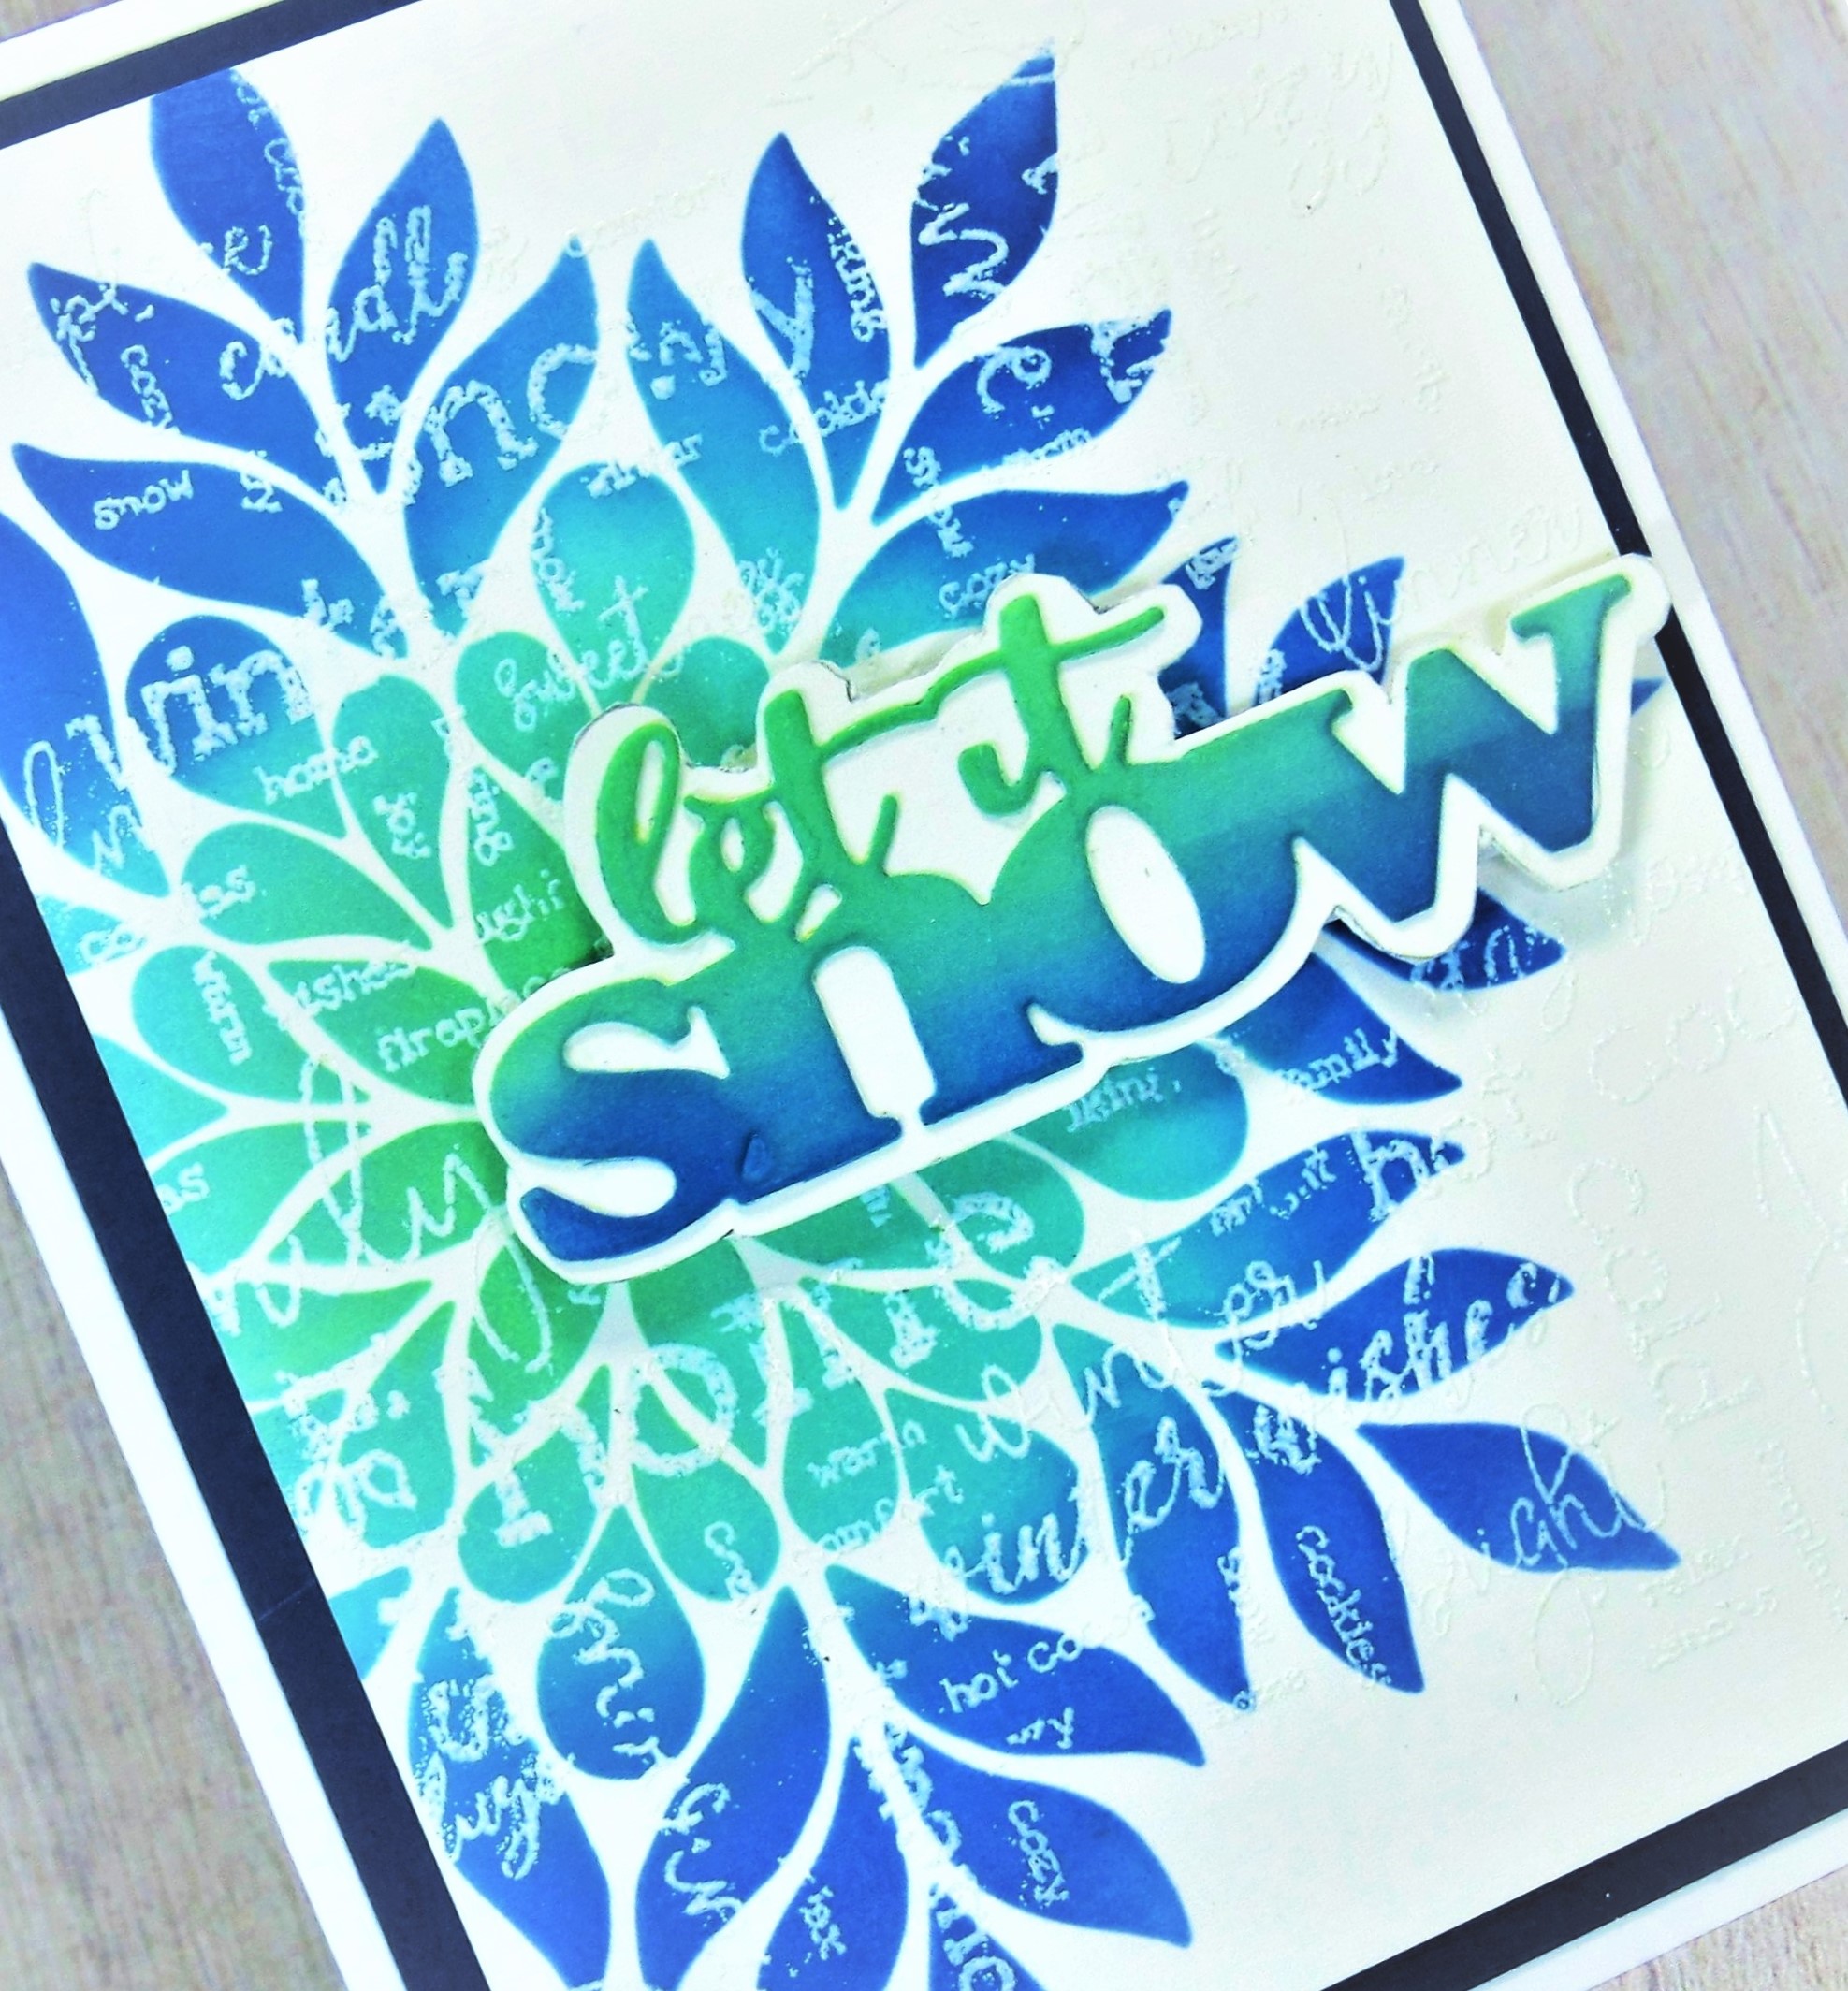
  • I placed the panel into my Misti and rubbed over the whole thing with an anti-static bag as I wanted to heat emboss it.  I stamped using the Friends background stamp from HA with some Versamark ink and white heat embossed.
  • Next, I laid the Pine Tree Duo over the embossed panel and inked it up with some Peacock Feathers and Rustic Wilderness Distress Oxide ink with an inking brush.
  • I removed the stencil and wiped off the ink left behind on the text, revealing the resist the heat embossing creates.  It adds great interest too.
  • To add further interest, I used my ScorPal and added the perforated line beside the inked area.
  • I stamped the Merry Christmas greeting onto a piece of white cardstock, then inked along the edges with some more of the Rustic Wilderness.
  • I glued the inked panel onto a piece of blue cardstock that matched the background colour and then onto a heavy white card base.
  • I pop dotted the sentiment over the panel, then added the little green gems.

Here is the stencil I used:

                                                         Discount Code for A Colorful Life Designs
(affiliate with not extra cost to you)

Thanks so very much for coming by and taking a look.

Adding my card to these challenges:
Christmas Crafts All Year Round- STARTS WITH U<V or W
(Winter white)


Supplies
Stamps- Merry Christmas (IO); Friends (HA)
Inks- DOX; Versamark, Versafine
Paper- heavy white (Scribes Nook- Waterloo, Ont.)
Accessories and Tools- stencil (ACLD); Misti (My Sweet Petunia); green gems (Dollar Tree);
TE inking brushes; ScorPal; Lawn Fawn white eb powder; heat tool

Sunday, 31 October 2021

Joyous Holiday


Hello and Welcome
I am playing with this great Big Snowflake stencil and doing an embossed resist technique.
I really like the look it gives and this stencil is one of my favourites.

So here's what I did to create my card.
  • I began with a piece of white cardstock, placed it into my Misti and stamped the Snowflake Outline from Simon Says with some Versamark and white heat embossed it.
  • I laid the Big Snowflake Stencil from ACLD over the embossed background, centering it on the panel.
  • I began at the center and blended on some Salvaged Patina Distress Oxide ink, then some Wilted Violet and finally Blueprint Sketch along the outside edges.
  • Using a dry cloth, I carefully wiped over the panel to remove any of the ink that was on top of the embossing and to make the snowflake pop.
  • I decided to create an 'eclipse' sentiment, so I positioned the 'merry' sentiment over the background and cut it out as you can see from the picture below. 

  • I wanted to add a shadow background to help make the sentiment more visible, so I traced around the die with a pencil and fussy cut it out.

  • I glued the die cut to the white fussy cut one I had done and set aside.
  • I glued the inked panel onto a piece of dark purple cardstock, then onto a white card base.
  • I pop dotted the sentiment back into place over the panel, matching it up in the cut away area.
  • I stamped the strip sentiment onto a piece of navy cardstock with Versamark ink and then white heat embossed it.
  • I glued the strip under the die cut 'merry'.


Here is the stencil I used:

Discount Code for A Colorful Life Designs
(affiliate with not extra cost to you)


Thanks so very much for coming by and taking a look.

Supplies 
Stamps- Snowflake Outline (SSS), Taylored Expressions-Simple Strips Christmas
Inks- Versamark, Distress Oxides (TH)
Paper- heavy white (Scribes Nook- Waterloo, Ont.)
Accessories and Tools- stencil (ACLD); Lawn Fawn white eb powder; Misti (My Sweet Petunia);
Christmas Words die (Cartabella)

Saturday, 16 October 2021

Ornate Snowflake


Hello and Welcome
I so appreciate that you dropped in for a visit.

Meet today's card.
Very simple to do with lovely results.  
I love to stencil and I find that using this technique just puts the look to the next level by adding a lot of interest...plus you can make use of more of your supplies.

So here's what I did to create my card.
  • I cut my card front panel from a piece of white cardstock.  I placed it into my Misti and stamped  the Snowy Afternoon background stamp from Studio Light with some Versamark, then white heat embossed it.  It has a wonderful design with different fonts and winter words going in different directions.  
  • I took the Elegant Snowflake stencil and positioned it over the script.  Starting at the center of the stencil, I rubbed on some Cracked Pistachio Distress Oxide ink.  Next I rubbed on some Salvaged Patina and finally Prize Ribbon DOX ink along the outer edges. 
  • When I was happy with the inking, I removed the stencil and gently rubbed with a cloth to remove the ink from the white embossing to reveal the script.  The white embossing resists the ink giving detail to anything put over it.
  • Next, I die cut the sentiment from STAMPlorations with some white cardstock.  I inked it up with the above mentioned colours used on the background.
  • After inking the sentiment, it looked lost on the background but I loved the colour so here's what I did to make it pop.  You can do this trick with any die you have.  I took a scrap of white cardstock and traced around the edges with a pencil.  Using a pair of detail scissors, I cut out around the traced lines.  Voila....a shadow for my die!
As you can see from this picture, I do it with many of my dies.
This is just an example of what I did.

  • I glued the inked sentiment over the white shadow piece I had fussy cut and set it aside.
  • I glued the snowflake panel over a piece of navy cardstock, then onto a white card base.
  • I popped the sentiment over the snowflake with pop dots.


Here is the stencil I used:

Discount Code for A Colorful Life Designs
(affiliate with not extra cost to you)


Thanks so very much for coming by and taking a look.
Hope you have a great weekend.

Supplies
Stamp- Snowy Afternoon (Studio Light)
Inks- Versamark; Distress Oxides
Paper- heavy white (Scribes Nook- Waterloo, Ont.)
Accessories and Tools- Elegant Snowflake Stencil (ACLD); TE Blending Brushes; heat tool;
Lawn Fawn EB powder; Let it Snow die (STAMPlorations); pop dots; Nuvo glue;
Misti (My Sweet Petunia)