Showing posts with label SU. Show all posts

Monday, 17 October 2022

Mad for Plaid


Welcome
I love seeing some plaid on a holiday card...how about you?
This one came together so easily using the Buffalo Plaid Stencil from A Colorful Life Designs.

So, here's what I did to create my card.
  • I began by cutting a piece of white cardstock and placing it onto my Make Art Station, then positioned the Buffalo Plaid stencil over that.
  • I decided to make my card monochromatic, so I inked it up first with some Candied Apple Distress Oxide ink, then added some Barn Door DOX ink, keeping it into just the center of the panel.  I kept most of my inking to the middle area and faded it out along the edges.  
  • I splattered using my white Posca pen to give a snowy look to my card.
  • Next, I took the panel and die cut a circle from the center and placed it into my Misti to stamp the sentiment and the little vines around it.
  • I die cut another white circle and glued them together.
  • I glued the plaid background onto a piece of red cardstock, then onto an A2 sized card base.
  • I foam taped the circle back into the center of my inked background.

Here is the stencil I used:

Discount Code for A Colorful Life Designs
(Affiliate with no extra cost to you)

Adding my card to these challenges:
Winter Wonderland- LET IT SNOW
Krafty Chicks- CHRISTMAS
Addicted to Stamps and More- DIE CUTS AND/OR STENCILS


Thanks so much for coming by and taking a look.

Supplies
Stamps- Encircled in Warmth (SU); Everyday Circle Tags (Avery Elle)
Inks- DOX, Versafine Clair
Paper- heavy white (Scribes Nook- Waterloo, Ont.) 
Accessories and Tools- stencil (A Colorful Life Designs); white Posca pen; 
Make Art Station (Ranger); TE Blending Brushes; Misti, Infinity Circle dies (Hero Arts)

Sunday, 28 August 2022

Embossing Folder Stamping with a Twist


Welcome
It's my turn to host the TLC (Technique Lovers) Challenge over at Splitcoast Stampers.
I always try my best to come up with challenges that are accessible to everyone and uses supplies we all most likely have in our stashes.
So I'm calling my challenge:

I have been trying to work on getting some Christmas cards made, so this one is another to add to the collection, all ready to mail out for the holidays.  

So here's what I did to create my card.
  • I began by looking through my supplies and found an embossing folder and a stencil that would work well together.  That really helps to make a more cohesive card front panel.
  • I opened the Texte Grunge Embossing Folder and rubbed some Cracked Pistachio Distress Oxide ink just on portions of the folder front, sprayed with water and then pressed my cardstock panel into the wet ink.  *For this technique, it is important not to cover the whole eb folder with ink as you want some white areas to be left behind*
  • I dried that, then using the Indian Blanket stencil from A Colorful Life Designs, I filled in the open areas randomly with the same above ink, merging the two patterns together. 
  • Next, I place the pine bough stamp in my Misti, inked it up with some Evergreen Bough DOX ink and stamped.  To add interest and more depth to the boughs, I used a Tombow marker to colour on just parts of the bough, sprayed with water and stamped again.
  • I repeated that process 3 more times, spacing out the greens over the card front.
  • When I was happy with the stamping, I splattered using my white Posca pen.
  • I stamped the sentiment between the boughs using my Misti again.
  • I used the end of a stylus to add the berries to the branches with some Barn Red DOX ink.  It helped brighten the branches a bit.
  • I glued it onto a piece of white cardstock, then onto an A2 card base.
  • Finally, I added 3 red gems near the sentiment.

Here is the stencil I used:

Discount Code for A Colorful Life Designs
(affiliate with no extra cost to you)

Thanks so much for coming by and taking a look.

Supplies
Stamps- Ornamental Pine (SU)
Inks- DOX; Versafine Clair, Tombow marker
Paper- heavy white- Scribes Nook- Waterloo, Ont.
Accessories and Tools- Embossing Folder (Carabelle); Indian Blanket stencil (ACLD);
TE Blending Brushes; Misti (My Sweet Petunia); white Posca Pen; red gems

Monday, 25 July 2022

Shoreline


Welcome
Meet today's card.
I've been playing along with some of the challenges over at Splitcoast Stampers.
So much inspirations there and the theme for this challenge was Let it Run.

So here's what I did to create my simple card.
  • I began by pulling out a scrap of mixed media paper to work on.  I figured it would be a good paper to work with as the inks would run a bit better then using my regular white cardstock.
  • I placed a few small drops of some Salty Ocean Distress re-inker on my non-stick craft mat, sprayed with water to dilute it and then using an old gift card, I dabbed some ink just along the center of my cardstock.  I sprayed with a bit of water to help the ink run.
  • I dried the blue, turned my panel around and then repeated that process using some Wilted Violet Distress re-inker in the same way.
  • While that dried, I took a piece of white cardstock and embossed it using a folder from Darice.
  • I placed the dried panel into my Misti to stamp the birds.
  • I glued the embossed white cardstock onto a heavy white card base.
  • I glued the inked panel onto some black cardstock and used some foam tape to mount it over the embossing.


Thanks so much for coming by and taking a look.

Adding my card to these challenges:
Addicted to CAS- NAUTICAL
Simon Says Mon.- LET'S GO ON VACATION


Supplies
Stamps- Wetlands (SU)
Inks- Distress re-inkers
Paper- Scribes Nook (Waterloo, Ont.)
Accessories and Tools- old gift card, Mister (TH); Misti (My Sweet Petunia)
EB folder (Darice)

Sunday, 20 March 2022

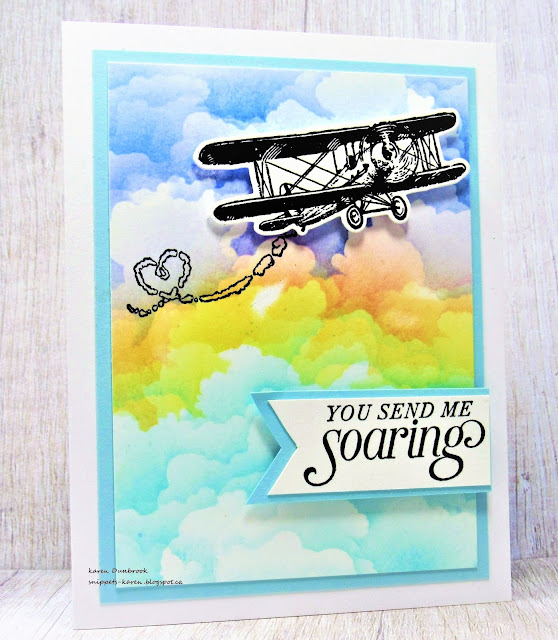
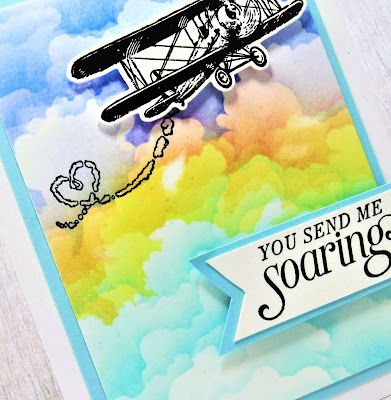
Soaring


Hello and Welcome Spring!!
I wanted to create a masculine card for my hubby and this is what I came up with.
I just love this Cloud Edger Stencil from ACLD.

So here's what I did to create my card.
  • I began by cutting a white cardstock panel that was 3 3/4 x 5" and got out my Cloud Edger stencil and some Distress Oxide inks.
  • Beginning at the top, I positioned the stencil and rubbed on some Salty Ocean DOX ink, moved the stencil down a bit and added more of that ink.  
  • Next I moved the stencil down a bit and added just a hint of Blueprint Sketch ink.  
  • I continued working my way down the white cardstock using some Carved Pumpkin, Mustard Seed, a hint of Cracked Pistachio and then finally a good dose of Peacock Feathers DOX ink along the bottom.
  • While my cloud background dried, I stamped the airplane with some black Versafine Clair ink and die cut it out.
  • I stamped the sentiment from the same set, cut it out and glued it onto a piece of light blue cardstock.
  • I positioned the airplane and stamped the heart trail with some black ink.
  • I glued the cloud background onto another piece of blue cardstock, then onto a white cardstock base.
  • I pop dotted the plane in the sky and then pop dotted the sentiment in the bottom corner.


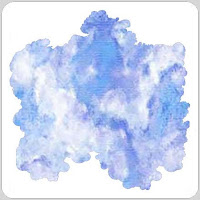
Here is the stencil I used:

Discount Code for A Colorful Life Designs
(affiliate with no extra cost to you)


Thanks so much for coming by and taking a look.

Adding my card to these challenges:
Bastel-traum- SPRING


Supplies
Stamps- Sky is the Limit (SU)
Ink- Versamark, DOX ink
Paper- heavy white (Scribes Nook- Waterloo, Ont.)
Accessories and Tools- Airplane die (SU): Cloud Edger stencil (ACLD); 
TE Blending Brushes

Saturday, 26 February 2022

Celebration Time


Welcome
It's the weekend and time to play!!
I was looking through my stencils mindlessly, trying to think about what I wanted to create.  
I like to have birthday cards on hand, so decided to go with that plan.  
I love this fun stencil, just add a few bright colours and you can make a great card.

So here's what I did to create my card.
  • I began by pulling out my Stencil Mat and cut a piece of white cardstock.  
  • I got out this fun stencil called Round Fragments from A Colorful Life Designs...one of my favs.  I decided to stencil these fun flower shapes in a totally random way, so I masked off around the largest shape and added that into the bottom corner of my white cardstock panel using some Carved Pumpkin, Picked Raspberry and a hint of Rusty Hinge right in the very center.  
  • I continued to move the stencil around over my card front, masking and placing some of the flower shapes into the corners and then more into the center area.  I inked the dots from that same  stencil to fill in the open areas.
  • I splattered with my white Posca pen and set aside to dry.
  • I stamped the 'Happy' and die cut it out, then stamped the 'Birthday' onto another piece of white cardstock and cut that out.  
  • I glued the stenciled panel onto a piece of matching pink cardstock, then onto a heavy white card base.
  • I glued the Happy onto the card front, then pop dot mounted the Birthday under that.
  • To finish my card off, I added 3 pink gems just around the sentiment.


Here is the stencil I used:

Discount Code for A Colorful Life Designs
(affiliate with no extra cost to you)

Thanks so much for coming by and have a great weekend.

Adding my card to these challenges:
Simon Says Wed.- ANYTHING GOES
Crafter's Cafe- MYO BACKGROUND

Supplies
Stamps- Happy (The Stamp Market); Birthday (SU)
Inks- Versafine Clair; DOX
Paper- heavy white (Scribes Nook, Waterloo, Ont.)
Accessories and Tools- Round Fragments stencil (ACLD); TE Blending Brushes, 
painter's tape for masking; white Posca pen, orange gems (Dollar Tree); foam tape