Showing posts with label airplane. Show all posts

Sunday, 20 March 2022

Soaring


Hello and Welcome Spring!!
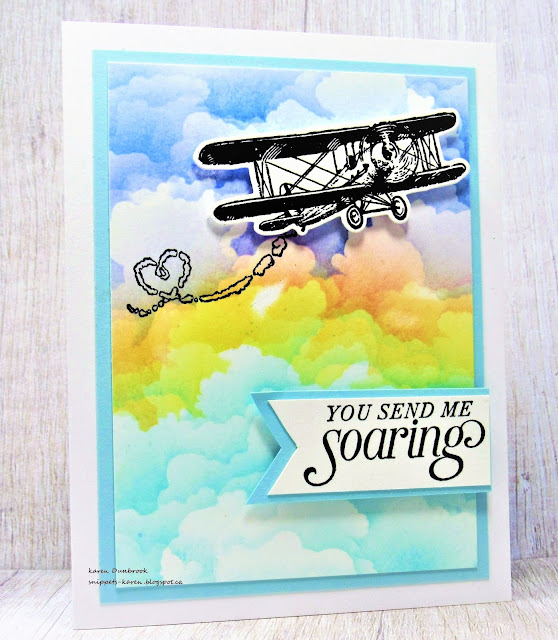
I wanted to create a masculine card for my hubby and this is what I came up with.
I just love this Cloud Edger Stencil from ACLD.

So here's what I did to create my card.
  • I began by cutting a white cardstock panel that was 3 3/4 x 5" and got out my Cloud Edger stencil and some Distress Oxide inks.
  • Beginning at the top, I positioned the stencil and rubbed on some Salty Ocean DOX ink, moved the stencil down a bit and added more of that ink.  
  • Next I moved the stencil down a bit and added just a hint of Blueprint Sketch ink.  
  • I continued working my way down the white cardstock using some Carved Pumpkin, Mustard Seed, a hint of Cracked Pistachio and then finally a good dose of Peacock Feathers DOX ink along the bottom.
  • While my cloud background dried, I stamped the airplane with some black Versafine Clair ink and die cut it out.
  • I stamped the sentiment from the same set, cut it out and glued it onto a piece of light blue cardstock.
  • I positioned the airplane and stamped the heart trail with some black ink.
  • I glued the cloud background onto another piece of blue cardstock, then onto a white cardstock base.
  • I pop dotted the plane in the sky and then pop dotted the sentiment in the bottom corner.
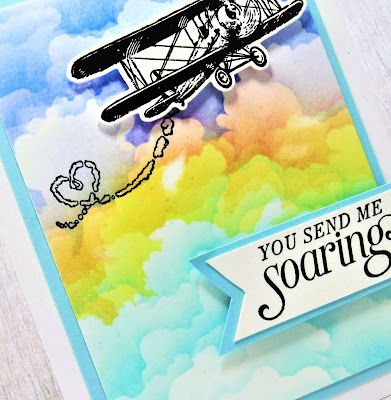

Here is the stencil I used:

Discount Code for A Colorful Life Designs
(affiliate with no extra cost to you)


Thanks so much for coming by and taking a look.

Adding my card to these challenges:
Bastel-traum- SPRING


Supplies
Stamps- Sky is the Limit (SU)
Ink- Versamark, DOX ink
Paper- heavy white (Scribes Nook- Waterloo, Ont.)
Accessories and Tools- Airplane die (SU): Cloud Edger stencil (ACLD); 
TE Blending Brushes

Saturday, 19 February 2022

Fly Away


Good Morning and Welcome to the weekend.
Here is today's card.  
Super simple but I think very fun.
This leftover piece was just big enough to make a mini slimline card which is a bit smaller then the regular size.  
A standard Slimline card is size is 8 1/2 x 3 1/2 whereas a Mini Slimline is 6" x 3".  
(to see an envelope I made the right size for this card, go HERE)

So here's what I did to create my card.
  • I found this inked background in my stash.  It was the bottom cut off from a larger piece.  Now I'm totally guessing about what I did as it has been sitting in my stash for a long time.  I would have to say I did a 'smooshing' technique to add the colour.  Most likely my go-to colours of Distress Oxide inks would have been Peacock Feathers, Salty Ocean and Cracked Pistachio.  When I say smooshing, I mean that I rubbed the inks directly onto my Glass Mat, sprayed with lots of water and smacked my paper into the wet ink.  I like to dry in between and repeat that process to get lots of splatters. I think I may have given it a spray with the blue as well.
  • I placed the inked piece into my Misti and stamped the sentiment with some black ink.  I clear heat embossed it to help make it pop.
  • I set that aside and stamped the vintage airplane onto a piece of white cardstock, then I die cut it out.  I left it white so it would show up better over the colourful background.
  • I glued the inked panel onto a piece of blue cardstock, then onto my card base.
  • I pop dotted the airplane at the top of the card front.


Thanks so much for coming by and taking a look.

Adding my card to these challenges:
Simon Says Wed.- SLIMLINE
Little Red Wagon- MAKE IT MASCULINE
CASology- AFFECTION

Supplies
Stamps- Smile Often (Impression Obsession); Sky is the Limit (SU)
Inks- Versafine Clair, Distress Oxides
Paper- heavy white (Scribes Nook- Waterloo, Ont.)
Accessories and Tools- Misti; Plane die (SU); Glass Mat (TH); Lawn Fawn eb powder; 
heat tool; Misti (My Sweet Petunia)