Showing posts with label Taylored Expressions. Show all posts

Wednesday, 8 June 2022

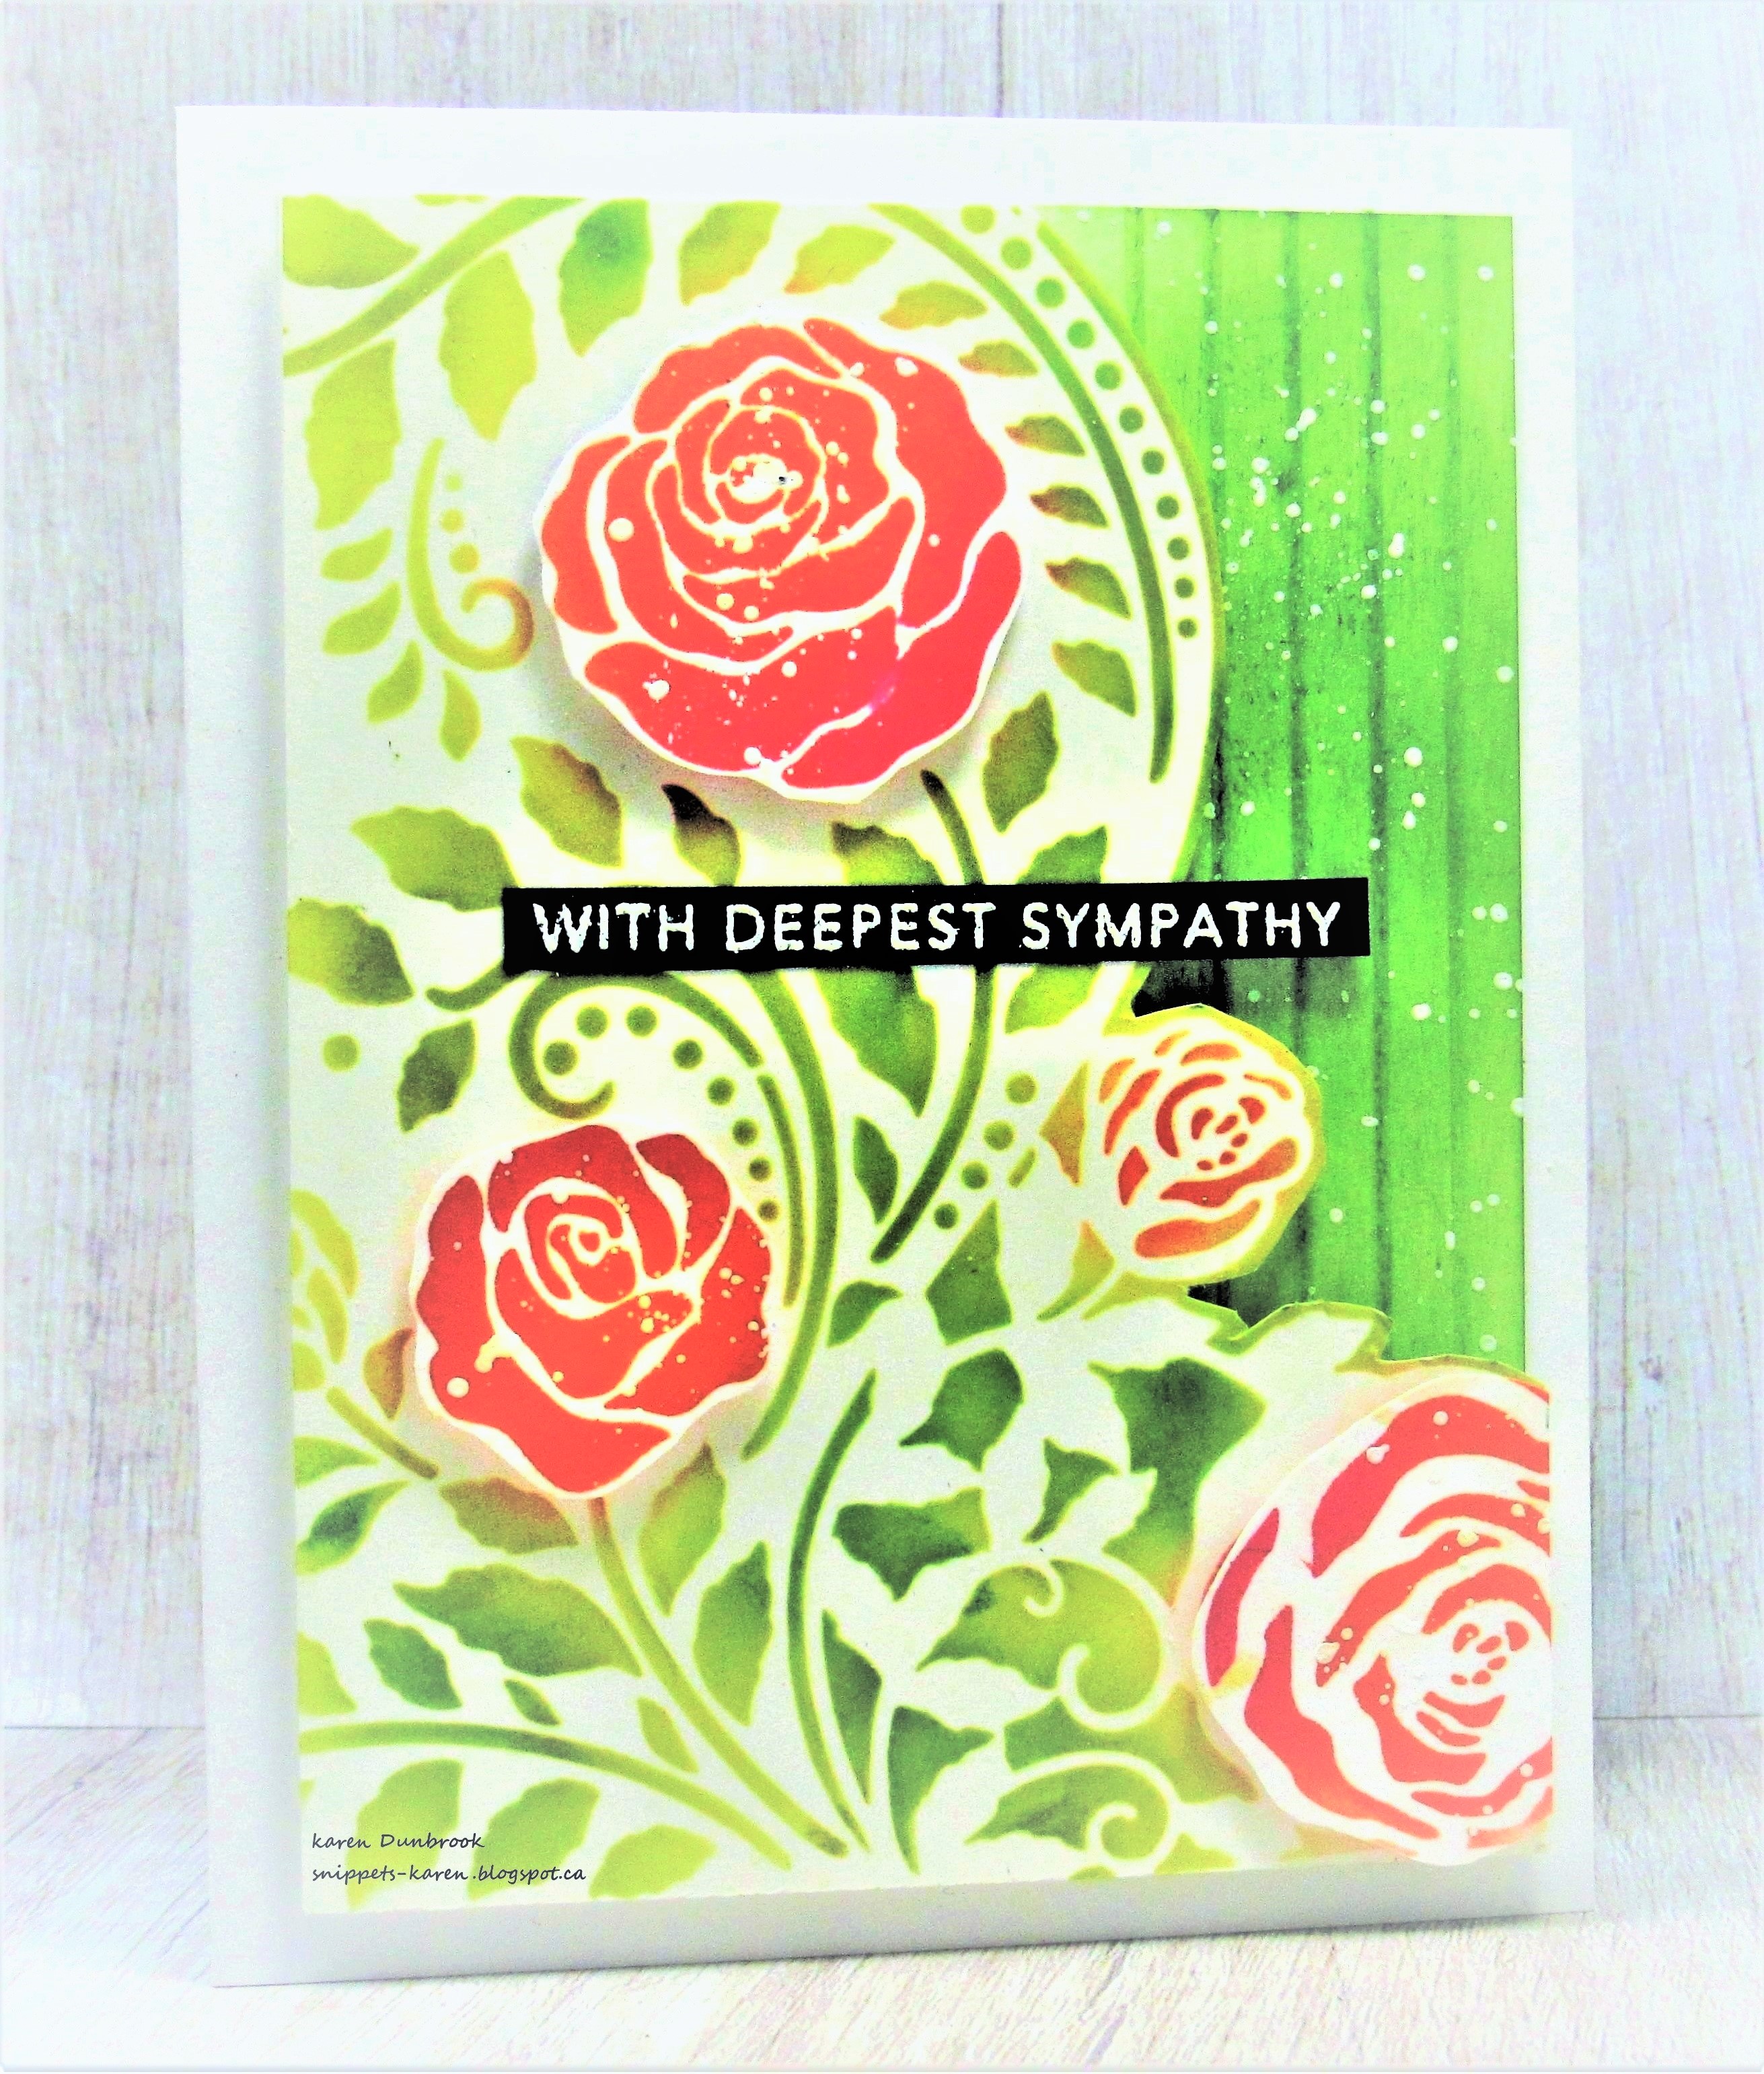
Floral Sympathy


Welcome
I really like to have some sympathy cards on hand as I know most of you do as well.
When I looked at this Split Rose Flourish stencil from A Colorful Life Designs, I thought it would work well for this.

So here's what I did to create my card.
  • I took the Split Rose stencil and laid it onto a piece of white cardstock on my Make Art Station.  I inked up the vines with some Cracked Pistachio Distress Oxide ink, then I did some highlighting using Peeled Paint DOX ink.
  • I removed the stencil and then placed it onto another piece of cardstock and inked up just the roses with some Picked Raspberry and then some Crackling Campfire DOX ink.  
  • Next, I fussy cut the panel with the vines on it along the 'split' edge and then cut out the roses.  I splattered just the cut out roses with my white Posca pen and set aside.
  • I cut a piece of white cardstock that was 3 3/4" x 5" and scored it along the right hand side.  I inked it up with more Peeled Paint DOX ink and splattered with more white.
  • I glued that onto a heavy white card base for my A2 card.
  • Time to assemble....  I pop dotted the vines over the scored front panel and then pop dotted the roses as well. 
  • I stamped the sentiment strip with some Versamark and white heat embossed it.  I popped that over the background.

Here is the stencil I used:

Discount Code for A Colorful Life Designs
(affiliate with not extra cost to you)

Thanks so very much for coming by and taking a look.

Adding my card to these challenges:


Supplies 
Stamps- Simple Strips (TE)
Inks- DOX, Versamark
Paper- Scribes Nook- Waterloo, Ont
Accessories and Tools- stencil (ACLD); TE Blending Brushes; foam tape;
Posca pen; white eb powder, ScorPal; Make Art Station (Ranger)

Thursday, 14 January 2021

Winter


Good Morning
Here is a simple monochromatic card I made while playing with some of my favourite colours of Distress Oxide inks and my new blending brushes from Taylored Expressions I got for Christmas.  

I wanted to make a layered stenciled card so here is what I did to create my card.
  • I began with a panel cut from heavy cardstock.  I centered the 2 Column Shadow Mask from ACLD over my cardstock and inked it up with some Tumbled Glass and Peacock Feathers Distress Oxide inks.  
  • I left the above stencil in place and then positioned the Icy Snowflake stencil over that up in the top corner.  I rubbed some Chipped Sapphire DOX inks over the snowflake. It reminded me of looking out a window.
  • Next, I removed just the snowflake stencil and splattered over the piece with my white Posca pen.
  • I removed the Column stencil and placed the panel into my Misti to stamp the sentiment from Impression Obsession.  I clear heat embossed it to help make it pop against the bkg.
  • I mounted the piece onto a piece of matching blue cardstock, then onto a heavy white card base. 


Here is the Icy Snowflake stencil I used.

Discount Code for A Colorful Life Designs

Thanks so much for coming by and taking a look.

Adding my card to these challenges:
CAS Mix Up- SPLATTERS
Cardz 4 Guyz- LET IT SNOW

Supplies
Stamps- To Everything (Impression Obsession)
Inks- DOX; Versafine Clair
Paper- heavy white (Scribes Nook); coloured cs
Accessories and Tools- Icy Snowflake (ACLD); 2 Column Shadow (ACLD); 
Posca pen; blue gem; TE blending brushes; Misti (My Sweet Petunia)


Wednesday, 30 December 2020

Winter Wonderland


 Good Morning
One more Christmas card that I didn't get time to post.
I just had to play with this new-to-me Merry stamp and die I got by Taylored Expressions and the newest release in the Distress ink line; Rustic Wilderness.
I added it over a bubble painted background....so fun and easy to do.

So here's what I did to create my card.
  • I began with a piece of heavy white cardstock for my card front panel.  I put some Peacock Feathers Distress and Salty Ocean re-inker into a cup of water, then added some Dawn Dish Soap and mixed it up really well.  That was my bubble solution.
  • Using a straw, I blew bubbles into the mixture and then placed my paper over the bubbles to create the bubble front of my card.  I repeated that process until I was happy with the coverage.  It looked a bit flat so I added some Evergreen Bough re-inker to the same mixture and made more bubbles.  I let the panel dry completely before moving onto the next step.
  • I placed the piece into my Misti and stamped the snowflakes randomly around the outside edge using some Versamark ink.  I then white heat embossed them all.
  • I stamped the 'Merry' over the bubble background in the center of the panel with some Rustic Wilderness ink and clear heat embossed it that gave it great shine.  The 'Merry' stamp comes with a die so I positioned that over the Merry and die cut it out in my Cuttlebug.
  • Using the die again and some white cardstock, I cut it out 3 more times and glued them all together with the one I cut from the stamped panel.
  • I glued the panel onto a heavy white card base, then I fit the die cuts back into the cut away area and glued them in place.  *by die cutting all the pieces and gluing them together, it raised up the sentiment to make it more prominent on my card front*
  • To add interest, I glued some little white pearl dots onto the center of the snowflakes.


Thanks so much for coming by and taking a look.

Supplies
Stamps- Merry (Taylored Expressions); Snowflakes (Recollections)
Inks- Versamark; Distress Re-inkers (listed above)
Paper- heavy white (Scribes Nook(
Accessories and Tool- Misti (My Sweet Petunia); clear eb powder; white eb powder; 
Dawn dish soap; straw; Cuttlebug

Monday, 7 December 2020

Christmas Reindeer


Good Morning and Welcome
Meet today's card.
I am so trying to use up some of my backgrounds and pieces that I have used to brayer off when using my Geli Plate.  
For those of you that are not familiar with using the Geli Plate, you add paint but then have to brayer it smooth.  Often that involves removing some paint onto a piece of paper.  I keep those to use as bkgs.
That's how this card started; as a piece that I brayered off blue acrylic paints.

So here's what I did to create my card.
  • I took this piece of acrylic painted cardstock and ran it through my Cuttlebug with the Cut and Stitch circle die from Penny Black.
  • I used the leftover piece to die cut the reindeer from STAMPlorations and set it aside.
  • I cut a piece of white cardstock and dry embossed it using a Distressed Stripes folder to give some interest.  I glued that onto my card front panel, then glued the blue die-cut piece over that.
  • I added some pop dots to the back of the reindeer and mounted that into the center of the circle.
  • I stamped the sentiment from Taylored Expressions and also pop dotted that under the deer. (the strip die is a part of that set)
  • I added black gems all around the circle to add more interest and a bit of colour.
  • Lastly, I mounted it onto a heavy white card base.

Thanks for looking.

Adding my card to these challenges:
Simon Says Wed.- FUN WITH DIES

Supplies
Stamps- Christmas Sentiments (Taylored Expressions)
Inks- Versafine Clair
Paper- heavy white (Scribes Nook0
Accessories and Tools- acrylic paint; brayer; Cut and Stitch Circle (PB); Cuttlebug;
Distressed Stripes EB Folder (Provo); pop dots; black gems

Tuesday, 1 December 2020

Nature's Greetings


Good Morning and Welcome
I hope you holiday preparations are going well.
Today's card was a fun card to create.  I played around with stencils and stamps and layering them.

So here's what I did to create my card.
  • I began with a piece of heavy white cardstock, some Speckled Egg Distress Oxide ink and 2 stencils.
  • I positioned the Tim Holtz stencil called Countdown over my card panel and rubbed a bit of the ink over that as I wanted it to be faintly visible in the background.
  • I removed that stencil and laid on the Circus Harlequin from A Colorful Life Designs over that and stenciled a bit heavier with the same ink.
  • I removed the stencil and placed the piece into my Misti to stamp the Deer from Lavinia Stamps with some Verafine Clair ink.
  • Next, I stamped the tree with more Versafine Clair, then did a second and third generation stamping behind the first tree.  I splattered with my white Posca pen.
  • I stamped the sentiment from the Taylored Expressions in the top corner and added some black gems under that.
  • I die cut a square frame and then pop dot mounted it over the card panel.

Thanks so much for coming by and taking a look.

Discount Code for A Colorful Life Designs

Adding my card to these challenges:
Simon Says Wed.- ANYTHING GOES
Sparkles- USE A STENCIL
Sweet Stampers- CHRISTMAS


Supplies
Stamps- Small Reindeer (Lavinia); Christmas Sentiments (Taylored Expressions);
Pine tree (Northwoods)
Inks- Distress Oxide; Versafine Clair
Paper- heavy white
Accessories and Tools- Circus Harlequin stencil (ACLD); Countdown stencil (TH);
inking tool; Misti; black gems, Posca pen