Showing posts with label frame. Show all posts

Sunday, 12 April 2026

Birthday Fun

Welcome
I'd like you to meet the new for April stencil called 
It is just one of the many fun designs from A Colorful Life Designs.

So, I pulled out 2 colours of ink and got busy making my card.
  • I began by placing the DOTTY HARLEQUIN stencil over a piece of white cardstock on an angle and then inked it up with some Ripe Persimmon Distress Oxide ink.
  • I wiped the stencil off and placed it back down over the white spaces left behind and then inked again with some Picked Raspberry DOX ink, creating a fun background.
  • Next, I took another piece of white cardstock and inked the top part with more of the Ripe Persimmon ink and the bottom with the Picked Raspberry.  I used that to die cut my sentiment and then glued it onto the white word shadow. 
  • I glued my stenciled card front panel onto a piece of white, then orange then onto a 4 1/4" square card base.
  • I cut out a white square frame and glued that over the panel and popped the sentiment inside the frame to finish off my card.

Here is the stencil I used:


Thanks for coming by and taking a look.

Adding my card to these challenges:
Crafty Catz- ANYTHING GOES
Crafty Calendar- DIES/PUNCHES
Word Power- WORDS AS FOCUS

Supplies
Stamps- none
Inks- DOX
Paper- Solar White
Accessories and Tools- stencil (A Colorful Life Designs); Bold Birthday die (TE);
TE Blending Brushes; Layered Square dies (Amazon)

Saturday, 24 January 2026

Patchworks

Hello
Today's card reminded me of a cozy patchwork quilt, so good for this cold winter we are having.

I had a bunch of pieces left over from doing the Bargello technique a few weeks ago, so I decided to use them and make another card.

So, here's what I did.
  • I began by looking through my scrap papers that I never use and found 4 that I thought would work together.
  • I cut them into 3/4" strips and glued the strips onto a piece of white cardstock side by side of each other being sure they were all touching. 
  • I let the piece dry, then cut the strips in the opposite direction, again 3/4" wide so each strip had the patterns on them. (hope that makes sense)
  • I glued them, one at a time onto another piece of white cardstock, offsetting the pieces like putting together a quilt pattern. There are many different ways you can create a pattern by just moving the strips into different positions.
  • While the glue dried, I die cut the black frame and then glued that over the patchwork.
  • I glued the finished card front onto a piece of patterned paper and then onto a 4 1/4" white square card base.
  • I die cut the sentiment with some black and added it over the middle to finish my card off.

Thanks so much for coming by and taking a look.

Adding my card to these challenges:
Time Out- FAV CARD MAKING TECHNIQUE
Crafty Catz- ANYTHING GOES
Craft Rocket- SOMETHING NEW (frame die I got for Christmas)

Supplies
Stamps- none
Inks- none
Papers- miscellaneous dp's scraps found in my stash
Accessories and Tools- frame die (Amazon); Hello die (Amazon)

Friday, 14 November 2025

Little Bunny


Welcome
Today's card was made for a little friend who was turning one. Such a special time.

So, here's what I did to create my card.
  • I began by cutting the Curly Frame from a piece of white cardstock and glued that over a piece of blue cardstock to create my card front.
  • Next, I took another piece of white cardstock, stamped the Bunny in a Wreath in my Misti and coloured it using Copic markers. I fussy cut it out around the wreath and set aside.
  • I stamped the sentiment in my Misti with some Salty Ocean Distress Oxide ink and die cut it out.
  • I glued the bunny onto a small embossed piece of paper that I inked with the Salty Ocean DOX ink.
  • I glued my card front panel onto a white A2 sized card base and then used foam tape to pop the image and the sentiment over the front inside the framed area.

Thanks a lot for coming by and taking a look.

Adding my card to these challenges:
Word Power- ANYTHING WORDS AS FOCUS
The Male Room- FLORAL (masculine)

Supplies 
Stamps- Bunny in a Wreath (IO-out of business); Big and Bold Sentiments (SSS)
Inks- DOX; Copic Markers
Paper- Solar White (Prism)
Accessories and Tools- Loopy Frame (??thrifted); Sweater Knit EB folder; foam tape;
Misti (My Sweet Petunia)

Sunday, 29 June 2025

Layered Stencils- Thanks

Good Morning
It's the end of the month already but I wanted to post one more card I made doing some fun stencil layering using 2 of the newly released stencils for June called:
from A Colorful Life Designs

So, here's what I did to create my card.
  • I placed the Open Coils stencil onto my Make Art Station and then inked it up with some Broken China Distress Oxide ink.
  • I left that stencil in place, then put the Connected Cogs stencil over that and inked again with some Villainous Potion DOX ink.  It created such a fun, layered look.
  • I took the stenciled panel and die cut the middle area using the Zig Zag Stackers, creating a frame.
  • I glued the inside of the frame die cut onto a piece of purple cardstock.  
  • Next, I added foam tape all along the outside edge of the the frame die cut, and placed it over the middle area.  It gave so much interest to the card front.  I glued that onto a white A2 sized card base.
  • I die cut the 'thanks' with some white cardstock, then glued it onto the white word shadow.  I used some foam tape to pop it over the card front.


Here are the stencils I used:


Thanks for coming and taking a look.

Adding my card to these challenges:
Simon Says Wed.- ANYTHING GOES
Krafty Chicks- MASCULINE
Just Us Girls- STENCIL WEEK

Supplies
Stamps- none
Inks- DOX
Paper- Solar White
Accessories and Tools- stencils (A Colorful Life Designs); Thanks die (Amazon);
Zig Zag Stackers Frame (Penny Black); Blending Brushes (TE)

Thursday, 29 May 2025

Just Wanted to say Hello

Good Morning
Unique and different is how I would describe this newly released stencil from A Colorful Life Designs called

So, here's what I did to create my card.
  • I placed the Swirl Band stencil over a piece of white cardstock and inked it up with some Salty Ocean Distress Oxide ink. I turned the stencil around and inked again in the other direction.
  • I lifted the stencil, cleaned it off and placed it down onto another piece of white cardstock.  I inked that up with some Villainous Potion DOX ink.
  • Using my circle dies, I cut pieces from the purple inked cardstock.  One circle from the center and then the ring from another part.
  • I placed the small circle into my Misti to stamp the sentiment.
  • I glued the blue panel onto a piece of purple cardstock, then onto an A2 sized white card base.
  • I used some foam tape to add the center circle, matching up the pattern and then added the ring in the same way.  

Here is the stencil I used:


Thanks a lot for coming by and taking a look.

Adding my card to these challenges:
Little Red Wagon- AND ALWAYS SHALL BE YOUR FRIEND
Simon Says Wed.- ANYTHING GOES
Cardz 4 Guyz- SHADES OF BLUE
Crazy is Our Fame- Stencils are Our Game- ANYTHING GOES/optional BOUQUETS

Supplies
Stamp- Simply Sentiments (SSS)
Inks- Versafine Clair, DOX
Paper- Solar White (Prisma)
Accessories and Tools- stencil (A Colorful Life Designs); TE Blending Brushes;
Infinity Circle dies (Hero Arts)

Thursday, 8 May 2025

Get Well Wishes

 
Welcome
So much goodness this month as A Colorful Life Designs releases new stencils for May.
So meet this fun new one called
I paired it up with an older release called

So, here's what I did to create my card.
  • I began by placing the Dot Circle stencil over a piece of white cardstock and inked that up with some Broken China Distress Oxide ink.
  • I took that stencil off and placed the Praise Burst stencil over that and inked again with some Villainous Potion DOX ink. By layering the stencils, it gave such a fun looking bkg.
  • Next, I looked through my stash of cast offs and found a piece to use to die cut the frame and leaves.  
  • I stamped the sentiment with some more of the Villainous Potion DOX ink and die cut it out.
  • I decided to cut my stenciled card front into 4 pieces to add interest and glued them onto a piece of white cardstock, then onto a piece of purple and finally, onto a white A2 sized card base.
  • I glued the frame over the stenciled panels and used some foam tape to pop the sentiment up in the bottom corner.

Here are the stencils I used:


My Discount Code for Your Entire Order from A Colorful Life Designs:

Many thanks for coming to visit today.

Adding my card to these challenges:
Simon Says Monday-STENCIL FUN
The Creative Crafters- ANYTHING GOES

Supplies
Stamps- Big and Bold Stamp and die (SSS)
Inks- DOX
Paper- Solar White (Prisma)
Accessories and Tools- stencils (A Colorful Life Designs); TE Blending Brushes;
foam tape; Leaf Frame (Amazon)

Sunday, 31 July 2022

Seashore


Hello and Welcome
Some simple stamping today.  
I decided to just leave my card in black and white.
I think going to the beach is on a lot of minds especially when the weather is sunny and warm.

So here's what I did to create my card.
  • I began by cutting a piece of white cardstock and placed the Fishing Boats stamp into my Misti and stamped with some black. 
  • I cut out the stamped image and glued it onto a piece of black cardstock, then set it aside.
  • Next, I die cut a frame from some white cardstock using a die from Penny Black.
  • I glued the white frame to an A2 card then popped the image inside the frame.

Thanks so much for coming by and taking a look.

Adding my card to these challenges:
Simon Says Wed.- ANYTHING GOES
Little Red Wagon- STITCHING SENSATIONS
Addicted to CAS- NAUTICAL

Supplies
Stamp- Fishing Boats (ISC- discontinued, company gone)
Inks- Versafine Clair
Paper- Scribes Nook- Waterloo, Ont.
Accessories and Tools- Misti (My Sweet Petunia); Zig Zag Stitch die (Penny Black);
foam tape

Monday, 11 April 2022

Frame It


Good Morning
Hope you had a good weekend.
It goes by so fast!

So meet today's card.
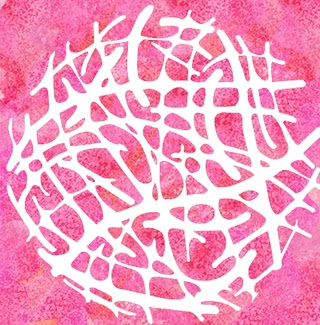
I wanted to try and use a stenciled background in a different way.  I also wanted to play with this newly released stencil called Scribble Sphere from ACLD.

So here's what I did to create my card.
  • I cut a piece of white cardstock and place it onto my Waffle Flower stencil mat.
  • Next, I pulled out some Distress Oxide colours that I thought would work well together.  They were:  Picked Raspberry, Carved Pumpkin and some Wilted Violet.  I inked over the Scribble Sphere stencil, blending those colours together.
  • I splattered with my white Posca pen and set aside to dry.
  • While that dried, I started looking through my stamp stash to find a good sentiment to use for the center.  I came across this older one from Penny Black and decided to use it.  I simply stamped it onto a piece of white cardstock and glued it onto a piece of pink cardstock that matched the stenciled piece.
  • I cut a piece of white cardstock that was 4 inches square.  
  • I cut the stenciled panel into 4 pieces and mitered the corners to create a frame, taking into consideration the size of my sentiment.  By mitering the corners, it broke up the pattern and added more interest rather then just cutting away the center.
  • I used some foam tape to add the mitered strips that would become my frame, then glued the sentiment into the center.
  • I glued that onto a card base that was 4 1/4 inches square and finally added 3 orange gems.  It 


Here is the stencil I used:

Discount Code for A Colorful Life Designs
(affiliate with not extra cost to you)

Thanks so much for coming by and taking a look.

Adding my card to these challenges:
Love to Craft- ANYTHING GOES


Supplies
Stamp- Write on Your Heart (Penny Black)
Inks- Versafine Clair, DOX
Paper- heavy white (Scribes Nook- Waterloo, Ont.)
Accessories and Tools- Scribble Sphere stencil (ACLD); Waffle Flower stencil mat;
TE Blending Brushes; white Posca pen, gems (Dollar Store) 

Sunday, 30 August 2020

Trace Your Stencil


Hello and Welcome.
It's my turn to host the TLC (Technique Lovers Challenge) over at Splitcoast Stampers this week.
So many of us are working on getting cards made to enter the Dare to Get Dirty Event, held each year for all the members there. 
I thought I would keep the challenge really simple and fun.
So my challenge will be 
Trace Your Stencil

So here's what I did to create my card.
  • I began with a piece of heavy white cardstock and a stencil from The Crafter's Workshop called Mini Joyful Sunflower.
  • I rubbed some Wilted Violet, Salty Ocean and some Blueprint Sketch on the back of my stencil, sprayed with water and pressed onto my card base creating a monoprint.  Remove the inky stencil soon after pressing it onto your paper or the ink may seep under the stencil.
  • I set the piece aside to dry completely before doing the next step.
  • When the piece was dry, I was left with a lovely print of the flower.
  • Using a black Signo pen, I traced around the inked outlines of the flower, giving it more of a defined presence and making the stenciled bkg look a bit different. *For more detailed stencils, lay the stencil back over the pattern and trace inside the stencil.
  • I splattered using my black Posca pen for interest.
  • Using a Spellbinder square die, I cut a frame to place over the flower image using pop dots.
  • I chose not to add a sentiment so I can use this card for so many different occasions.

Thanks so much for coming by and taking a look.

Adding my card to these challenges:
Simon Says Wed.- ANYTHING GOES
My Time to Craft- CLEAN AND SIMPLE
Krafty Chicks- ALL OCCASIONS


Supplies
Stamps- none
Inks- Distress Oxides
Paper- heavy white (Scribes Nook)
Accessories and Tools- Stencil (TCW); mister (TH); Signo #1 pen; Spellbinder Square die;
pop dots

Sunday, 4 March 2018

Lovely Magnolia- The Flower Challenge

Good Morning and Welcome.
Time for some fun at
This month our theme is:


For the challenge this month, we are offering a lovely prize to the winner.
This month, the talented EunJi Jung from DotBStamp, has offered two of her newest released digitals as a prize.  The DT's have also used these digitals to create our cards this month.
Please check out the wonderful creations over at the blog.

So onto my card.
I wanted this beautiful magnolia to be the star of the show so I printed it out onto heavy white cardstock, watercoloured it using my Zig Waterbrush markers, then fussy cut out the images.  
I mounted one flower over the other using pop-dots to help give it some dimension.
I stamped a piece of blue cardstock with Penny Black Script as a backdrop then mounted it all under a circle frame.  I added the sentiment using my Misti.


Thanks so much for coming by and taking a look.

Adding my card to these challenges:
Simon Says Wed.- ANYTHING GOES
Addicted to Stamps and More- ANYTHING GOES
Time Out- GO BOLD
Corrosive Challenge- ANYTHING GOES

Supplies
Stamps- Magnolia (digi- DotBStamp); Live Life (High Hopes); Script (Penny Black)
Ink- Salty Ocean Distress; Tuxedo Black Memento
Paper- heavy white (local store)
Accessories and Tools- Misti; circle die (Spellbinders); Zig Waterbrush Markers; pop-dots