Showing posts with label ledger. Show all posts

Saturday, 29 January 2022

Heavy Heart


Welcome
Happy Saturday.
Hoping to get in some crafting time today.
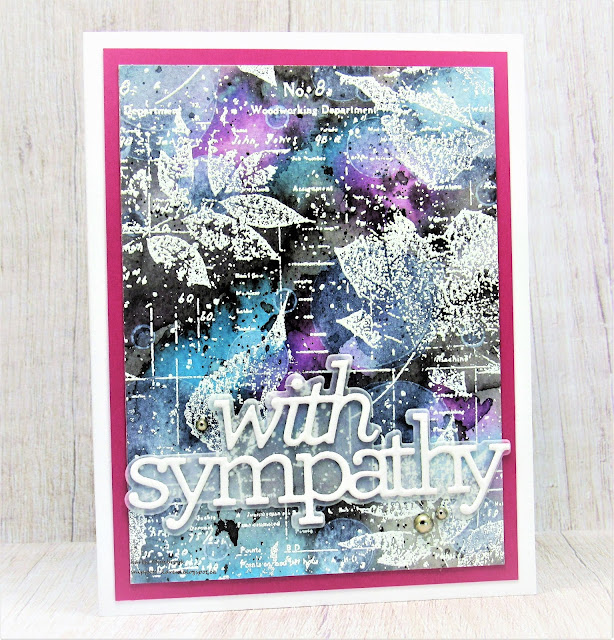
Meet today's card.  I'm trying to add to my stash of sympathy cards and this is what I came up with.

So here's what I did to create my card.
  • I began by cutting a piece of white cardstock 3 3/4 x 5".  I like that size as there is room to mat it before adding it onto a card base.
  • I got out a variety of Distress Oxide inks and using my Blending Brushes, just started blending away.  Colours used:  Black Soot, Picked Raspberry, Peacock Feathers, Blueprint Sketch, Weathered Wood
  • When I was happy with the inking, I spritzed water over the whole panel lifting some of the ink and blending other areas and then set it aside to dry.
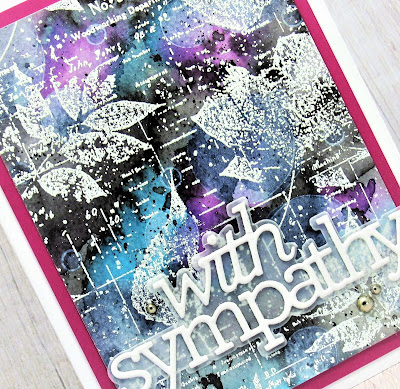
  • I placed the dry panel into my Misti, rubbed with my Anti-static bag and stamped with this beautiful Leaf Ledger stamp using some Versamark ink and white heat embossed.
  • I splattered with my white Posca pen.
  • I glued the panel onto a piece of cardstock, then onto a white card base.
  • I die cut the new-to-me sentiment with white cardstock, then cut the outline with a piece of vellum and glued them together, then onto my card front.  
  • I added some silver gems that are most difficult to see in the photo.

Thanks again so much for coming by and taking a look.

Adding my card to these challenges:
Simon Says Wed.- ANYTHING GOES
Stamps & Fun= Creativity
A Place to Start- ANYTHING GOES

Supplies
Stamps- Leaf Ledger (Impression Obsession)
Inks- Versamark; Distress Oxide
Paper- Vellum; white cs- (Scribes Nook- Waterloo, Ont.)
Accessories and Tools- Lawn Fawn white eb powder; heat tool; Misti; 
white Posca pen; TE Blending Brushes; Sympathy die (SSS); Anti Static bag

Saturday, 7 August 2021

From My Garden


Welcome
So happy to have the weekend to play.
I hope you aren't getting sick of seeing all the Gel Plate leaf prints I have been making.
I made a bunch of them while playing so now it's time to make them into cards.
This was a super simple one using my Distress Oxide inks.

So here's what I did to create my card.
  • I cut my white cardstock for the panel, then pulled out my Gel Plate, brayer and some Distress Oxide inks: Rustic Wilderness, Evergreen Bough.
  • Next, I took the fern and laid it flat onto my work surface.  I inked up my brayer with some Rustic Wilderness DOX ink, being sure to cover all the surfaces and then laid that onto my plate pressing over it with a piece of scrap paper to make good contact.  I carefully lifted the leaf off and pressed my cardstock onto the plate to pick up the impression.
  • Since this was going to be a simple print, I wanted to add some interest to the background, so I inked up the Leaf Ledger background stamp from Impression Obsession with the inks mentioned above and stamped directly onto my plate, then rubbed the leaf print back onto the plate.  >>watch that your stamp doesn't slide or you won't get a good image impression<<  
  • I placed the panel into my Misti and stamped the sentiment, then splattered the whole panel with my black Posca pen.
  • I mounted it onto a white card base.....easy right?


Thanks so much for coming by and taking a look.

Supplies
Stamps- Scripted Bold Sentiments (Pinkfresh Studios); Leaf Ledger (IO)
Inks- Distress Oxides (mentioned above); Versafine Clair Nocture
Paper- heavy white (Scribes Nook- Waterloo, Ont.)
Accessories and Tools- Gel Plate; Misti (My Sweet Petunia); leaf from garden; black Posca pen