Showing posts with label note. Show all posts

Friday, 28 February 2025

Spiral Frame

Good Morning
Today's card features the newly released stencil from A Colorful Life Designs called 

So, here's what I did to create my card.
  • I've been going through my stash of inky background or failed attempts that I save to use for the future. I found this background in my stash that I had done using the Fur Stencil on my Gel Plate with some Tumbled Glass Distress Oxide ink. I liked the look so decided to start with that.
  • I placed the Spiral Frame stencil over my previously inked background and inked it up with some Tumbled Glass and some Shaded Lilac DOX ink.
  • I move the stencil around and inked again until I was happy with the coverage.
  • Next, I die cut the sentiment with some purple cardstock and then cut again 4 x's with some white cardstock and glued them together stacking them.
  • I glued the stenciled card front onto a piece of white cardstock, then purple and then onto an A2 sized card base. 
  • I glued the sentiment to the center of my card and added some purple gems.

Here are the stencils I used:


My Discount Code for Your Entire Order from A Colorful Life Designs:

Thanks so much for coming by and taking a look.

Adding my card to these challenges:
Simon Says Wed.- ANYTHING GOES

Supplies
Stamps- none
Inks- DOX
Paper- heavy white (Scribes Nook- Waterloo, Ont.)
Accessories and Tools- stencils and gems (A Colorful Life Designs); TE Blending Brushes;
Just a Note Die (Mama Elephant); Gel plate; Speedball Brayer

Tuesday, 13 August 2024

Cheerful Note


Good Morning
Just a note card today featuring the newly released stencil from A Colorful Life Designs called:

So, here's what I did to create my card.
  • I placed the Changing Triangles stencil over a piece of white cardstock. This stencil has so many possibilities.  It is easy to ink just portions or even cut it up into pieces as you will see in an upcoming card I made.
  • I wanted each triangle area to be a different colour, so I masked the first ones off, inked and then continued with that process until the card front was all stenciled.  I used these Distress Oxide colours:  Fossilized Amber, Ripe Persimmon, Picked Raspberry and Peacock Feathers.
  • I set that aside and die cut the sentiment words from some blue cardstock.
  • Next, I die cut the word shadow right from the center of my stenciled card front and glued the 'just a note' words onto that.
  • I glued the card front onto a piece of blue cardstock and then onto an A2 sized card base.
  • I used some foam tape to pop the sentiment back over the front, matching it up in place.

Here is the stencil I used:

Discount Code for A Colorful Life Designs
(Affiliate with no extra cost to you) 

Thanks a lot for coming by and taking a look.

Adding my card to these challenges:
Little Red Wagon- Make it MASCULINE
Crafts Galore Encore- ANYTHING GOES
Love to Craft- ANYTHING GOES

Supplies
Stamps- none
Inks- Distress Oxides
Paper- heavy white (Scribes Nook- Waterloo, Ont.)
Accessories and Tools- stencil (A Colorful Life Designs); TE Blending Brushes;
Just Saying die (Concord and 9th)

Thursday, 8 August 2024

Big and Little Lines

Hello and Welcome
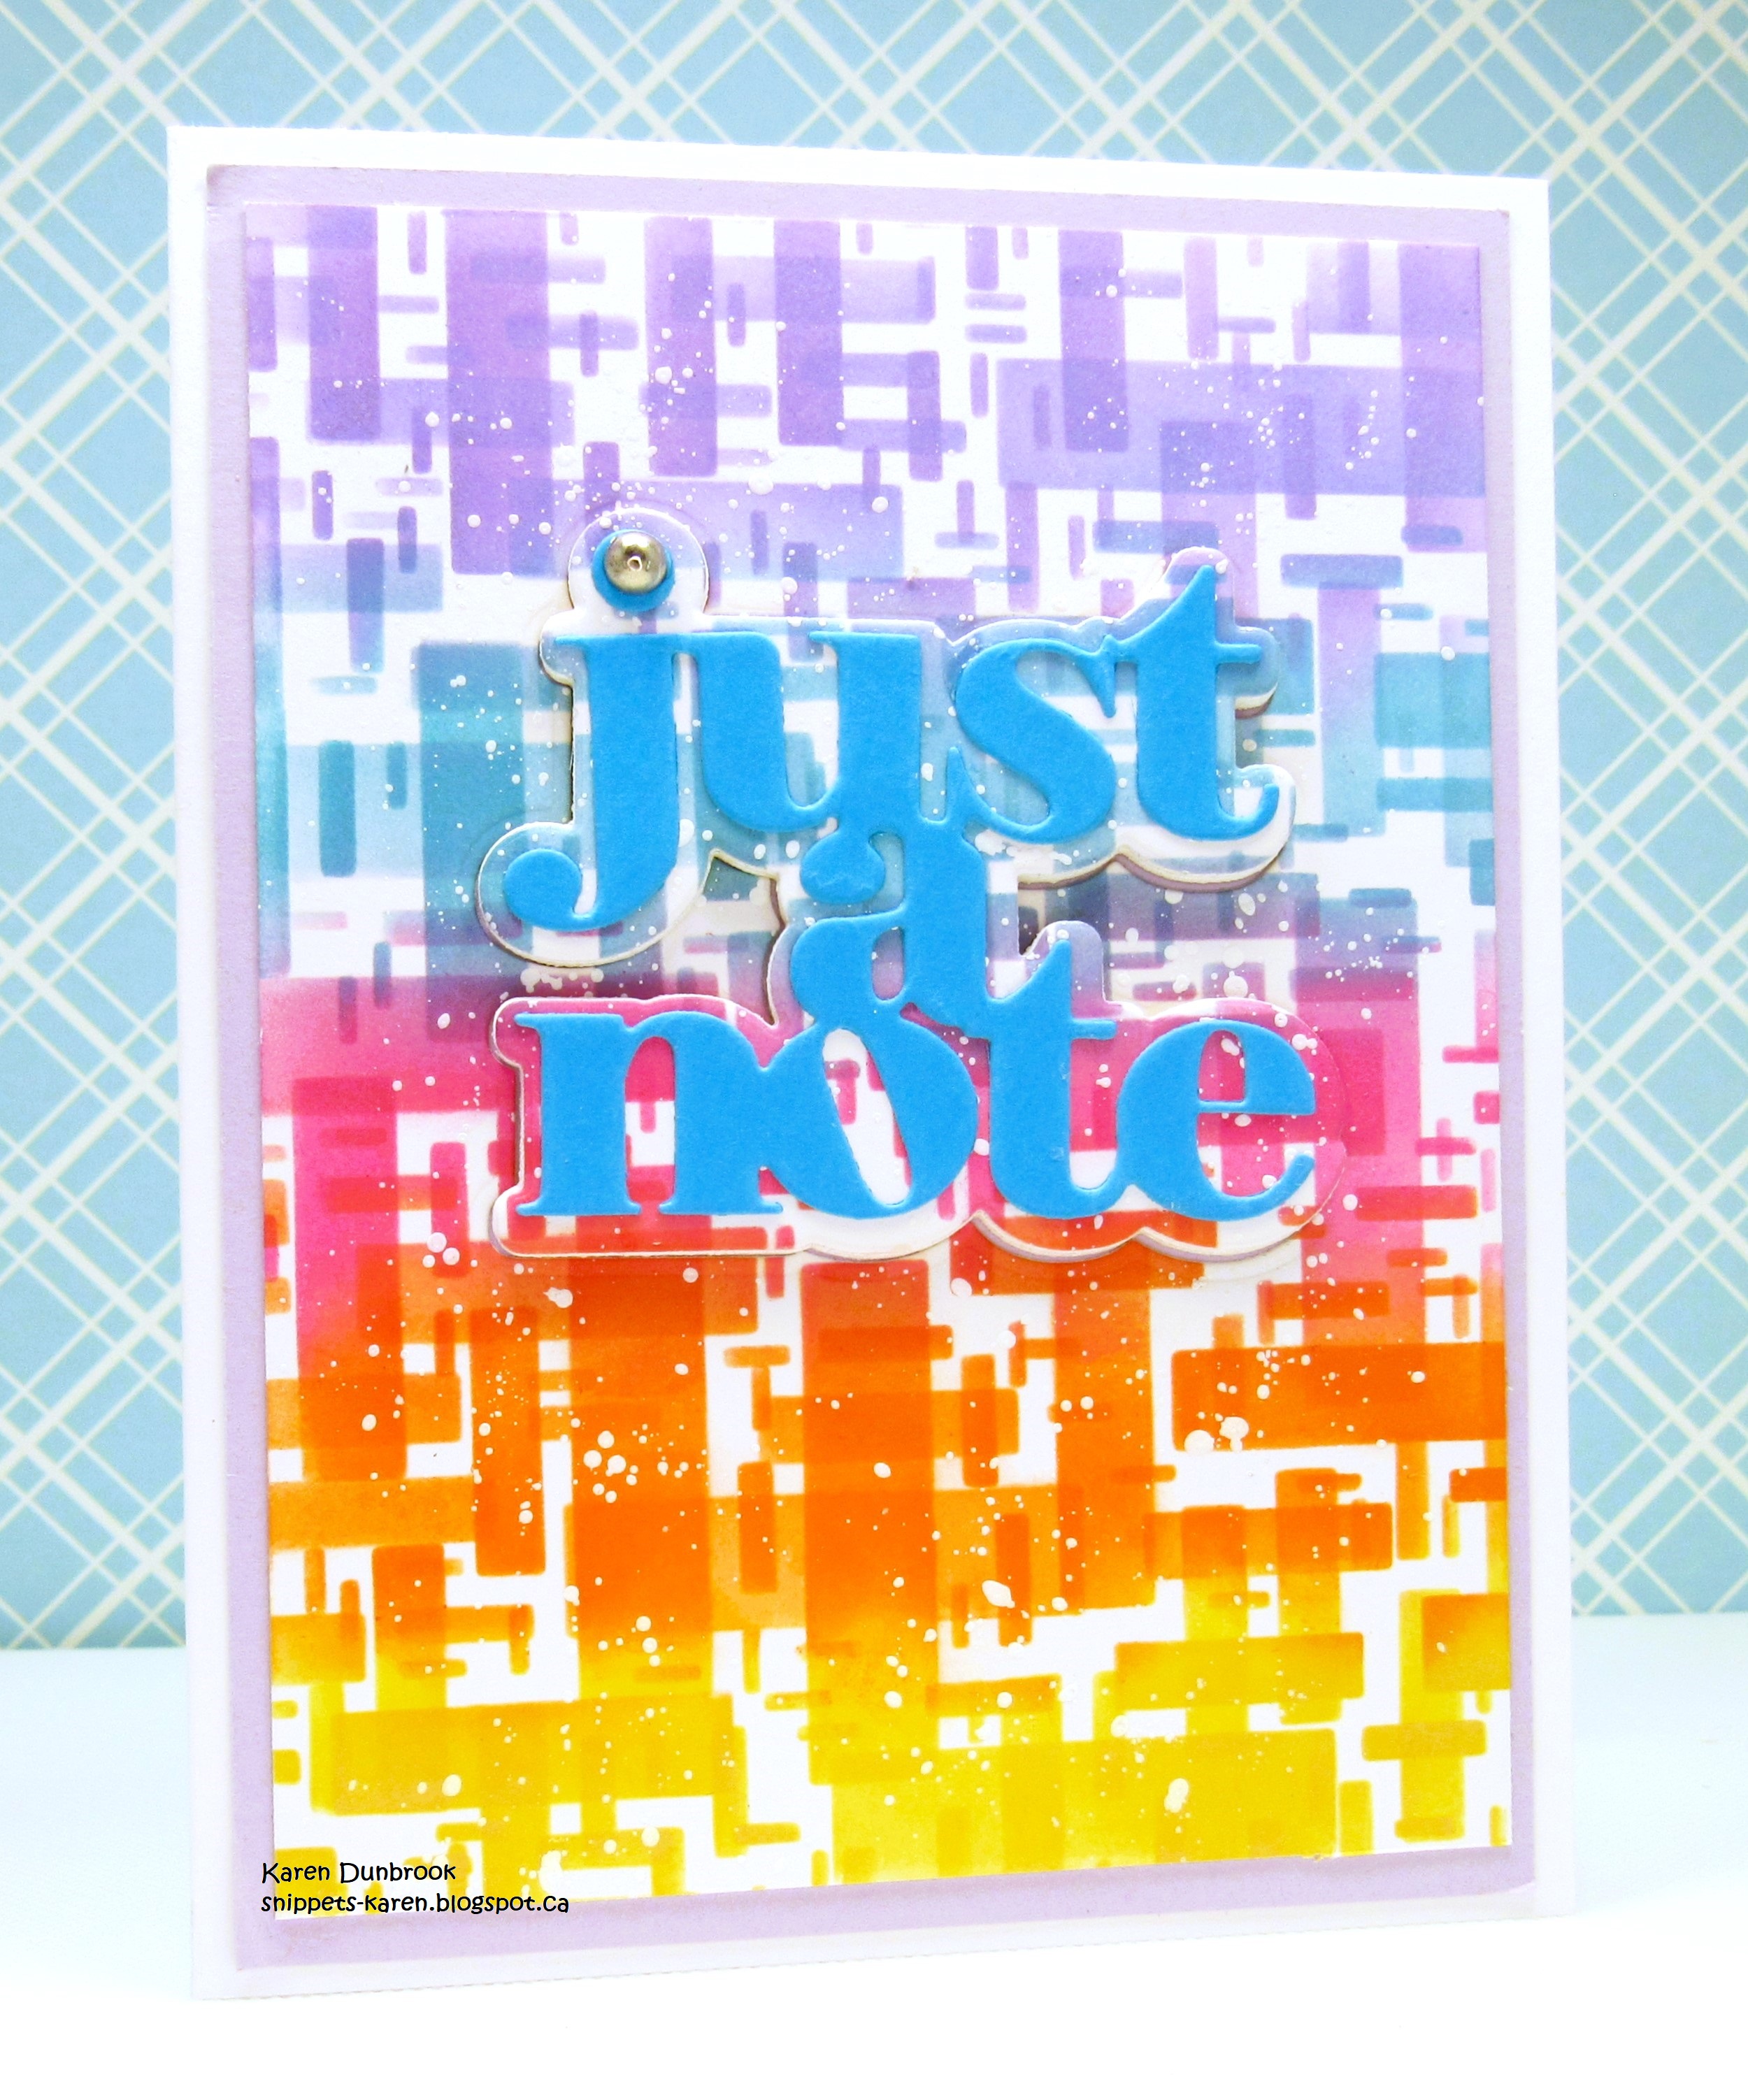
Today's card is featuring a new stencil for August from A Colorful Life Designs called

So, here's what I did to create my card.
  • I placed a piece of white cardstock onto my Make Art Station and positioned the Big and Little Lines stencil over that.  
  • Next, I inked starting at the top and moving my way down with these Distress Oxide colours:  Shaded Lilac; Peacock Feathers; Picked Raspberry; Ripe Persimmon and some Fossilized Amber.
  • I lifted the stencil off, wiped it and then flipped it onto it's side.  I inked again using the same colours as mentioned above.
  • After I removed the stencil, I splattered with my white Posca pen and set aside to dry.
  • While the panel dried, I die cut the sentiment letters from some blue cardstock, then die cut the shadow from the center of my card front panel.  I glued the letters onto the shadow.
  • I glued my stenciled card front onto a piece of pale purple cardstock, then onto an A2 sized white card base.
  • I used some foam tape to pop the sentiment back into place over the card front and added a silver gem to dot the 'i'.

Here is the stencil I used:

Discount Code for A Colorful Life Designs
(Affiliate with no extra cost to you) 

Thanks so very much for coming by and taking a look.

Adding my card to these challenges:
Love to Craft- ANYTHING GOES
Crafts Galore Encore- ANYTHING GOES
(rainbow colours)

Supplies
Stamps- none
Inks- DOX
Paper- heavy white (Scribes Nook- Waterloo, Ont.)
Accessories and Tools- stencil (A Colorful Life Designs); Make Art Station (Ranger);
Small Blending Brushes (Amazon); silver gem; Just a Note (Concord and 9th)

Wednesday, 15 May 2024

Paper Piercing with Stencils

Good Morning
A Colorful Life Designs has just released some great new stencils for May and when I saw this one, I knew right away what I wanted to do to create with it.

Meet the new stencil called:

So, here's what I did to create my card.
  • I cut a piece of black cardstock and placed the Airy Swirls over my paper.
  • Next, instead of inking up the stencil, I got out my paper piercing tool and I poked holes through the stencil onto my cardstock.  Just another way to get more mileage using your stencils.
  • I removed the stencil and glued the black cardstock onto a white A2 card base.
  • I die cut the sentiment in black and the word shadow in white and glued them together.
  • I added the sentiment to the card front with some foam tape and then added 3 silver gems.

Here is the stencil I used:
*THIS STENCIL IS ON SALE FOR ONE WEEK ONLY FROM $6.99 down to $4.00*
(you can also use my code for even more of a discount)

Discount Code for A Colorful Life Designs
(Affiliate with no extra cost to you) 

Thanks so much for coming by and taking a look.

Adding my card to these challenges:
Simon Says Wed.- USE DIE CUTS
(option: Girly)
Daisy Chain- BOYS/MEN


Supplies
Stamps- none
Inks- none
Paper- black and heavy white (Scribes Nook- Waterloo, Ont.)
Accessories and Tools- stencil (A Colorful Life Designs); piercing tool; 
Just Saying dies (Concord and 9th); silver gems

Friday, 29 May 2020

Note Cards


Welcome!
I hope you are keeping well and safe during these crazy times.
Still playing around with my Gel Plate and experimenting with different types of paints.
I did manage to get to the Dollar Store and picked up some Acrylic paints.  They are pretty watery and thin but look at the results they created on the Gel Plate.  Kind of a bubble looking background that I thought looked great.

So here's what I did to create my note cards.
Like I mentioned above, I got out some Dollar Store paint and brayered it onto my Gel Plate.  
Next, I laid on a stencil and rubbed a piece of scrap paper over it to remove some of the paint. 
I lifted the stencil and then pulled the print. 
I repeated that same process with the other stencil.  It is a great way to use your stencils in a different way, giving the impressions a new look.
When they were dry, I cut them down and mounted them onto a piece of light blue cardstock, then onto a heavy white card base.  I added a shiny enamel dot to the centers for interest.


stencil used:  


stencil used:


Thanks so much for coming by and taking a look.

Adding my cards to these challenges:
Simon Says- ANYTHING GOES
Time Out- FREE


Discount Code for A Colorful Life Designs

Supplies
Stamps- none
Inks- Acrylic Paint (Dollar Store)
Paper- heavy white (Scribes Nook)
Accessories and Tools- Gel Plate, Stencils- A Colorful Life Designs, brayer, enamel dot