Sunday, 14 February 2021

Friends


Good Morning
I hope all is well in your part of the world.
Happy Valentine's Day....great day to show our family and friend how much we love them.
Where I live, we are still in lockdown and I am missing my friends so much!
I still had my Vicki Boutin Art Crayons out from the other day, so I decided to use them again to create this background.  I love how this turned out.

So here's what I did to create my card.
  • I began with a card panel cut from some heavy white cardstock.  I rubbed some of the yellow Art Crayon onto a piece of acetate, sprayed with a generous amount of water and blended with a paint brush.  When it was all mixed and diluted, I pressed onto my card front and dried.
  • I used some greens and blues to add the additional colours.  **Vicki's crayons come in 3 different sets; Neutrals (brown, grey), Warm (reds, orange, yellow) and Cool (blues, greens).  The great thing about these crayons is that you can mix them to create your own custom colours.**
  • I added some more Art Crayon to my acetate sheet, diluted that and used it as a stamp pad to add the background letters using the Faded Text stamp.
  • I dried the panel completely, then placed it into my Misti and stamped the flowers from STAMPlorations with some Versafine Clair ink.
  • I stamped the sentiment from Impression Obsession to the one side.
  • Using my black Posca pen, I splattered with black, then mounted onto a piece of coordinating cardstock and then onto a heavy white card base.


Thanks so much for coming by and taking a look.

Supplies
Stamps- Beautiful You (STAMPlorations); Friends (IO)
Inks- Vicki Boutin Art Crayons; Versafine Clair Noir
Paper- heavy white (Scribes Nook, Waterloo, Ontario)
Accessories and Tools- Misti (My Sweet Petunia); sheet of acetate; Posca pen

Friday, 12 February 2021

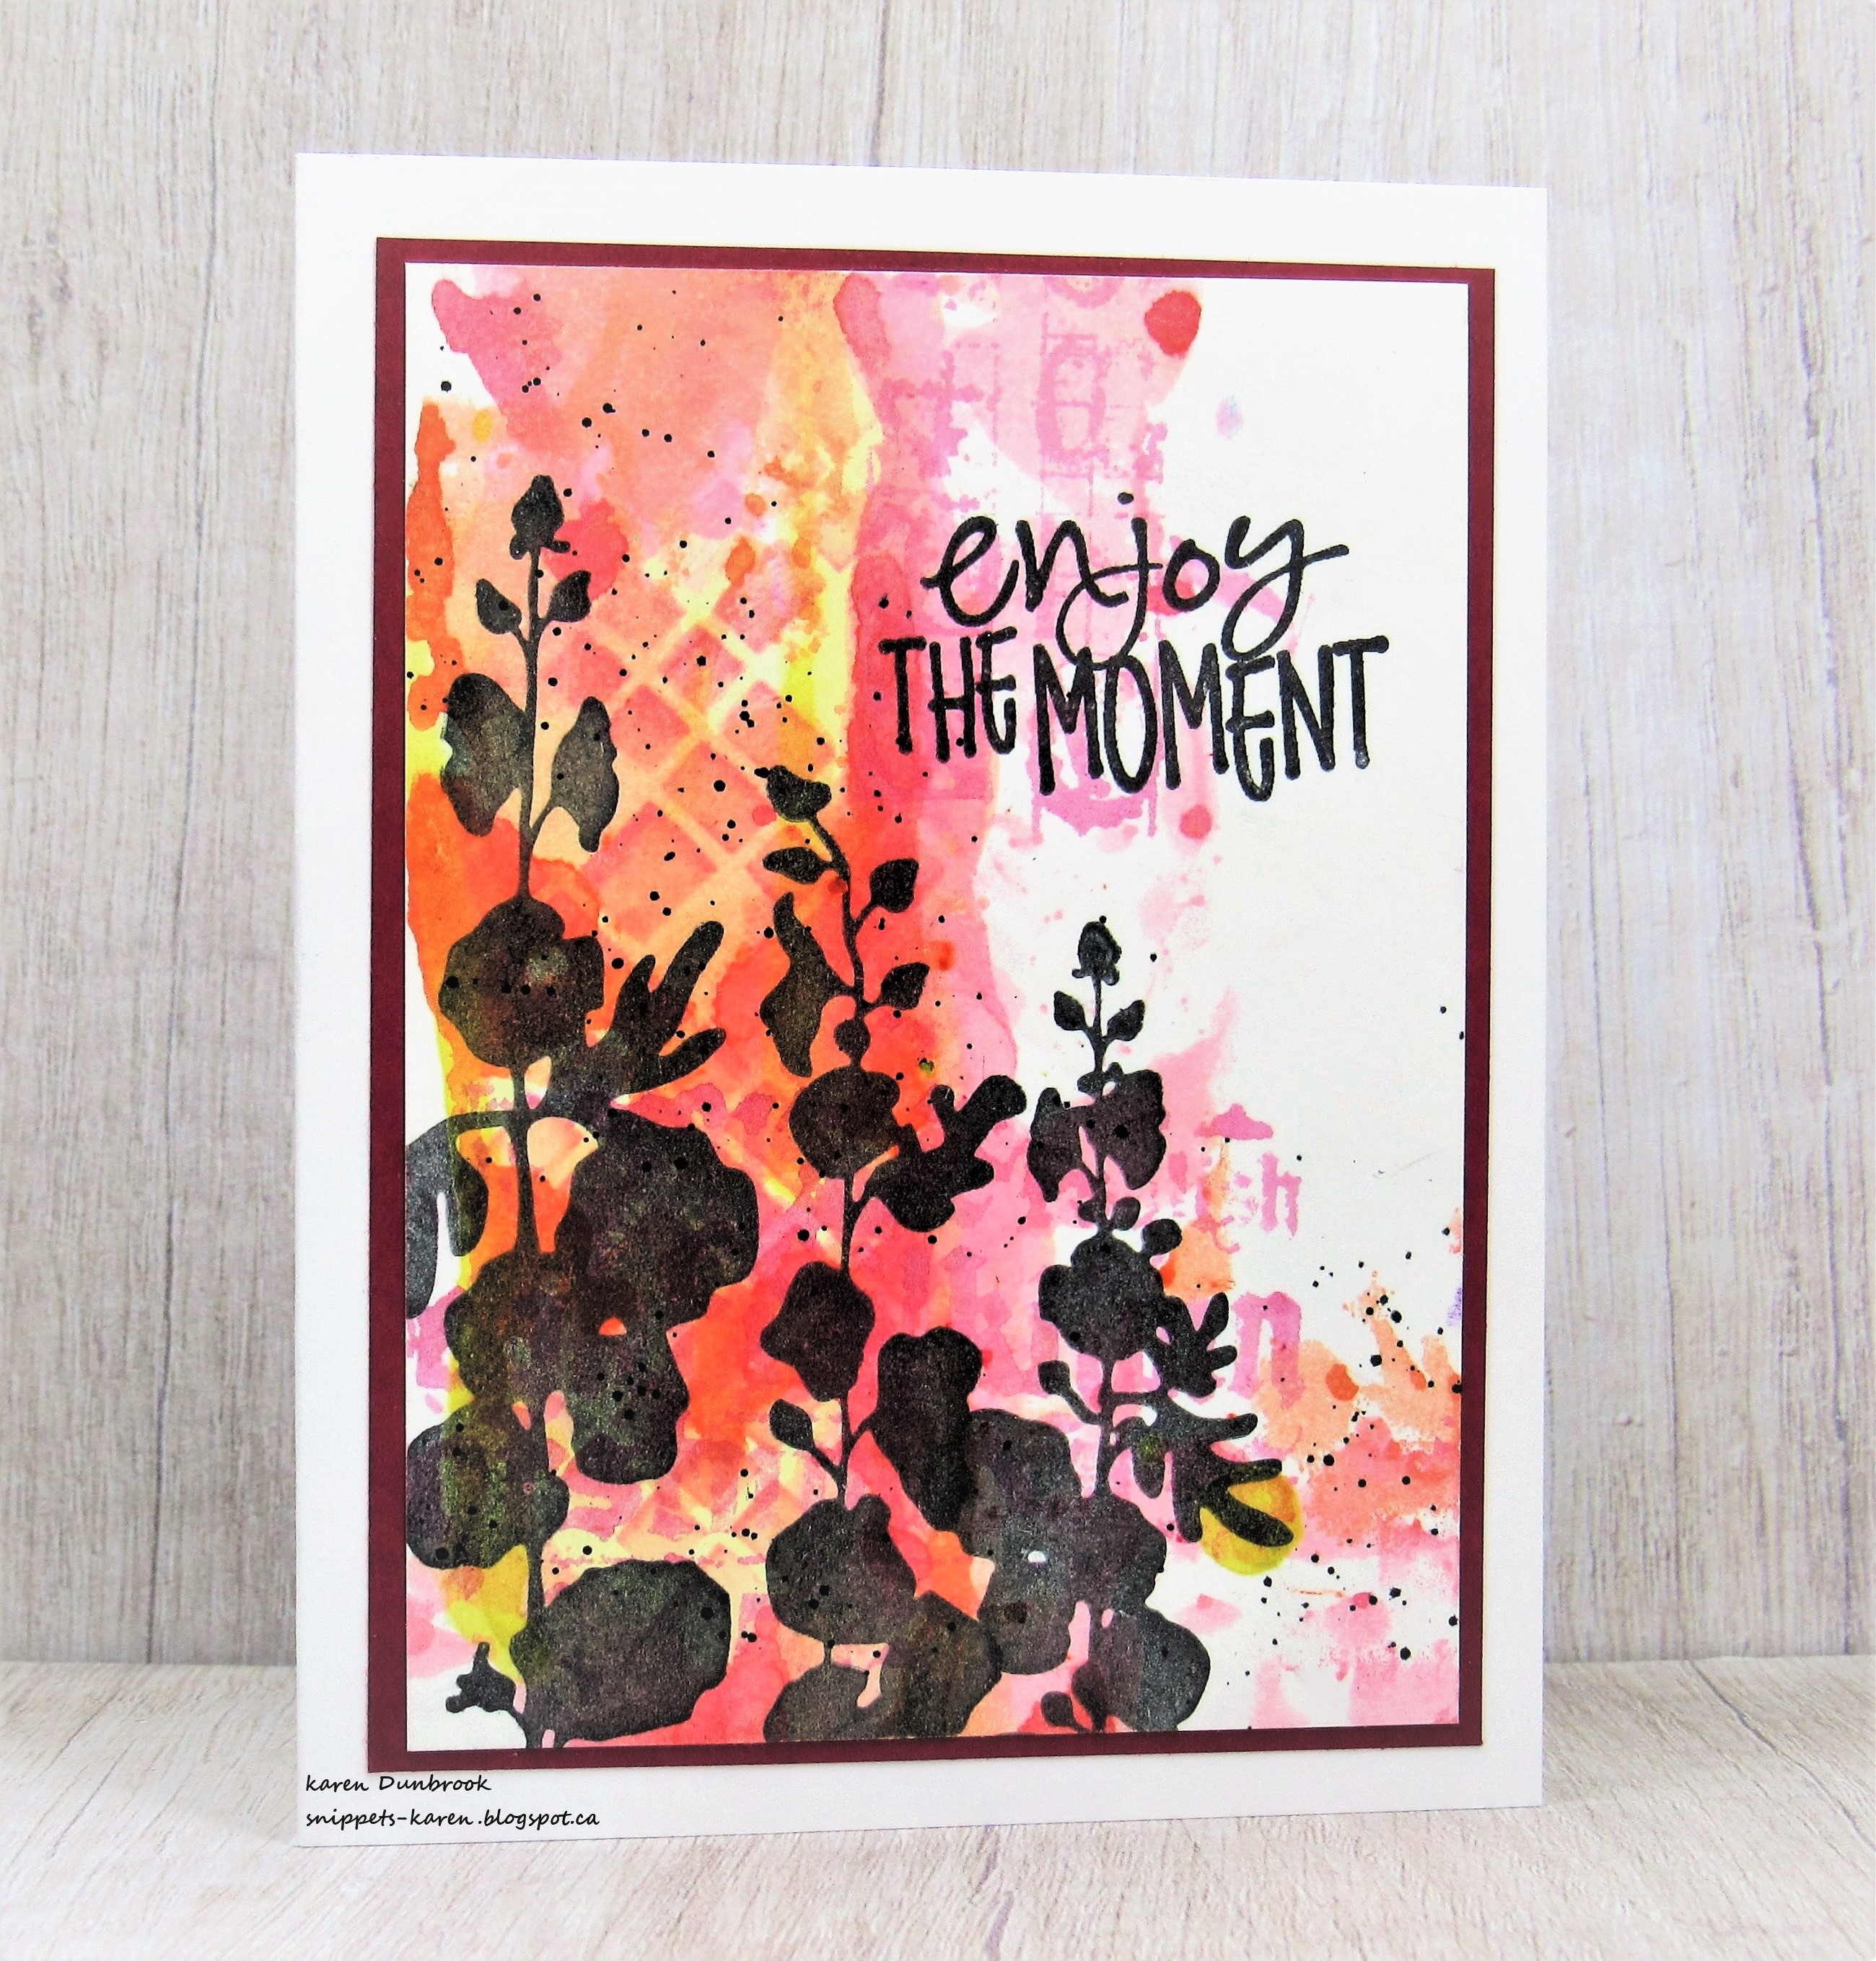
Enjoying the Moment


Hello and Welcome
Meet today's card.  A real throwback for sure.
I made it for a challenge over at Splitcoast Stampers; What's Old is New Again.  We were to find some of our oldest stamps and use them in a new way.
I looked through my stamps and came across these hollyhocks that I still love.  They are from a company that I did some work for years and years ago but are no longer in business.
The sentiment is also from a long gone company but I love it.

So here's what I did to create my card.
  • I began with a piece of white cardstock and my Vicki Boutin Art Crayons.  Her crayons are very highly pigmented and are so fun and easy to work with.
  • I took out a piece of acetate and rubbed the crayons onto it.  I sprayed with a generous amount of water, then pressed the wet ink onto my card panel.  I repeated that process a few times until I was happy with the inking.
  • I rubbed some more of the Art Crayon onto my acetate sheet and sprayed with water, then using a stencil brush and the Diagonal Weave Stencil from A Colorful Life Designs, I added more of the ink.  There was a bit of ink left on my acetate sheet, so I pressed one of the stamps from the Faded Text stamp set by Tim Holtz  into the wet ink and added it to the background to give more interest.  I dried the panel completely before going onto the next step.
  • I placed the panel into my Misti and inked up the Hollyhocks from Innovative Stamp Creations with some Versafine Clair ink.  I had to repeat stamp them so they would ink over the Art Crayons.
  • I stamped the sentiment from Daisy Bucket and then splattered using my black Posca pen.
  • I mounted the piece onto some matching cardstock, then onto a heavy white card base.


Here is the stencil I used.

Discount Code for A Colorful Life Designs
Thanks so much for coming by and taking a look.


Supplies
Stamps- Garden (Innovative Stamp Creations-OUT OF BUSINESS); 
Enjoy (Daisy Bucket- OUT OF BUSINESS); Faded Text (TH)
Inks- Vicki Boutin Art Crayons; Versafine Clair
Paper- heavy white (Scribes Nook, Waterloo, Ontario)
Accessories and Tools- Misti (My Sweet Petunia); Diagonal Weave stencil (ACLD); 
Posca pen; acetate sheet

Tuesday, 9 February 2021

Layered Hearts


Good Morning.
So happy to be back with a fun card.  With limited time on my hands, I just love and so appreciate the creative time I do get.
Here's a card I created with Valentine's Day on my mind.  Super simple and fun.

So here's what I did to create my card.
  • I began with a piece of heavy white cardstock.  I positioned the Marvelous Rectangle Mask from A Colorful Life Designs over my panel as I wanted to be left with a clean white border. There are a number of sizes of rectangle stencils and masks included in that set.
  • Next. I pulled out my Hearts Marvelous Mask also from ACLD.  These stencils include the masks as well and that's is what I used for the background.  I chose a size that would fit nicely over the masked panel as there are numerous sizes in that set too.
  • Starting at the top of the panel and using the heart mask, I sponged on some Peacock Feathers Distress Oxide inks along the edges of the heart.  I moved the heart over slightly and sponged on some more ink.
  • I repeated that process, moving the heart mask each time down the card panel and sponged using some Salty Ocean then some Blueprint Sketch DOX inks next.  *I used my small finger sponges instead of my blending brushes as it was such a small area.*
  • When I was happy with the inking, I die cut the Heart from Hero Arts right from the center of the card panel.
  • I placed the die cut heart into my Misti and stamped the sentiment from Hampton Arts in the center of the heart and clear heat embossed it.  
  • To add more interest and to help make the heart pop, I pierced around the outer edge.
  • I glued the main panel onto a piece of matching cardstock, then pop dotted the heart back into place.


Thanks so much for coming by and taking a look.

Adding my card to these challenges:
Little Red Wagon- TOTAL ECLIPSE OF THE HEART
Simon Says Wed.- LOVE IS IN THE AIR


Discount Code for A Colorful Life Designs

Supplies
Stamps- Love (Hampton Arts- Doodlebug)
Inks- Versafine Clair; DOX
Paper- heavy white (Scribes Nook, Waterloo, Ontario)
Accessories and Tools- Rectangle Marvelous Masks (ACLD); Heart Marvelous Masks (ACLD); 
Misti (My Sweet Petunia); heart die (HA); Tim Holtz Piercing Tool; pop dots;
finger foam sponging tool; clear eb powder


Sunday, 31 January 2021

Special Thanks


Good Morning!
I'm back today with a thank-you card I made using the side fold card design that I really like.
It makes for a change and creates a very sturdy card.  

So here's what I did to create my card.
  • I began by going through my stash.  As I have mentioned in some of my previous posts, I really need to use some of the backgrounds that I have created that are just sitting in a bin.  I found this one I had done with Alcohol inks and Rubbing Alcohol and I was ready to make something with it.
  • Next, I put together my card base to create the side fold card.  To do that please see my instructions HERE.
  • I cut the Alcohol inked piece into a square, glued that onto a piece of navy cardstock, then onto the main card front.  I repeated that process with the small side piece.
  • I die cut the Geometric Cutout 1 from Impression Obsession with some white cardstock.  It cuts the pattern into the paper, then I used a circle die to cut it round and then placed it into my Misti.
  • I stamped one of the shapes from the Hero Arts set called Tie Dye right over the center of the die cut using some coordinating Distress Oxide inks.  
  • I stamped the 'Thanks' from the same set onto some white cardstock and pop dotted that over the center of the circle.
  • To finish off my card, I pop dotted the finished die cut over the inked background.


Thanks so much for coming by and taking a look.

Adding my card to these challenges:
Simon Says Wed.- ANYTHING GOES
The Creative Crafters- ANYTHING GOES
The Sisterhood of Crafters- CREATE YOUR BACKGROUND


Supplies
Stamps- Tie Dye (HA)
Inks- DOX; Alcohol Inks (Ranger); Versafine Clair
Paper- heavy white (Scribes Nook...my local store); Yupo paper
Accessories and Tools- Misti (My Sweet Petunia); Geometric Cutout die (IO); pop dots;
rubbing alcohol (99%); circle die (Spellbinders)


Tuesday, 19 January 2021

Remember


Hello and Welcome
Meet today's card.  I need to make some sympathy cards to have on hand; always a tough one to create in the moment.

So here's what I did to create my card.
  • I began with a piece of heavy white cardstock.  I sprinkled some green Brushos onto the bottom corner of my panel, then sprayed with a bit of water to activate the colour crystals.  Using a straw, I blew the inks in an upward motion.  I repeated that process using some blues next.  * For those of you that are not familiar with Brushos, they are highly pigments granules of colour that are activated with water.  You can sprinkle them onto your paper or use them diluted to watercolour*
  • When I was happy with all the inking, I let the panel dry completely.
  • Next, I laid the Flower Head stencil from A Colorful Life Designs over my inked panel with some Peacock Feathers Distress Oxide ink.  I just love the look it gave.
  • I placed the panel into my Misti to stamp the new to me sentiment from Impression Obsession with some Versafine Clair and clear heat embossed it.
  • Using my black Posca pen, I splattered the corner of my flower right over what would be the flower center.  I added some dots to that as well using my white Posca pen.
  • I added it to a piece of navy cardstock, then onto a heavy white card base.


Thanks so very much for coming by and taking a look.


Discount Code for A Colorful Life Designs

Supplies
Stamps- Happy Memory (Impression Obsession)
Inks- DOX, Brushos, Versafine Clair
Paper- heavy white (Scribes Nook)
Accessories and Tools- Flower Head stencil (ACLD); straw; Posca pens; clear eb powder;
heat tool (Ranger)