Friday, 8 September 2023

Close at Heart

Welcome
Today's card features the beautiful, new for September Artichoke Rose stencil from A Colorful Life Designs.
I paired it up with an older stencil called Simple Grid to create my card.

So, here's what I did to create my card.
  • I placed a piece of white cardstock onto my Make Art Station and positioned the rose part of the Artichoke Rose stencil in the bottom right hand corner as I wanted it to be the largest on my card front.
  • Using some Picked Raspberry Distress Oxide ink, I blended that into the flower center and then added some Festive Berries DOX ink to the rest of the flower.
  • I moved the flower to the side and then to the top corner using the same colours of inks.
  • I removed the stencil and added the square details to the open white areas using the Simple Grid stencil and some more of the Picked Raspberry DOX ink.
  • I placed the stenciled panel into my Misti to stamp the sentiment and clear heat embossed it.
  • I splattered with my white Posca pen.
  • I glued the dried panel onto a piece of deep red cardstock although it looks more blackish in the photo, then onto an A2 sized card base.
  • I added 3 black gems around the sentiment.

Here are the stencils I used:


Discount Code for A Colorful Life Designs
(Affiliate with no extra cost to you) 

Thanks so much for taking a look.

Adding my card to these challenges:
Little Red Wagon- RECTANGLE OR SQUARE
The Crafty Addicts- ANYTHING GOES
Simon Says Wed.- STAMP IT

Supplies
Stamp- Side by Side (IO- retired)
Inks- Versafine Clair; DOX
Paper- heavy white (Scribes Nook- Waterloo, Ont.)
Accessories and Tools- stencils (A Colorful Life Designs); TE Blending Brushes;
Make Art Station (Ranger); black gems; white Posca pen

Thursday, 7 September 2023

With Much Sympathy


Welcome
Sympathy cards are never easy to make, so that's why I like to always have some on hand.
I like to keep mine very simple and not overdone.

So, here's what I did to create my card.
  • I cut a piece of white cardstock and placed it into my Misti to stamp the tree line.
  • I clear heat embossed the trees as I wanted to add some water and inking and didn't want the ink to smear.
  • Next, I rubbed some Lucky Clover, Rustic Wilderness and some Tumbled Glass Distress Oxide ink onto a piece of acetate. 
  • Using a damp sponge, I dabbed into the ink and then dabbed over and around the embossed trees.  It gave a lovely mottled look to the background.
  • When I was happy with the sponging, I splattered with a black Posca pen to add interest.
  • While that all dried, I stamped the sentiment onto a piece of white cardstock and rubbed some Tumbled Glass DOX ink along the edges.
  • I glued the tree panel onto a piece of blue cardstock, then onto an A2 sized card base.
  • I added the sentiment with some foam tape to pop it up.

Thanks so much for coming by and taking a look.

Adding my card to these challenges:
Simon Says Wed.- STAMP IT
Little Red Wagon- SQUARE or RECTANGLE
Simon Says Mon.- STAMP IT

Supplies
Stamps- Tree Line (Impression Obsession); More Sentiments (Avery Elle)
Inks- DOX; Versafine Clair
Paper- heavy white (Scribes Nook- Waterloo, Ont.)
Accessories and Tools- Misti (My Sweet Petunia); sponge; piece of acetate; 
black Posca pen

Tuesday, 5 September 2023

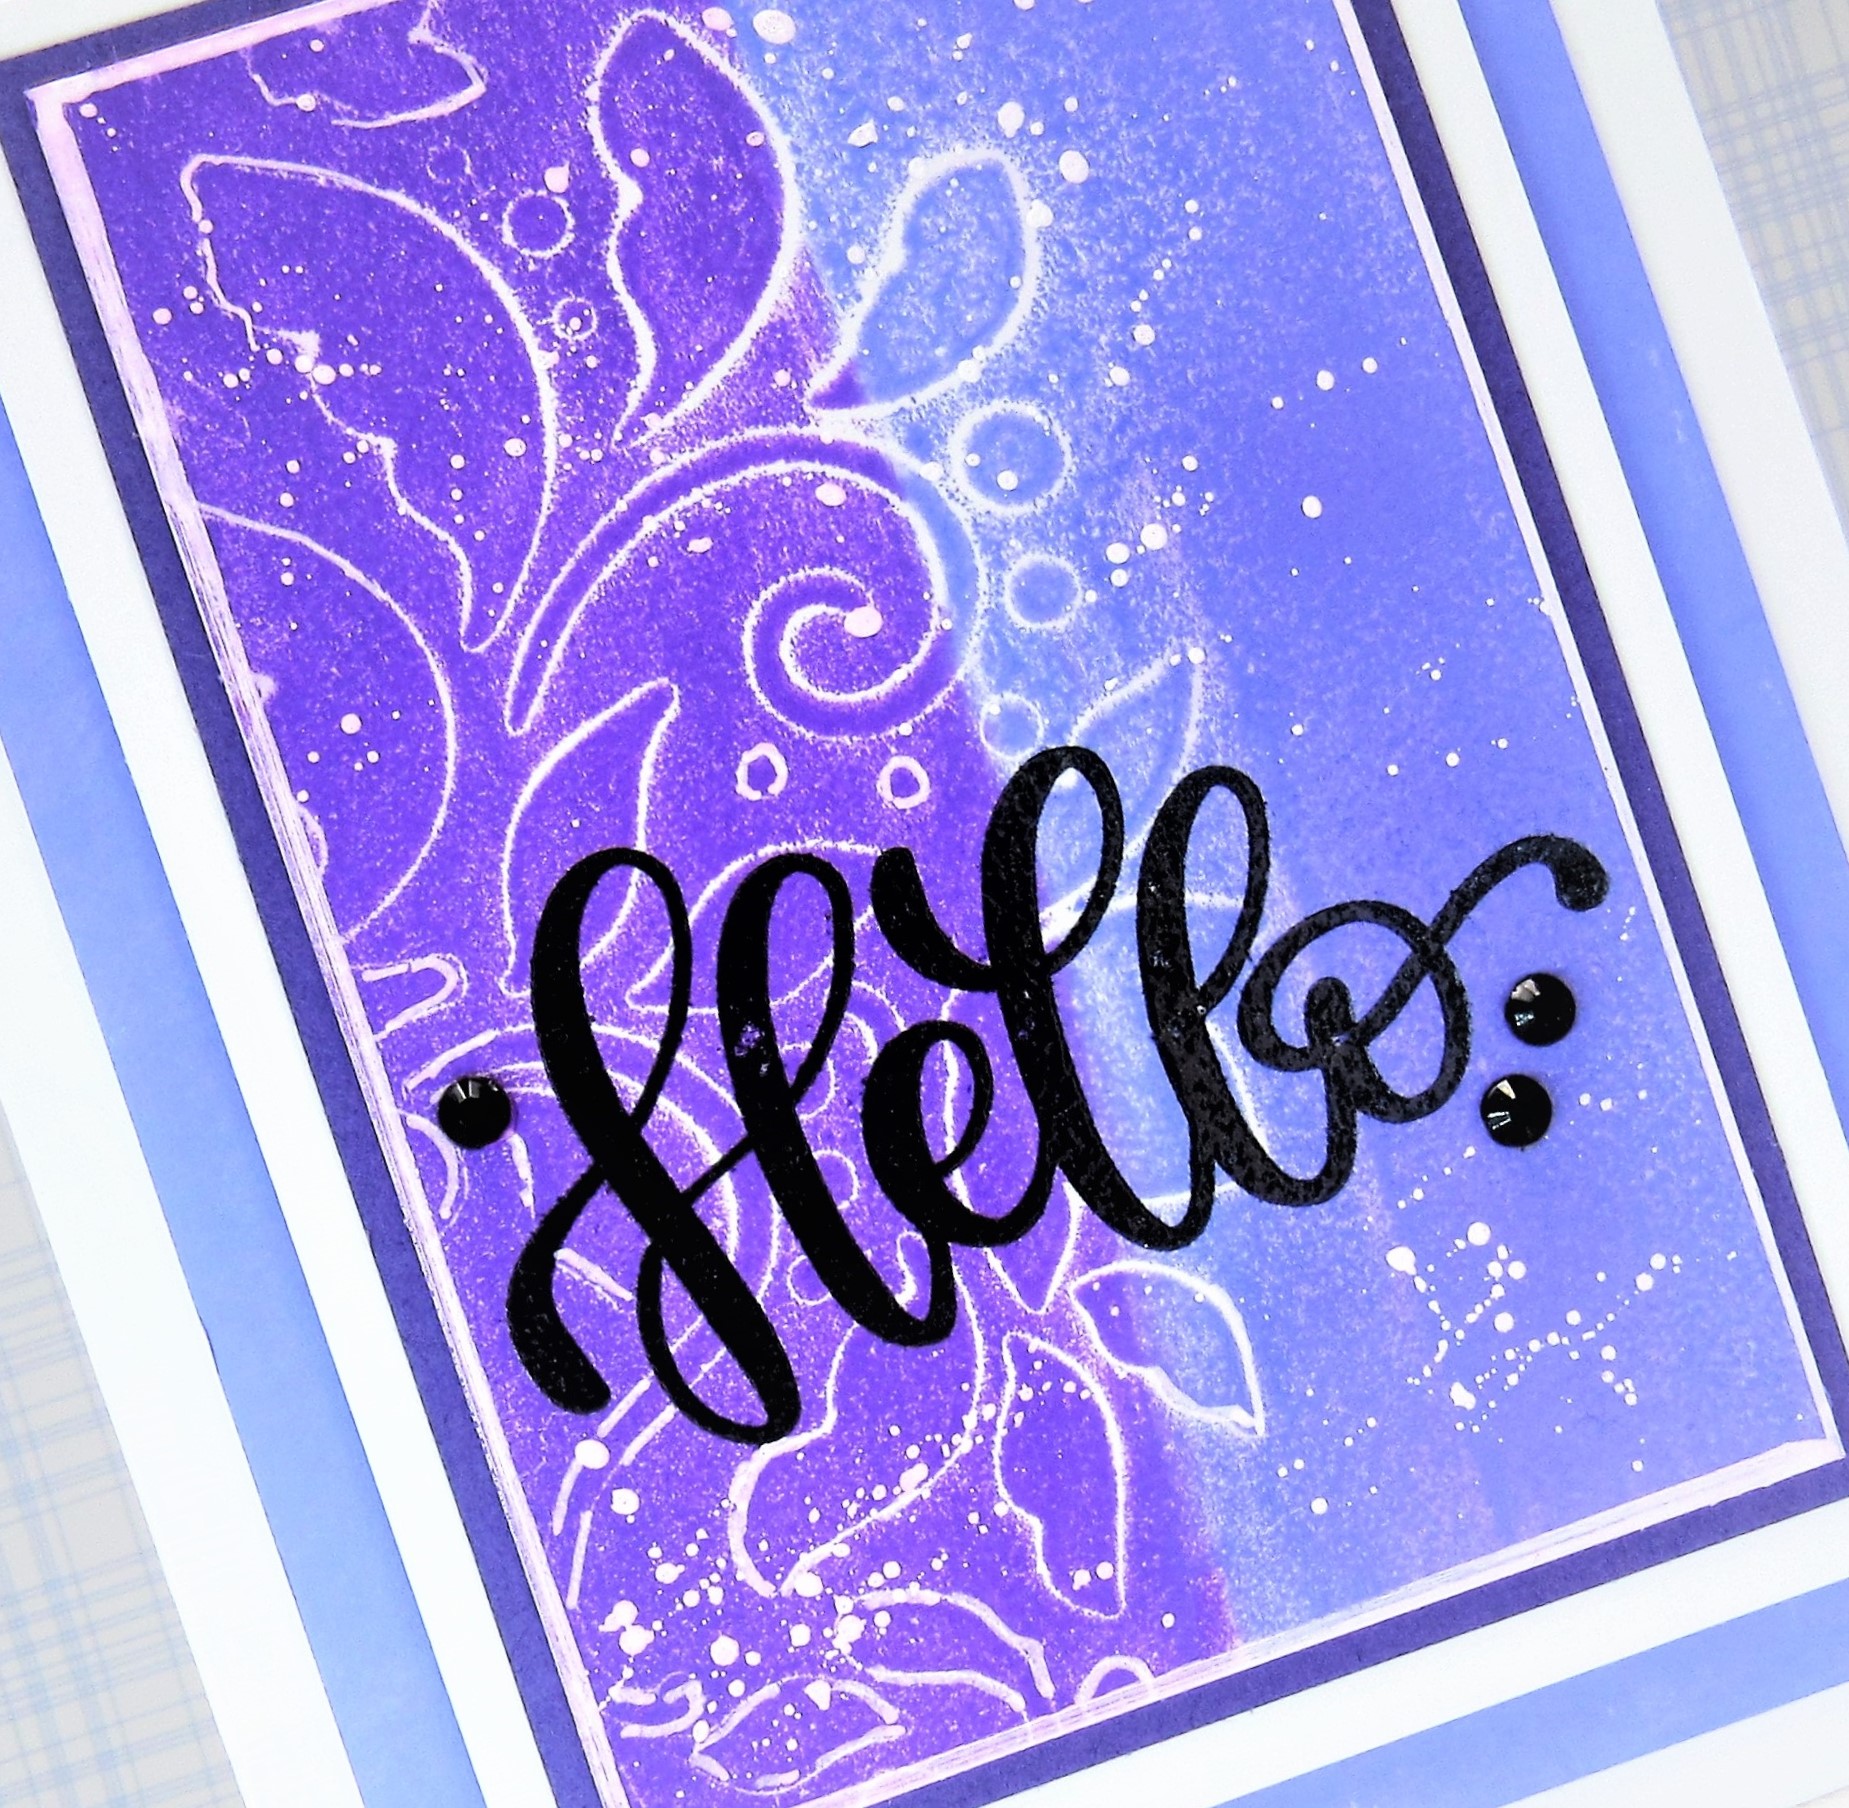
Hello My Friend


Welcome
Today's card is featuring one of the many new stencils for September from A Colorful Life Designs called Pumpkin Pouf.
I decided to use just the leaves of the stencil to create this simple card.

So, here's what I did to create my card.
  • I decided to use the Pumpkin Pouf stencil in a different way this time.  To see the first card I made using this stencil go HERE.  
  • I got out my Simon Hurley Stamping Foam and heated it up with my heat tool.  I pressed it onto just the leaves of the pumpkin stencil, pressing firmly to make an imprint onto the foam.  
  • I lifted up the Stamping Foam to see the fun leaf design it made and then I inked up one side of the Foam with some Shaded Lilac and the other side with Wilted Violet Distress Oxide ink.
  • I gave it a light spray of water and then pressed it onto my white cardstock to give me the impression.  Some areas of the impression were faint, so I carefully went over them with my white Posca pen and then splattered the panel with that pen as well.
  • When it was all dry, I placed it into my Misti to stamp the sentiment and clear heat embossed it.
  • I glued the finished panel onto a piece of dark purple cardstock, then onto a piece of lighter, then onto an A2 sized card base.
  • I added some black gems around the sentiment.

Here is the stencil I used:

Discount Code for A Colorful Life Designs
(Affiliate with no extra cost to you) 

Thanks so much for coming by and taking a look.

Adding my card to these challenges:
Simon Says Wed.- ANYTHING GOES
Simon Says Mon.- STAMP IT
Crafting Happiness- (ANYTHING GOES)

Supplies
Stamp= XL Greetings (SSS)
Inks- DOX, Versafine Clair
Paper- heavy white (Scribes Nook, Waterloo, Ont.)
Accessories and Tools- stencil (A Colorful Life Designs); Simon Hurley Stamping Foam;
Misti (My Sweet Petunia); heat tool; clear eb powder; black gems; white Posca pen

Saturday, 2 September 2023

Greetings for Autumn


Welcome
Fall is in the air as September arrives.  
That also means new releases from A Colorful Life Designs.  
This Pumpkin Pouf stencil is a good one for the Fall.

So, here's what I did to create my card.
  • I looked through my patterned paper stash and found this one...a bit grungy but works well for the theme I was going for.
  • I placed the paper onto my Make Art Station and positioned the Pumpkin Pouf stencil over that.
  • I inked up the leaves with some Rustic Wilderness Distress Oxide ink, then removed the stencil to splatter with my white Posca pen.
  • I took another piece of the patterned paper and stencil the pumpkin with some Ripe Persimmon and Carved Pumpkin DOX ink.  When it was dry, I fussy cut it out.
  • Next, I placed the stenciled panel into my Misti and stamped the sentiment along the bottom.
  • I glued the panel onto a piece of dark green cardstock and then onto an A2 sized card base.
  • I used some foam tape to pop the pumpkin in the middle of the panel.

Here is the stencil I used:

Discount Code for A Colorful Life Designs
(Affiliate with no extra cost to you) 

Thanks so much for taking a look.

Adding my card to these challenges:
Little Red Wagon- BIG or SMALL
Simon Says Wed.- ANYTHING GOES
CRAFT- SHABBY/CHIC

Supplies
Stamps- Autumn Foliage (Inkadinkadoo)
Inks- Versafine Clair, DOX
Paper- white (Scribes Nook- Waterloo, Ont.); dp- ?
Accessories and Tools- stencil (A Colorful Life Designs); Make Art Station (Ranger);
white Posca Pen; TE Blending Brushes

Thursday, 31 August 2023

Holly Jolly


Good Morning
I'm working on getting some Christmas cards done and this one uses a technique called Bargello.
It is such a great way to use some of the paper strips we all have saved in our stash.
I went with some Christmas papers I had on hand.

So, here's what I did to create my card.
  • To do this technique, first, you cut scraps of paper into strips.  I cut my strips into 1/2".
  • Next, I glued the strips from top to bottom onto another piece of cardstock, placing them right beside one another.
  • After the glue was dry, I cut another piece of cardstock to use as the base for my finished strips.  I cut the strips panel into more strips again and glued them onto the cardstock, OFFSETTING them to create the look.  If that doesn't make sense go watch this video:  Bargello technique - YouTube
  • I added the finished panel to an A2 sized card base.
  • I die cut the sentiment from white cardstock, then glued that onto a red shadow base.  I used some foam tape to pop it over the finished background.

Thanks so much for coming by and taking a look.

Adding my card to these challenges:
Simon Says WED.- ANYTHING GOES
Little Red Wagon- SMALL or BIG (big sentiment)

Supplies
Stamps- none
Inks- none
Paper- heavy white (Scribes Nook- Waterloo, Ont.); various scraps of Christmas paper
Accessories and Tools- die (Catherine Pooler)

Wednesday, 30 August 2023

Snowflake Wishes


Welcome
Today's card was part of a challenge over at Splitcoast Stampers called Split Negative Technique.
This technique is to SPLIT a symmetrical image or pattern, while mirroring the colors.
I've never used this technique before, so I was all for trying it out.

So, here's what I did to create my card.
  • I began by choosing the colours I wanted to use and the stamps, then got out my Misti. Using my Misti for the image placement really helped to get the images to line up the way I wanted.
  • I placed the blue cardstock into my Misti first and stamped the snowflake using some Unicorn White ink.
  • I removed that and replaced it with a piece of white cardstock and stamped the snowflake again using some Tumbled Glass Distress Oxide ink.  
  • I cut both panels right down the center and glued them back together over a piece of lighter blue cardstock.
  • Next, I stamped some of the dots that are included with the snowflake set, around the snowflake to add interest.
  • I glued the stamped panel onto an A2 sized card base and then used some foam tape to add the sentiment over the center of the snowflake.

Thanks for coming by and taking a look.

Adding my card to these challenges:
Little Red Wagon- LARGE or SMALL
Try it On Tuesday- LET'S GO OUTDOORS
Simon Says- ANYTHING GOES

Supplies
Stamps- Let it Snow (Visible Image)
Inks- Hero Arts White Unicorn; DOX
Paper- heavy white (Scribes Nook- Waterloo, Ont.)
Accessories and Tools- Misti (My Sweet Petunia)

Monday, 28 August 2023

Comfort and Peace


Hello and Welcome
Today's card were part of a challenge to create one inked or stamped piece of cardstock, then cut in half to create 2 cards.

So, here's what I did to create my cards.
  • On my walk, I collected some grasses and leaves that I wanted to use on my cards.
  • I got out my Gel Plate and pressed some Bundled Sage, Cracked Pistachio and some Lucky Clover Distress Oxide ink directly onto my Gel Plate.  I used my brayer to blend the colours together.
  • Next, I carefully laid the grasses I had picked up onto the plate, then rubbed a piece of white cardstock over the Plate to create the print. 
  • I used my black Posca pen and splattered over the images.
  • When it was all dry, I cut the piece of white cardstock in half to create 2 A2 sized card.
  • I placed the inked panel into my Misti and one at a time, stamped the sentiment onto them.
  • I glued each finished panel onto a piece of green cardstock before adding it to the base.


Thanks so much for coming by and taking a look.

Adding my cards to these challenges:
A Place to Start- ANYTHING GOES- OPTION TREES or LEAVES
The Paper Funday Challenge- ANYTHING GOES- OPTION OUTDOORS

Supplies
Stamps- Comfort and Peace (Penny Black); Treasure (Verses)
Inks- DOX, Versafine Clair
Paper- heavy white (Scribes Nook- Waterloo, Ont.)
Accessories and Tools- Gel Plate; Speedball Brayer; grasses picked on a walk; 
black Posca pen; black gems